How to make and knit a “mando bag,” super easy fluffy bag with chunky knit popular in Korea!
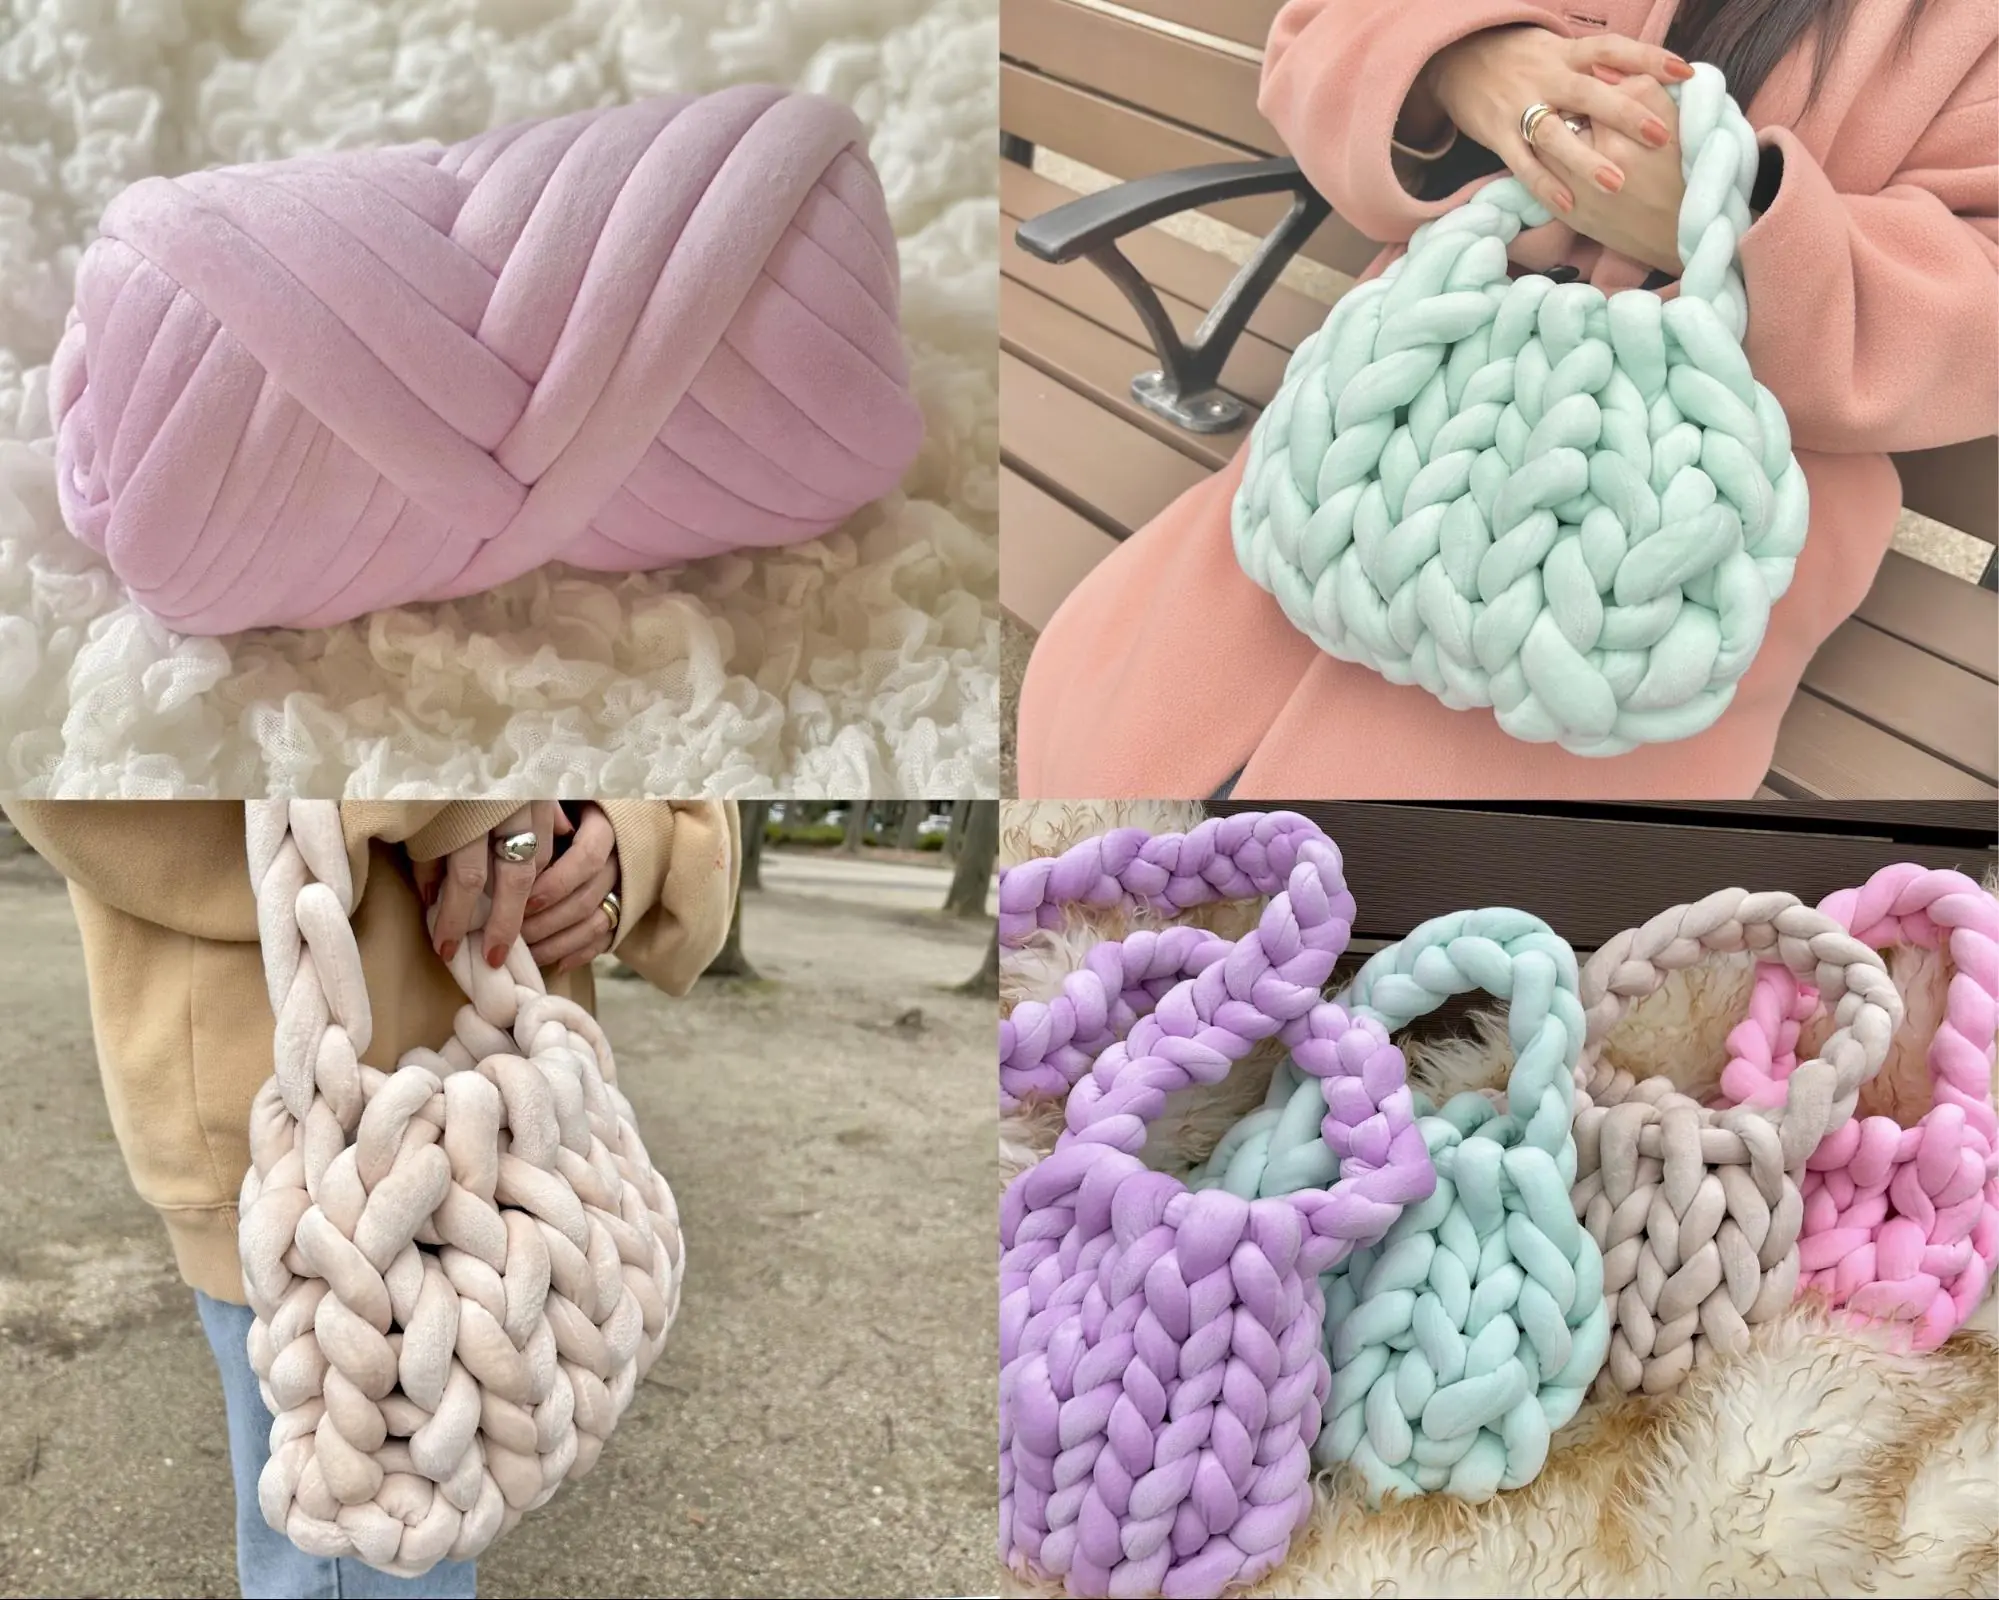
Ladies and gentlemen, do you know the "mando bag" that has become a hot topic this winter?
Mandu bags are handmade bags that are becoming popular mainly in Korea. They are so called because their shape resembles a "mando" (dumpling).
Instagram and YouTube, which transmit the latest trends, are all featured on mando bags. You may have heard the name here and there.
Table of Contents
All you need is "chunky knit".
You can make it right away without any tools!
The characteristic of the mando bag is that it can be easily hand-knitted using a thick yarn called “chunky knit”. It takes about 30 minutes to make! You don't need any special tools, and you can easily make a chunky knit anywhere.
By using chunky knit, it becomes soft and fluffy. Not only does it look cute, but it also has excellent functionality as a bag, and is attracting attention, especially among fashion-conscious women.
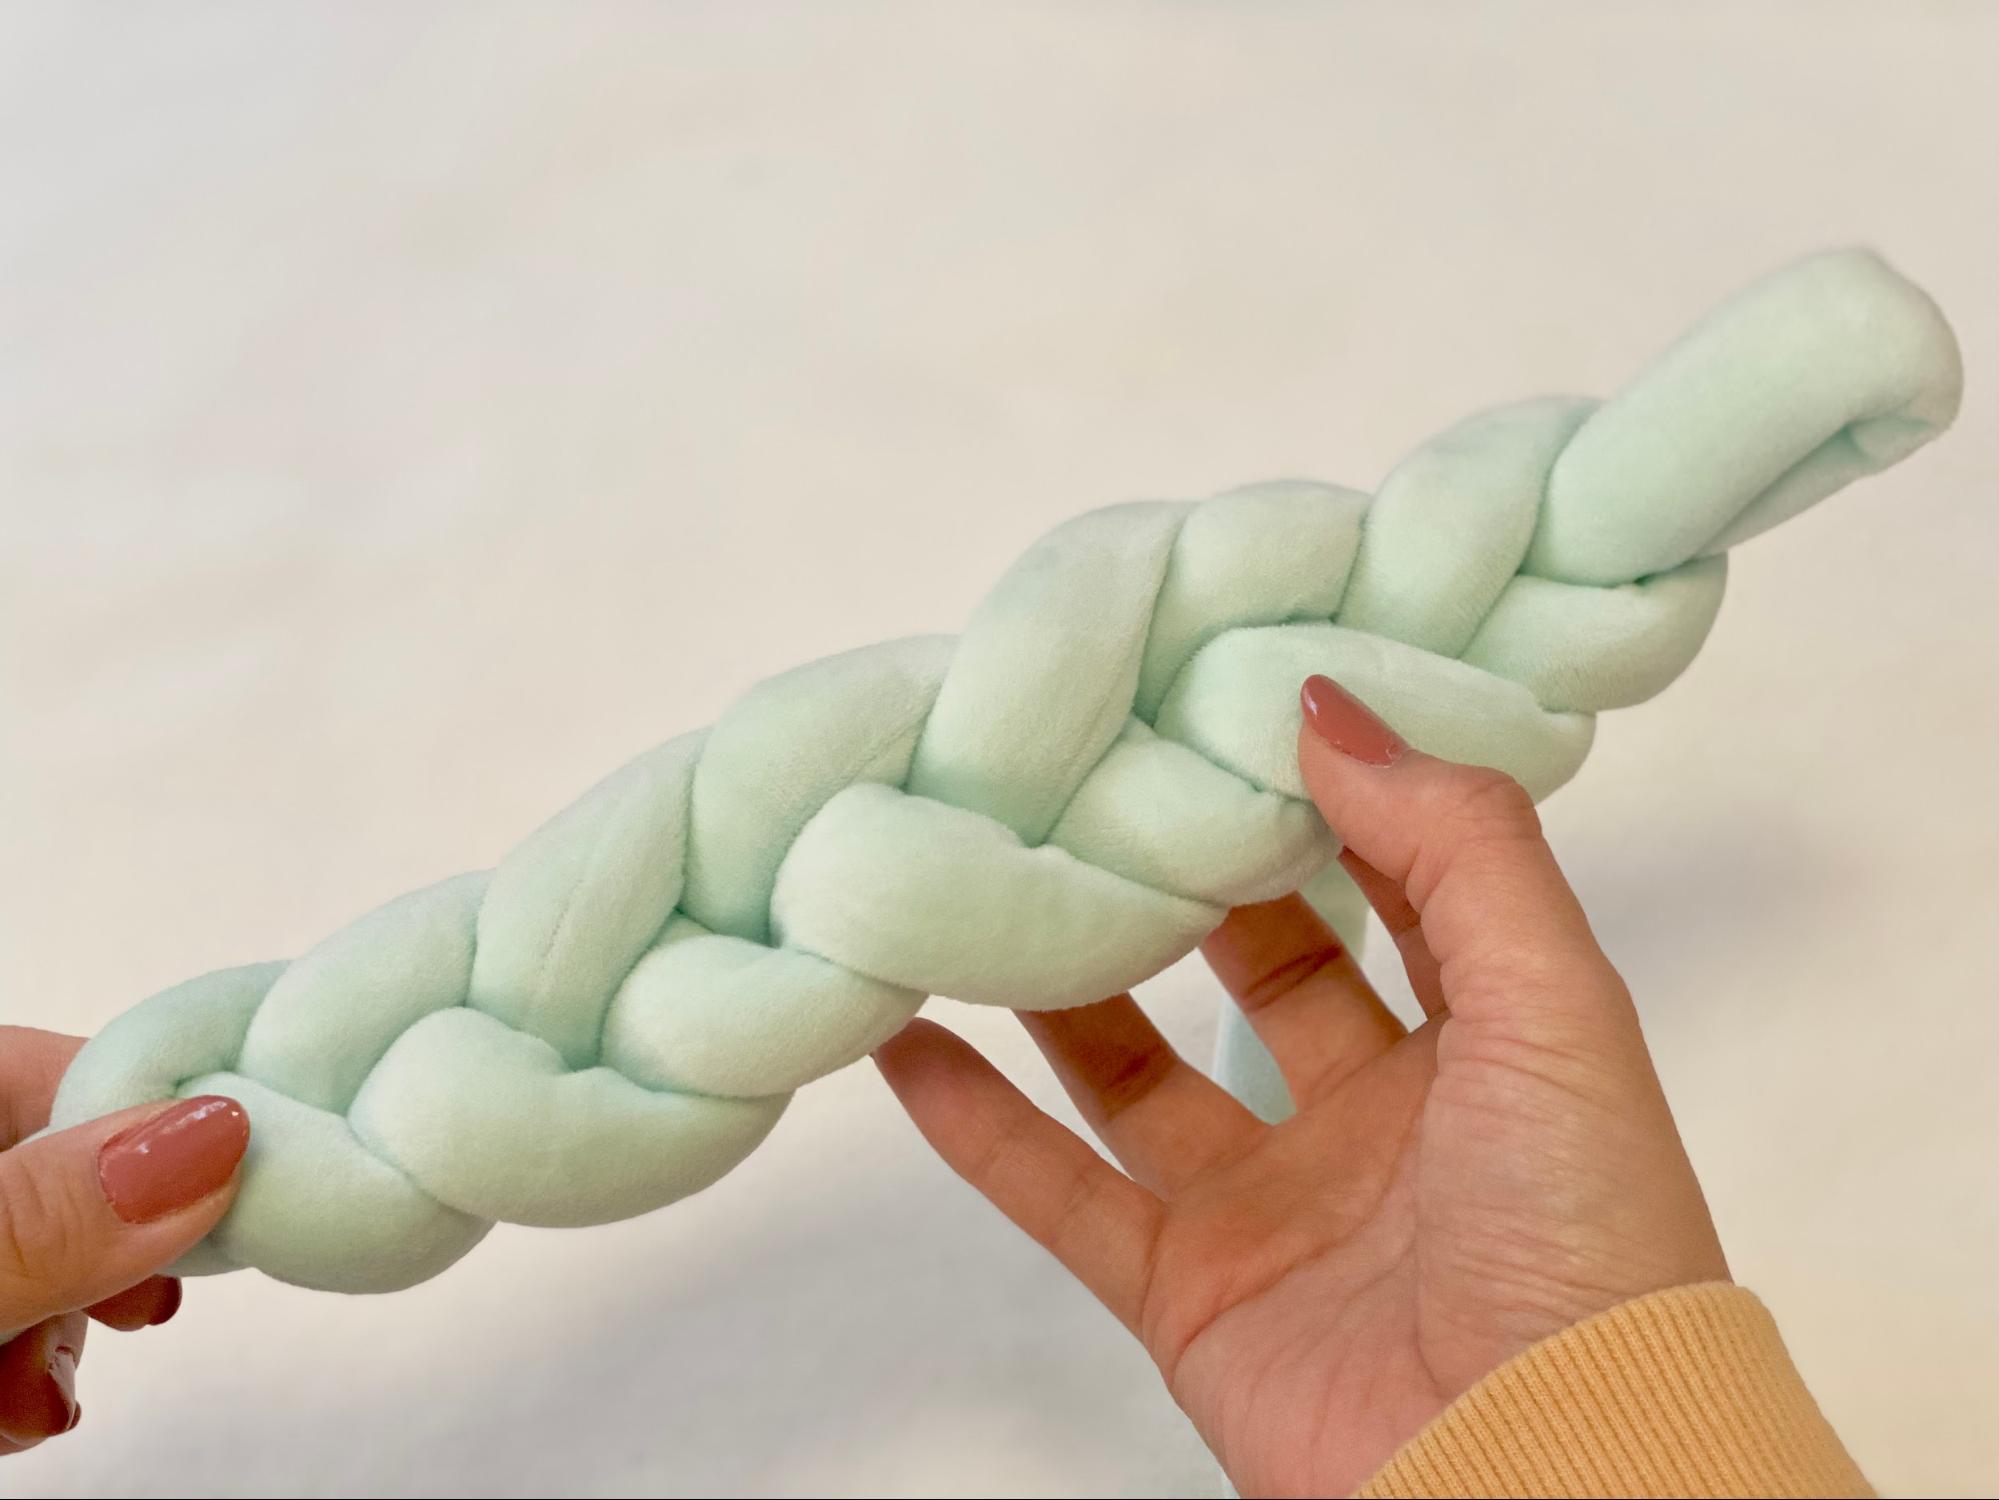
I tried to make the rumored "Mandu bag"!
This time, I will try to make such a "mando bag"! I will introduce you to the points and tricks of how to make it, and the coordination. Please use it as a reference.
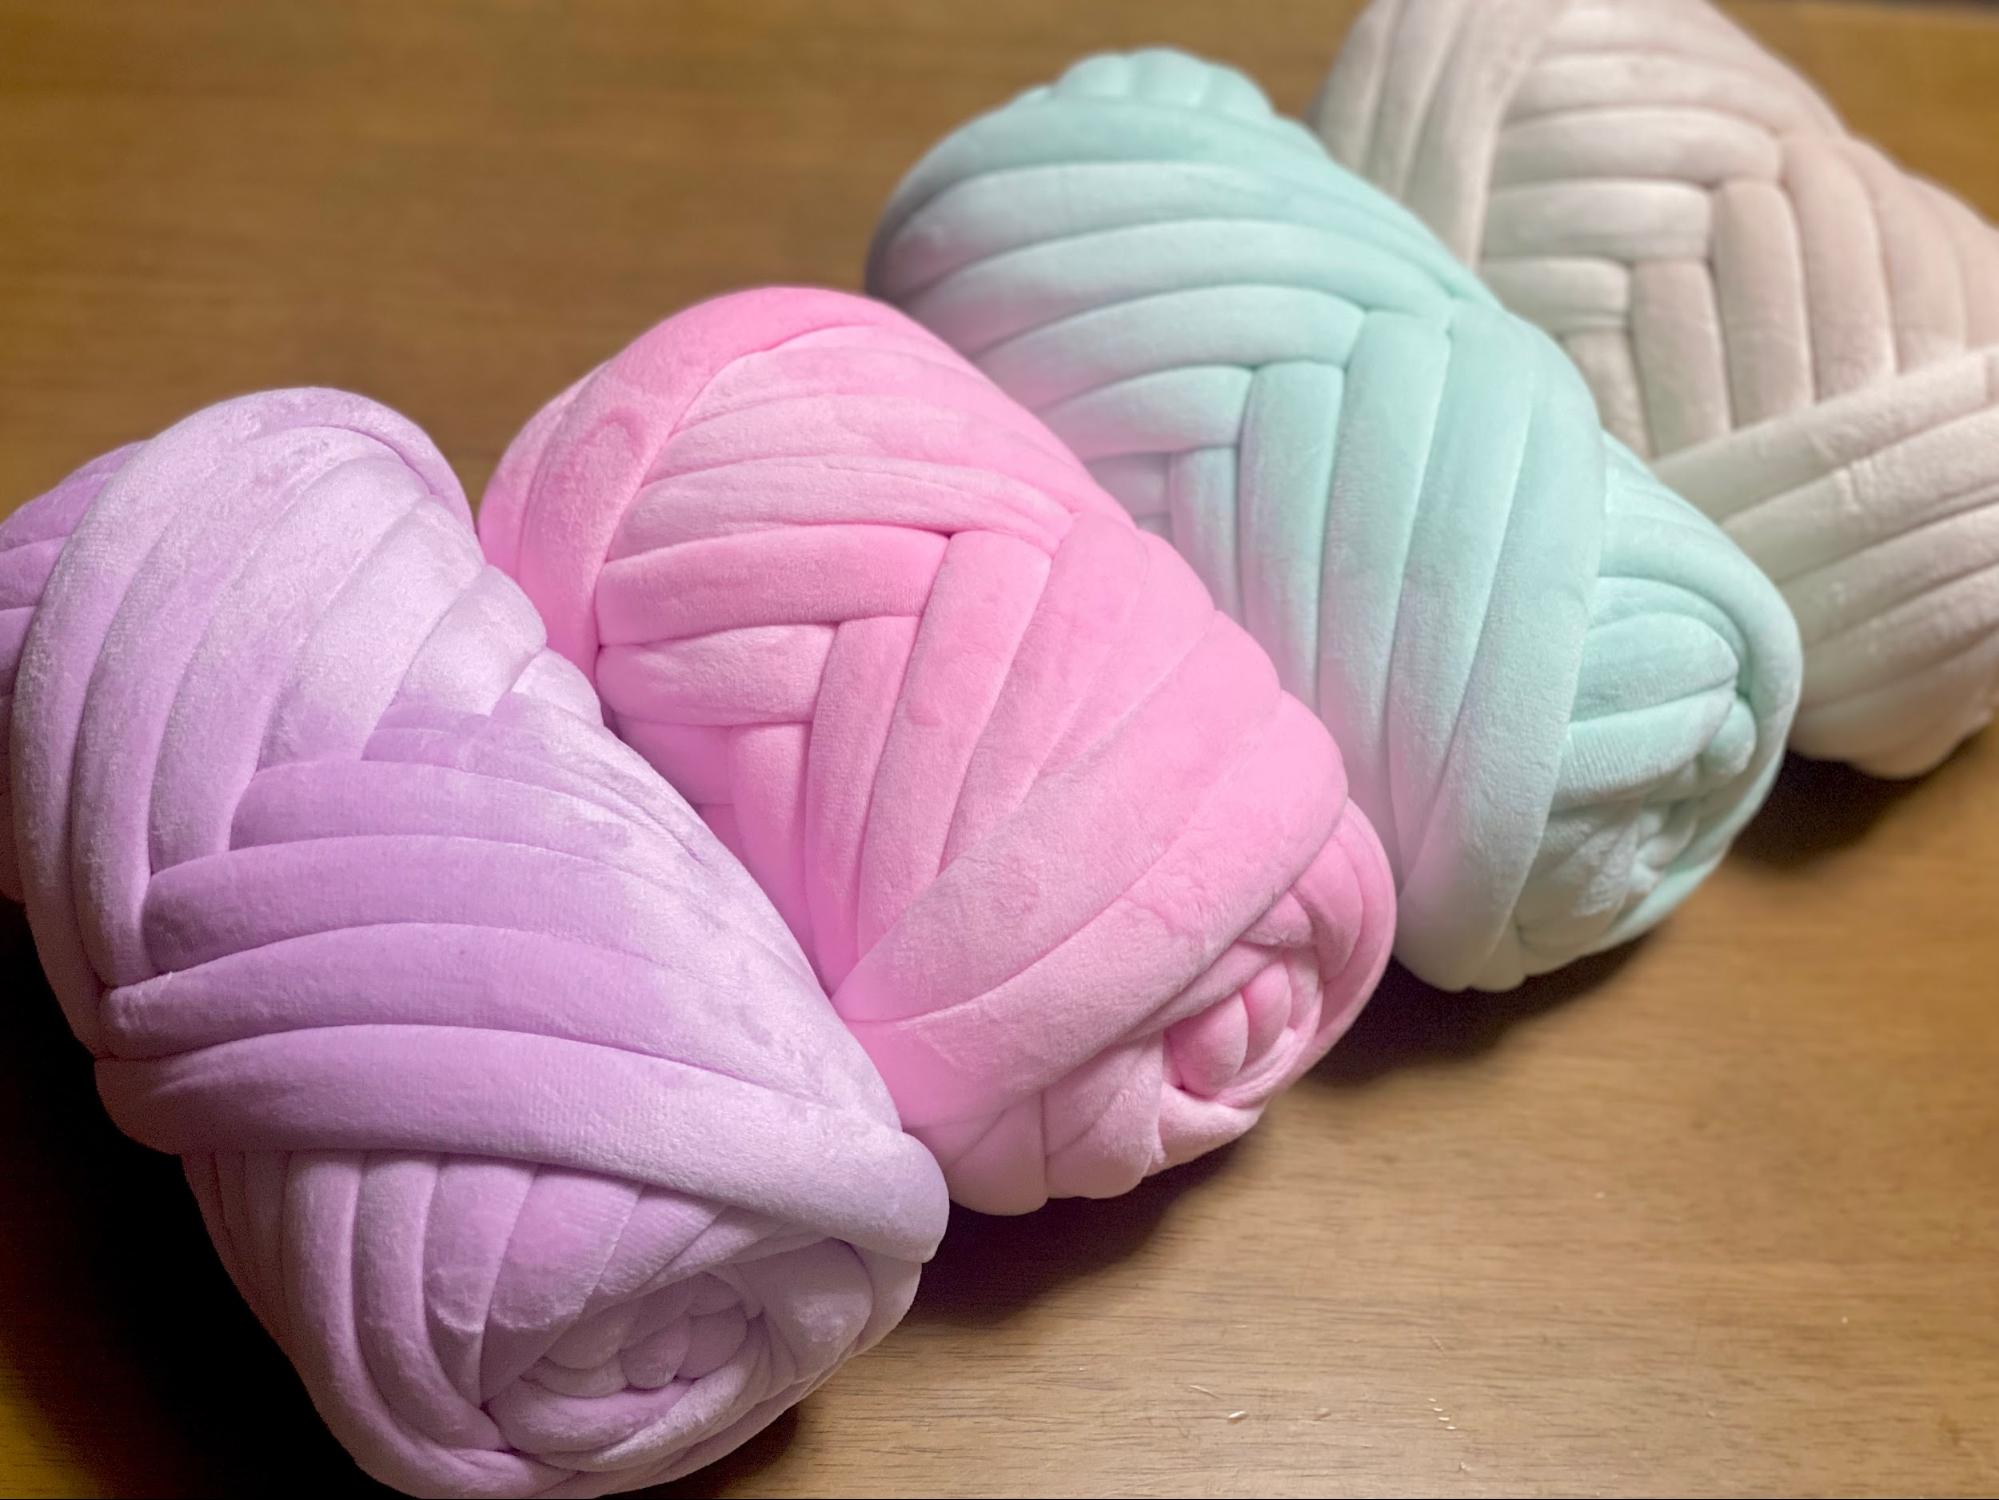
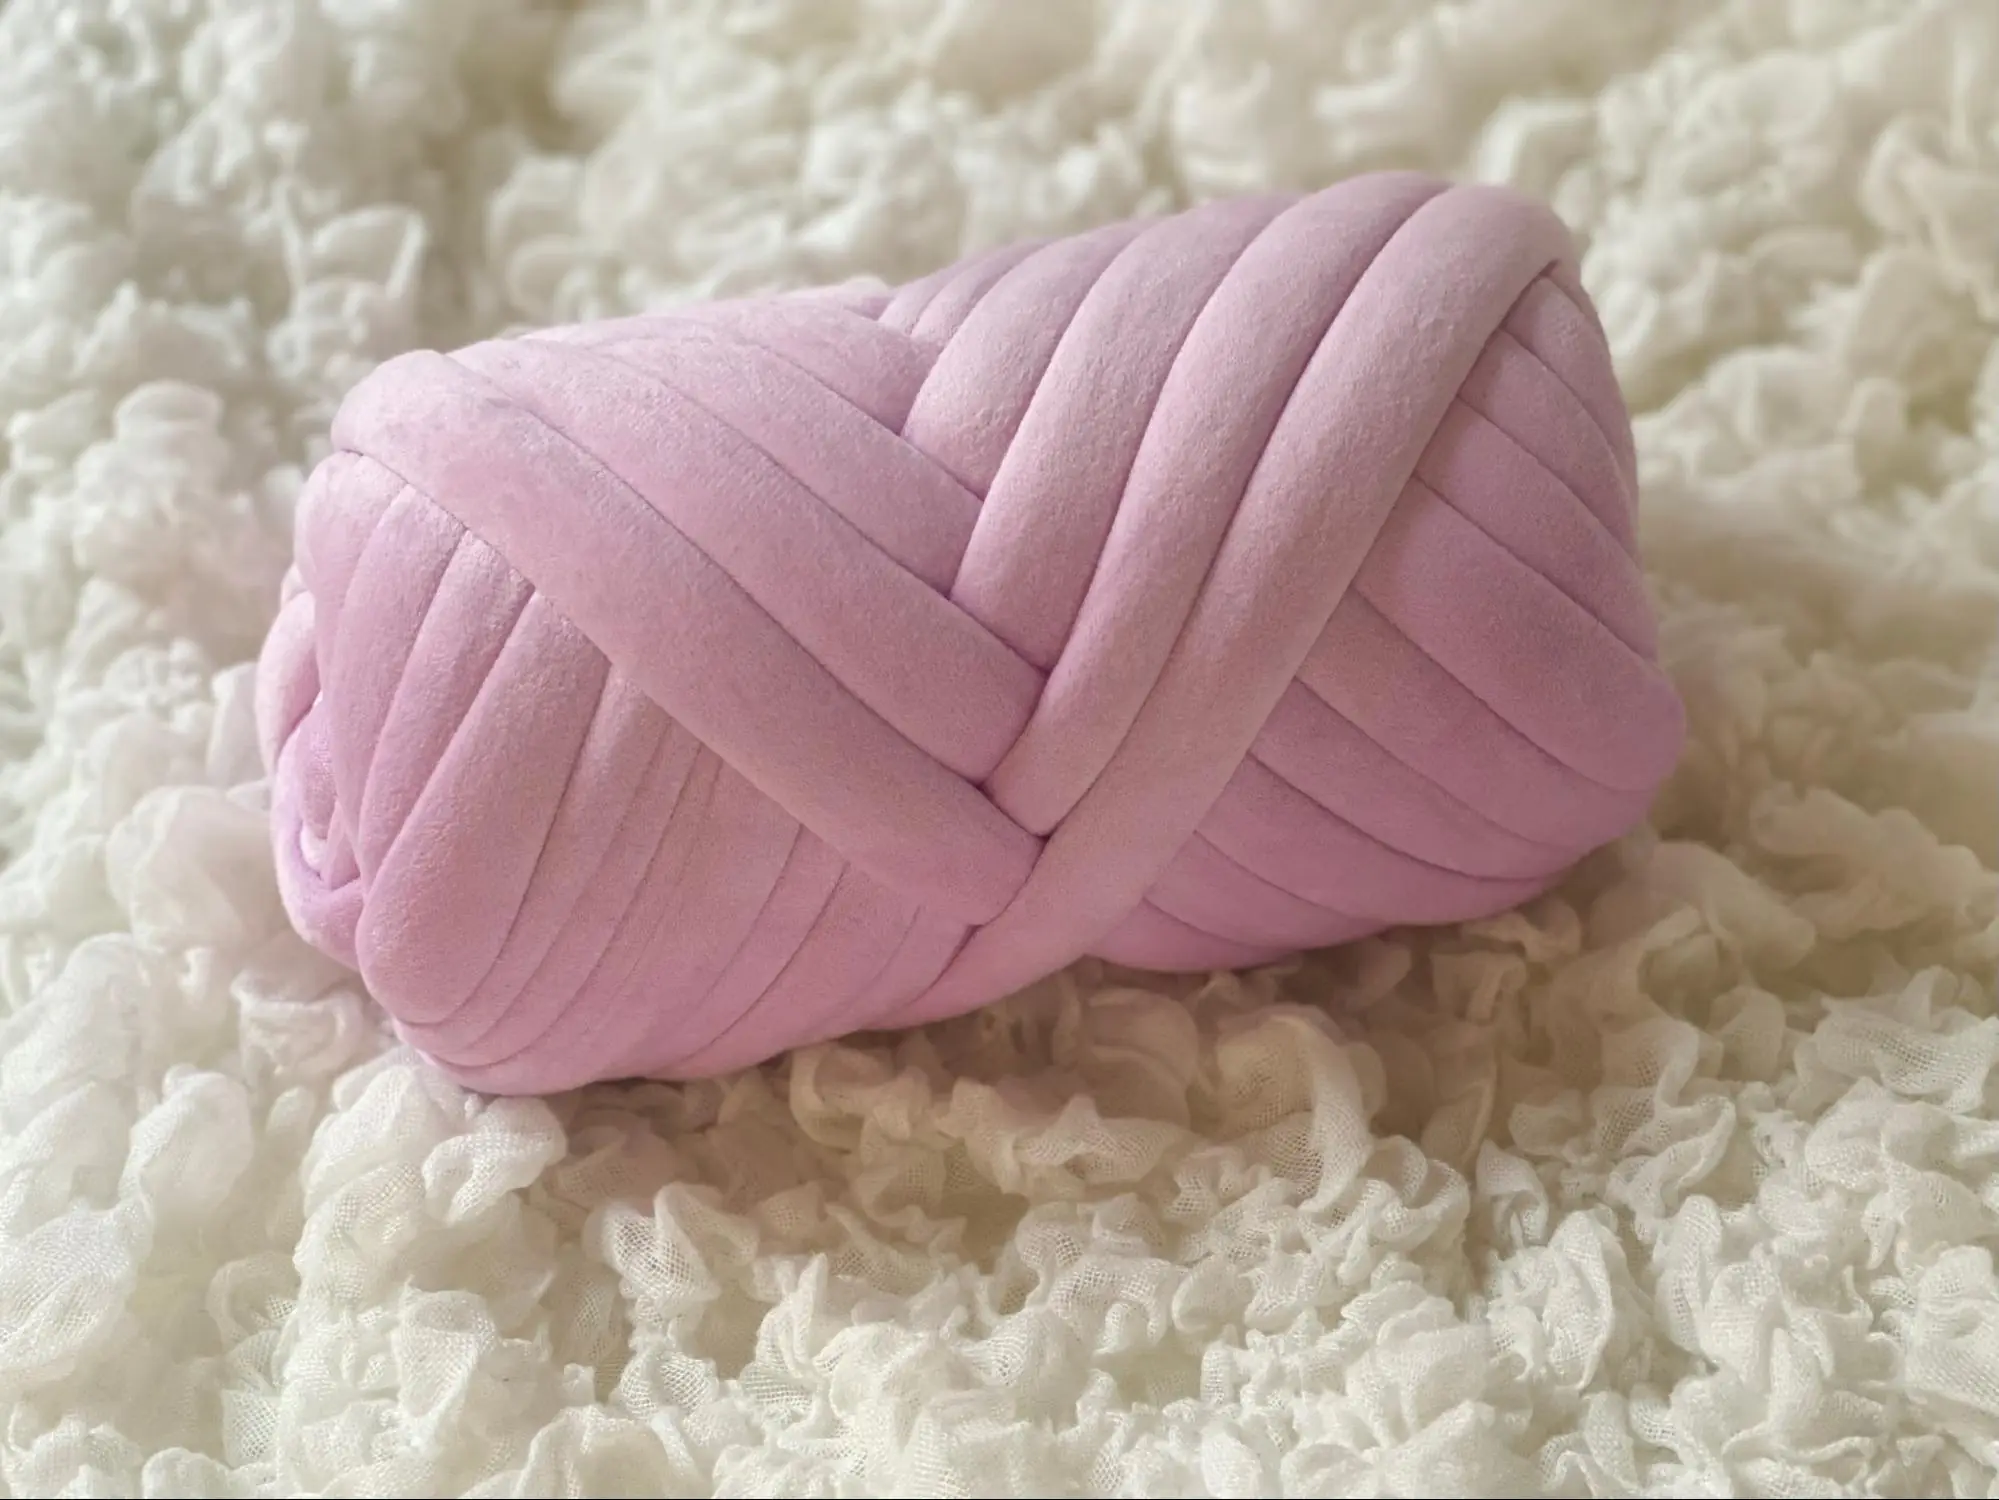
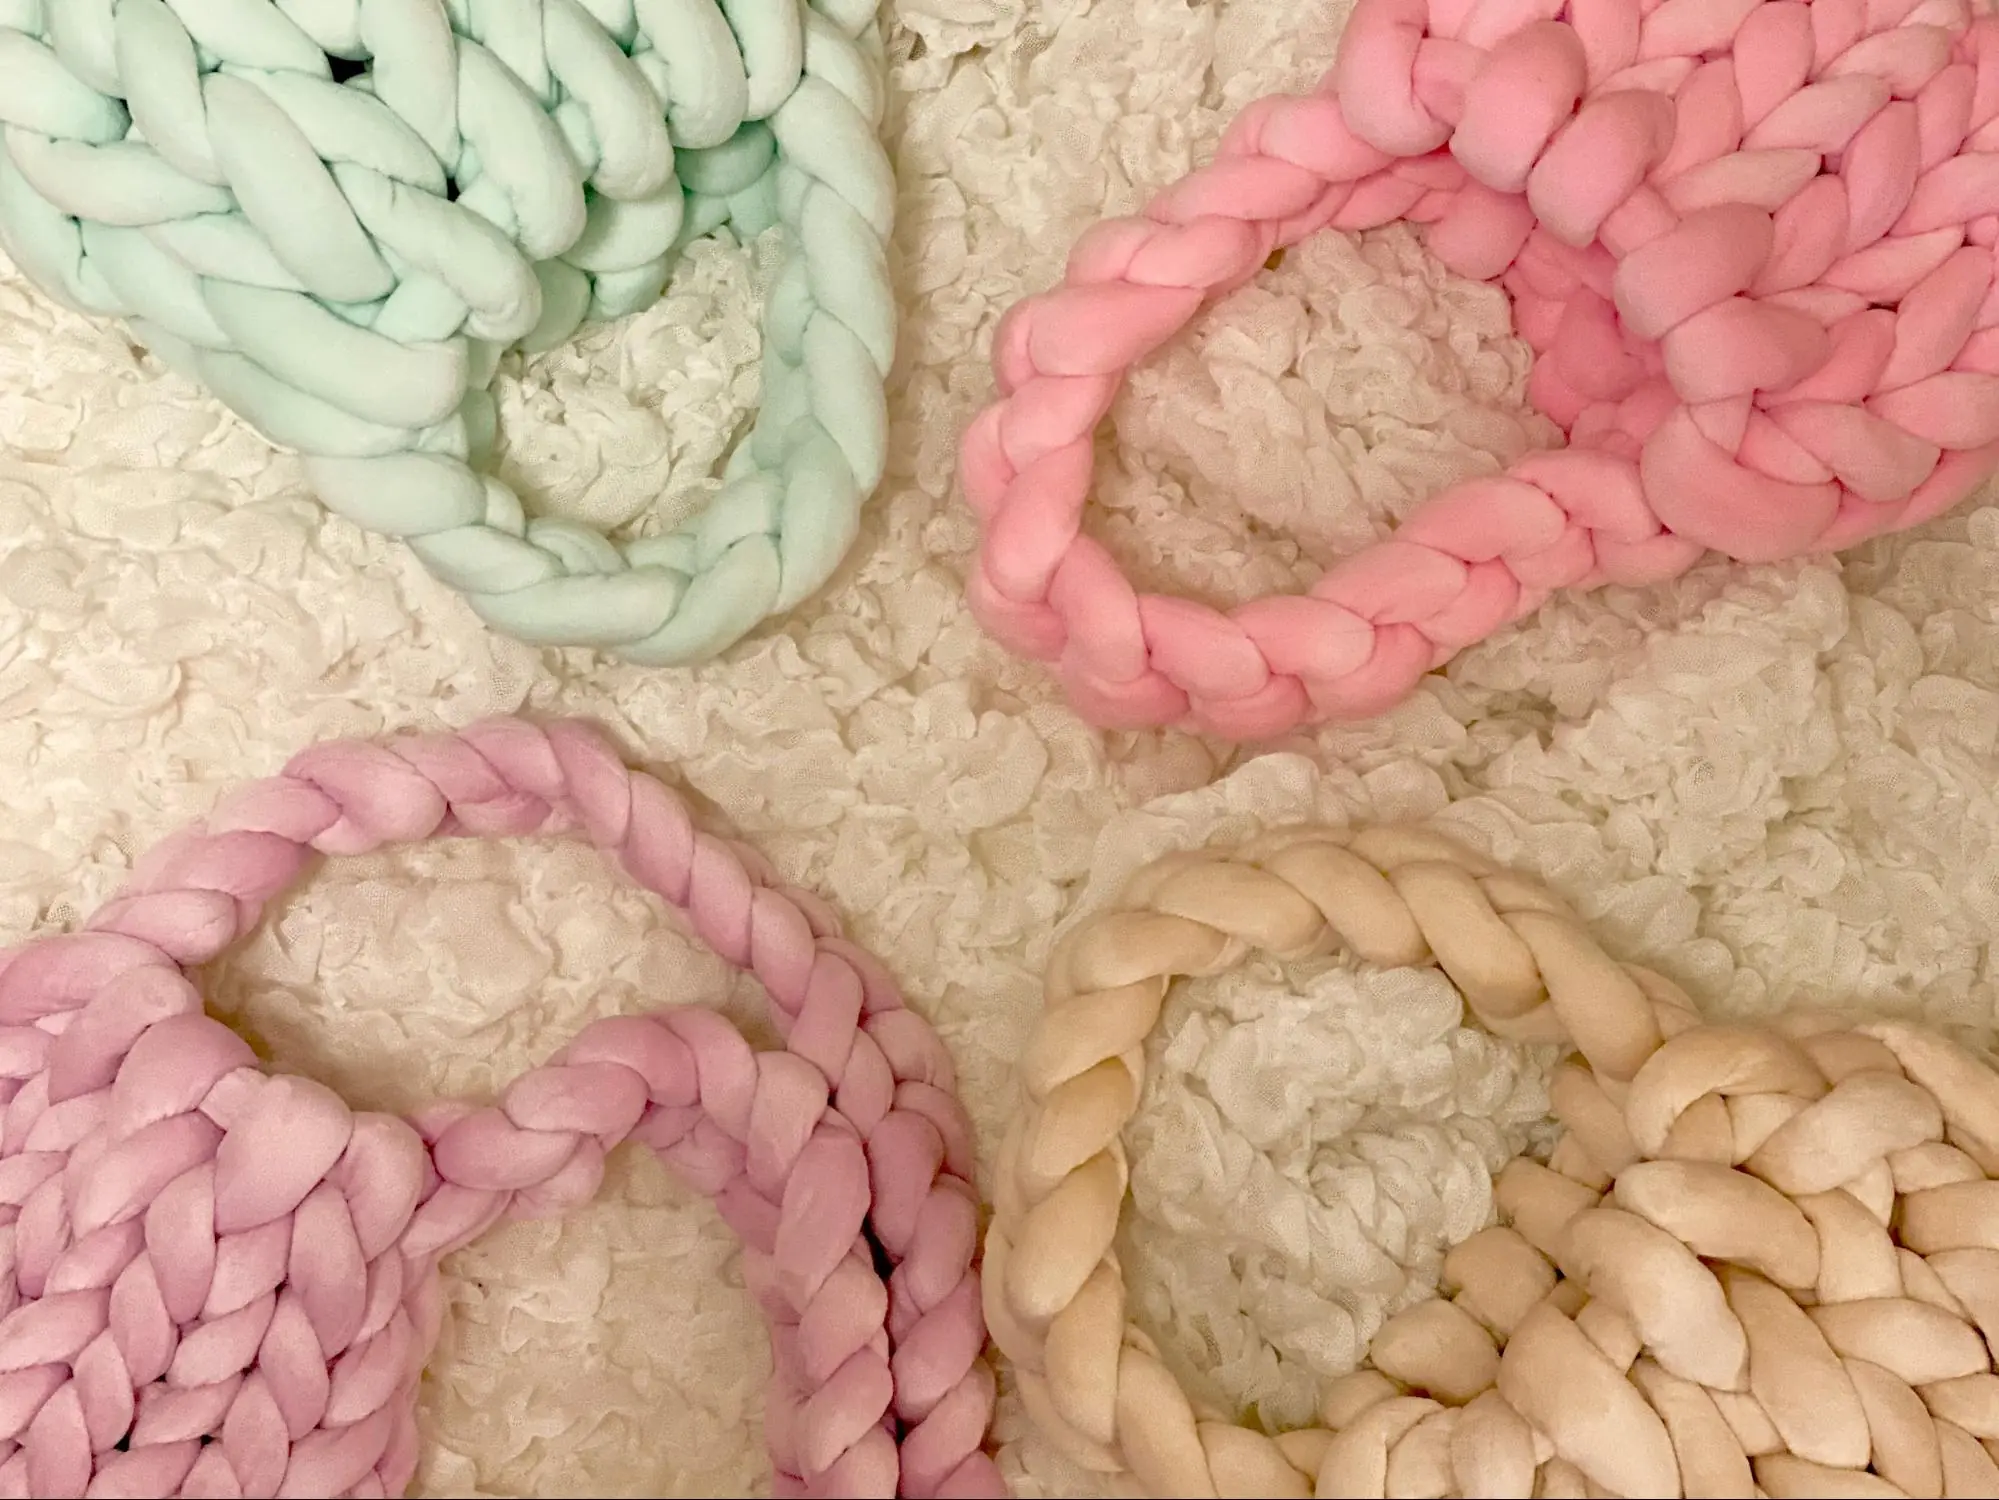
The chunky knit used this time is in four colors: purple, pink, light green, and beige. I chose a velor fabric that is perfect for autumn and winter. The size is 500g each. With this amount, you can make a mandu bag big enough to fit your belongings inside.
Chunky knits come in a variety of materials, colors, and sizes (lengths). You can get the knits of your choice from many varieties at major Japanese mail-order sites.
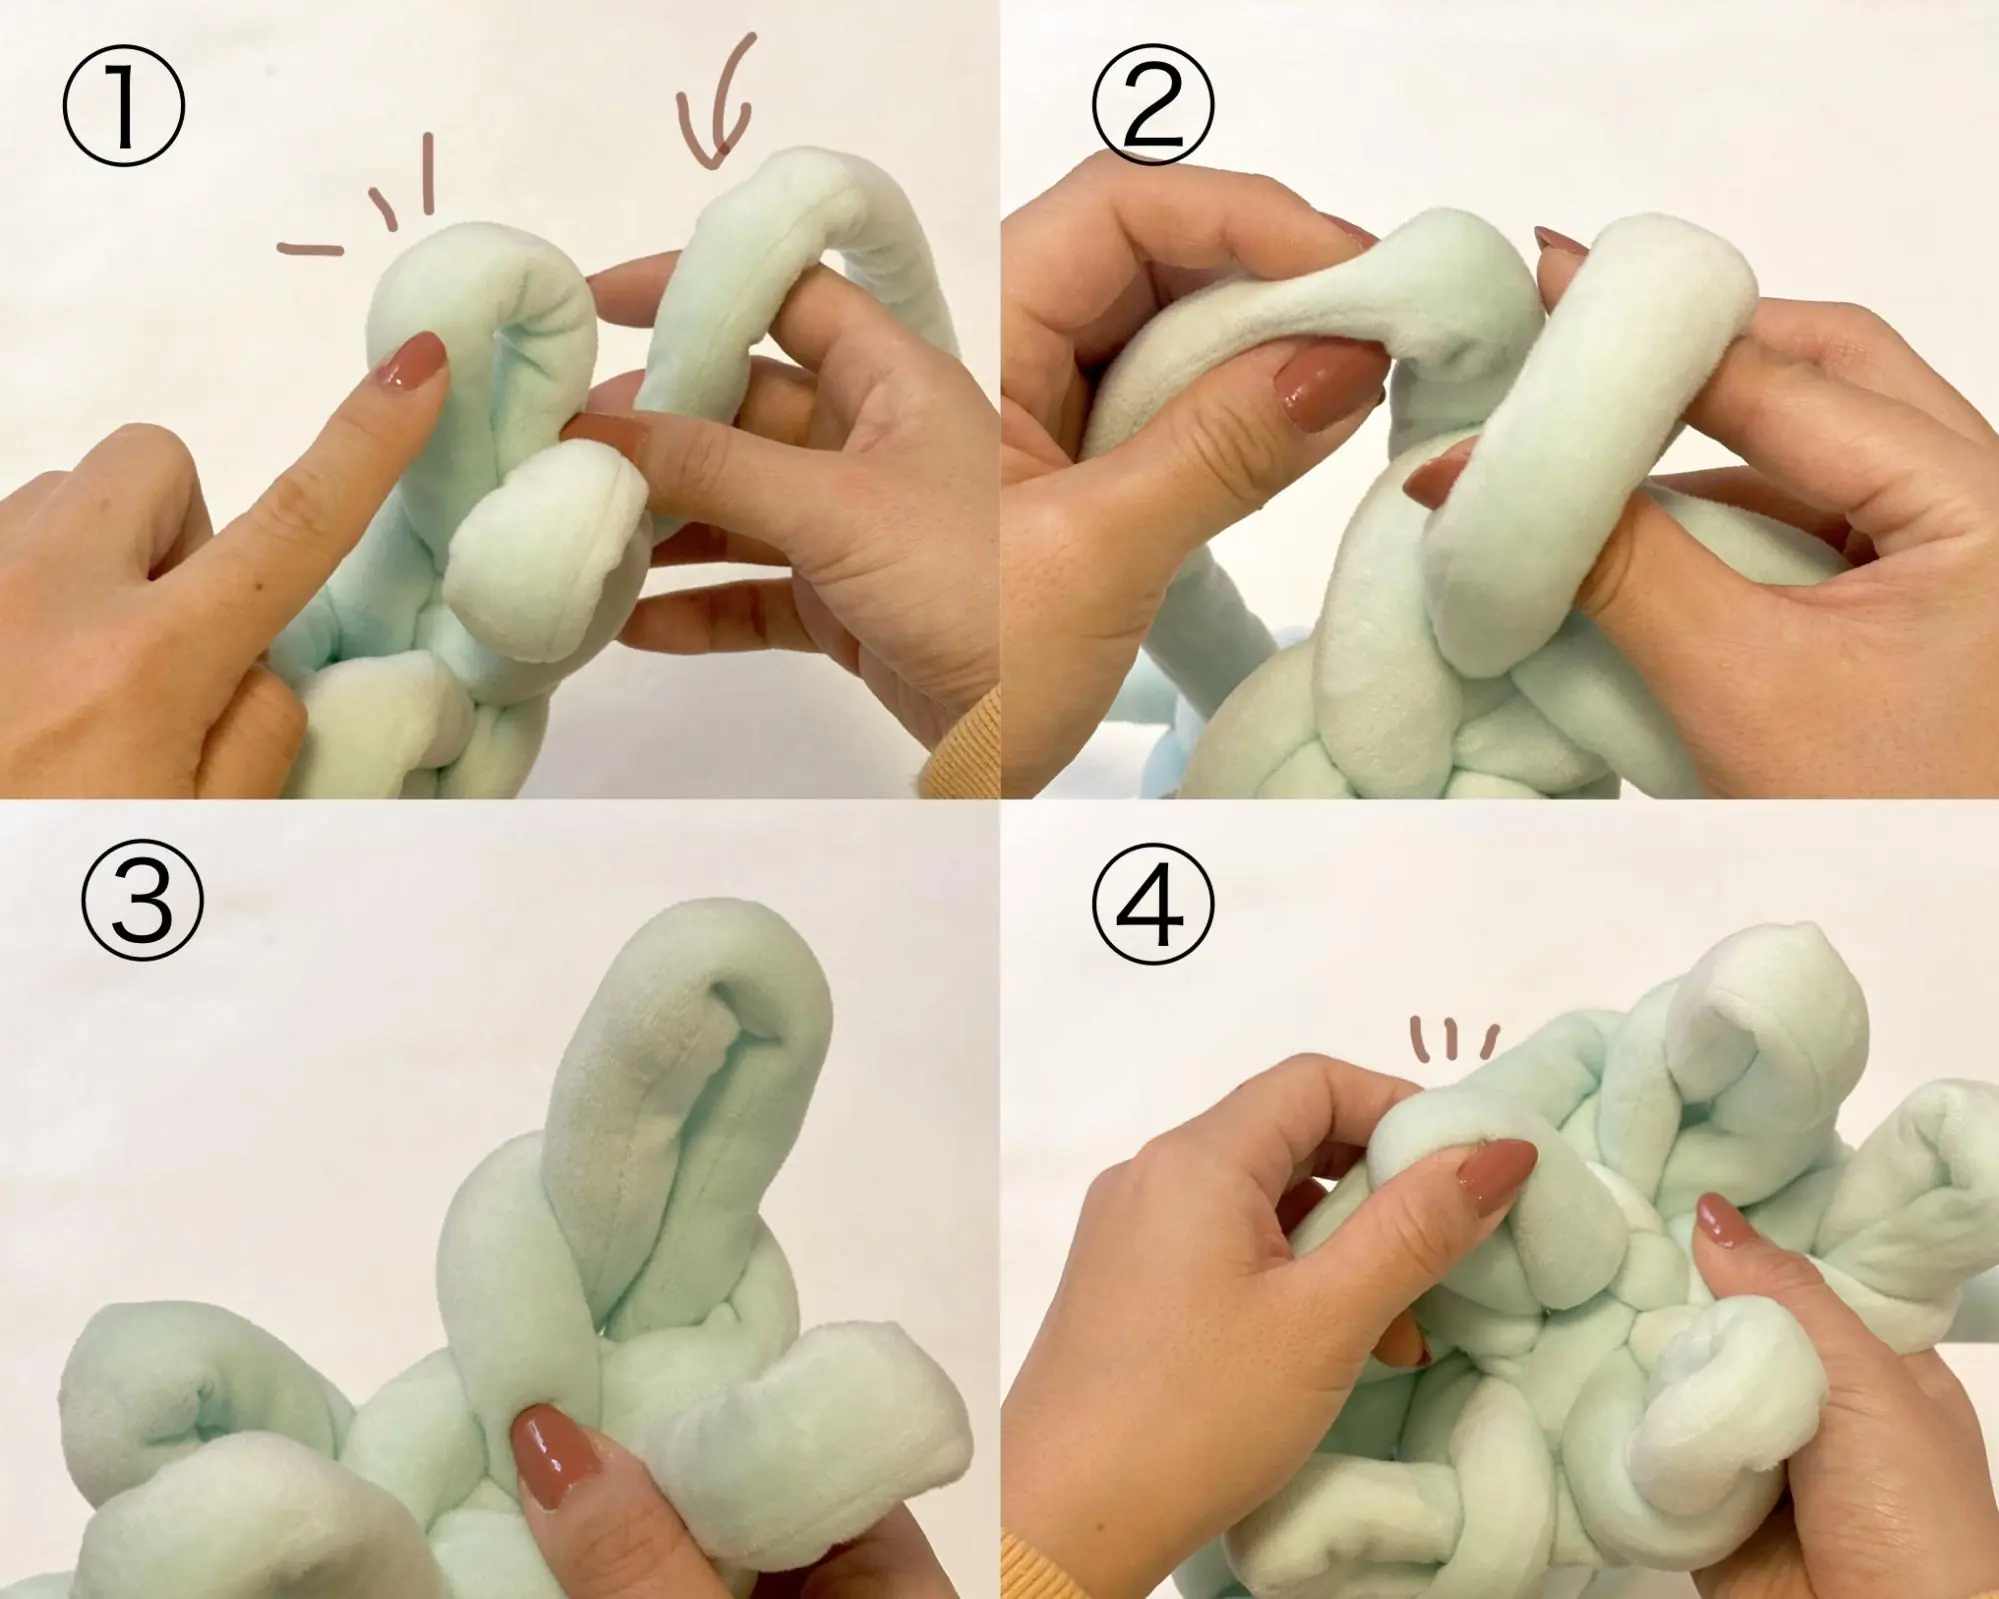
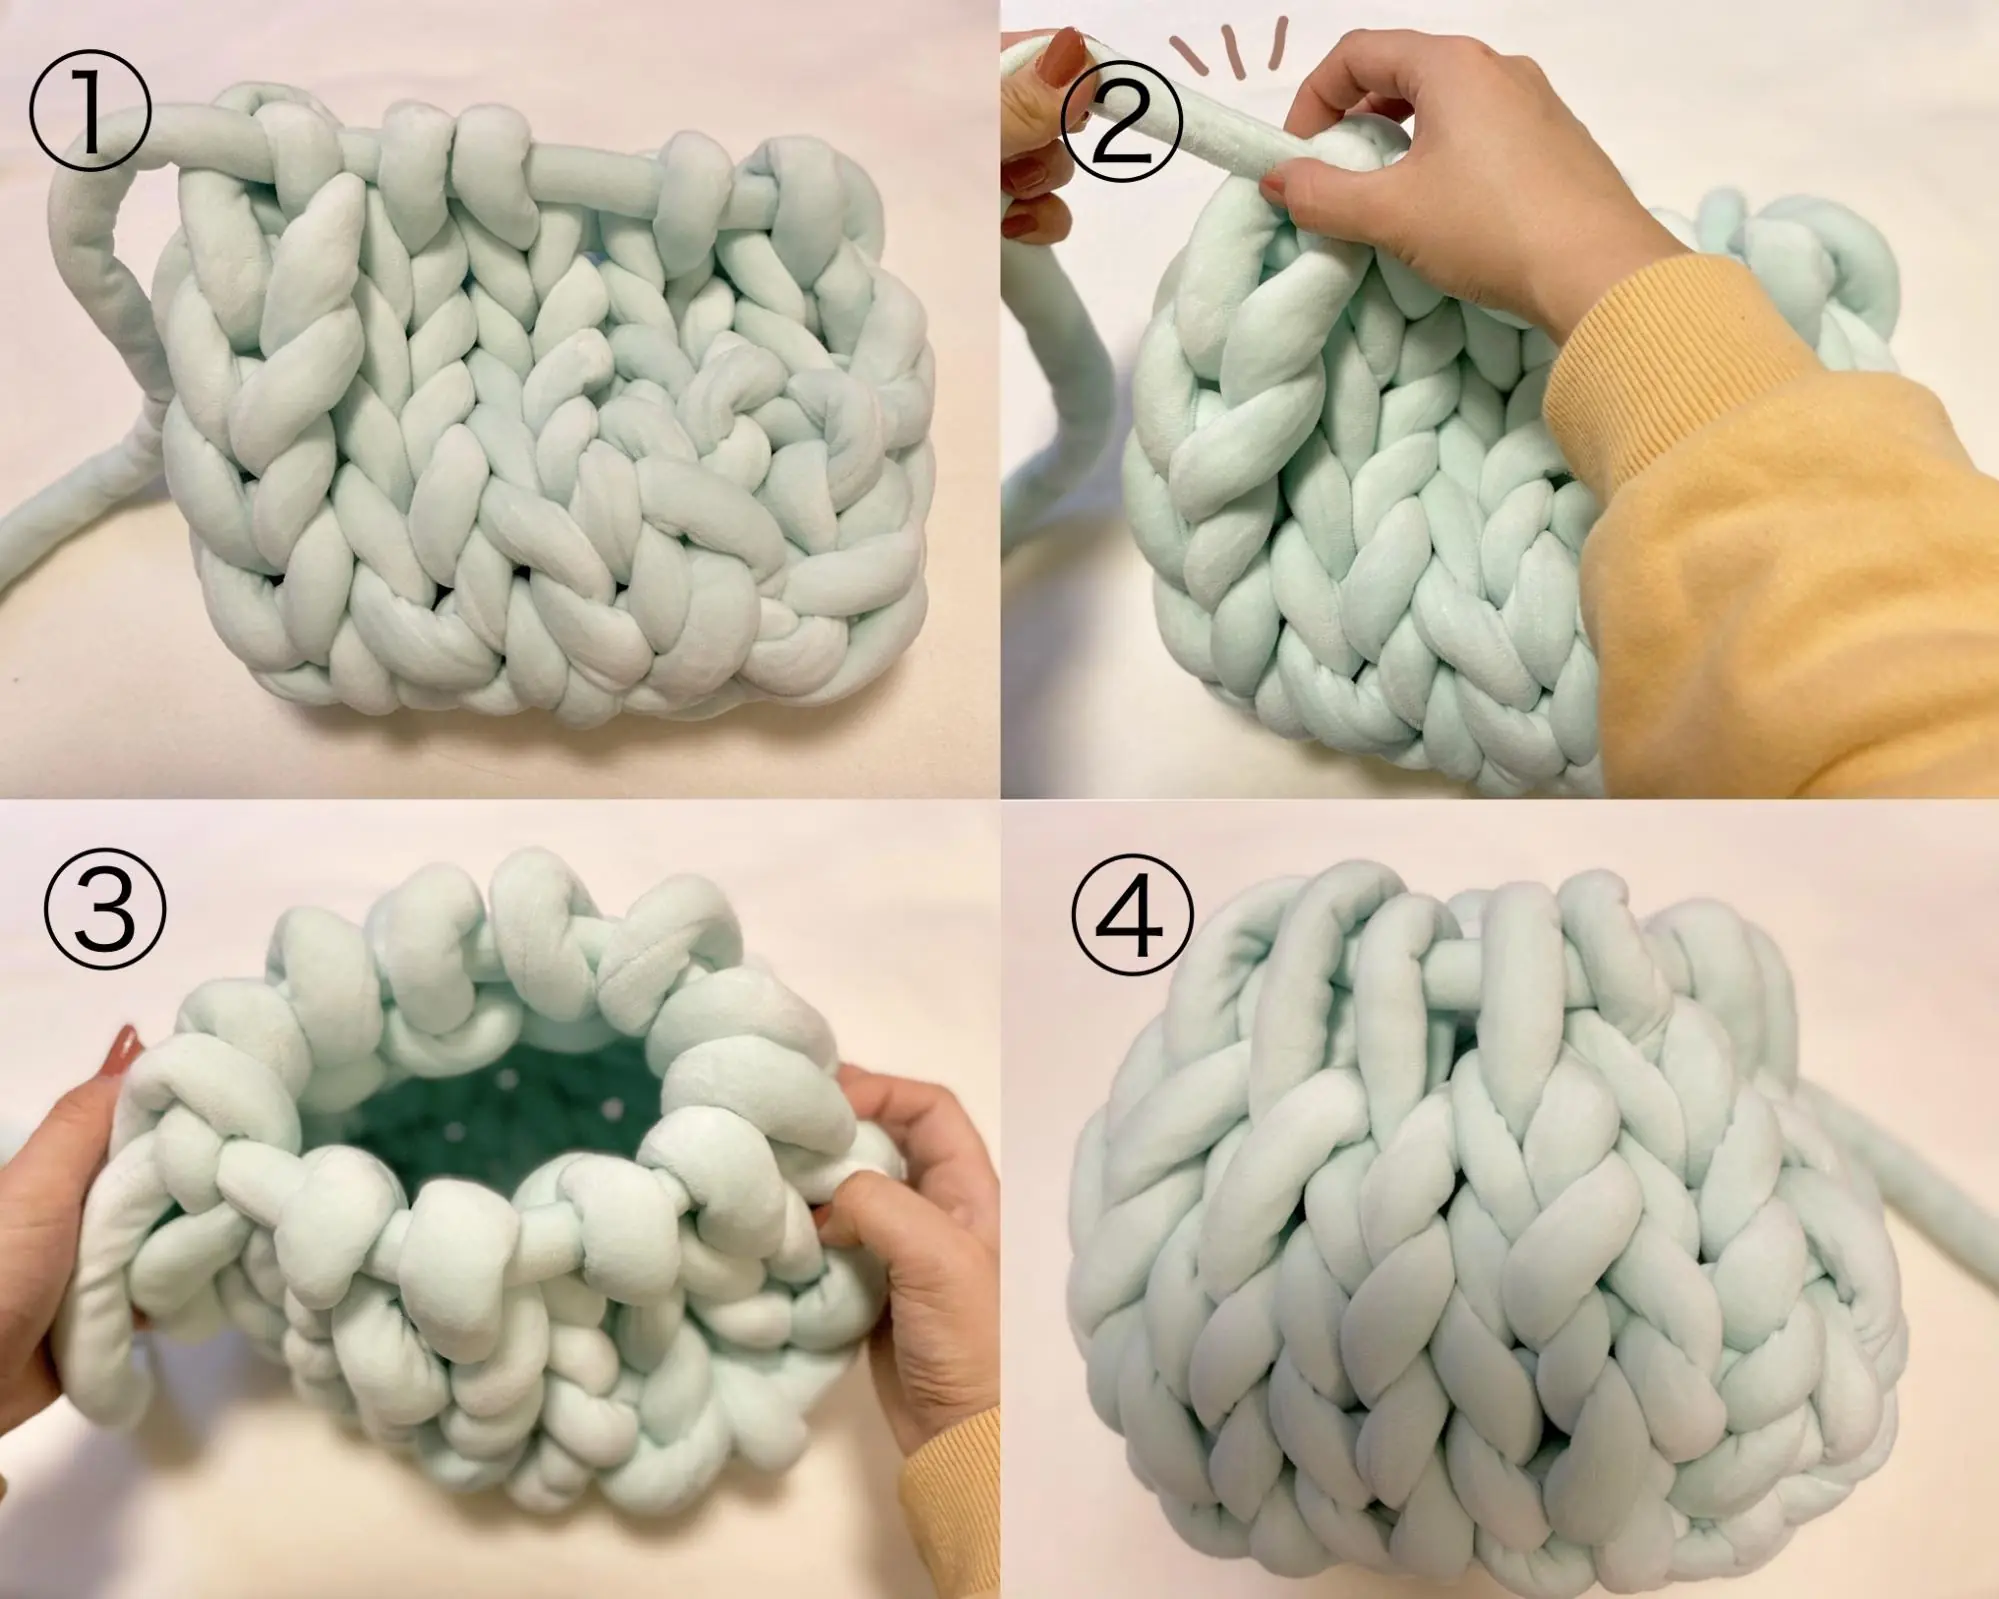
1. Let's make the base of the bag!
First, knit the base of the bag. This is the base part, so let's make it carefully.
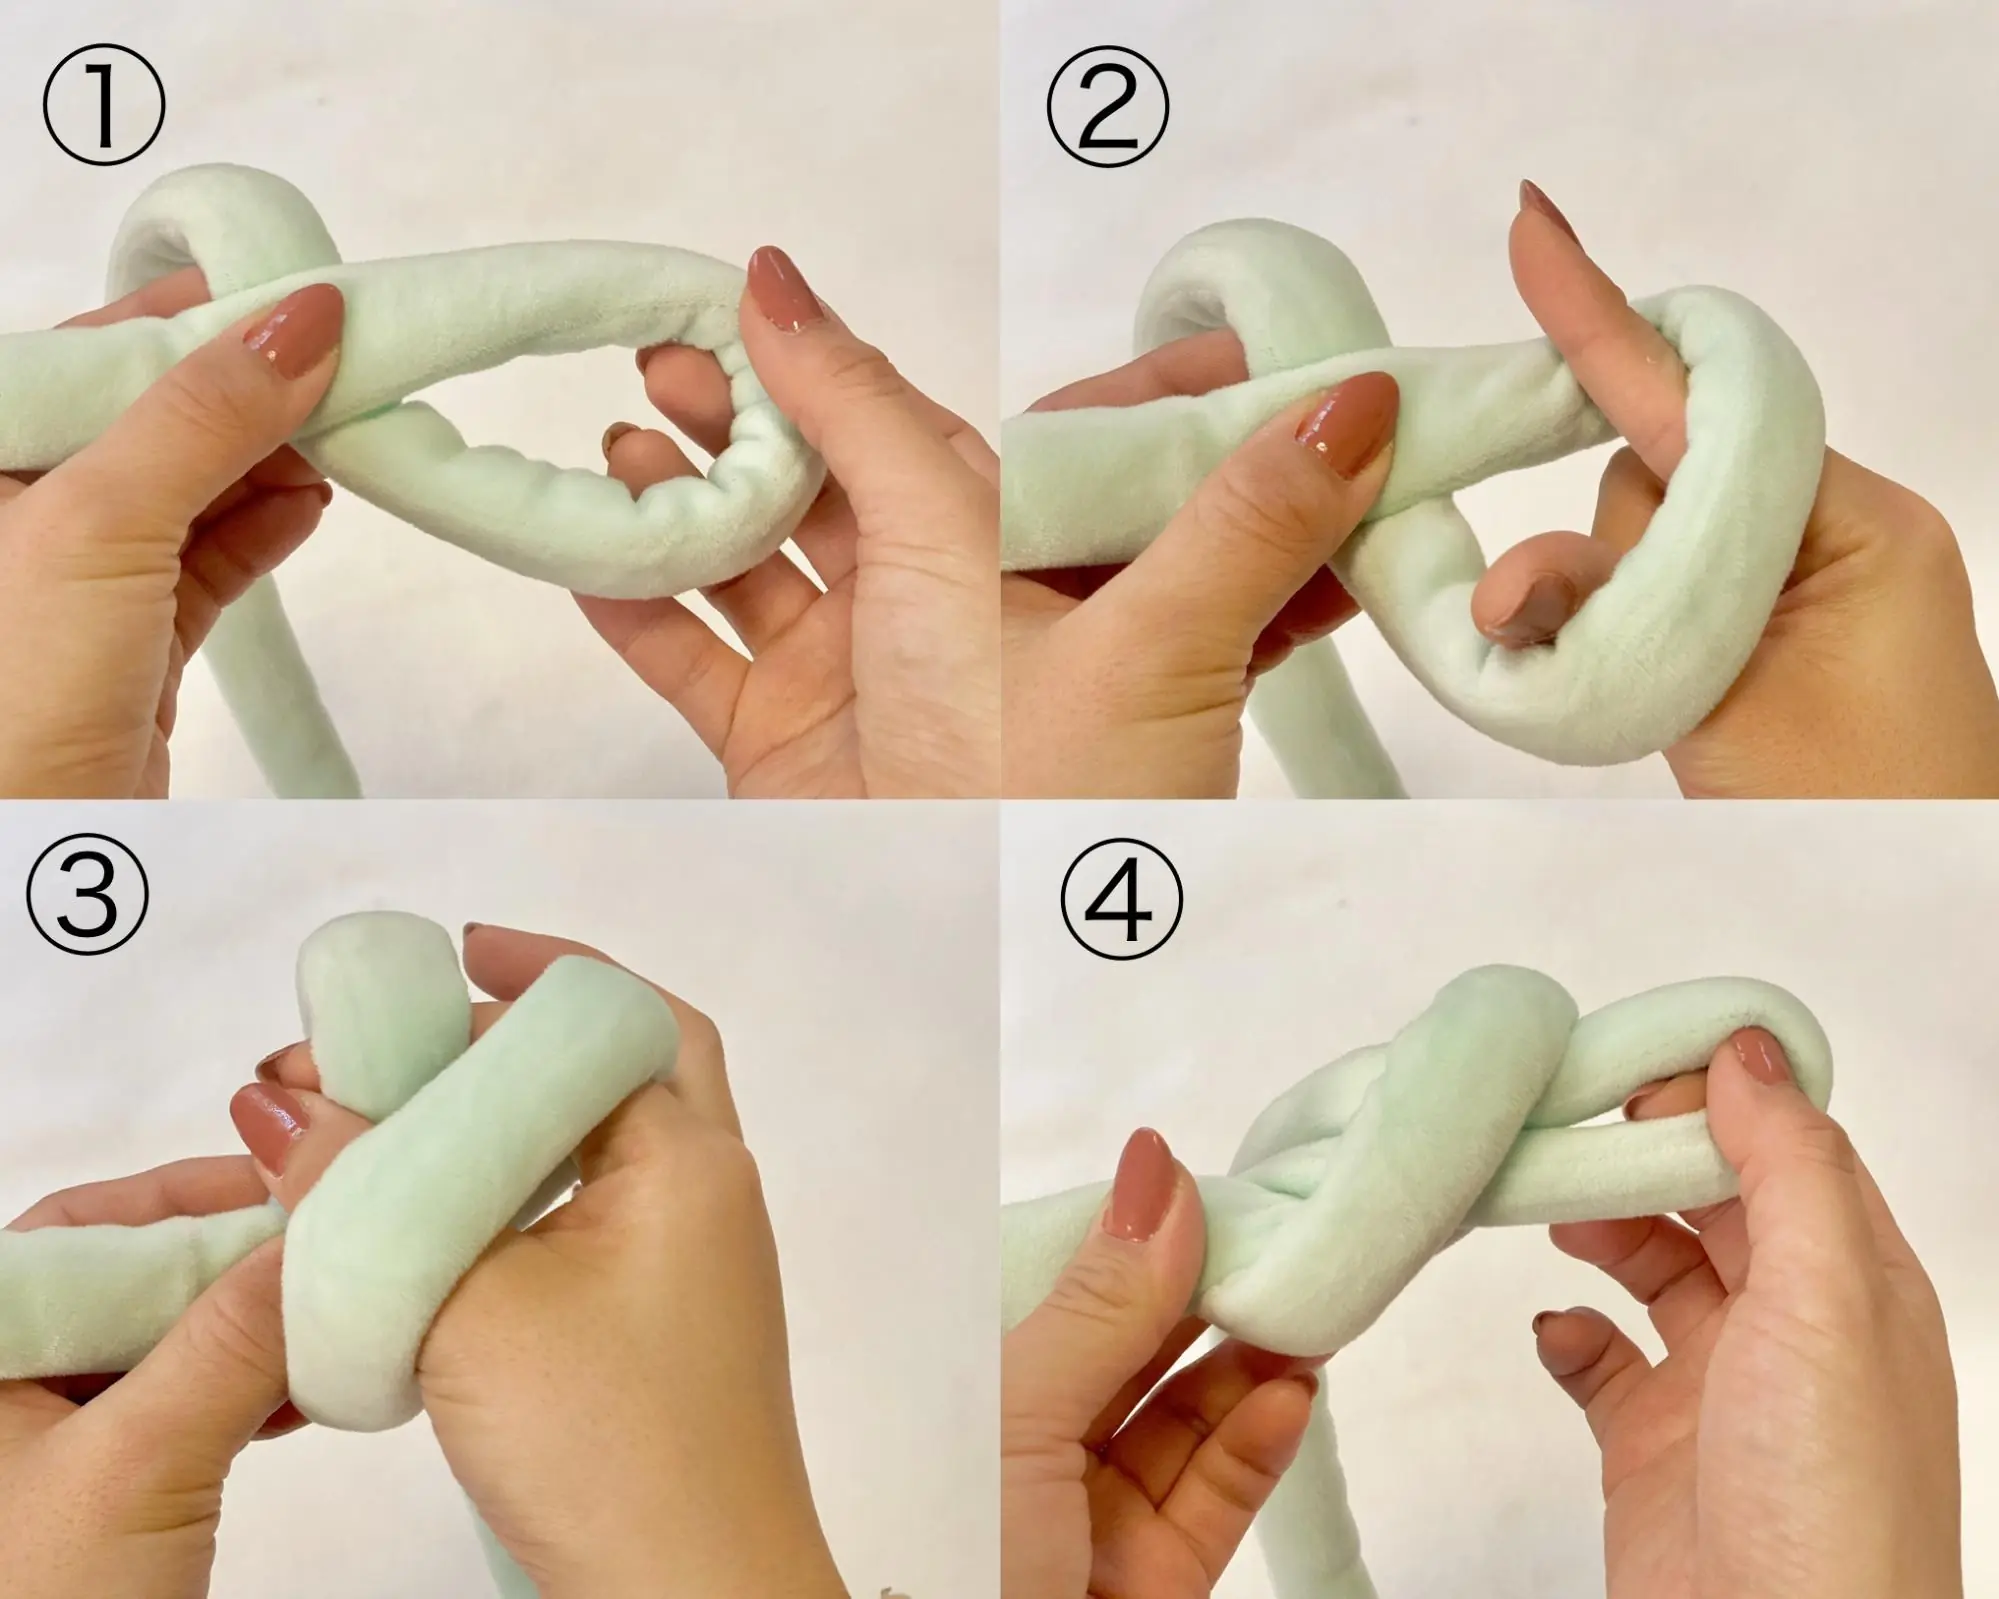
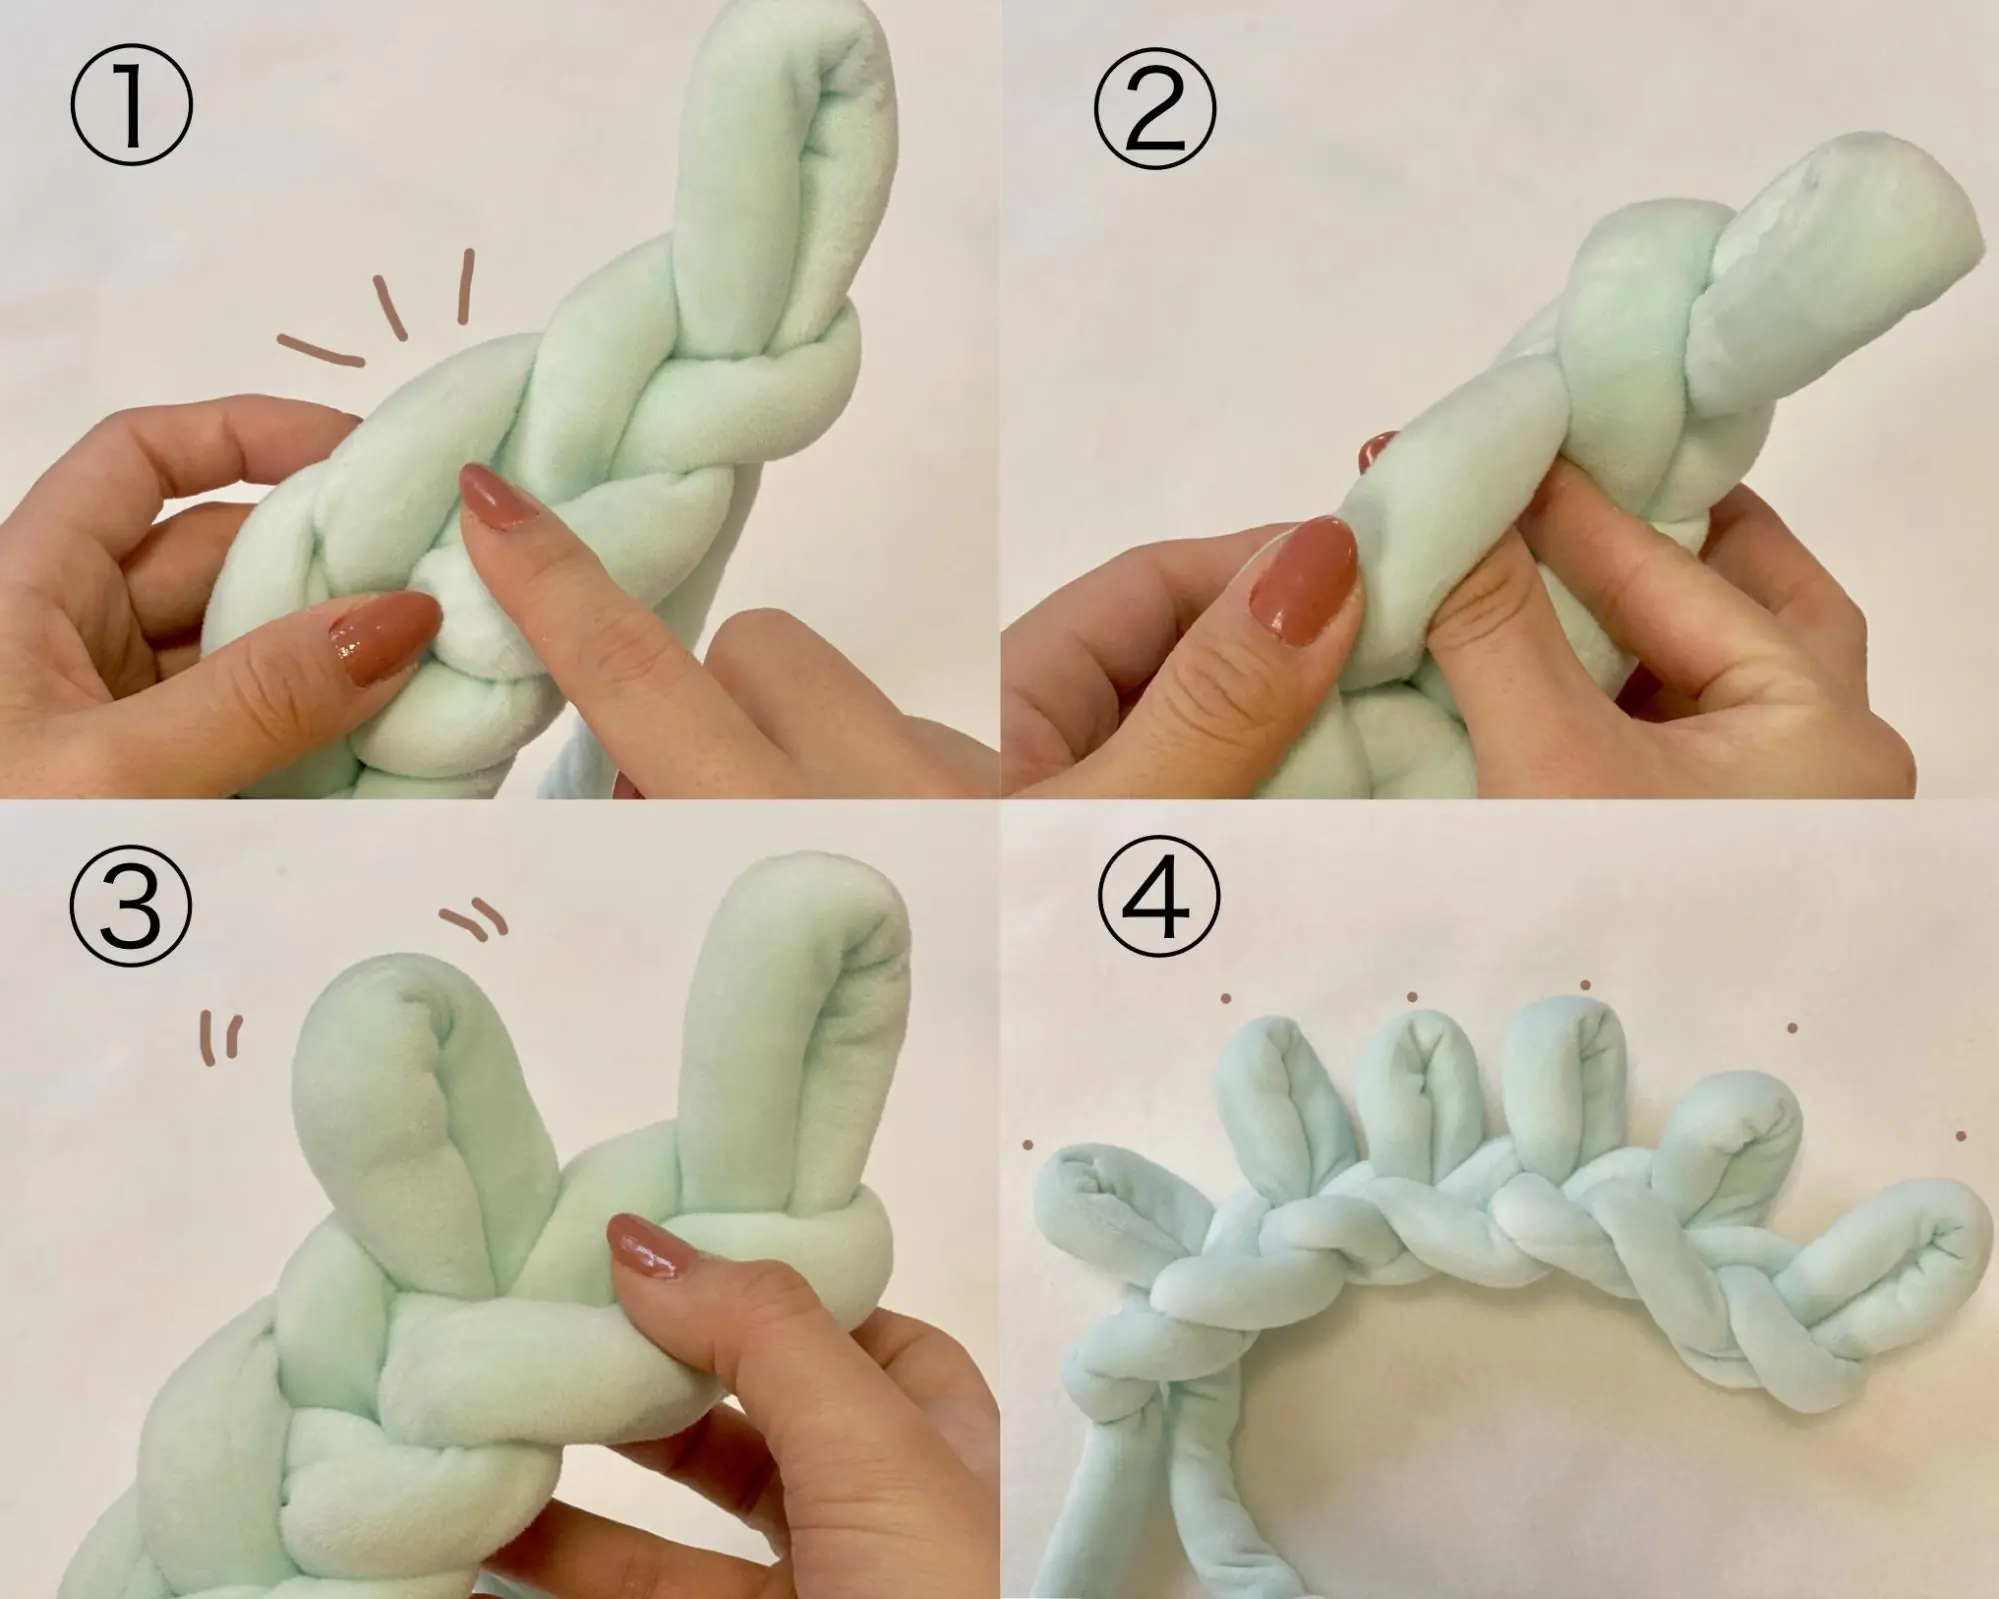
Make a loop at the end of the yarn as shown in ①. At this time, make sure that the tip of the yarn overlaps the longer one!
Place your thumb and forefinger inside the loop and pull the longer yarn through to make a loop. (See②to ④)
The length of the hoop at this time is about the length of your thumb. Be careful not to make this area too large, as the stitches will become loose. Conversely, if it is too small, the stitches will be tight.
Then, put the yarn in the loop again in the same way to make a new loop. It's OK if you can make braid-like stitches like ④! Repeat this process until you have the size of bag you want.
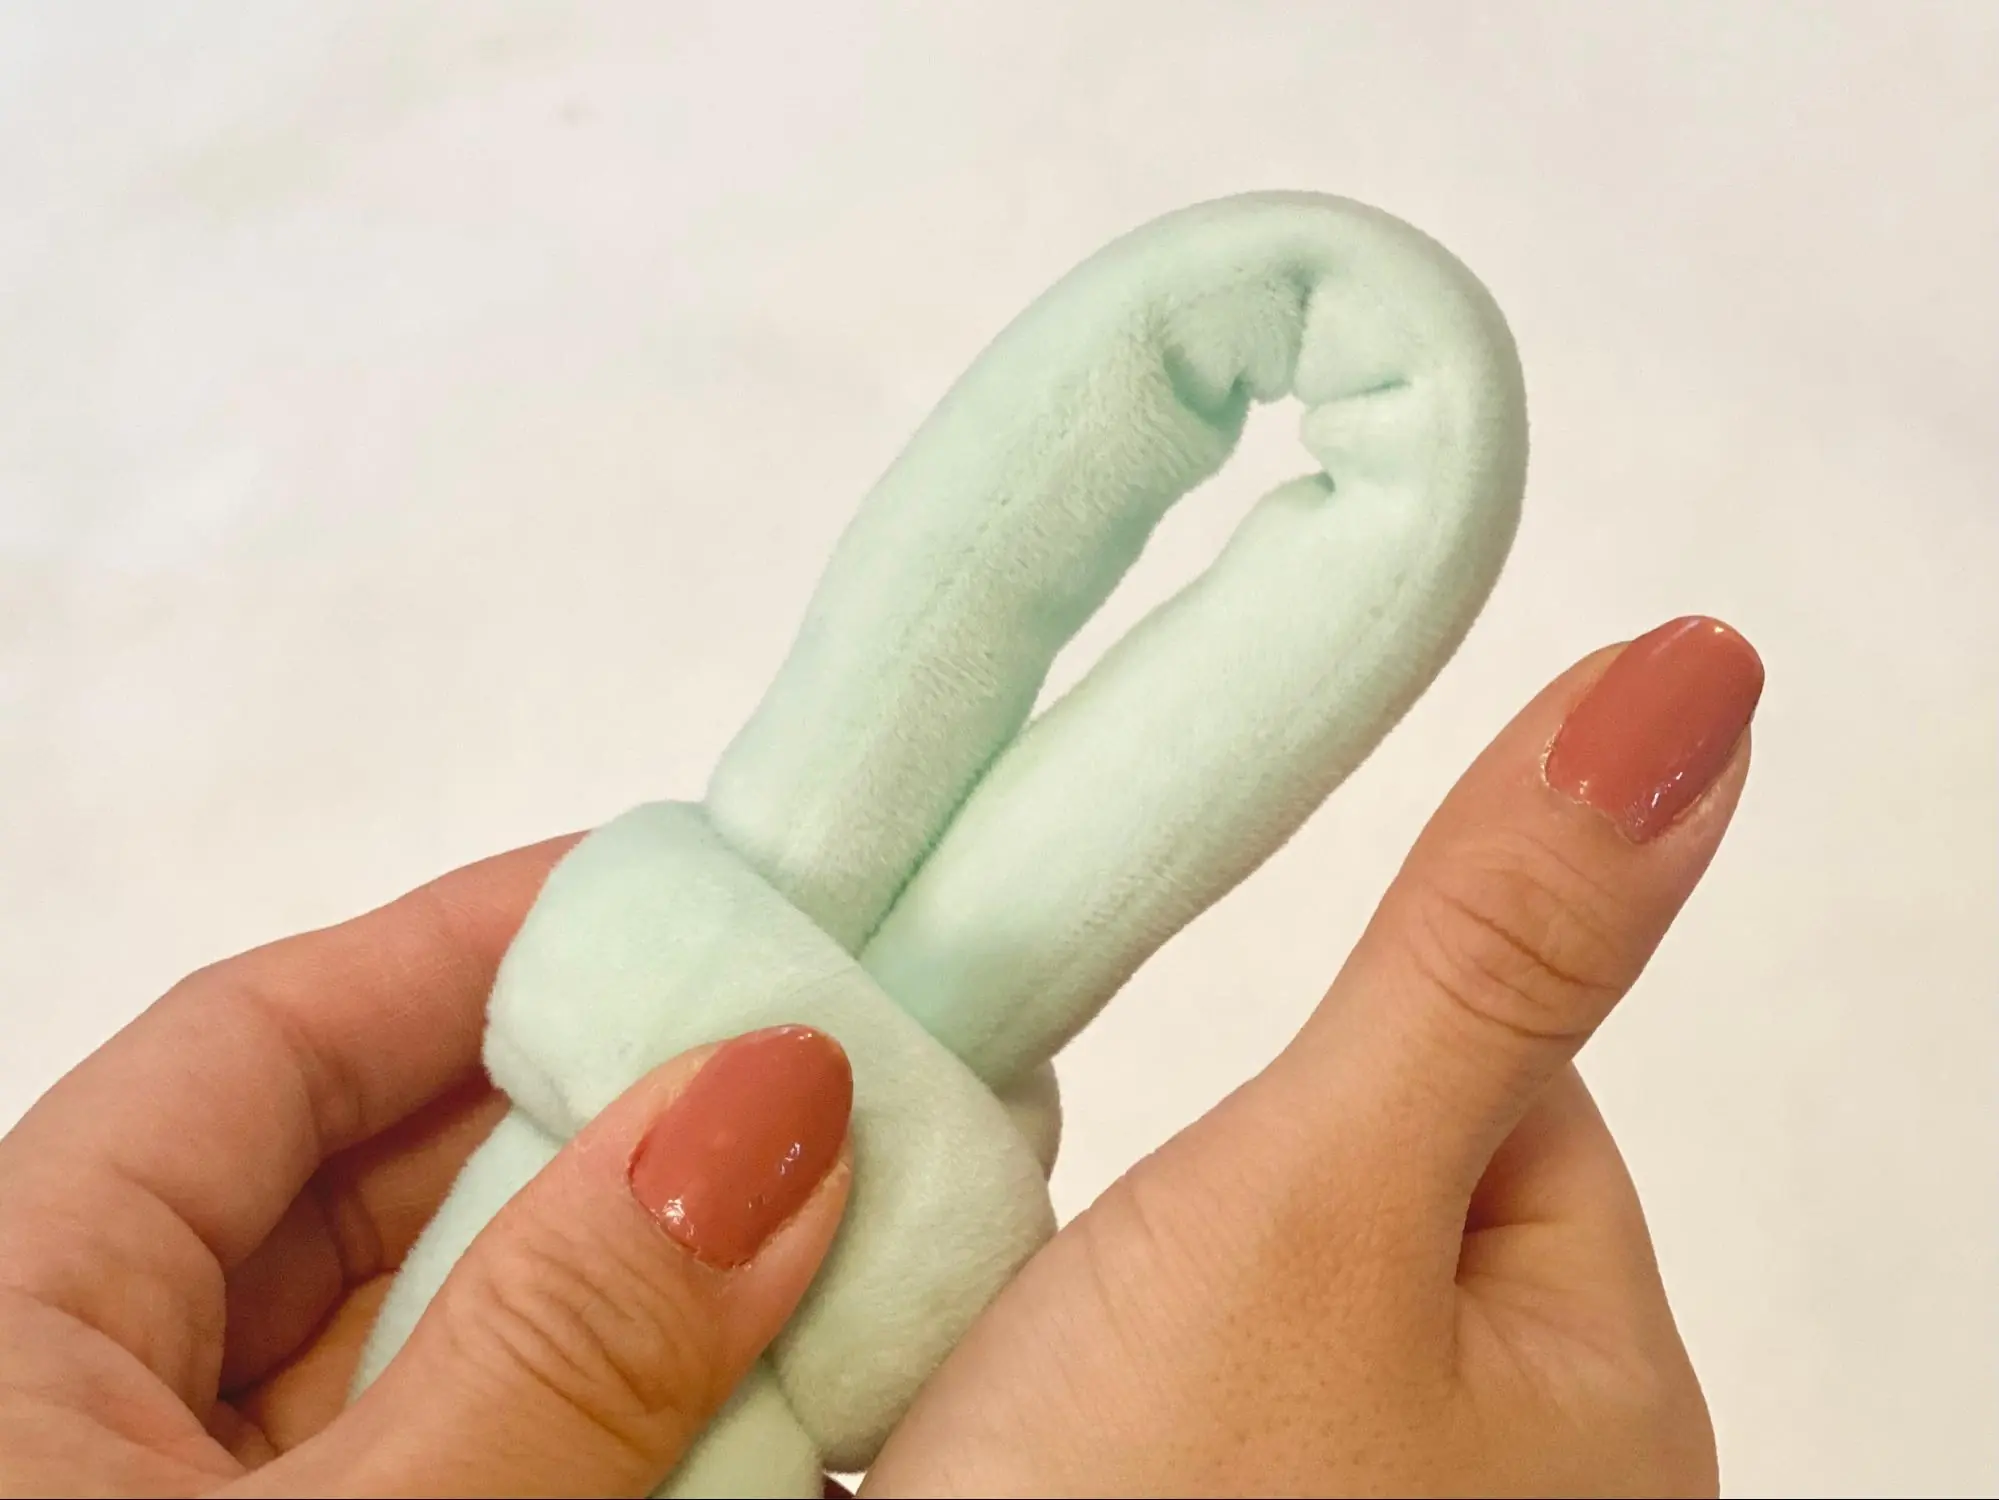
The bottom part of the bag is ready! This time, make 6 stitches. This is about 25-28 cm wide.
If you want to make a small bag, we recommend using about 5 stitches for the base. For normal to large size, please adjust to your favorite size from 6 to 10 pieces.
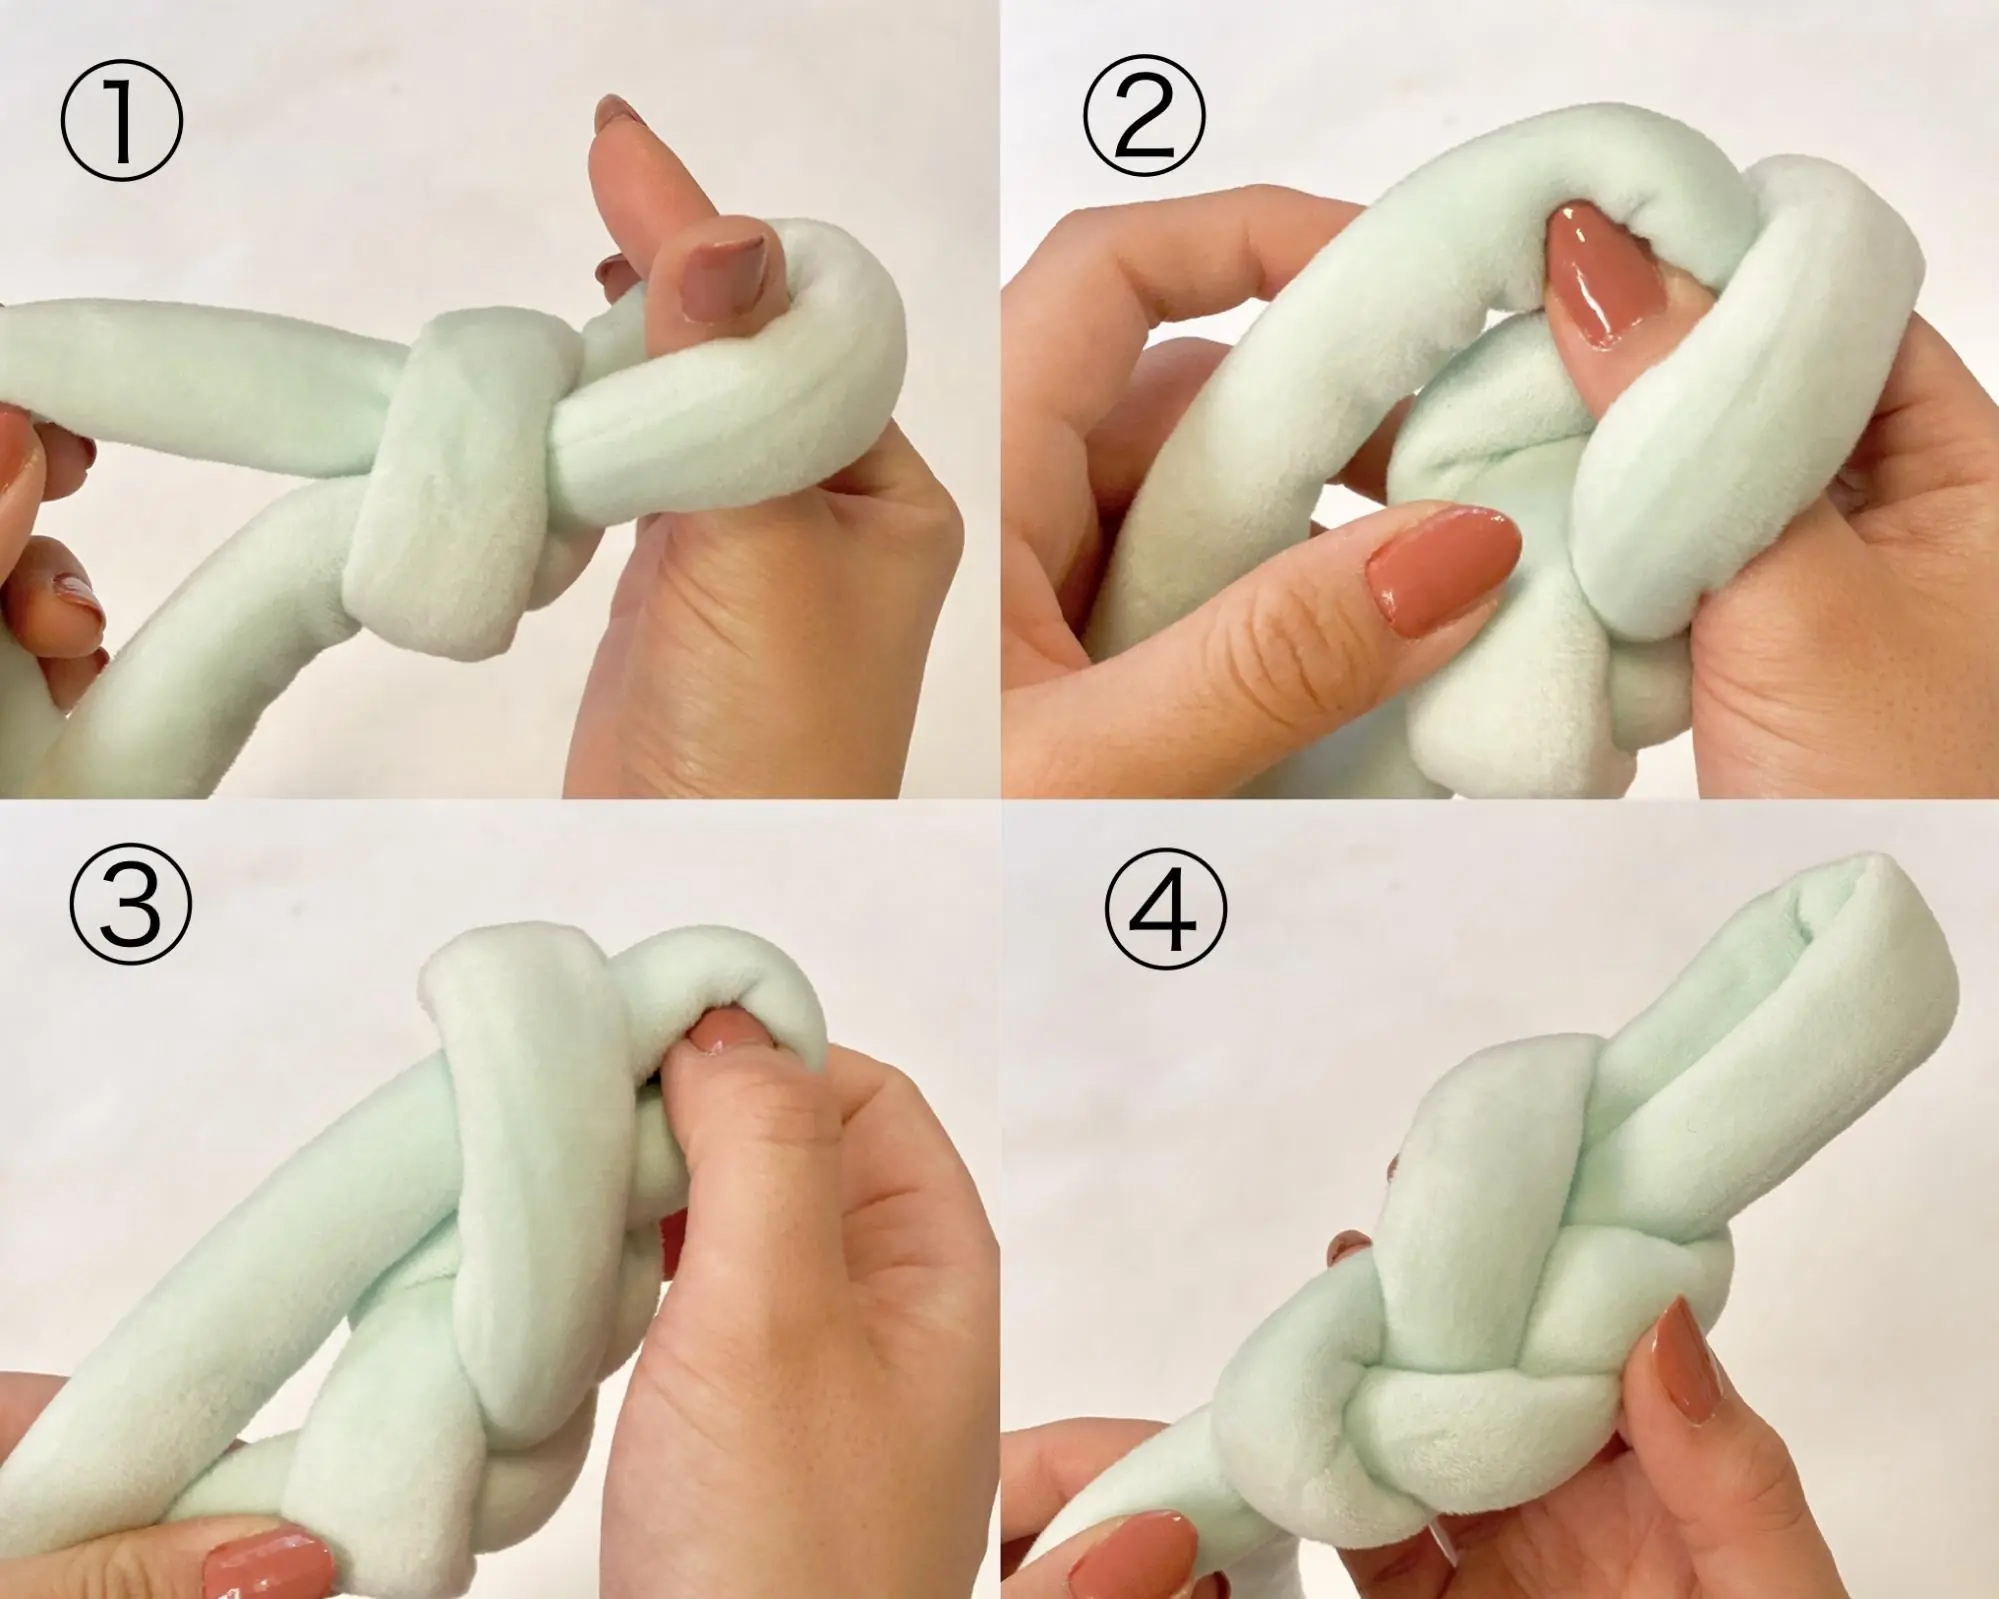
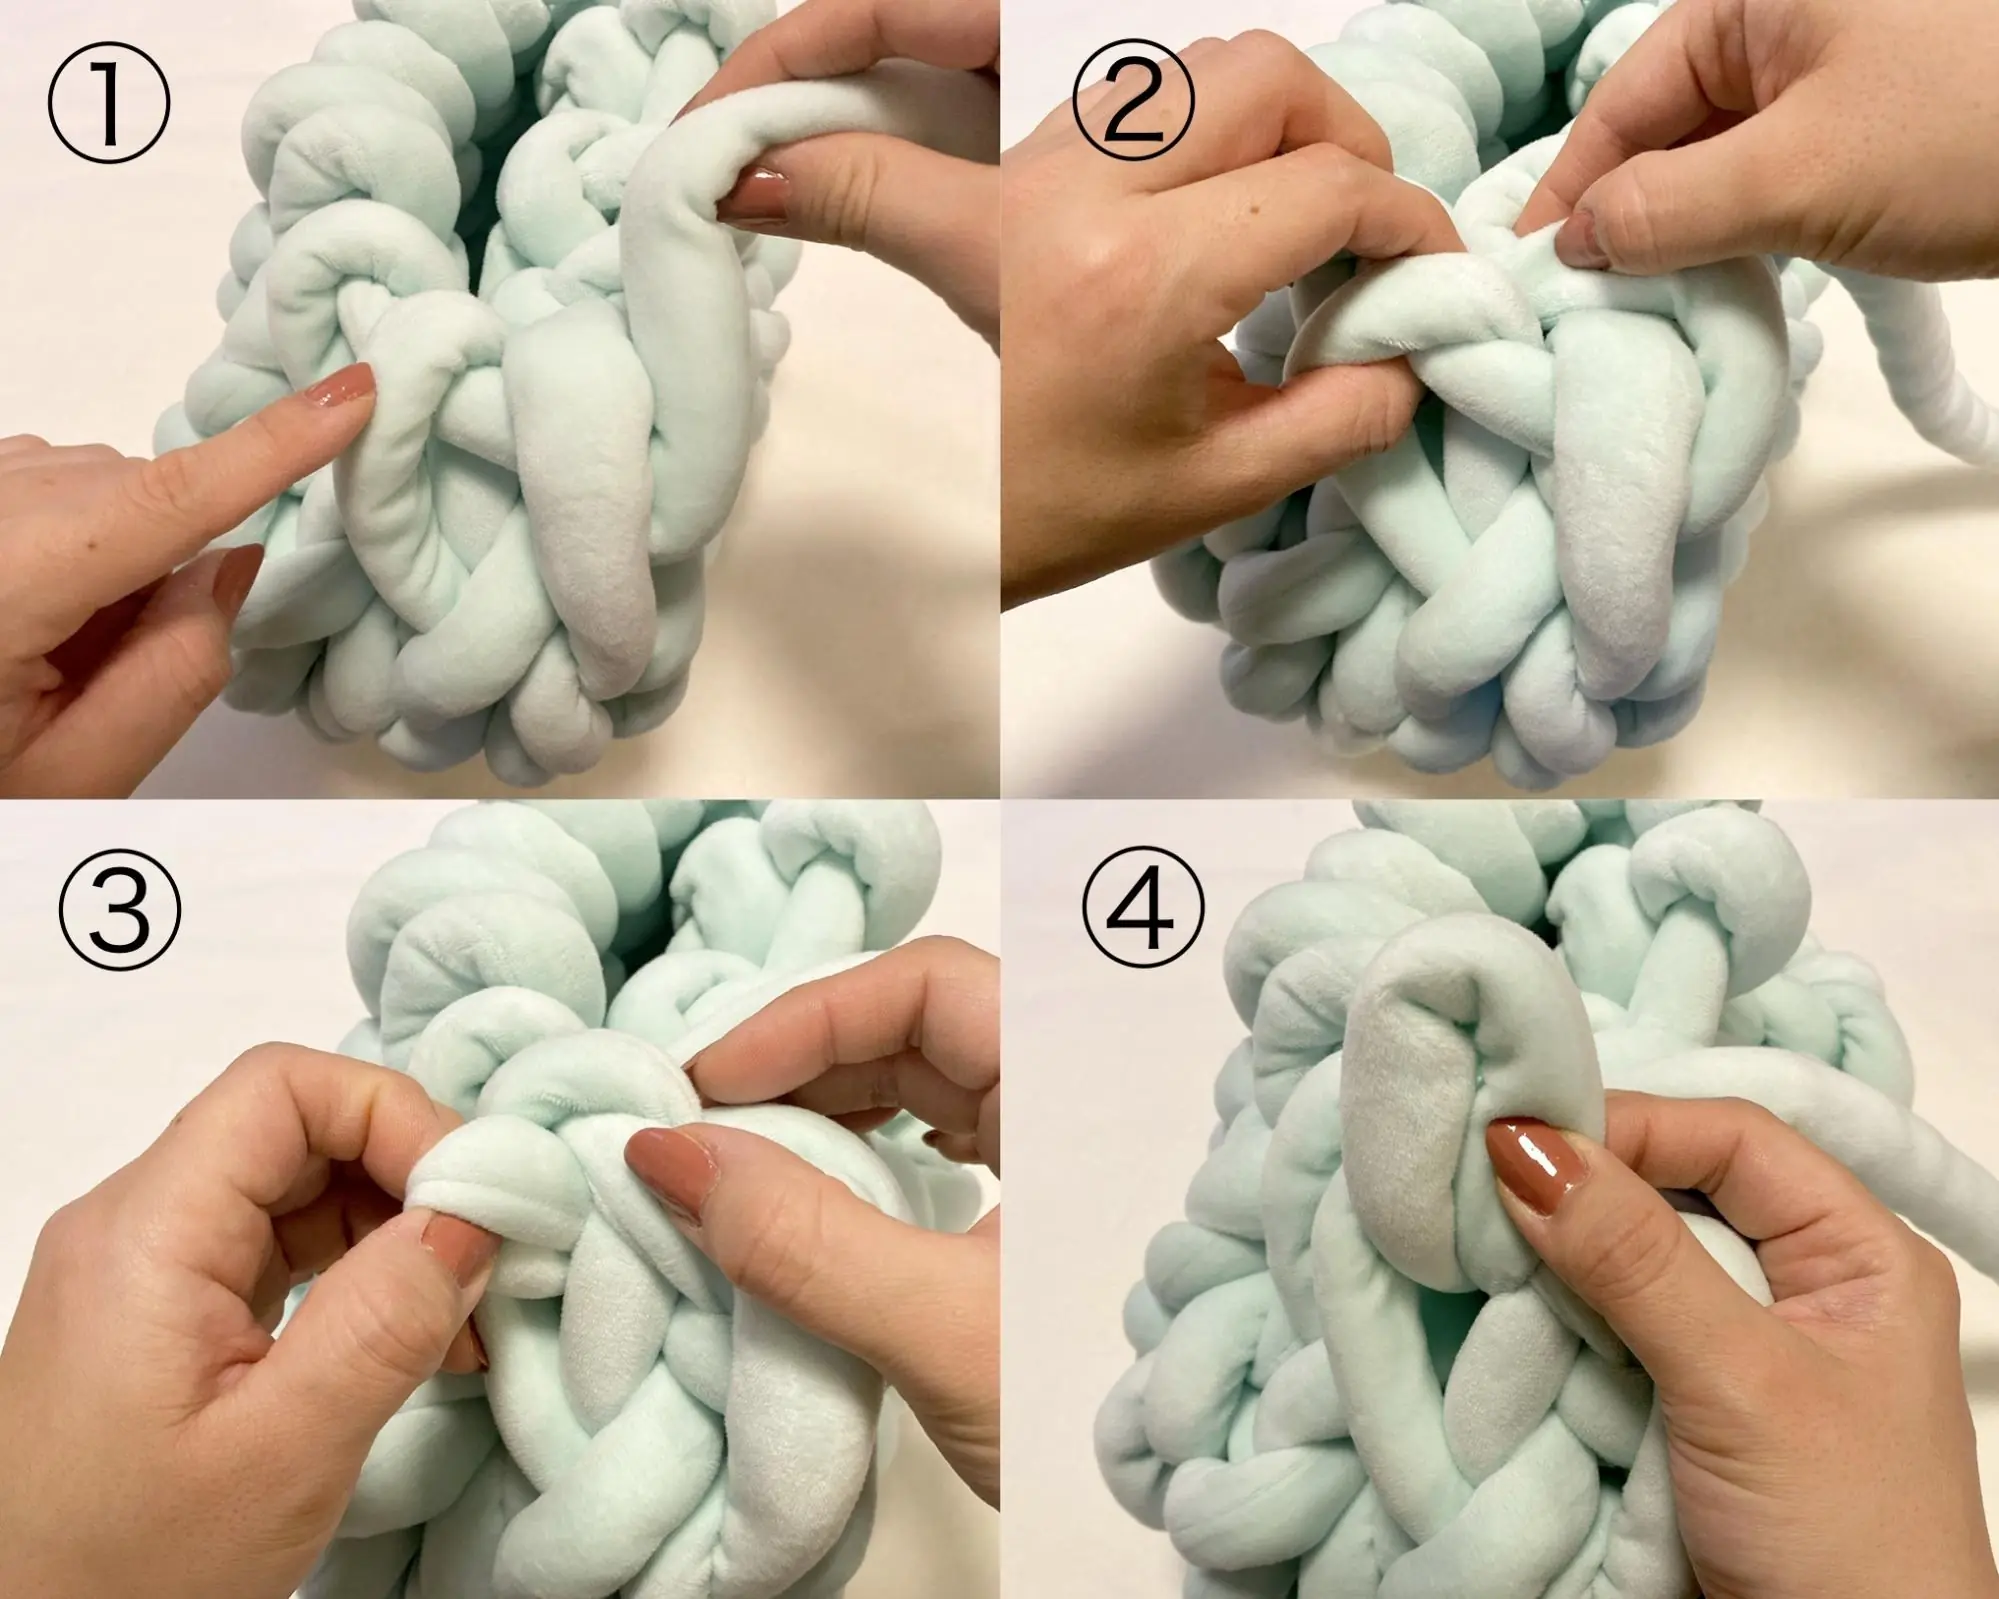
Next, create loops on the left and right sides of the base as many as the number of stitches. Put your finger under the loop you just made (see ①) and thread the yarn in the same way as before. Again, the point here is to align the size of the loops! Once you have loops (see ④), the base on one side is complete.
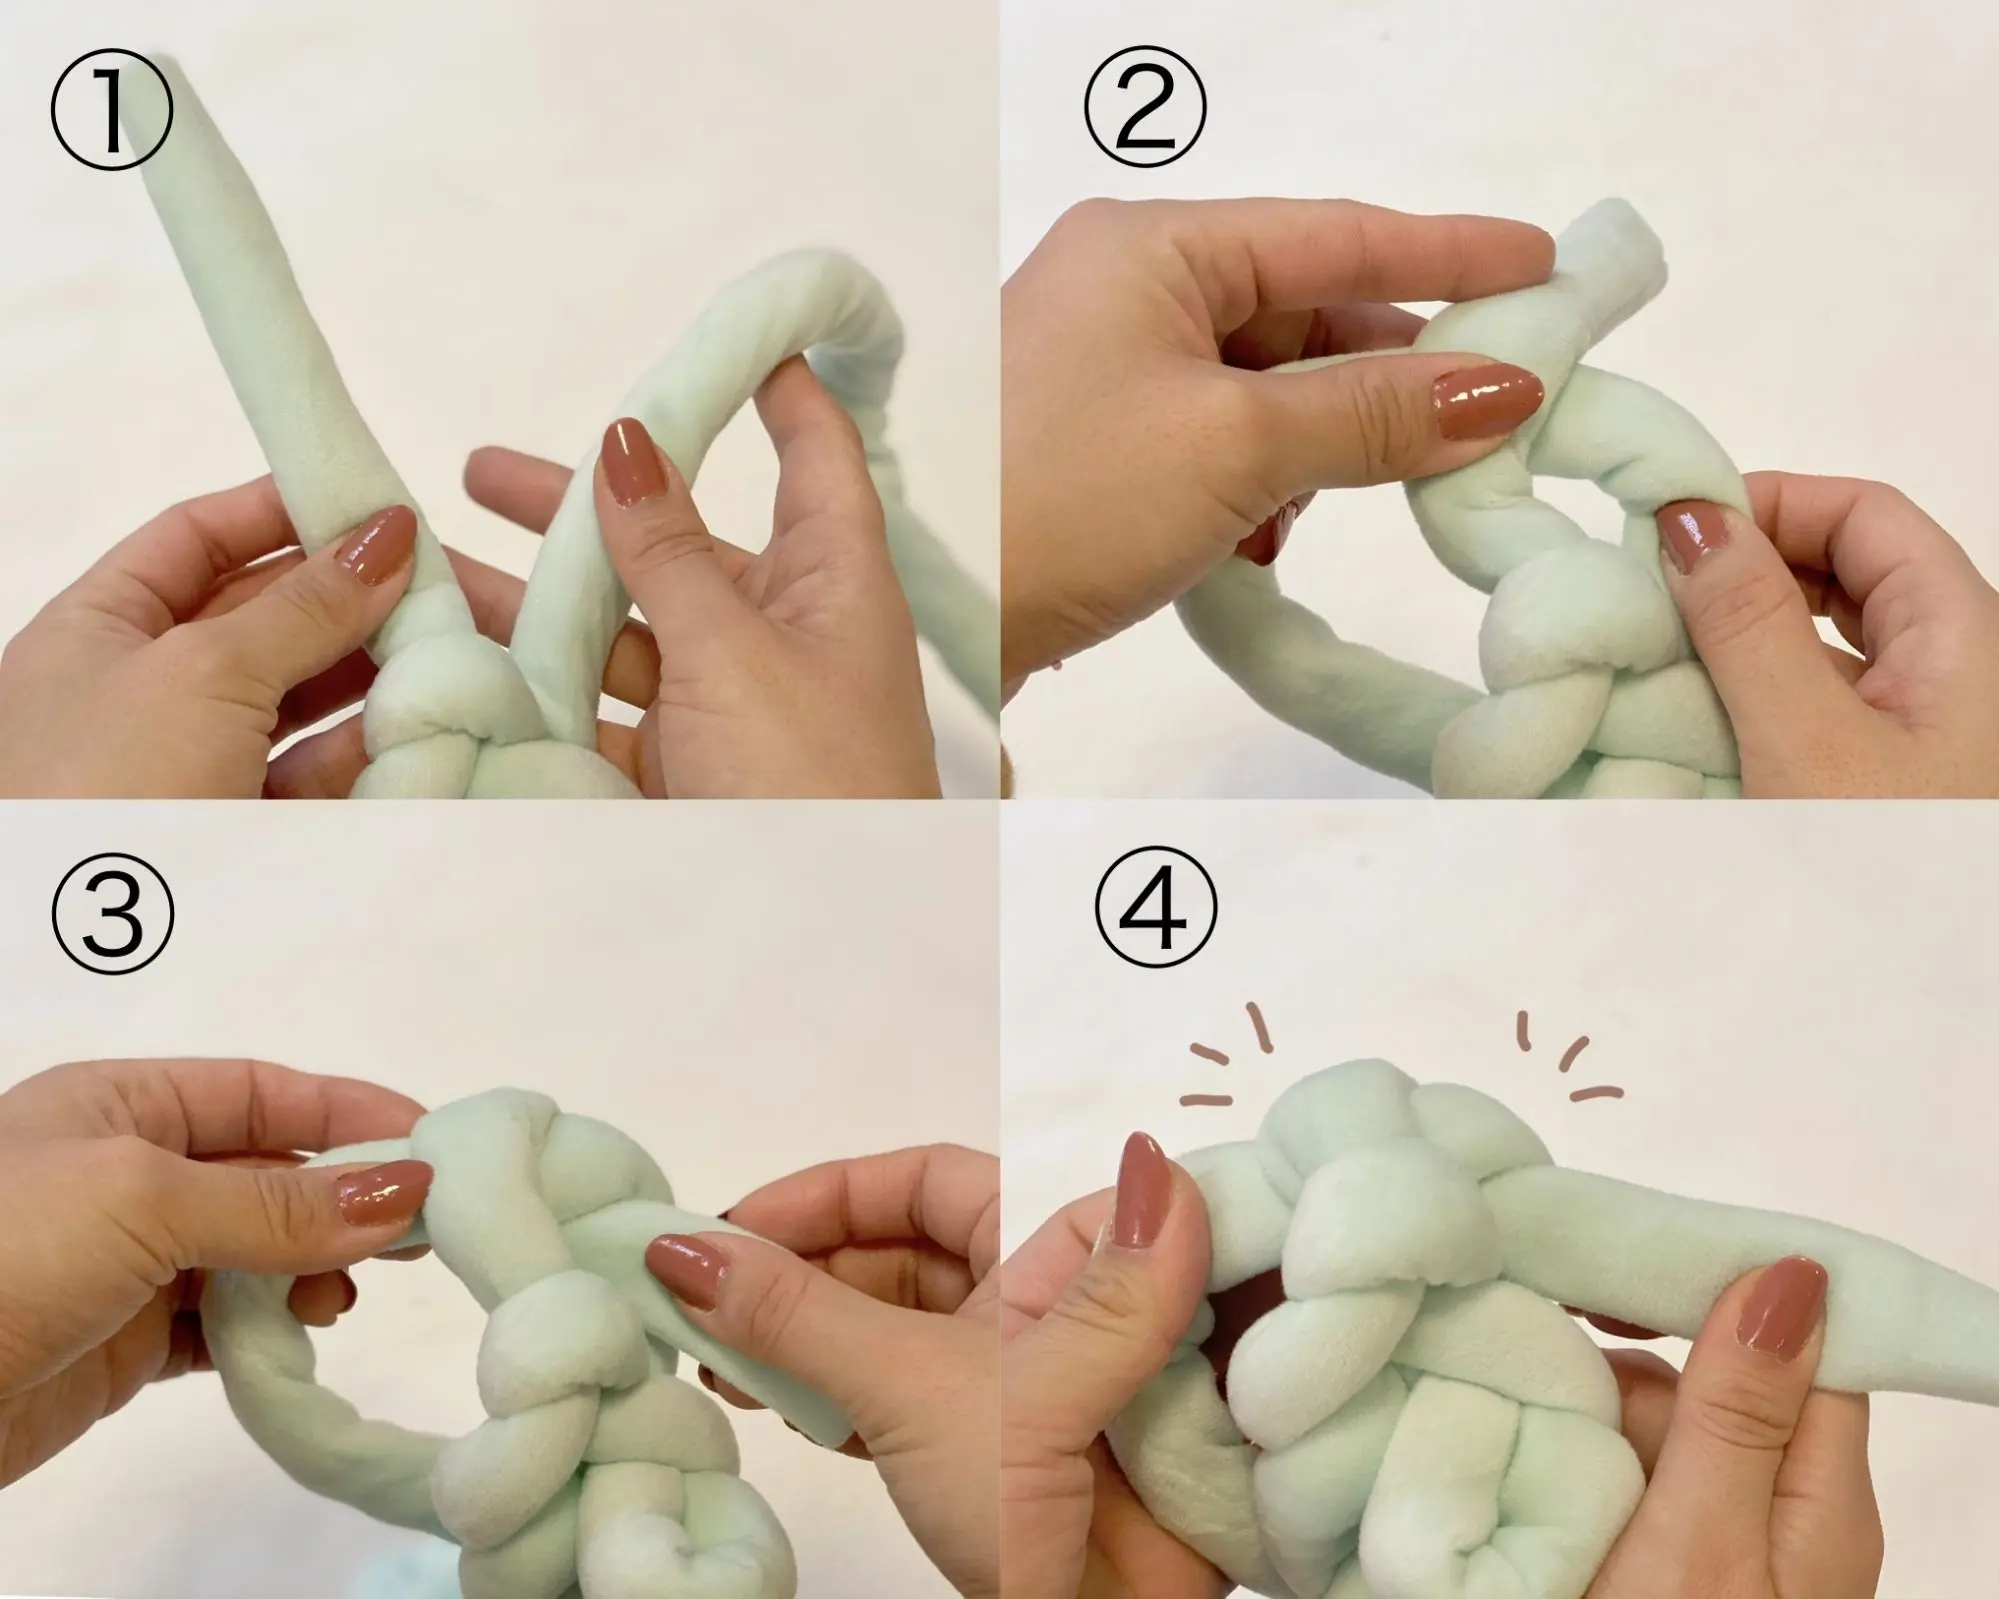
I will make loops on the other side in the same way, but before that, there is a recommended point!
If you tie the end of the first remaining yarn and the long yarn once like ① to ④, the base will be stable without worrying about unraveling. (You can continue without tying.)

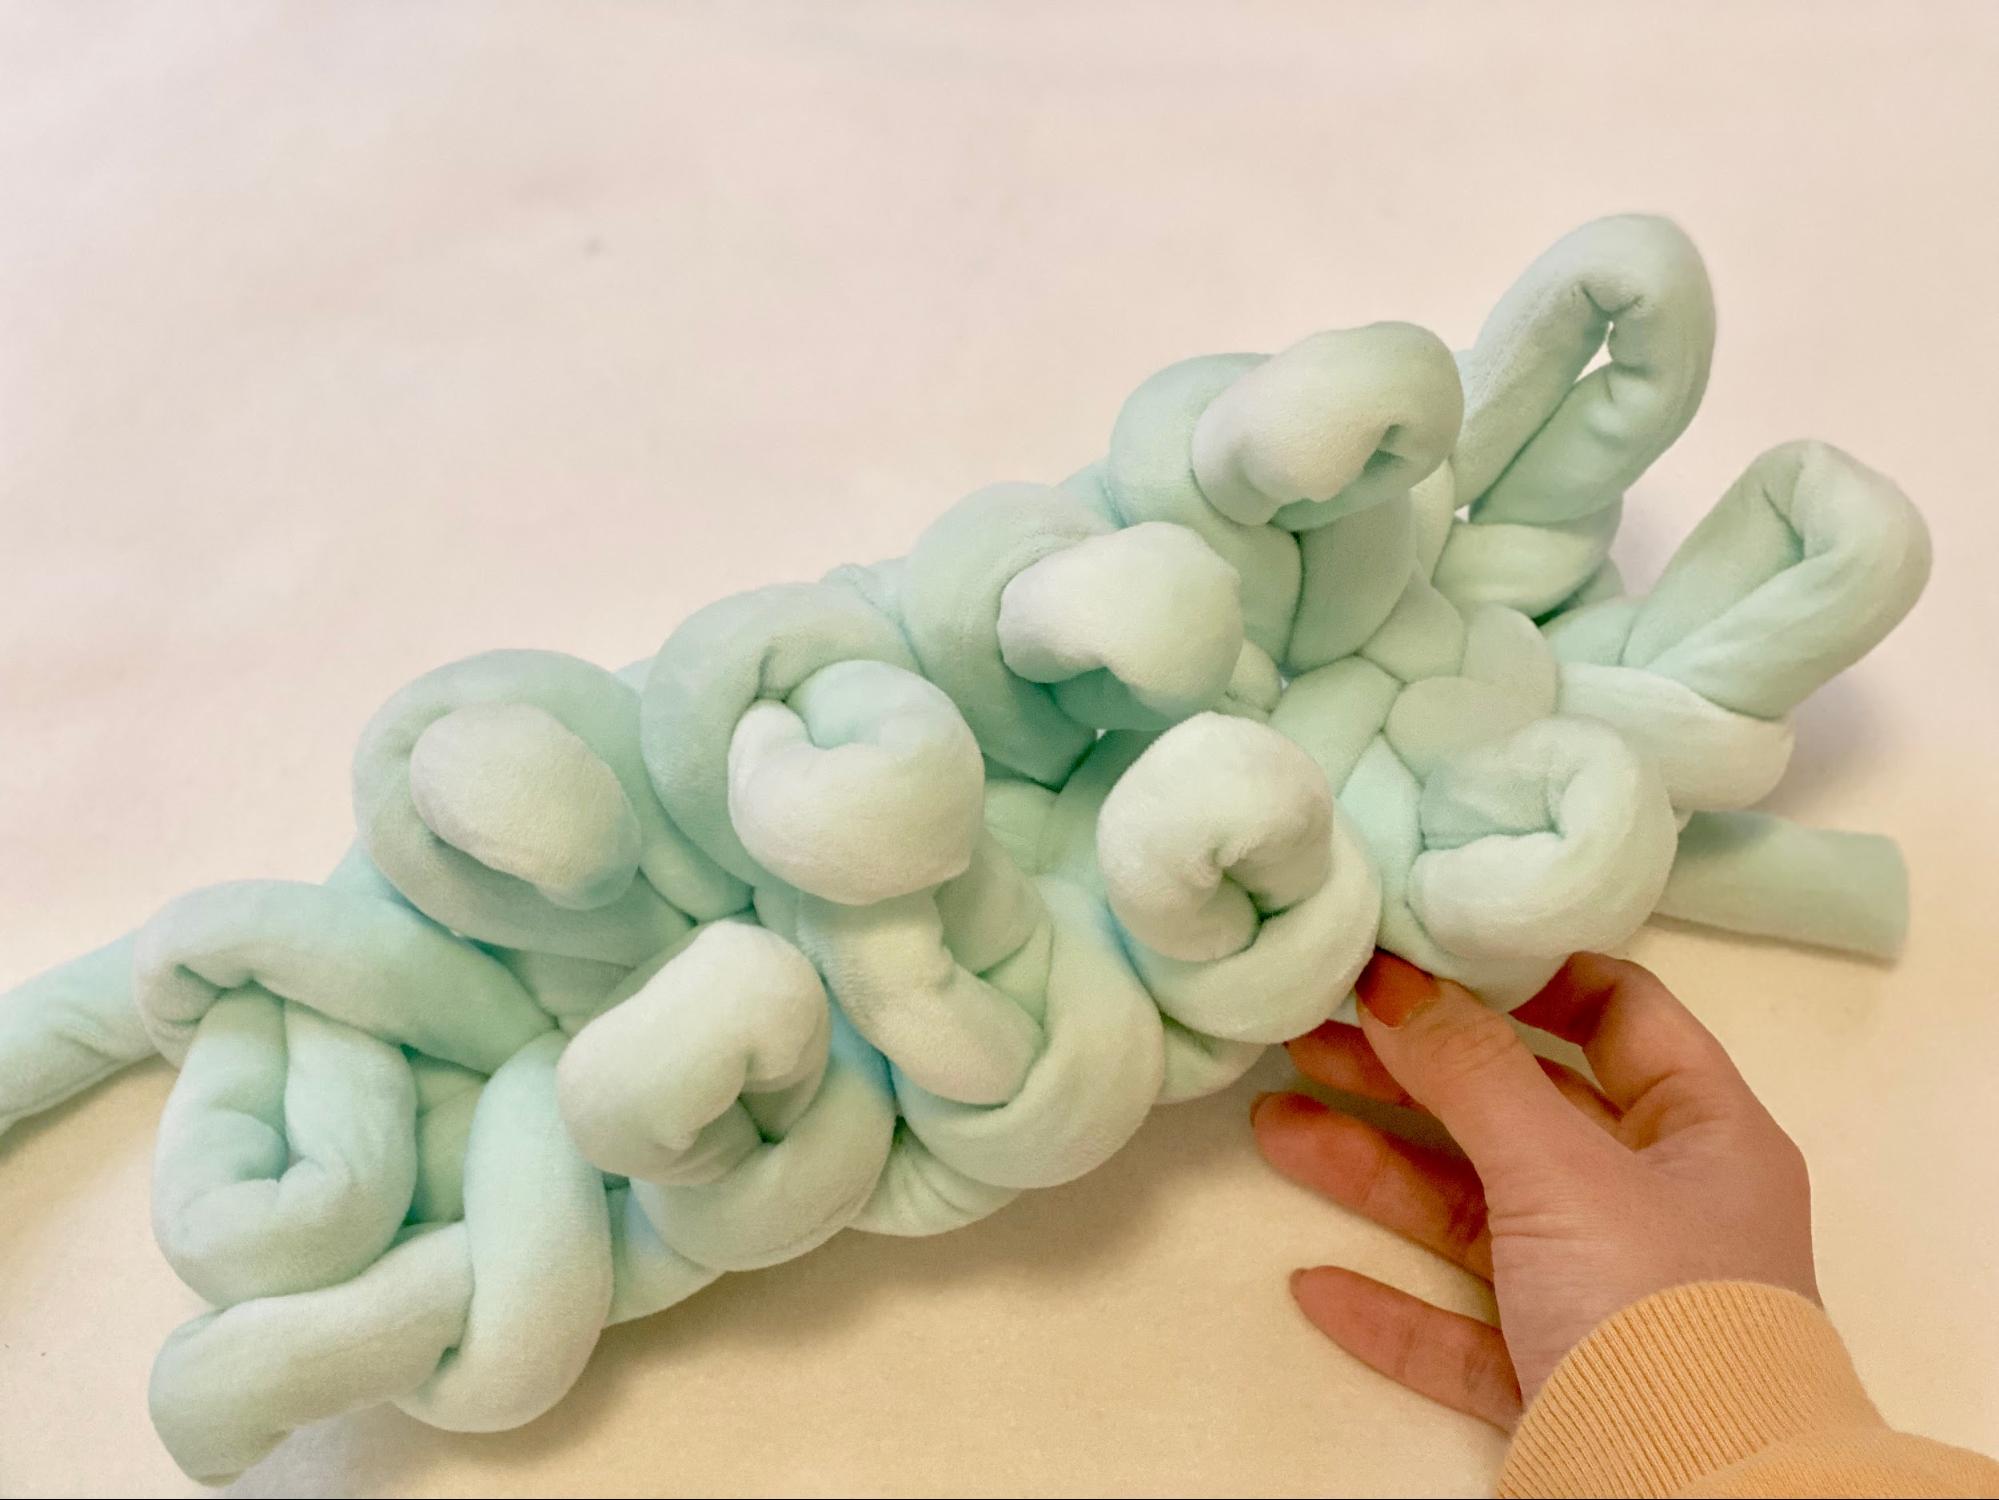
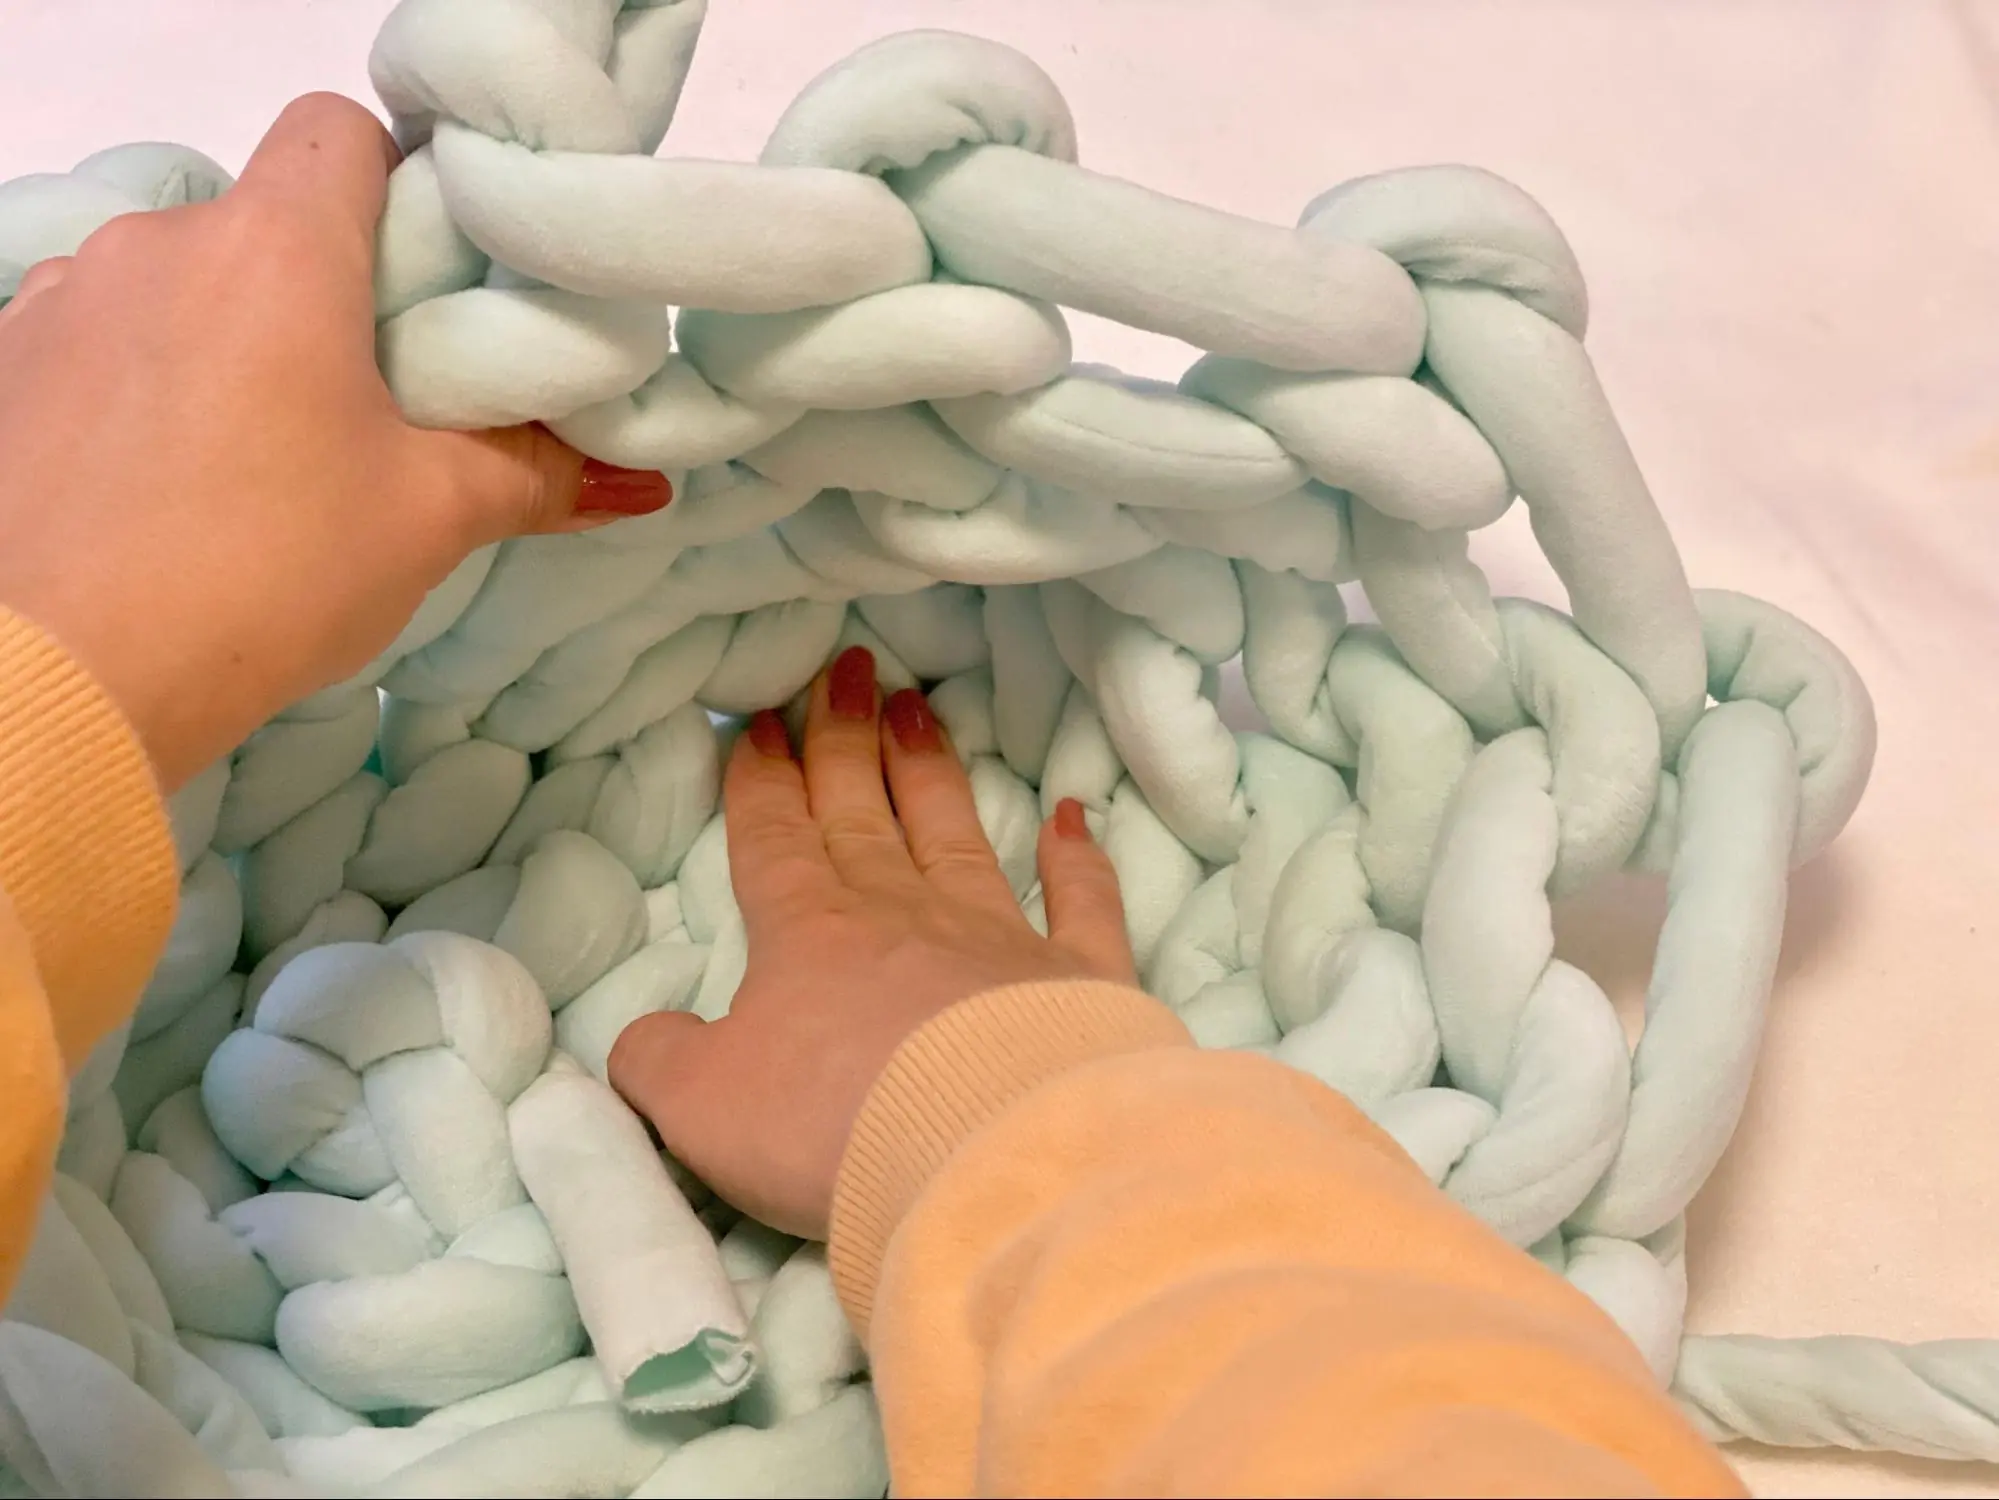
The other side also has a loop! However, this look... It's kind of like a dinosaur's back and cute (laughs)
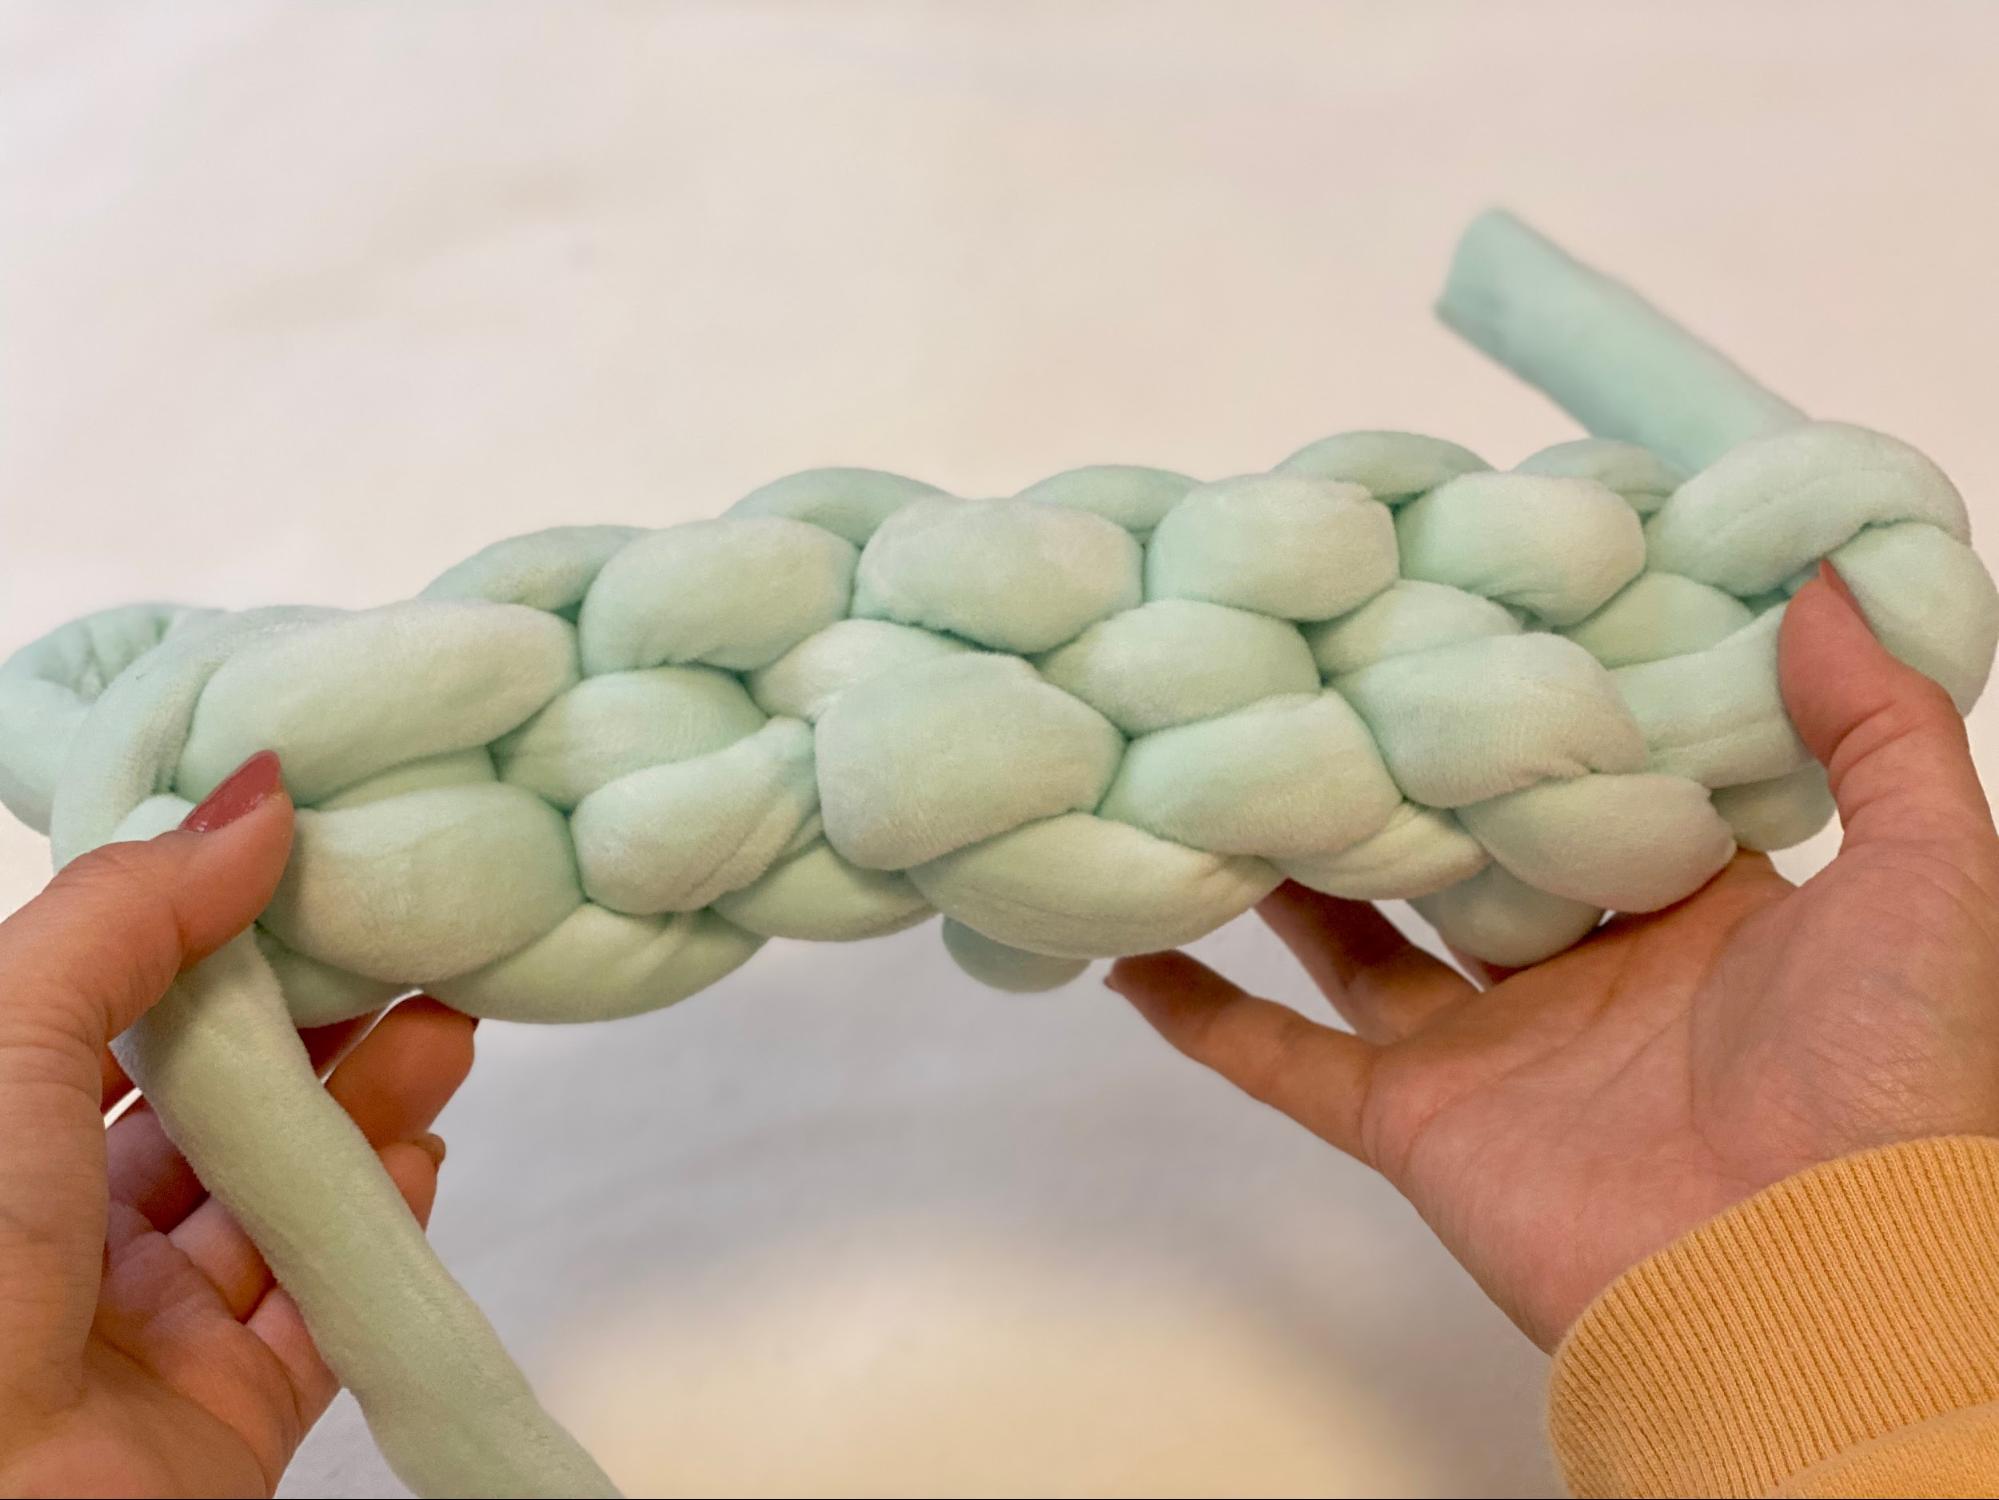
This is what the back looks like! The stitches are neatly connected. The base is now complete.
2. Knit the outside of the bag!
Once the foundation is ready, it's a turning point in no time! Next is making the outside of the bag.
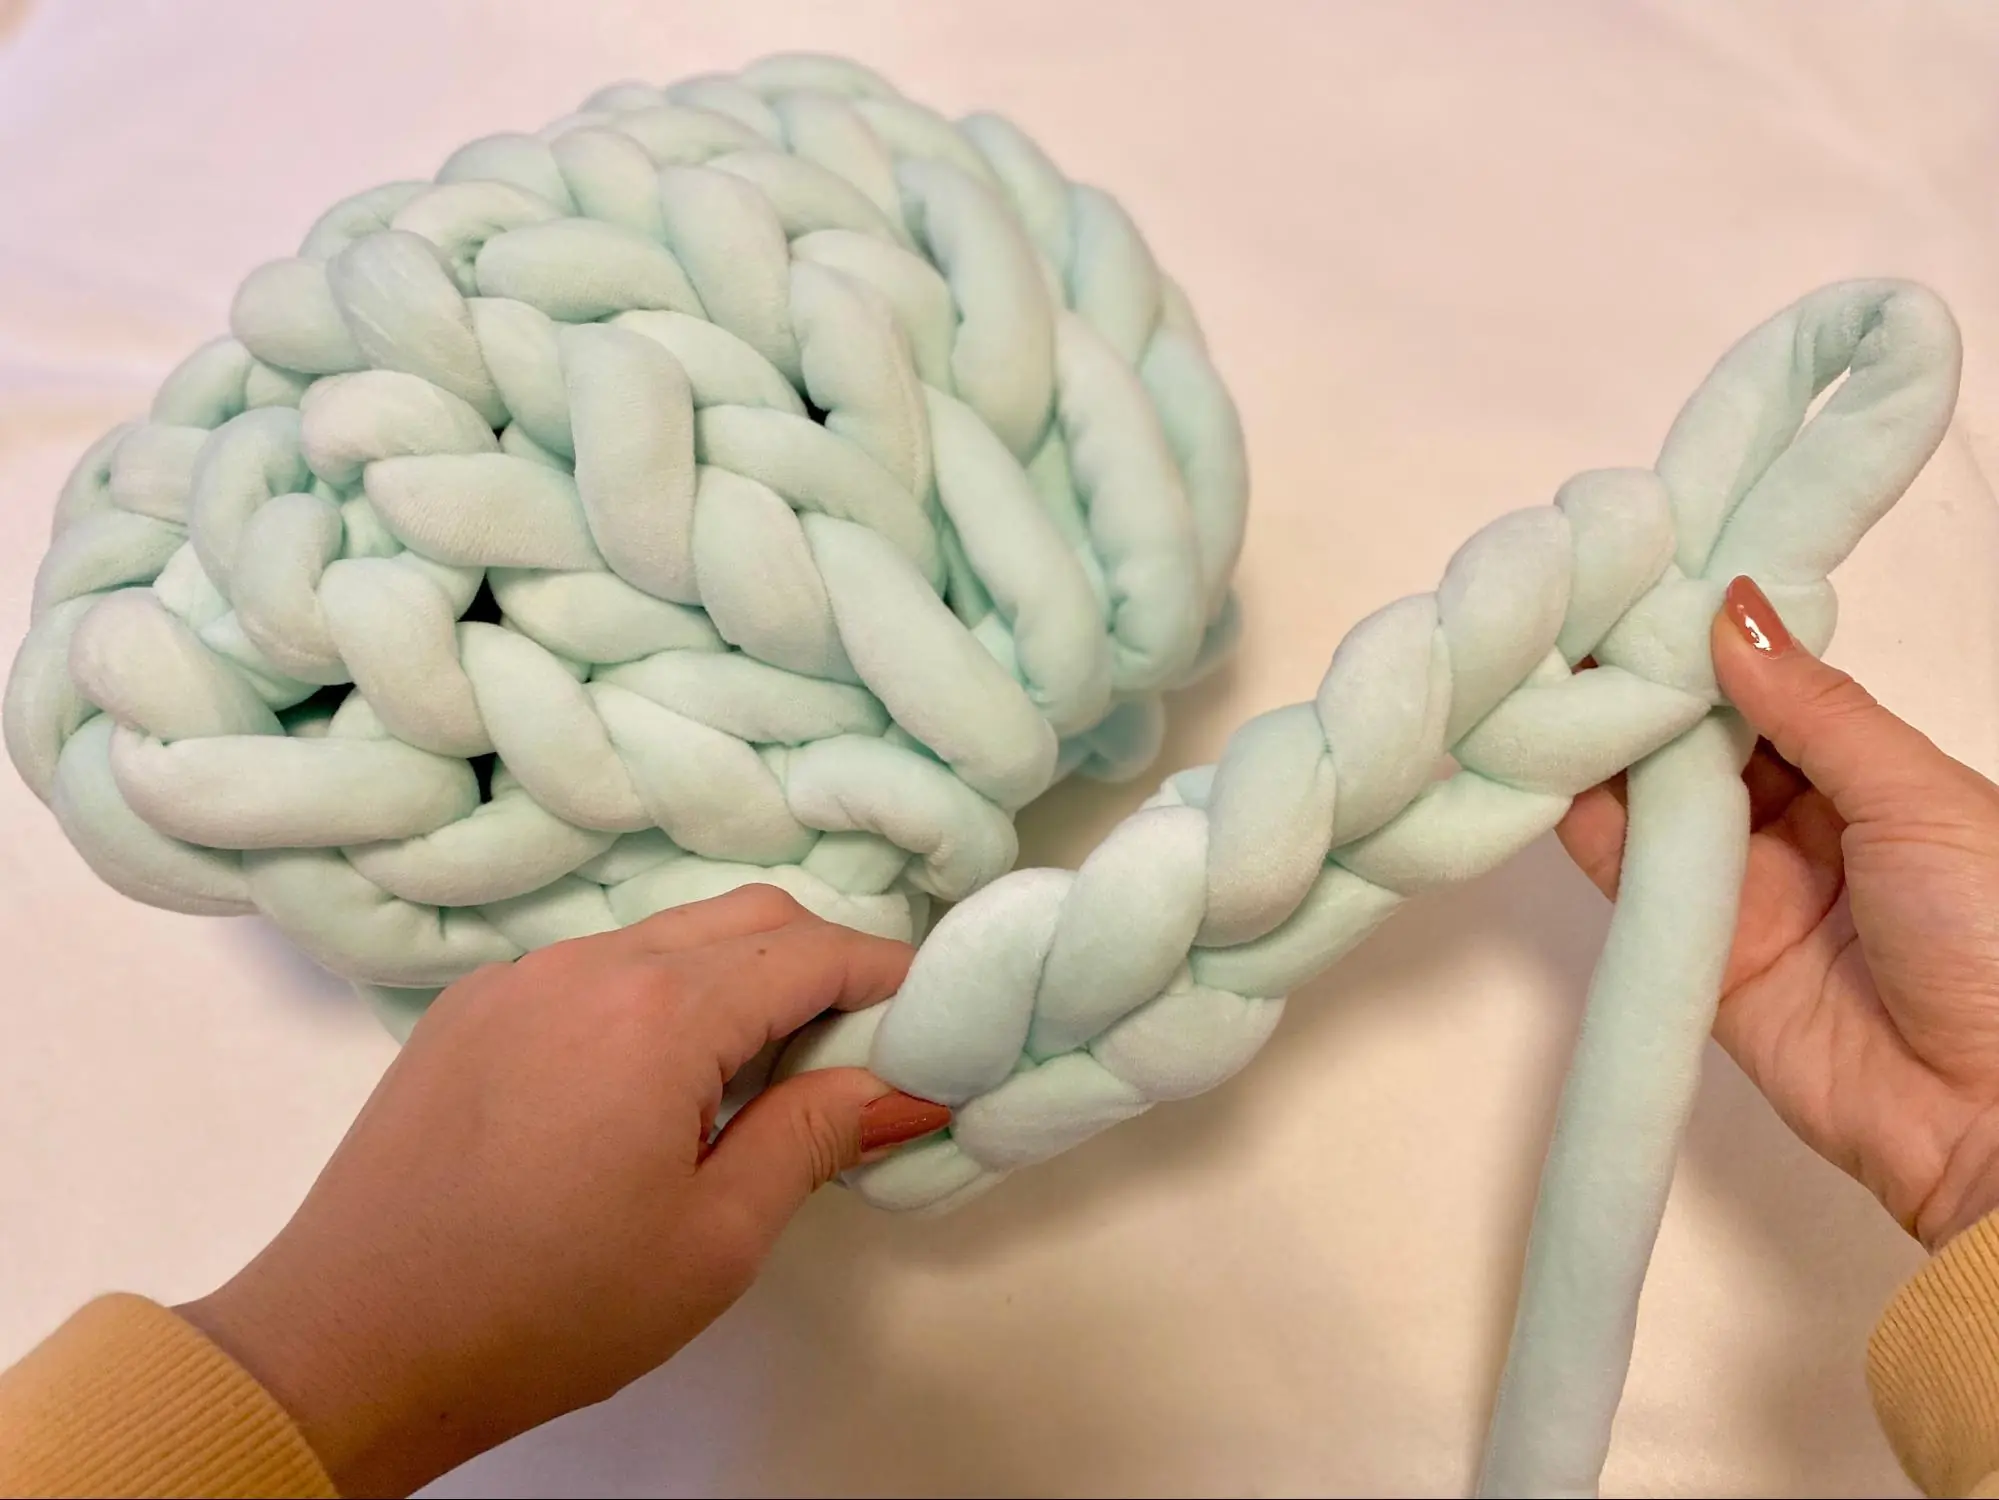
To the loops made with the foundation, I will make new loops in order.
Thread a long yarn through the loop you made at the beginning. (See ① to ③) After adjusting the size of the loop, knit the adjacent loop in the same way as in ④.

What I want you to be careful about here is not to open too much space between the neighbors! If this part is stretched, the weave of the entire bag will become loose. Let's knit while keeping this part in mind.
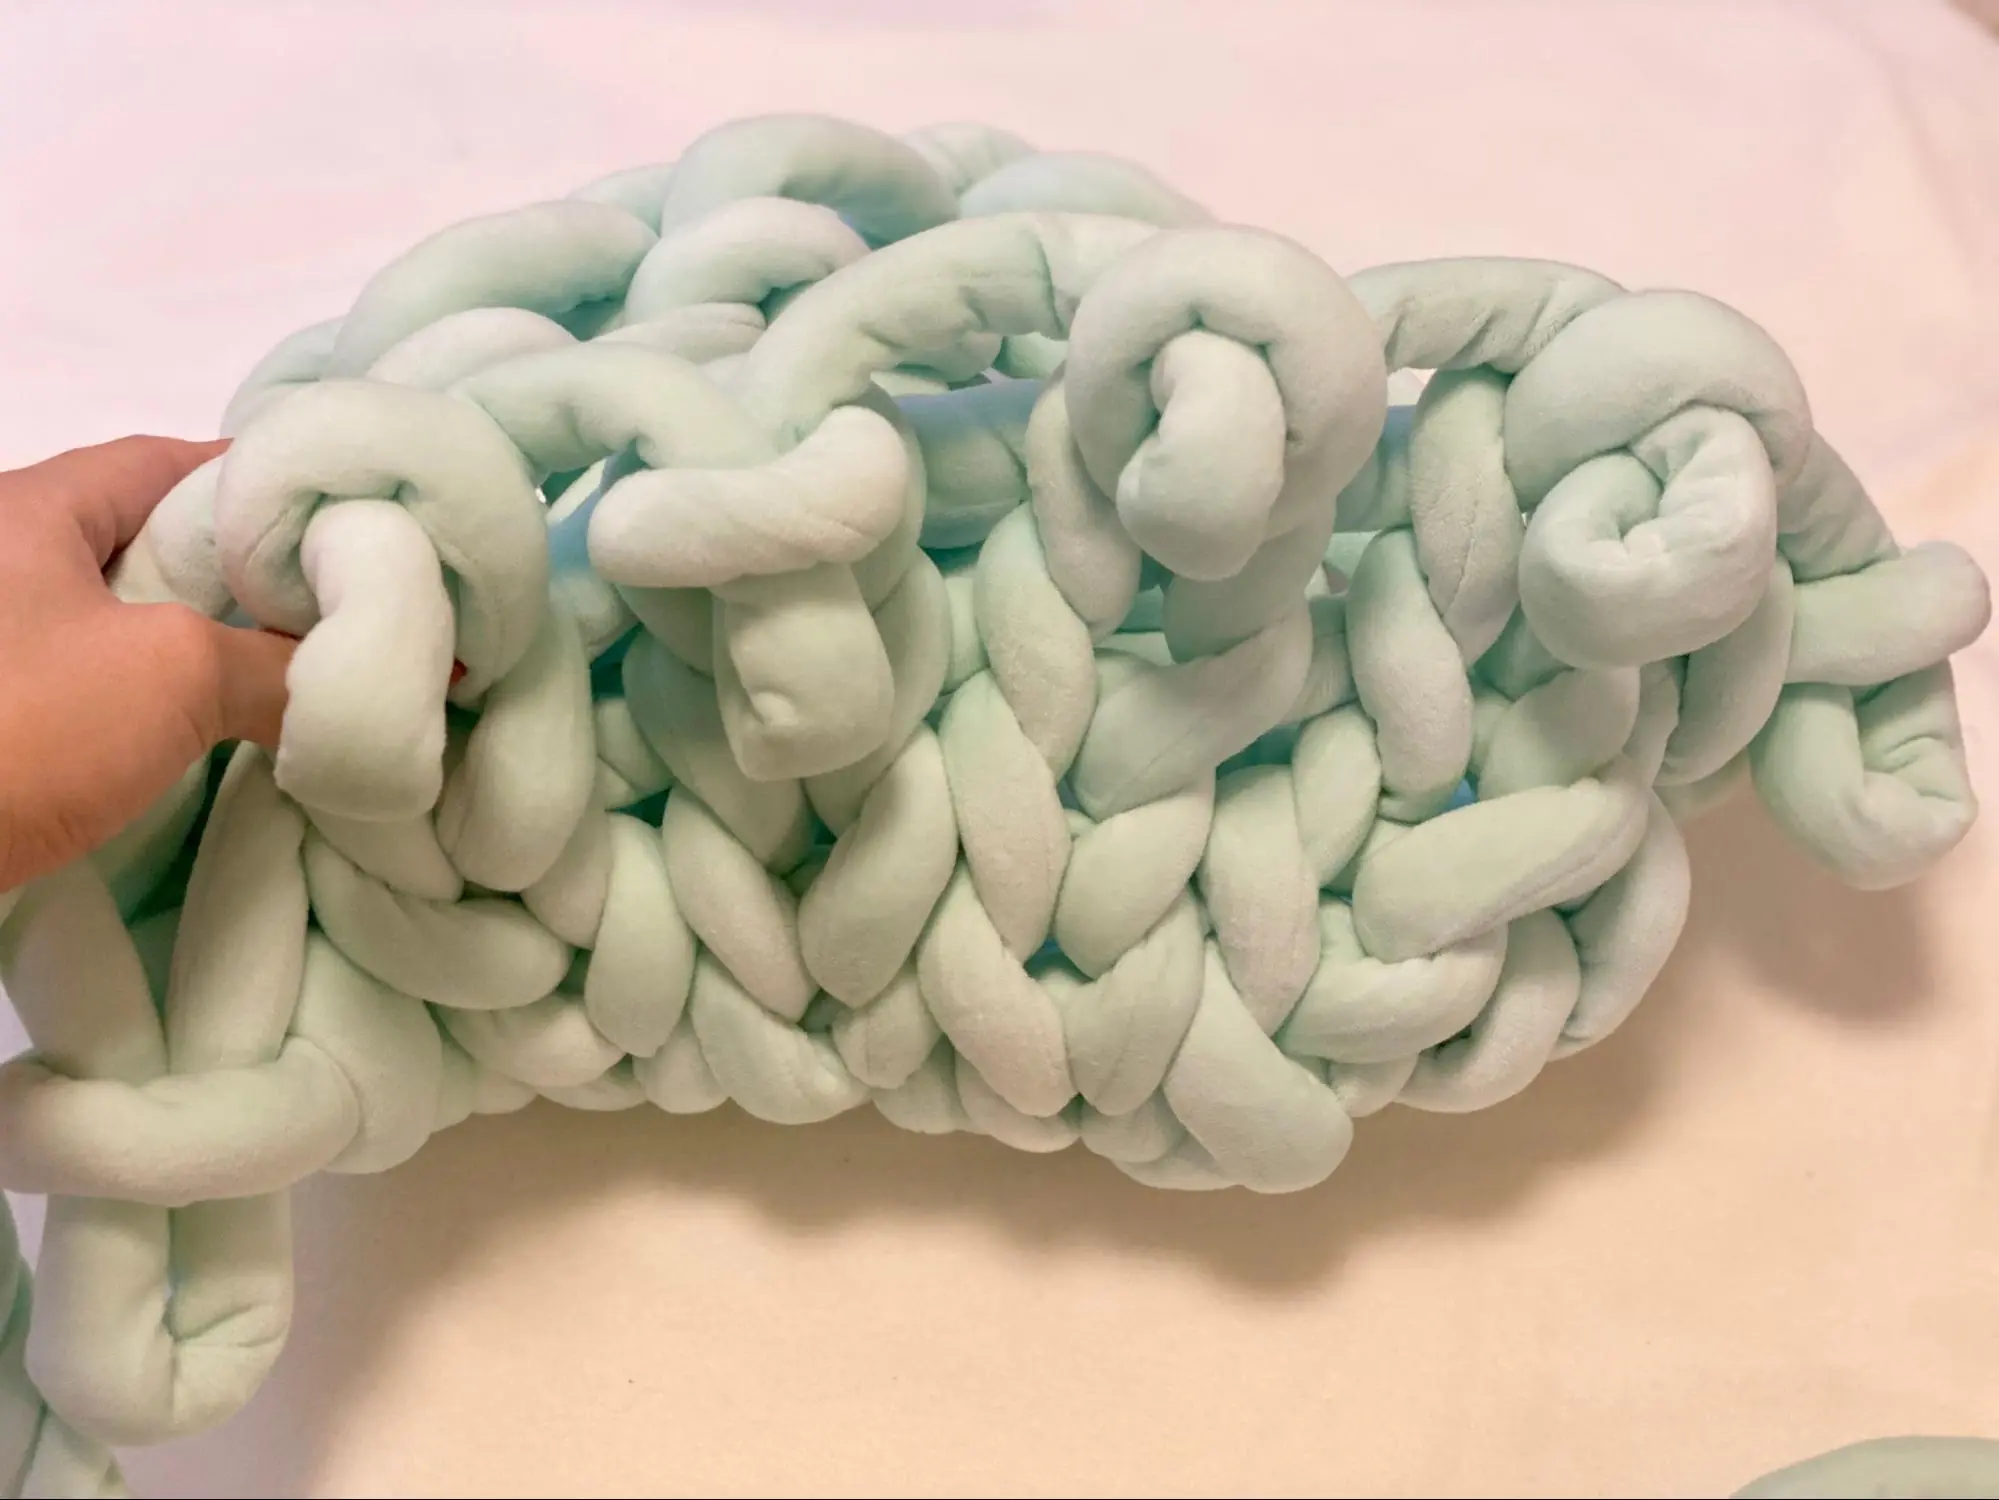
Finished knitting the first row! I will continue to do this work. Continue increasing the number of rows until you reach your desired height.

If you knit continuously, the yarn may get twisted as shown in the picture. If this happens, untie the twist and continue knitting. If you make a loop while it is twisted, it will not look good when completed!
This time, I knit up to the 5th row! If you want to make a tall bag, I recommend 5 to 6 steps.
The good thing about mando bag making is that if you make a mistake, you can start over right away. If you don't like it halfway through, you can solve it all and start over. Great for knitting beginners.
3. Dare to flip over!
Once you have completed the sides, turn the knitted yarn inside out at once.

The loops on the top are easy to come off, so be careful...
You can make fine adjustments later, so let's flip it inside out.
Press the bottom with your hand to straighten it. Especially for the corners, if you press them tightly, you can create a beautiful shape.
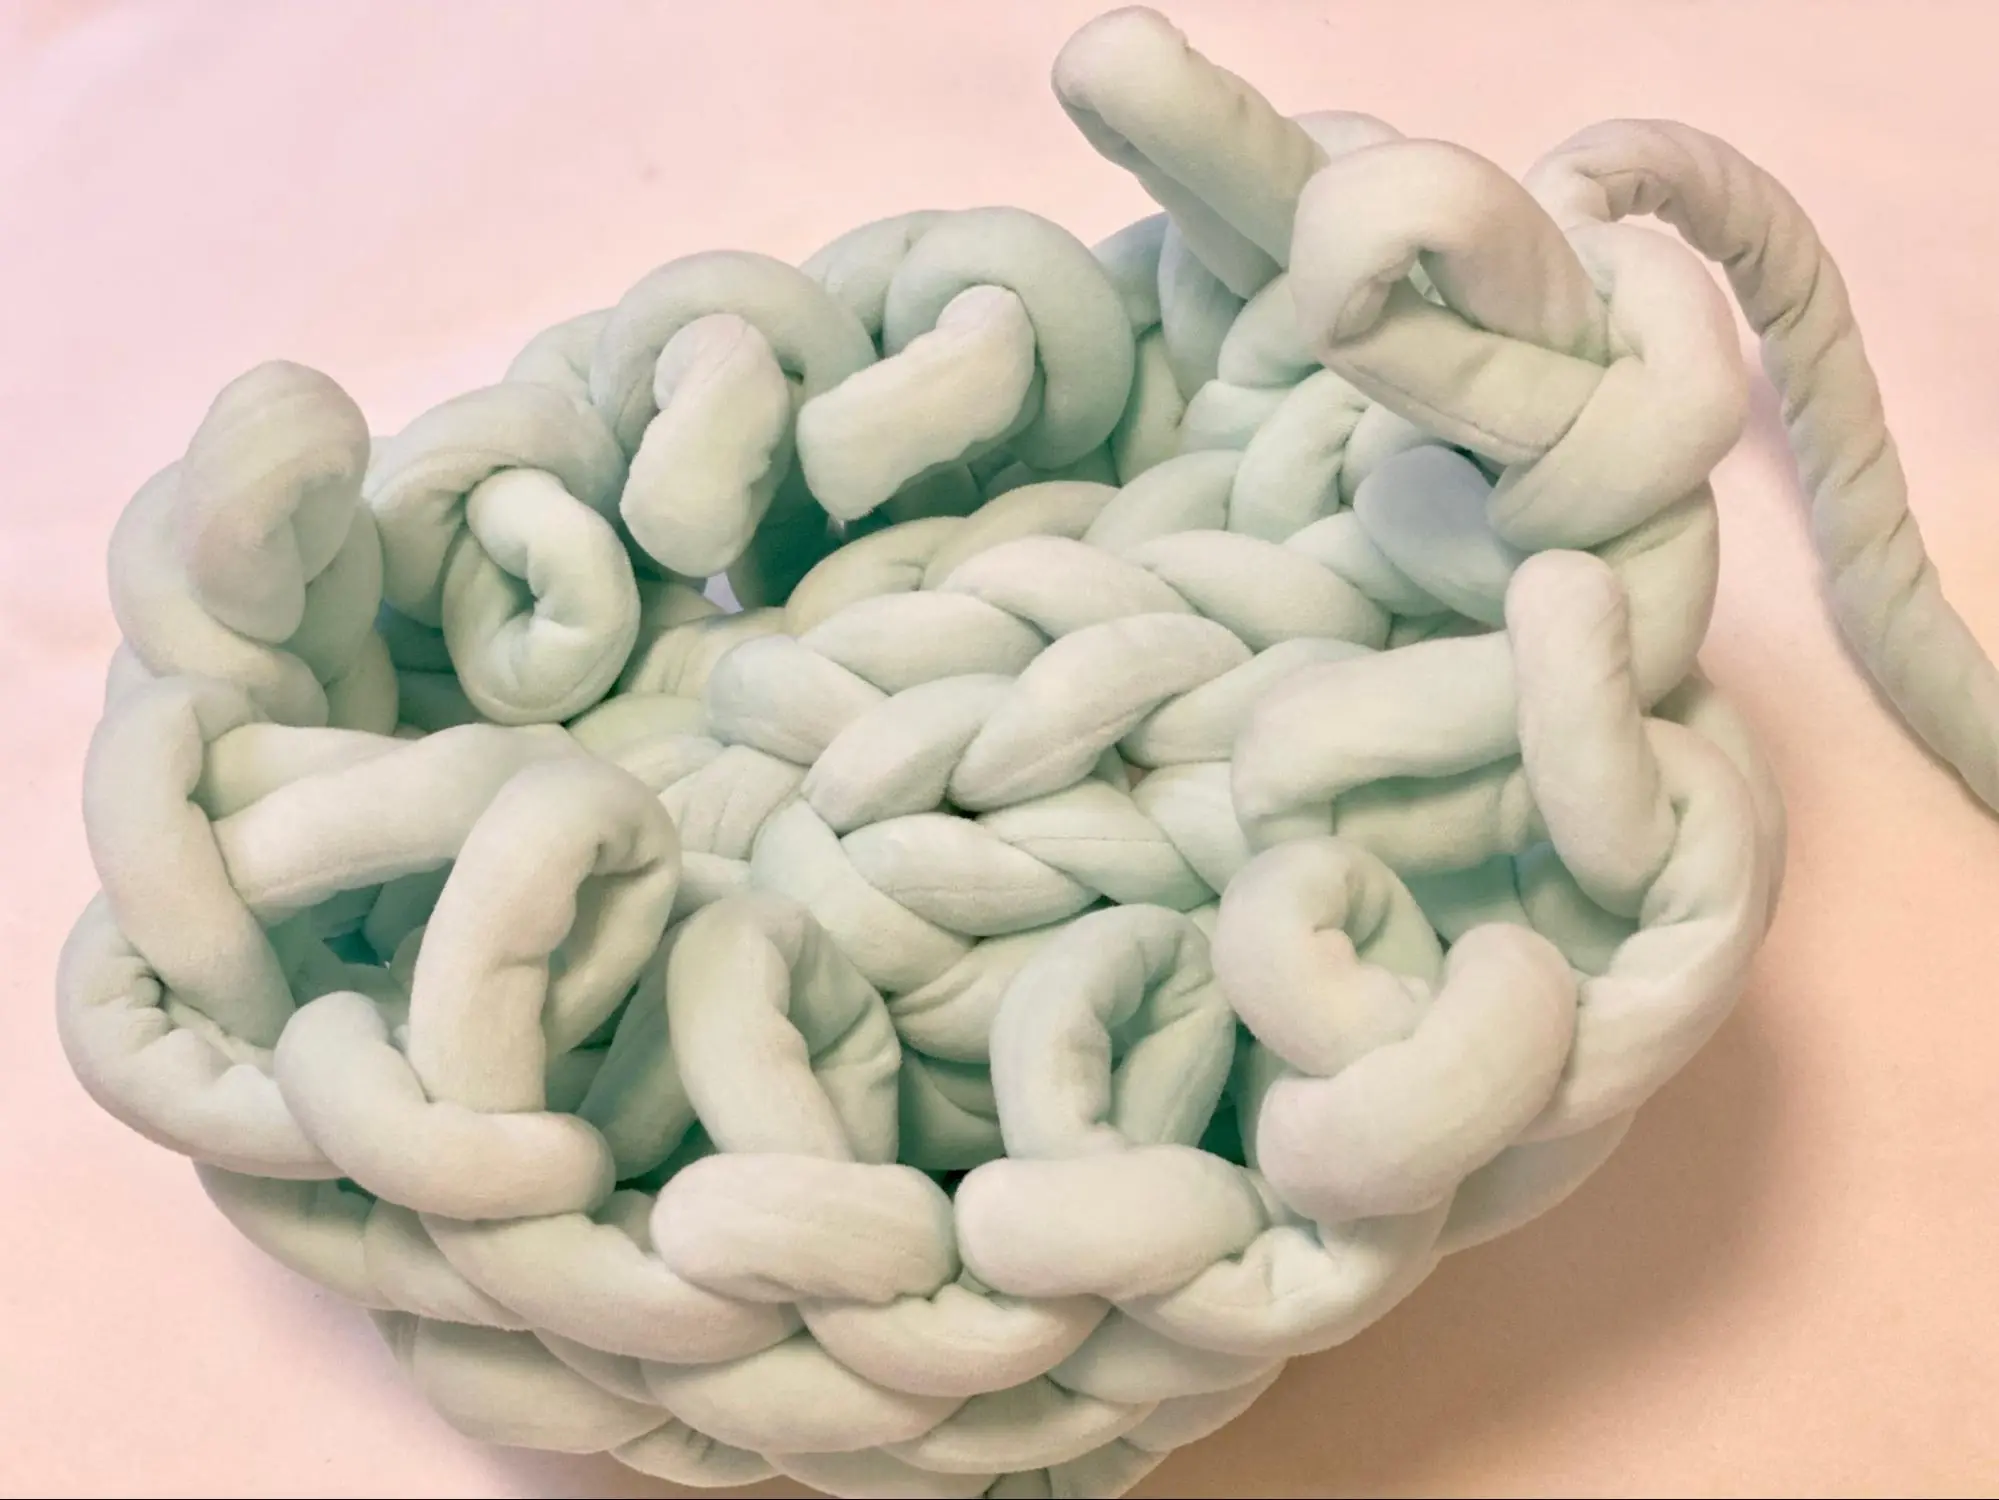
Here it is after turning it over. The stitches are beautifully made, and it's starting to look like a mando bag! It's a relief.
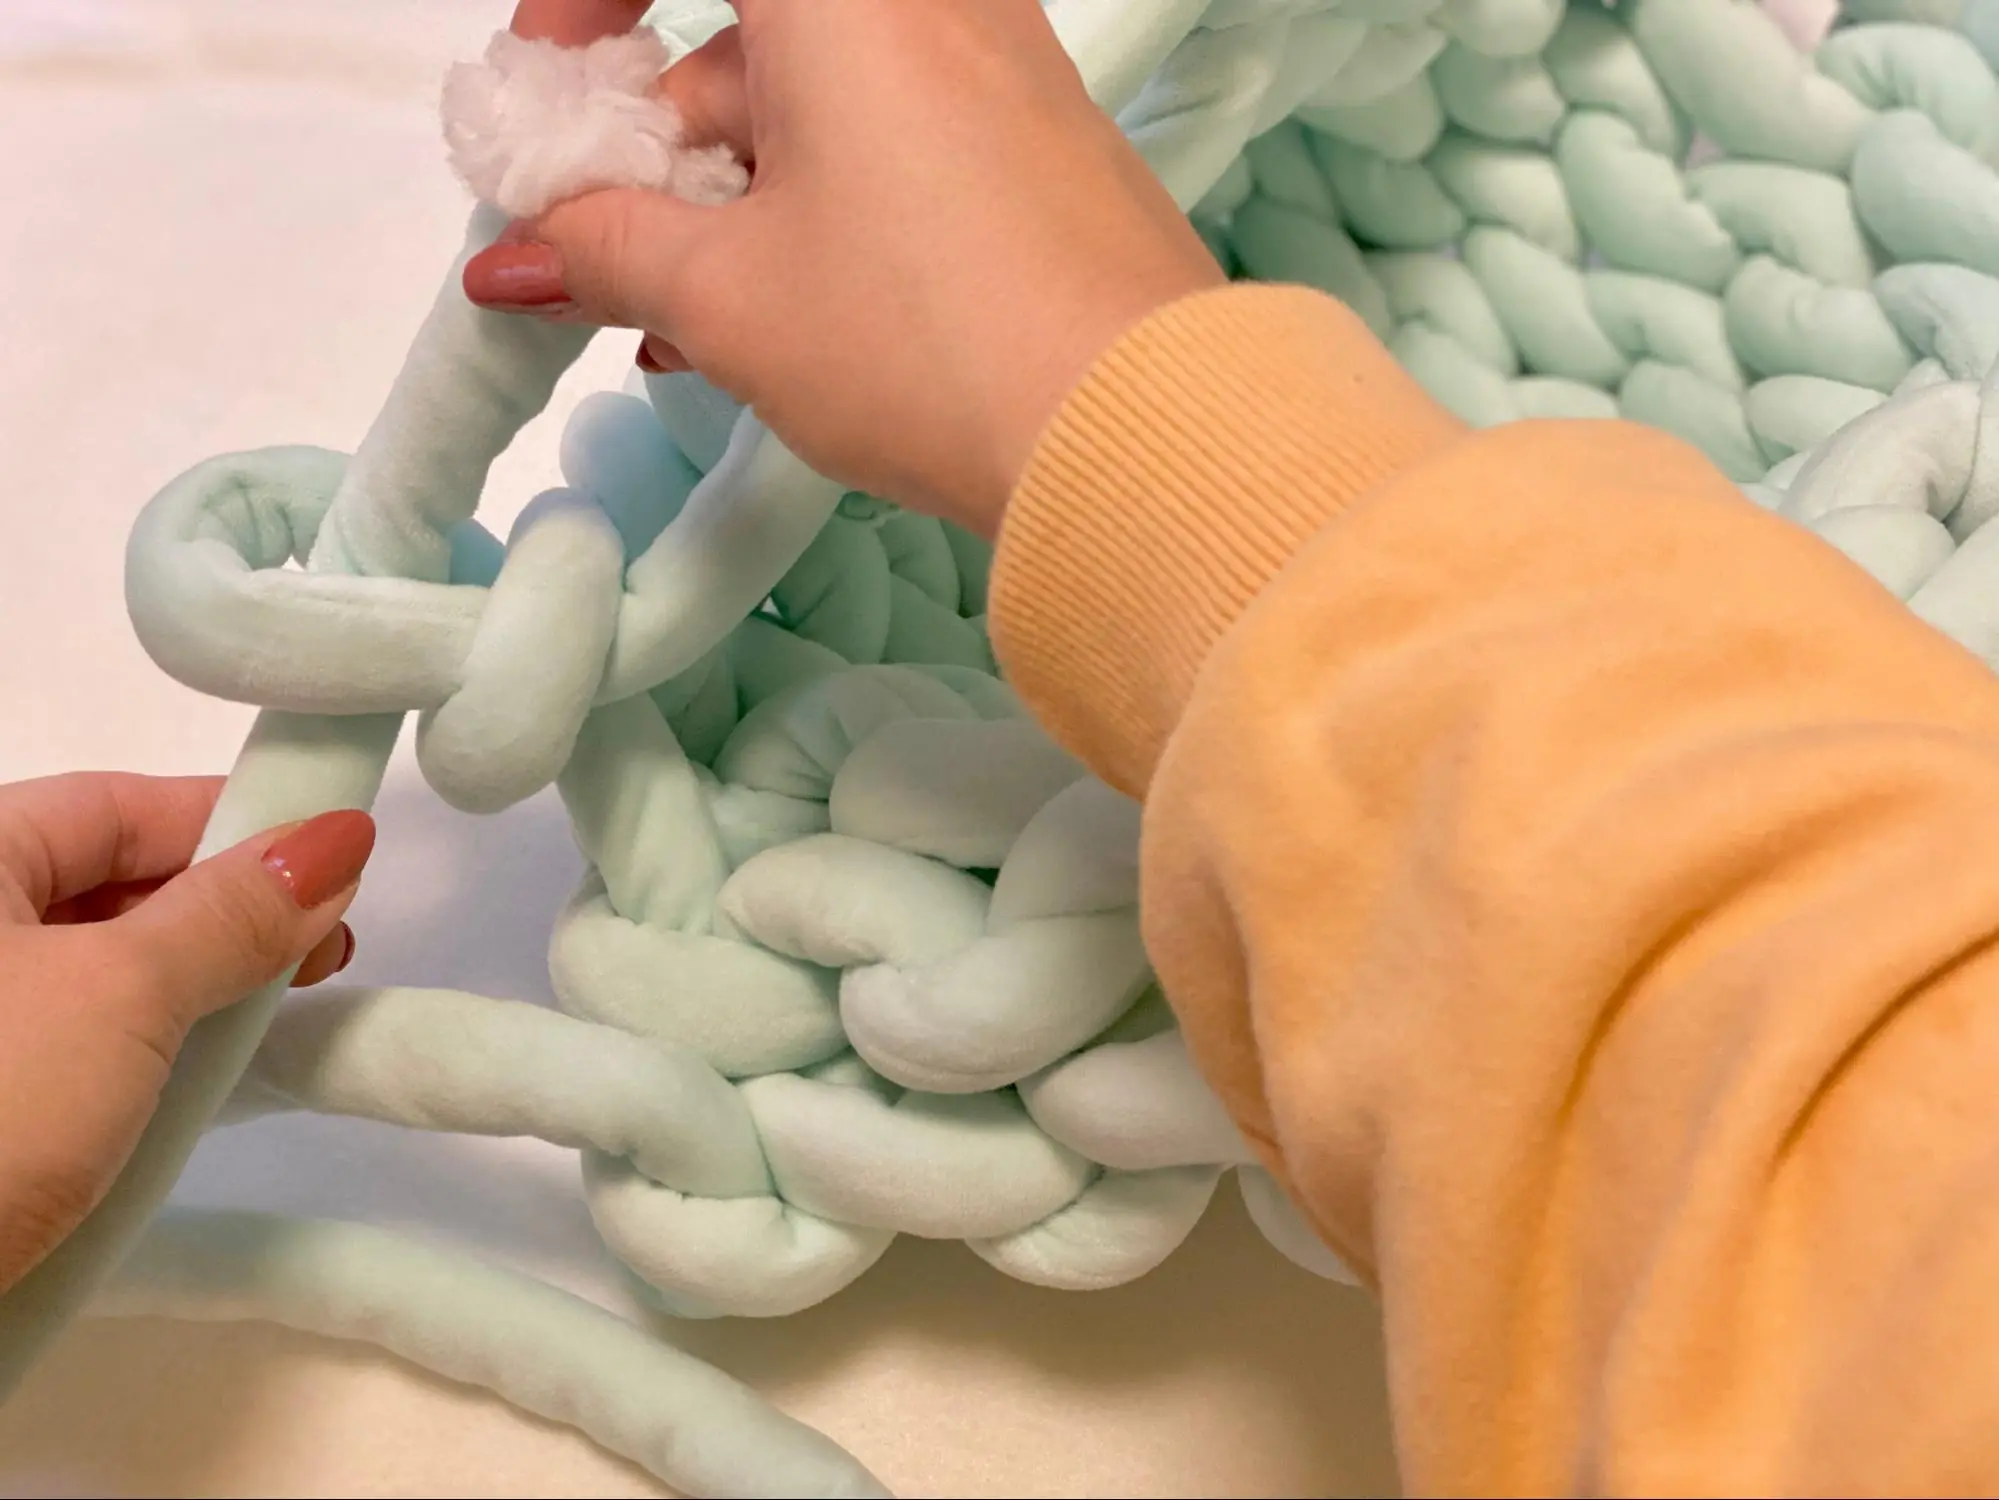
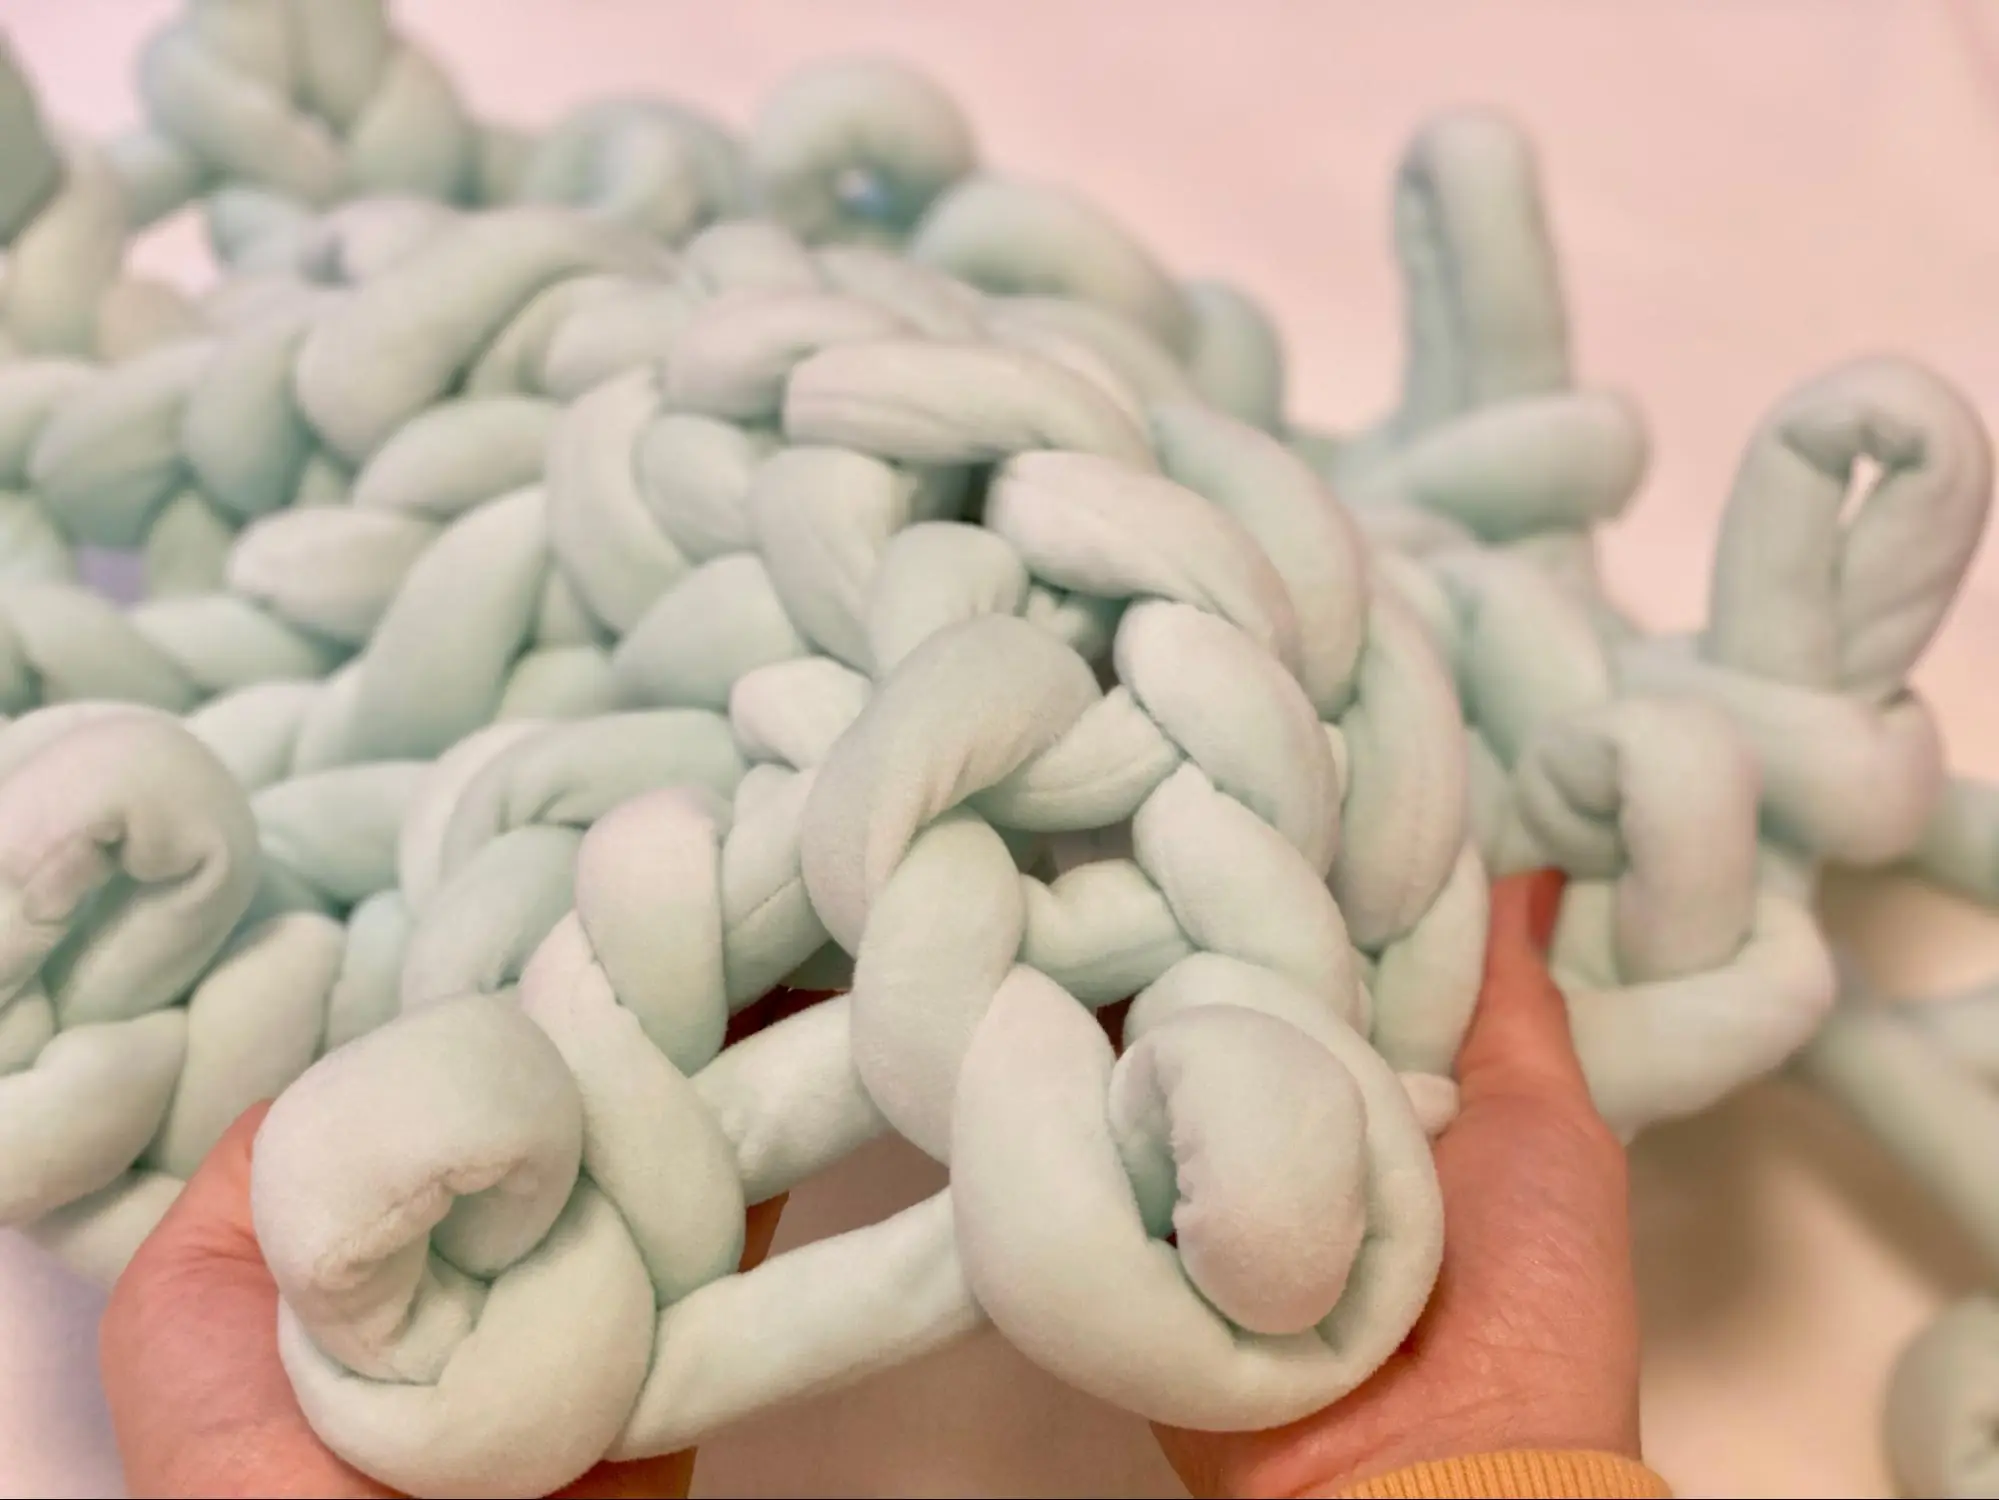
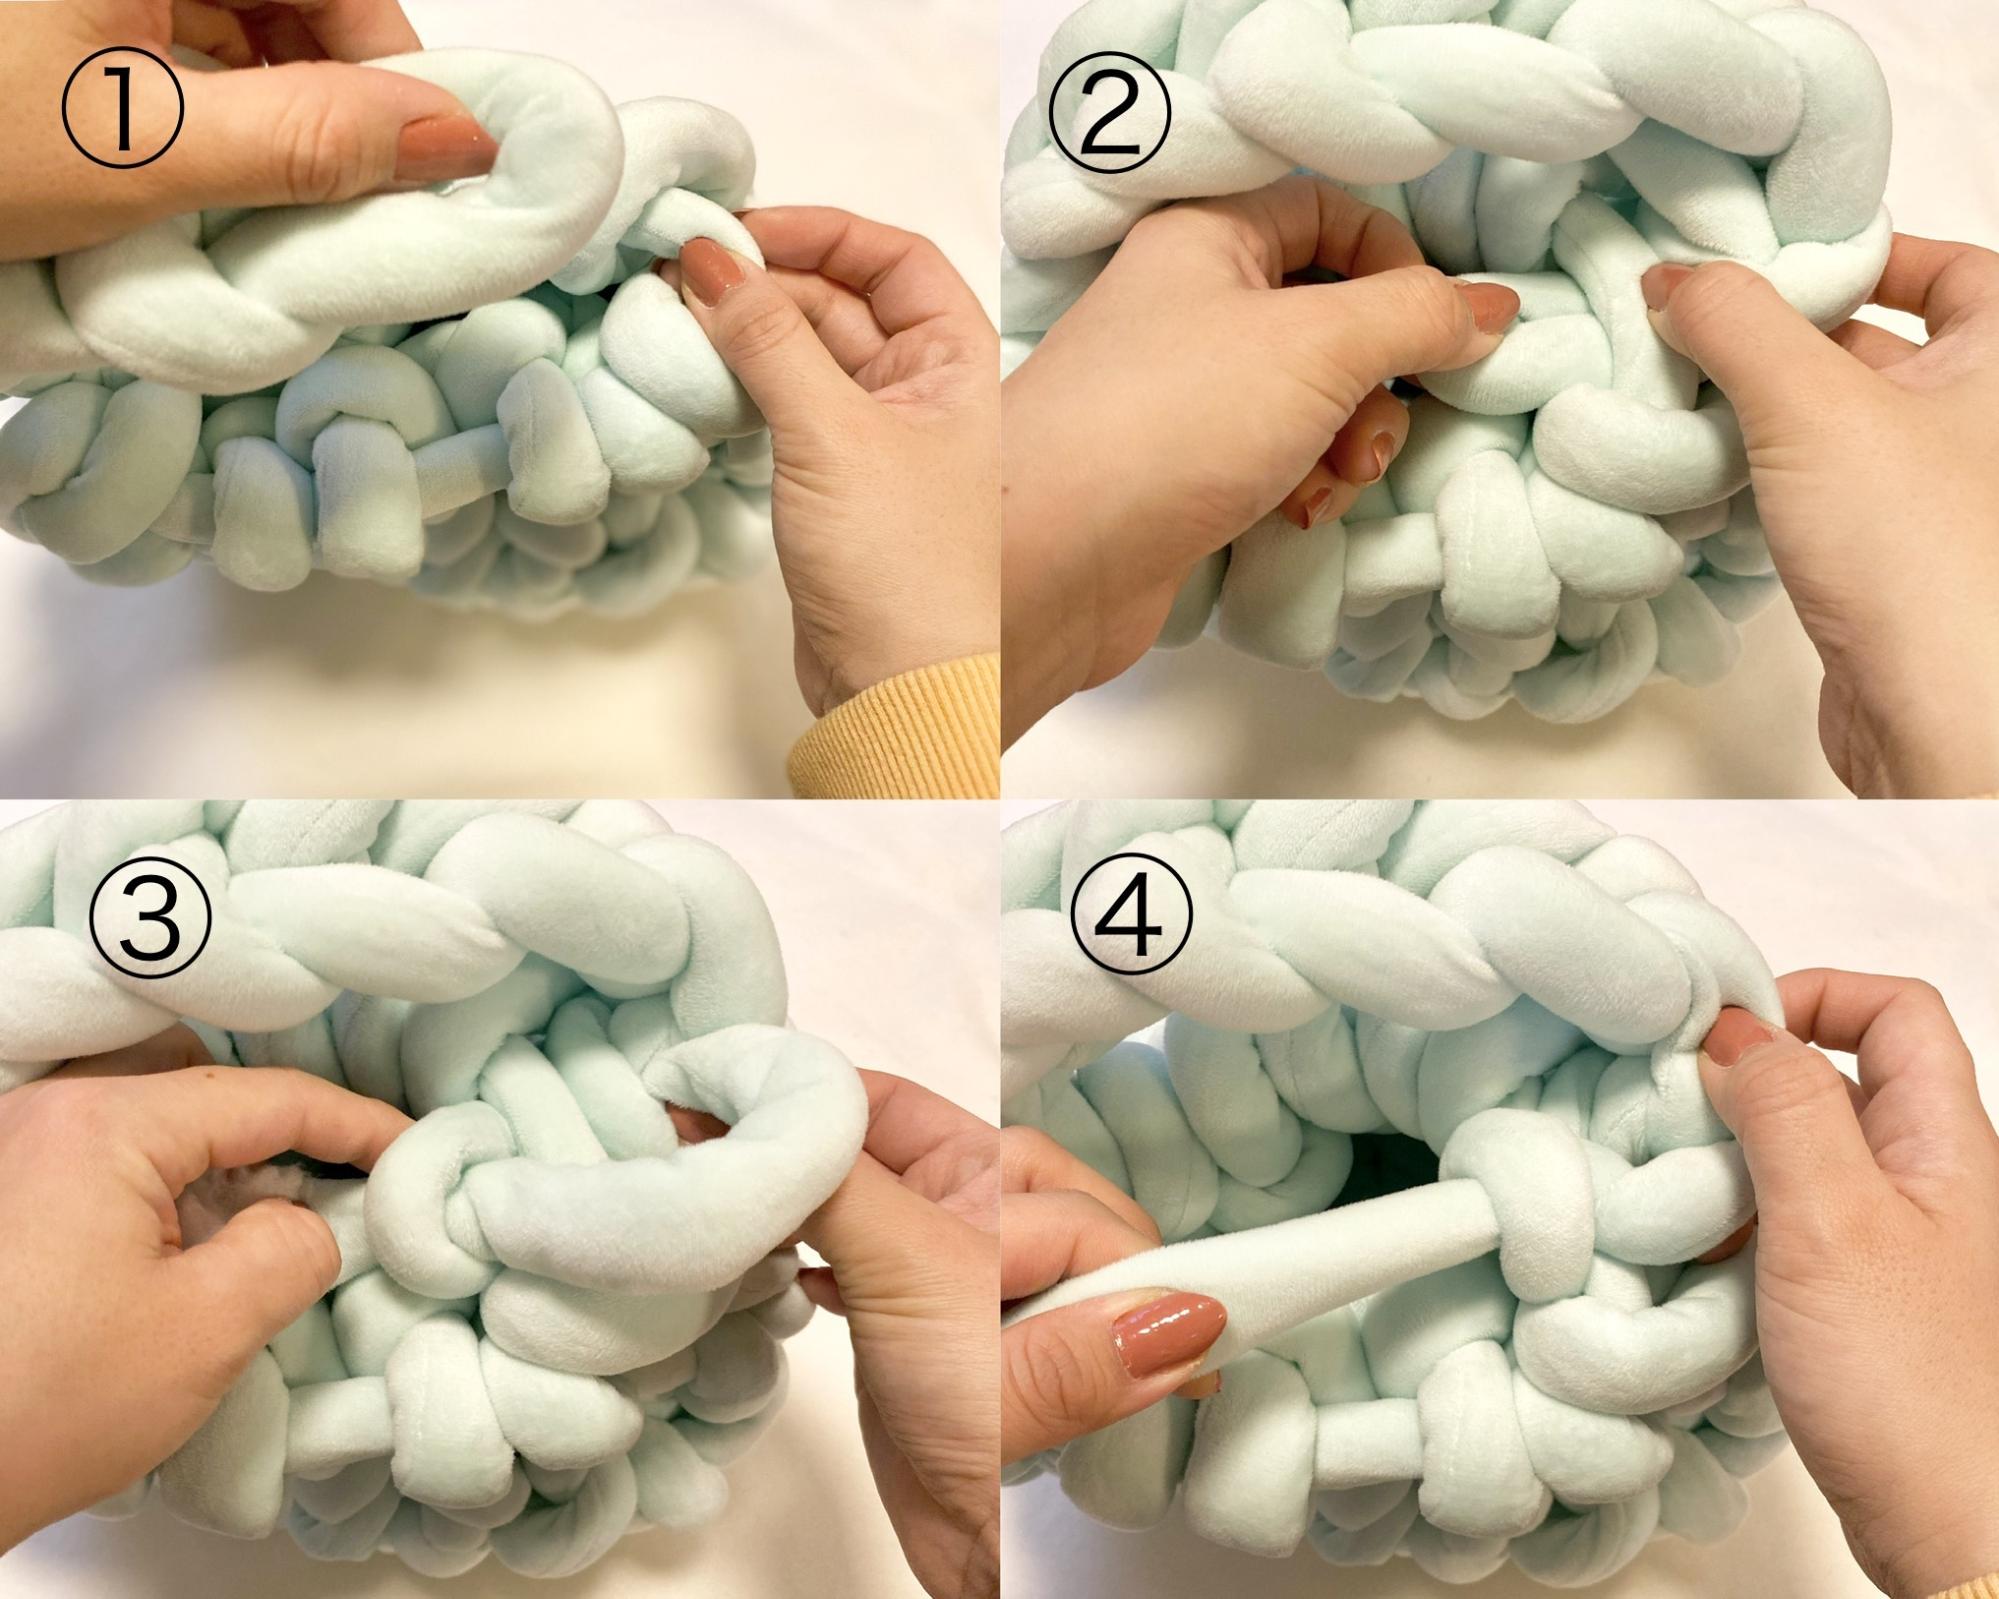
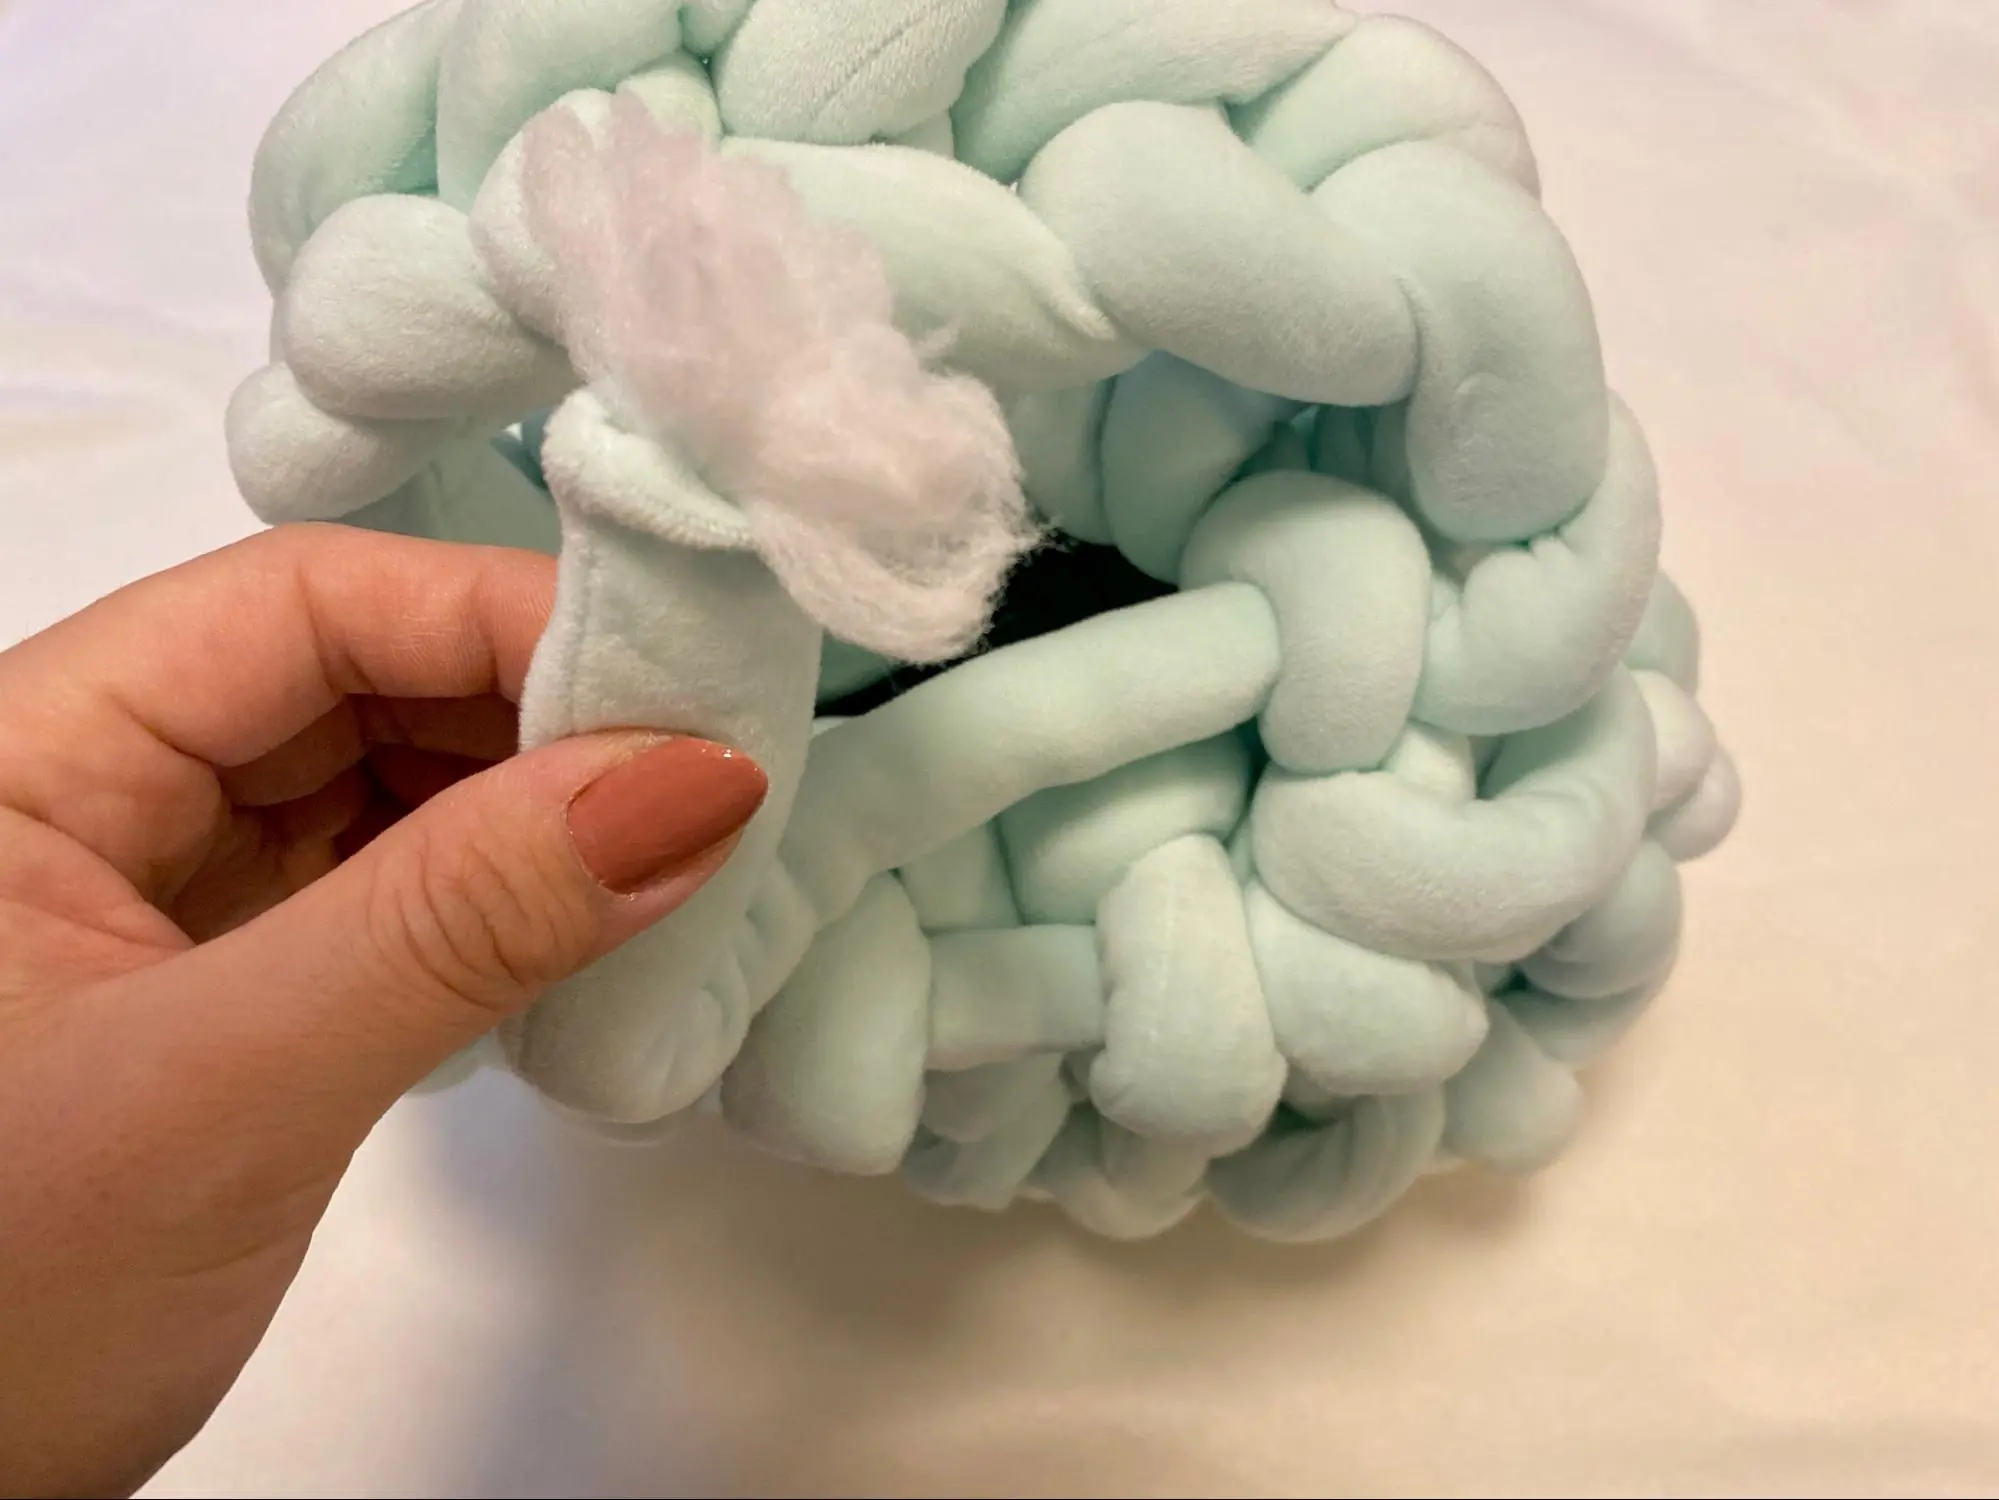
Then, pass the yarn around through loops.
This is what it looks like from the top. Make sure to thread the yarn through all the loops!
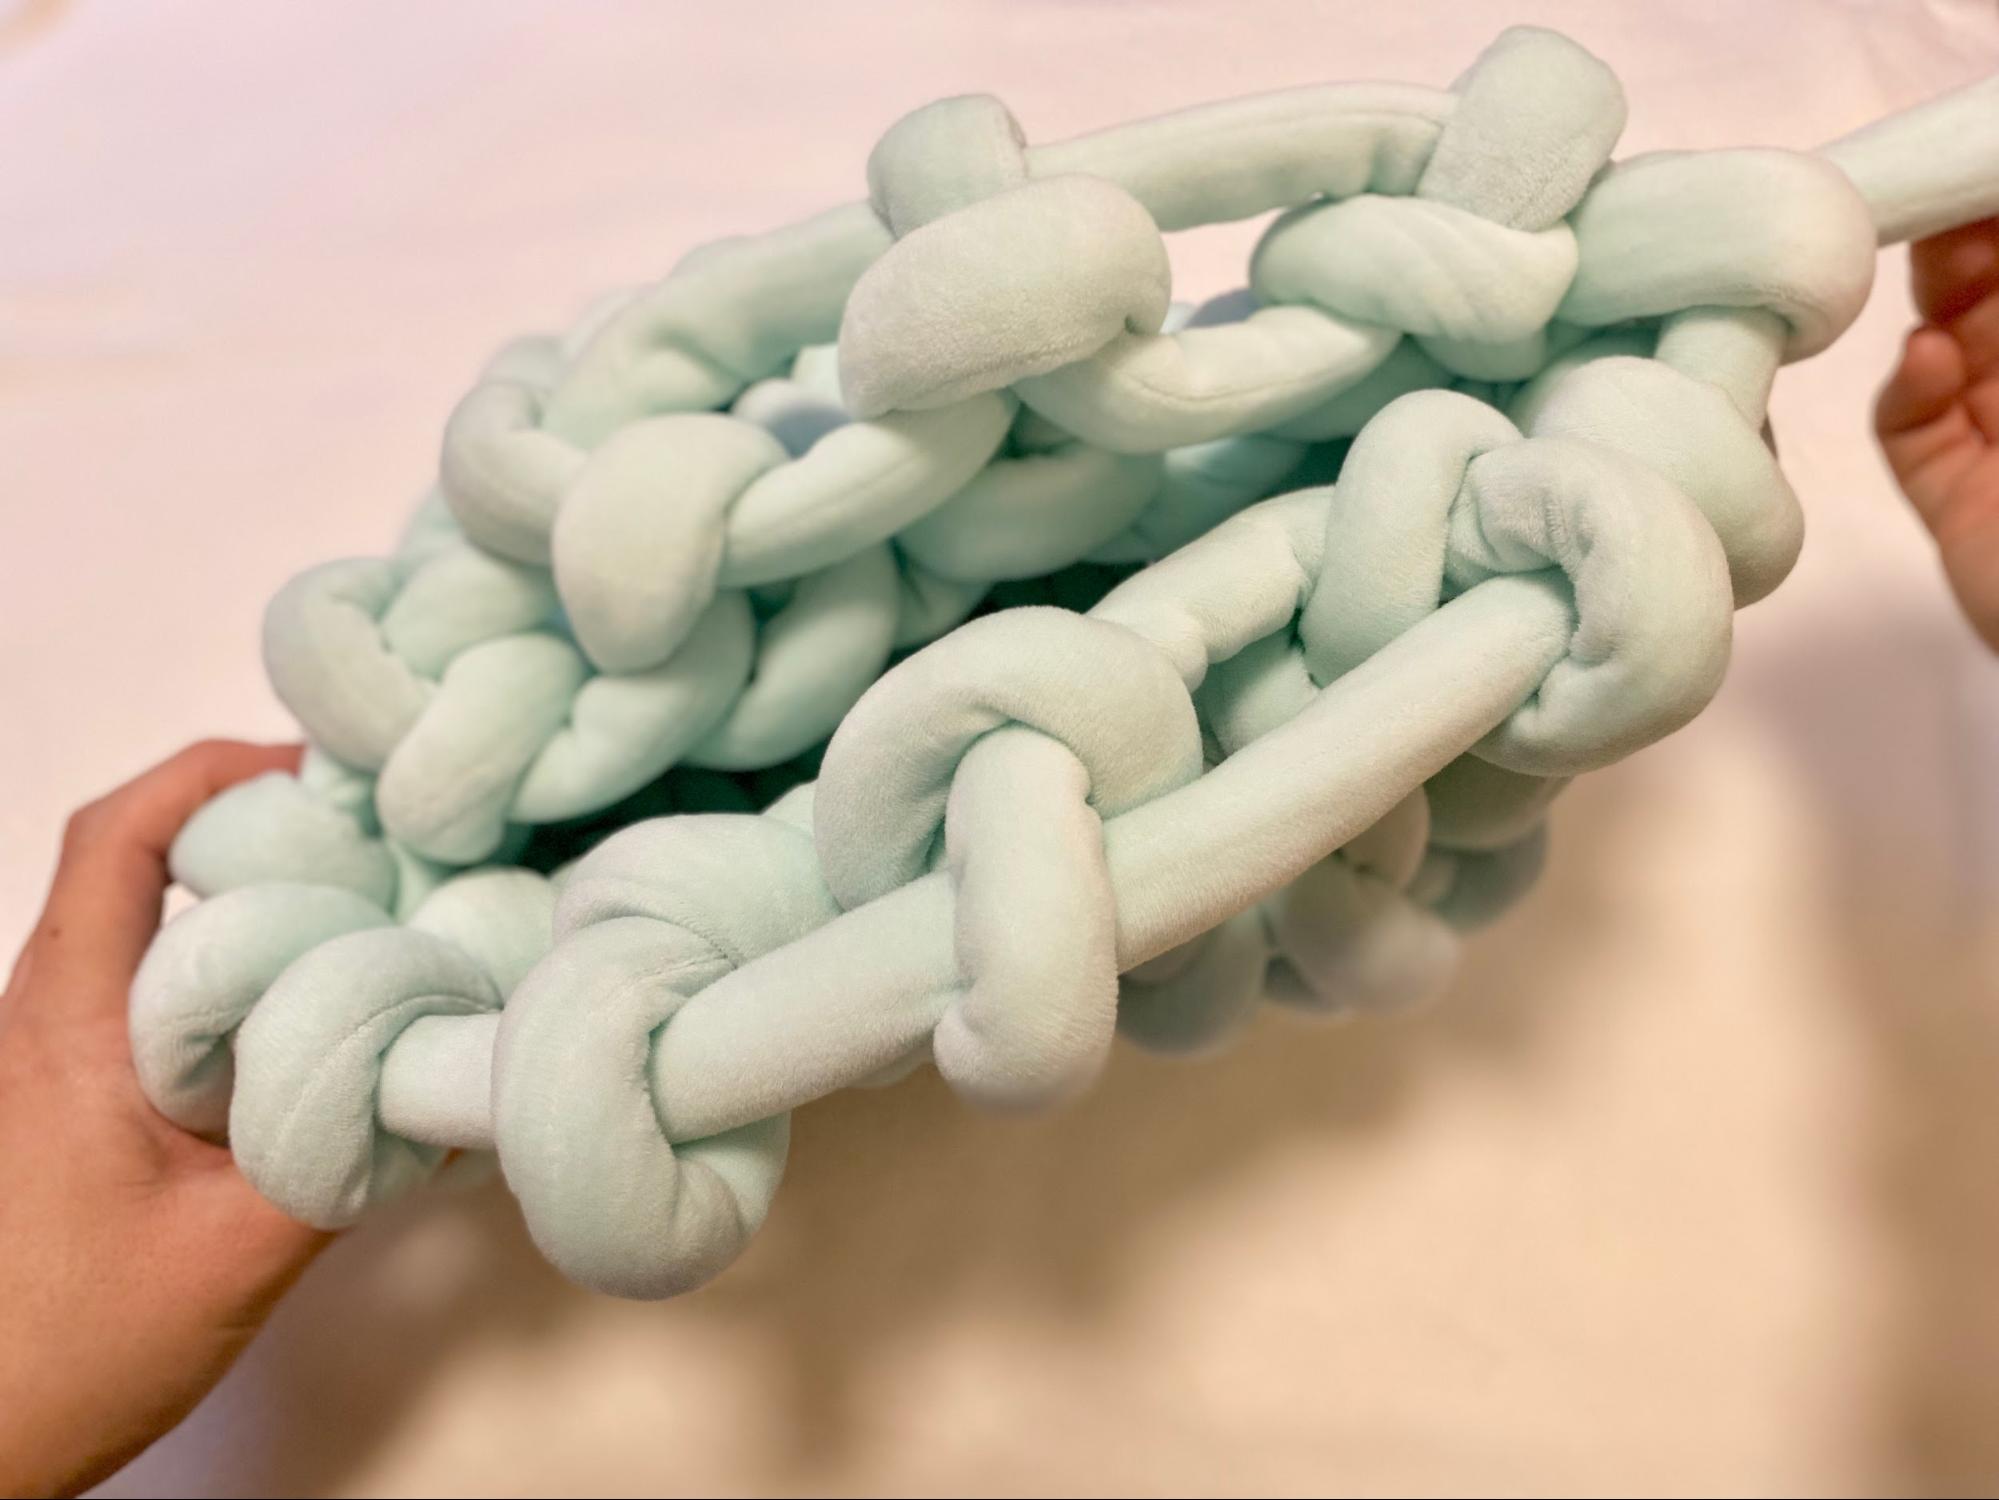
Next, adjust the opening of the bag. Pull the ② part tightly to open it to your desired degree. As shown in ③, you can make it look nice by looking at it from above and adjusting it one by one!
4. Make a handle and you're done!
Finally, the last step! I will make the "handle" part of the final process.
Thread the yarn through the sides of the bag to create a loop. (Refer to ① to ④) After that, just like making the first base, thread the yarn through the loop of ④ again and knit.
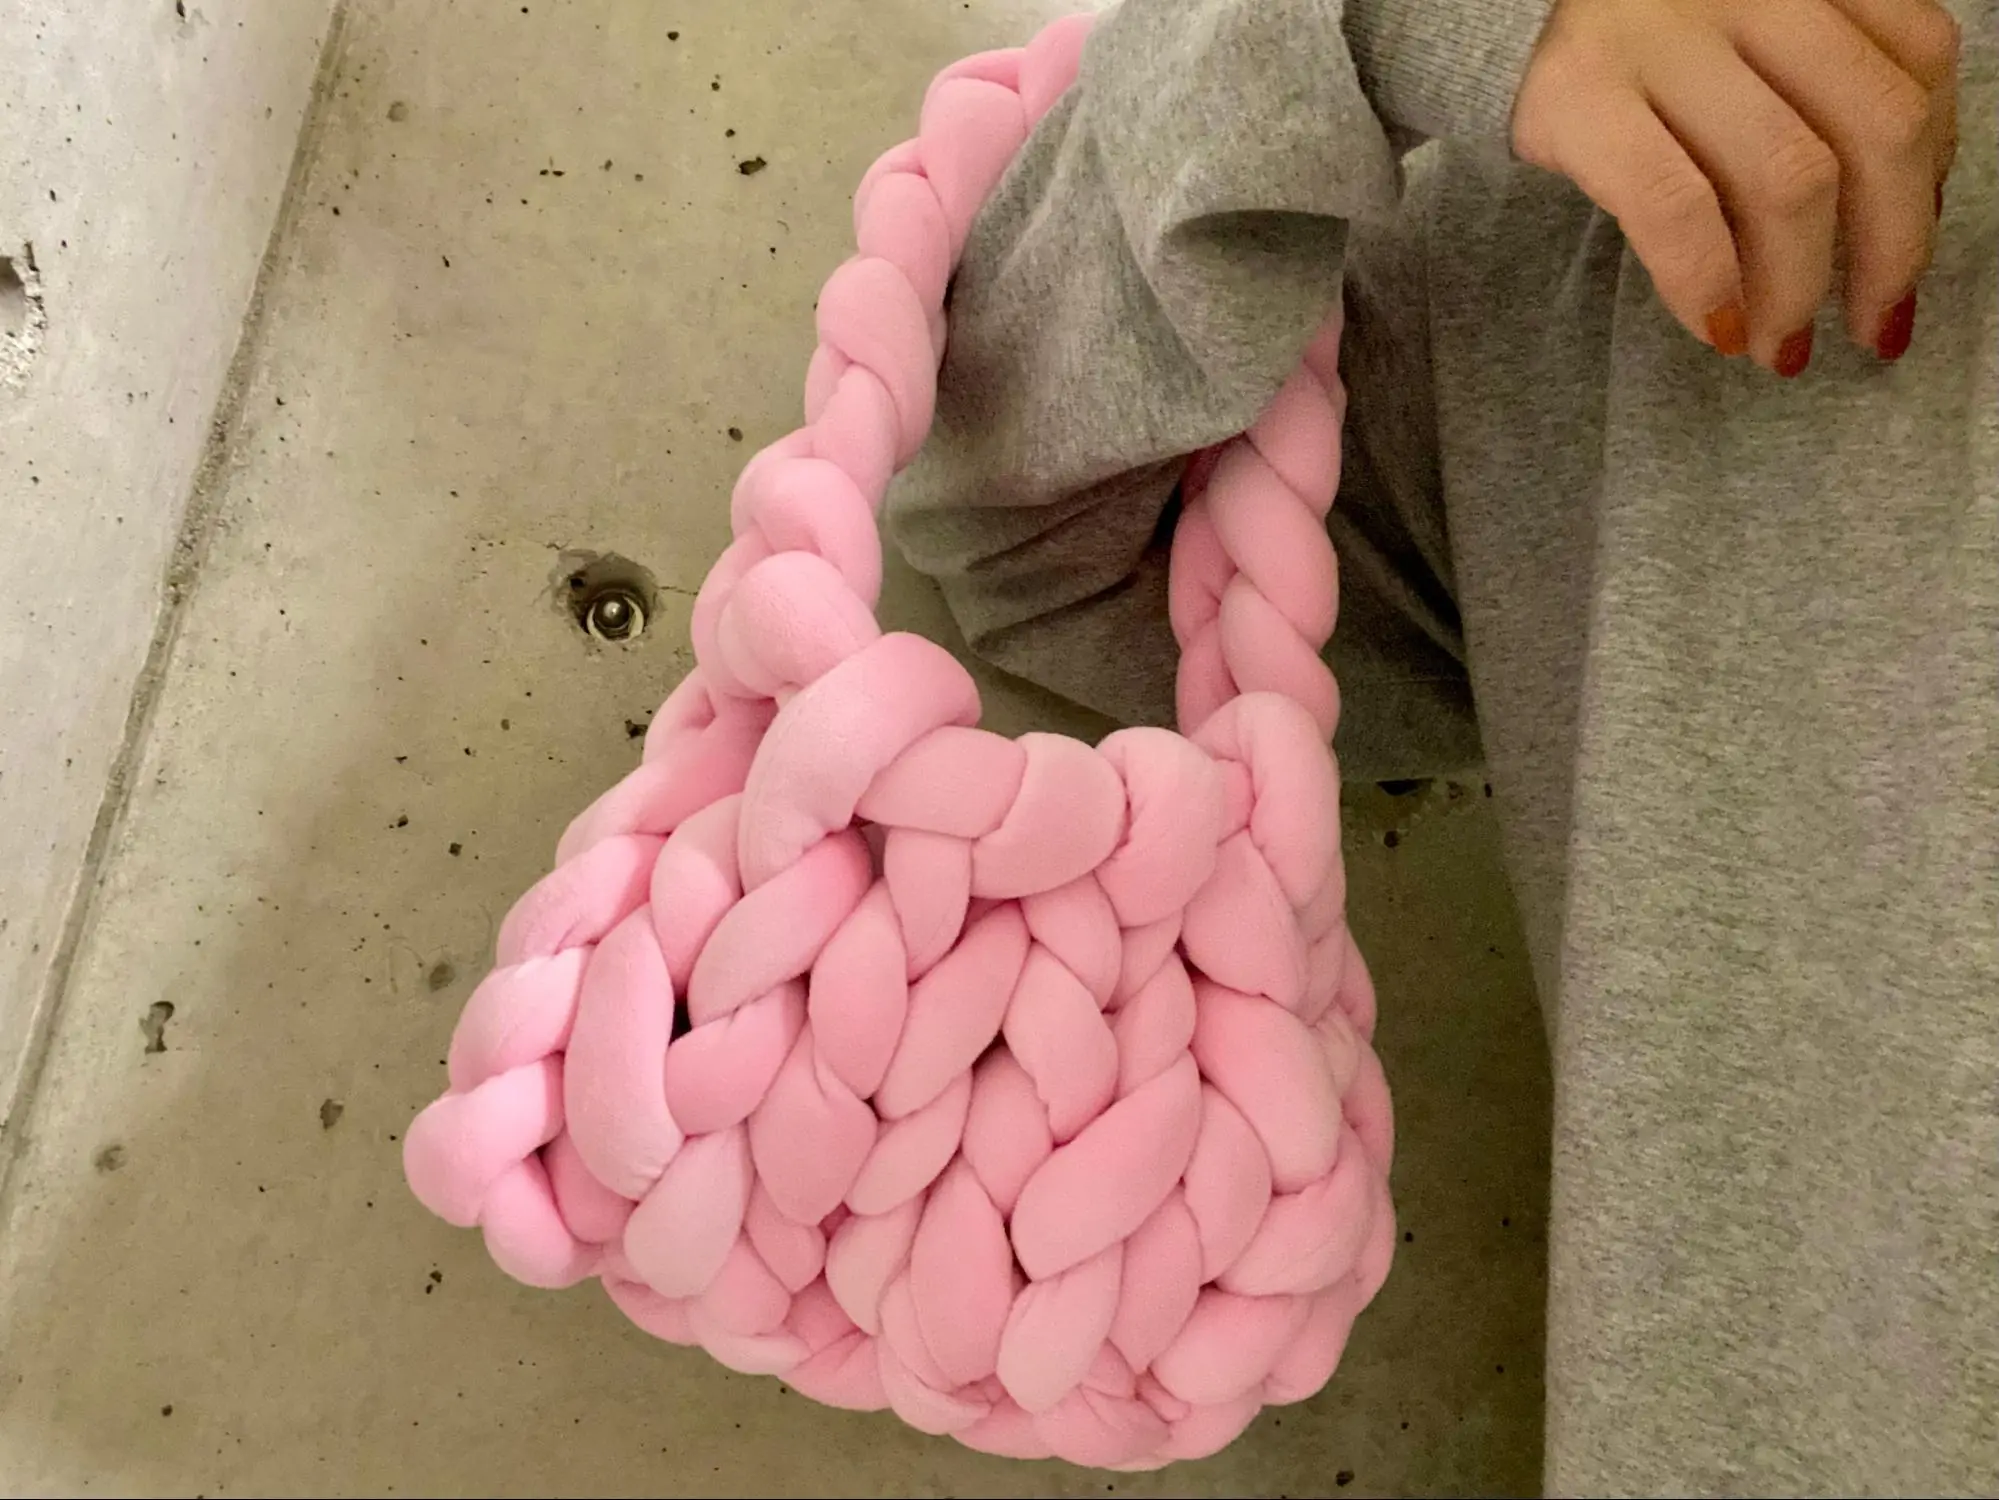
Knit the handle to the desired length. If you lengthen this part, it can also be used as a shoulder bag. When you put something in the bag, the handle will stretch a little due to the weight, so it's important to keep it short!
Once you have adjusted the length of the handle, pass the loop through the ① part on the other side. Then, insert the yarn into the loop you passed through and pull it tight.
Tuck the excess yarn end into the knitting several times inside the bag to hold it in place so it doesn't fall out. If it is too long, cut it with scissors.
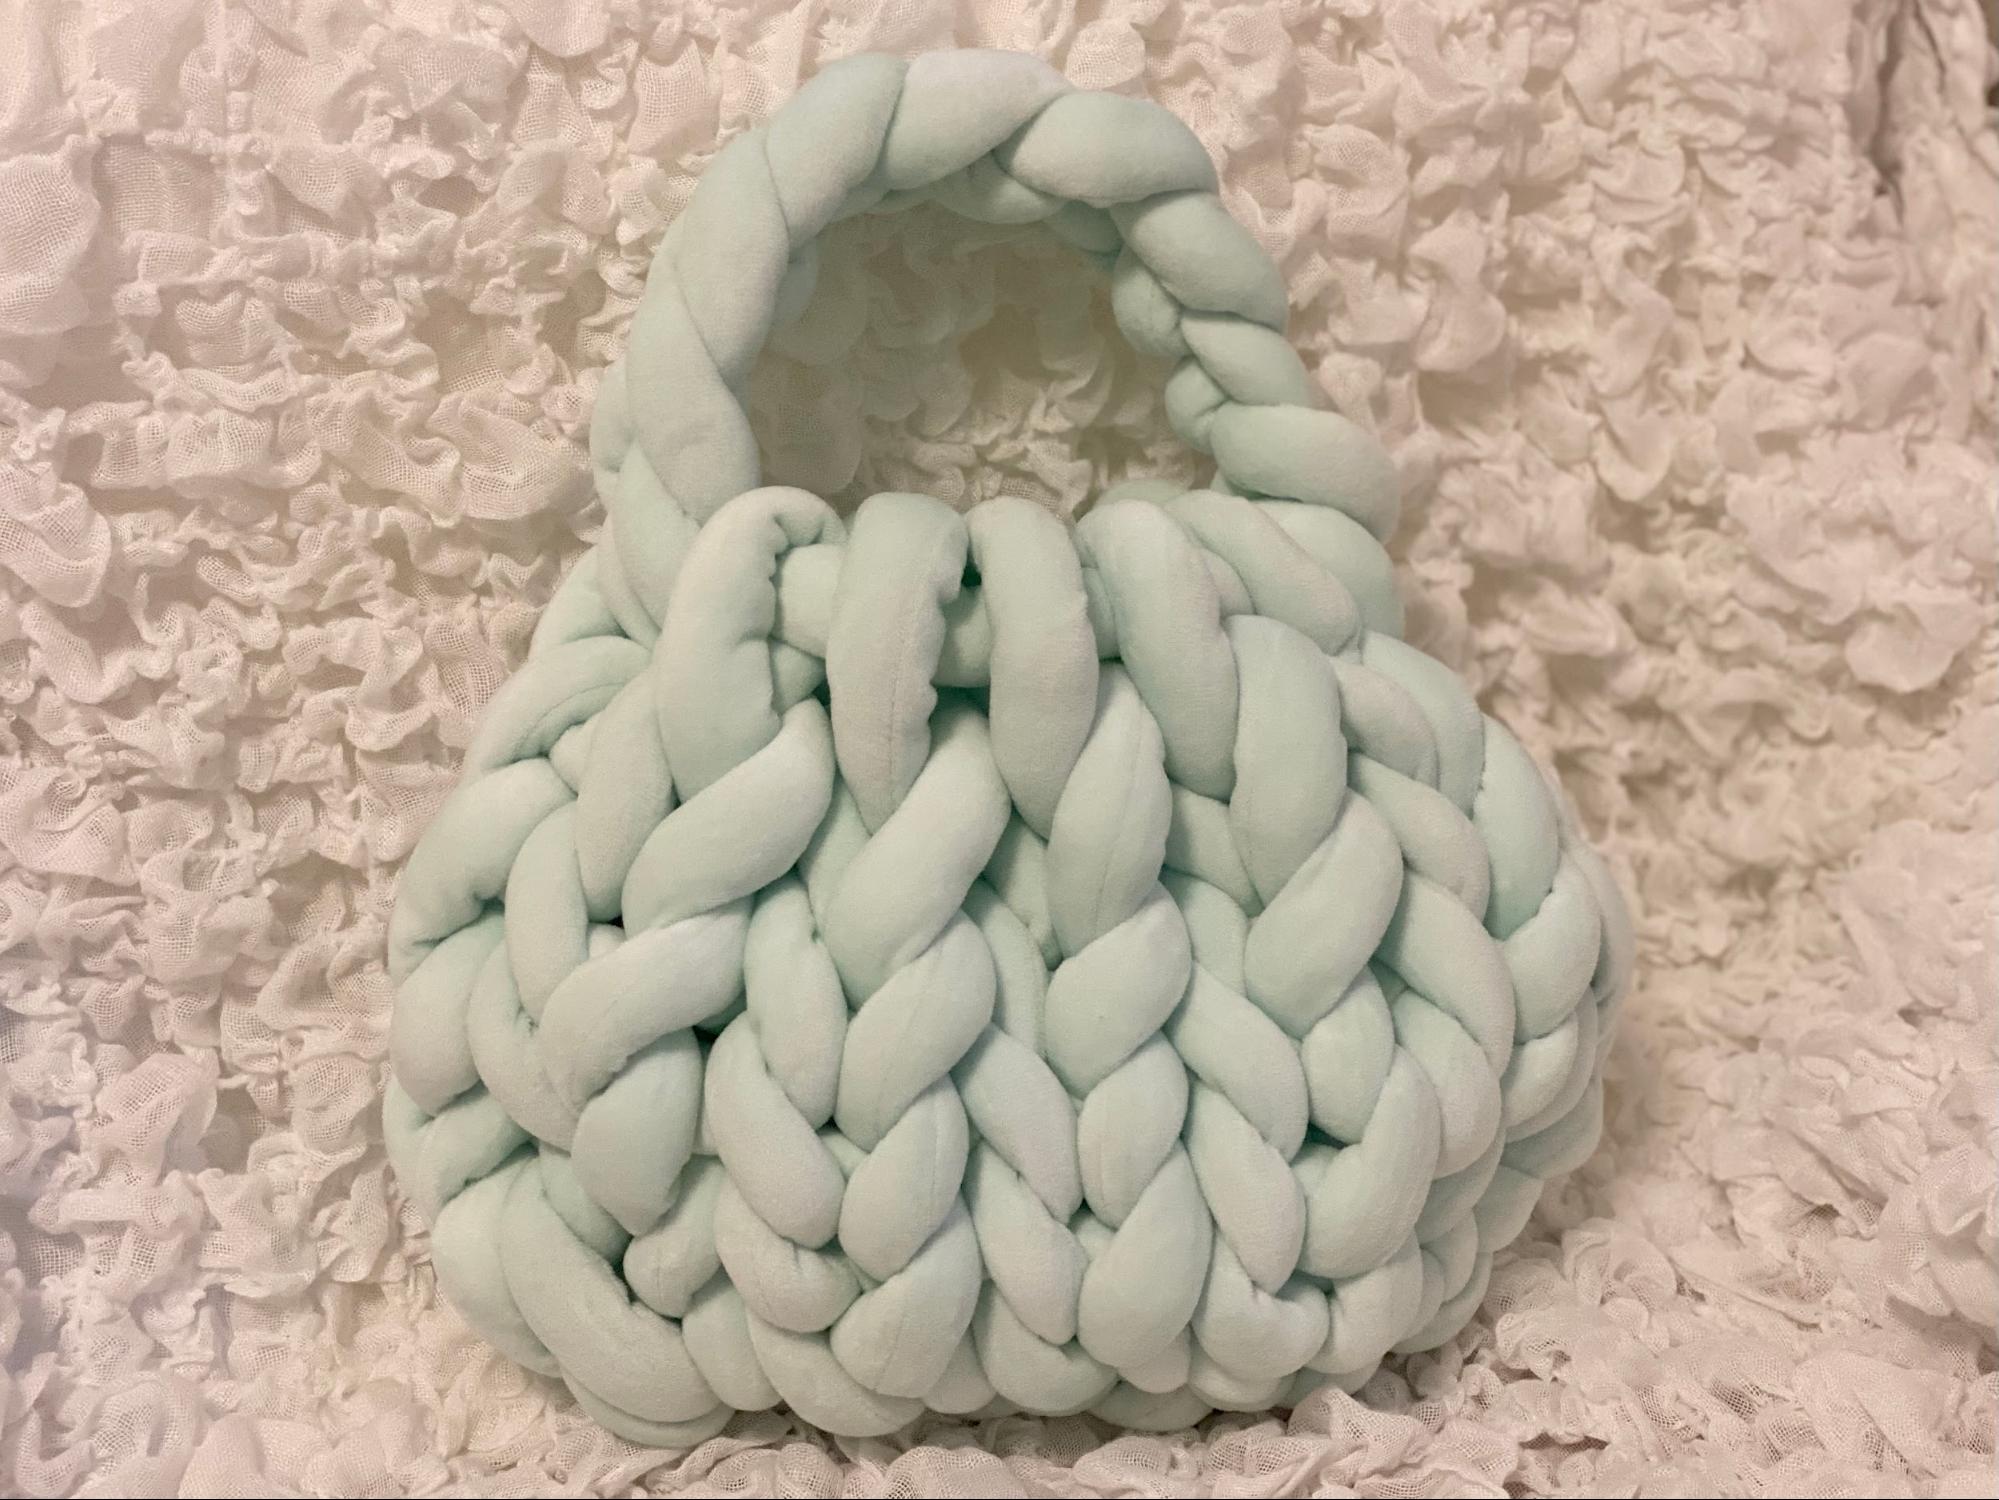
Finally, the mando bag is complete! It is soft and rounded like a mando (dumpling) and fluffy. The warm and cute atmosphere is a skill that can only be achieved by hand knitting.
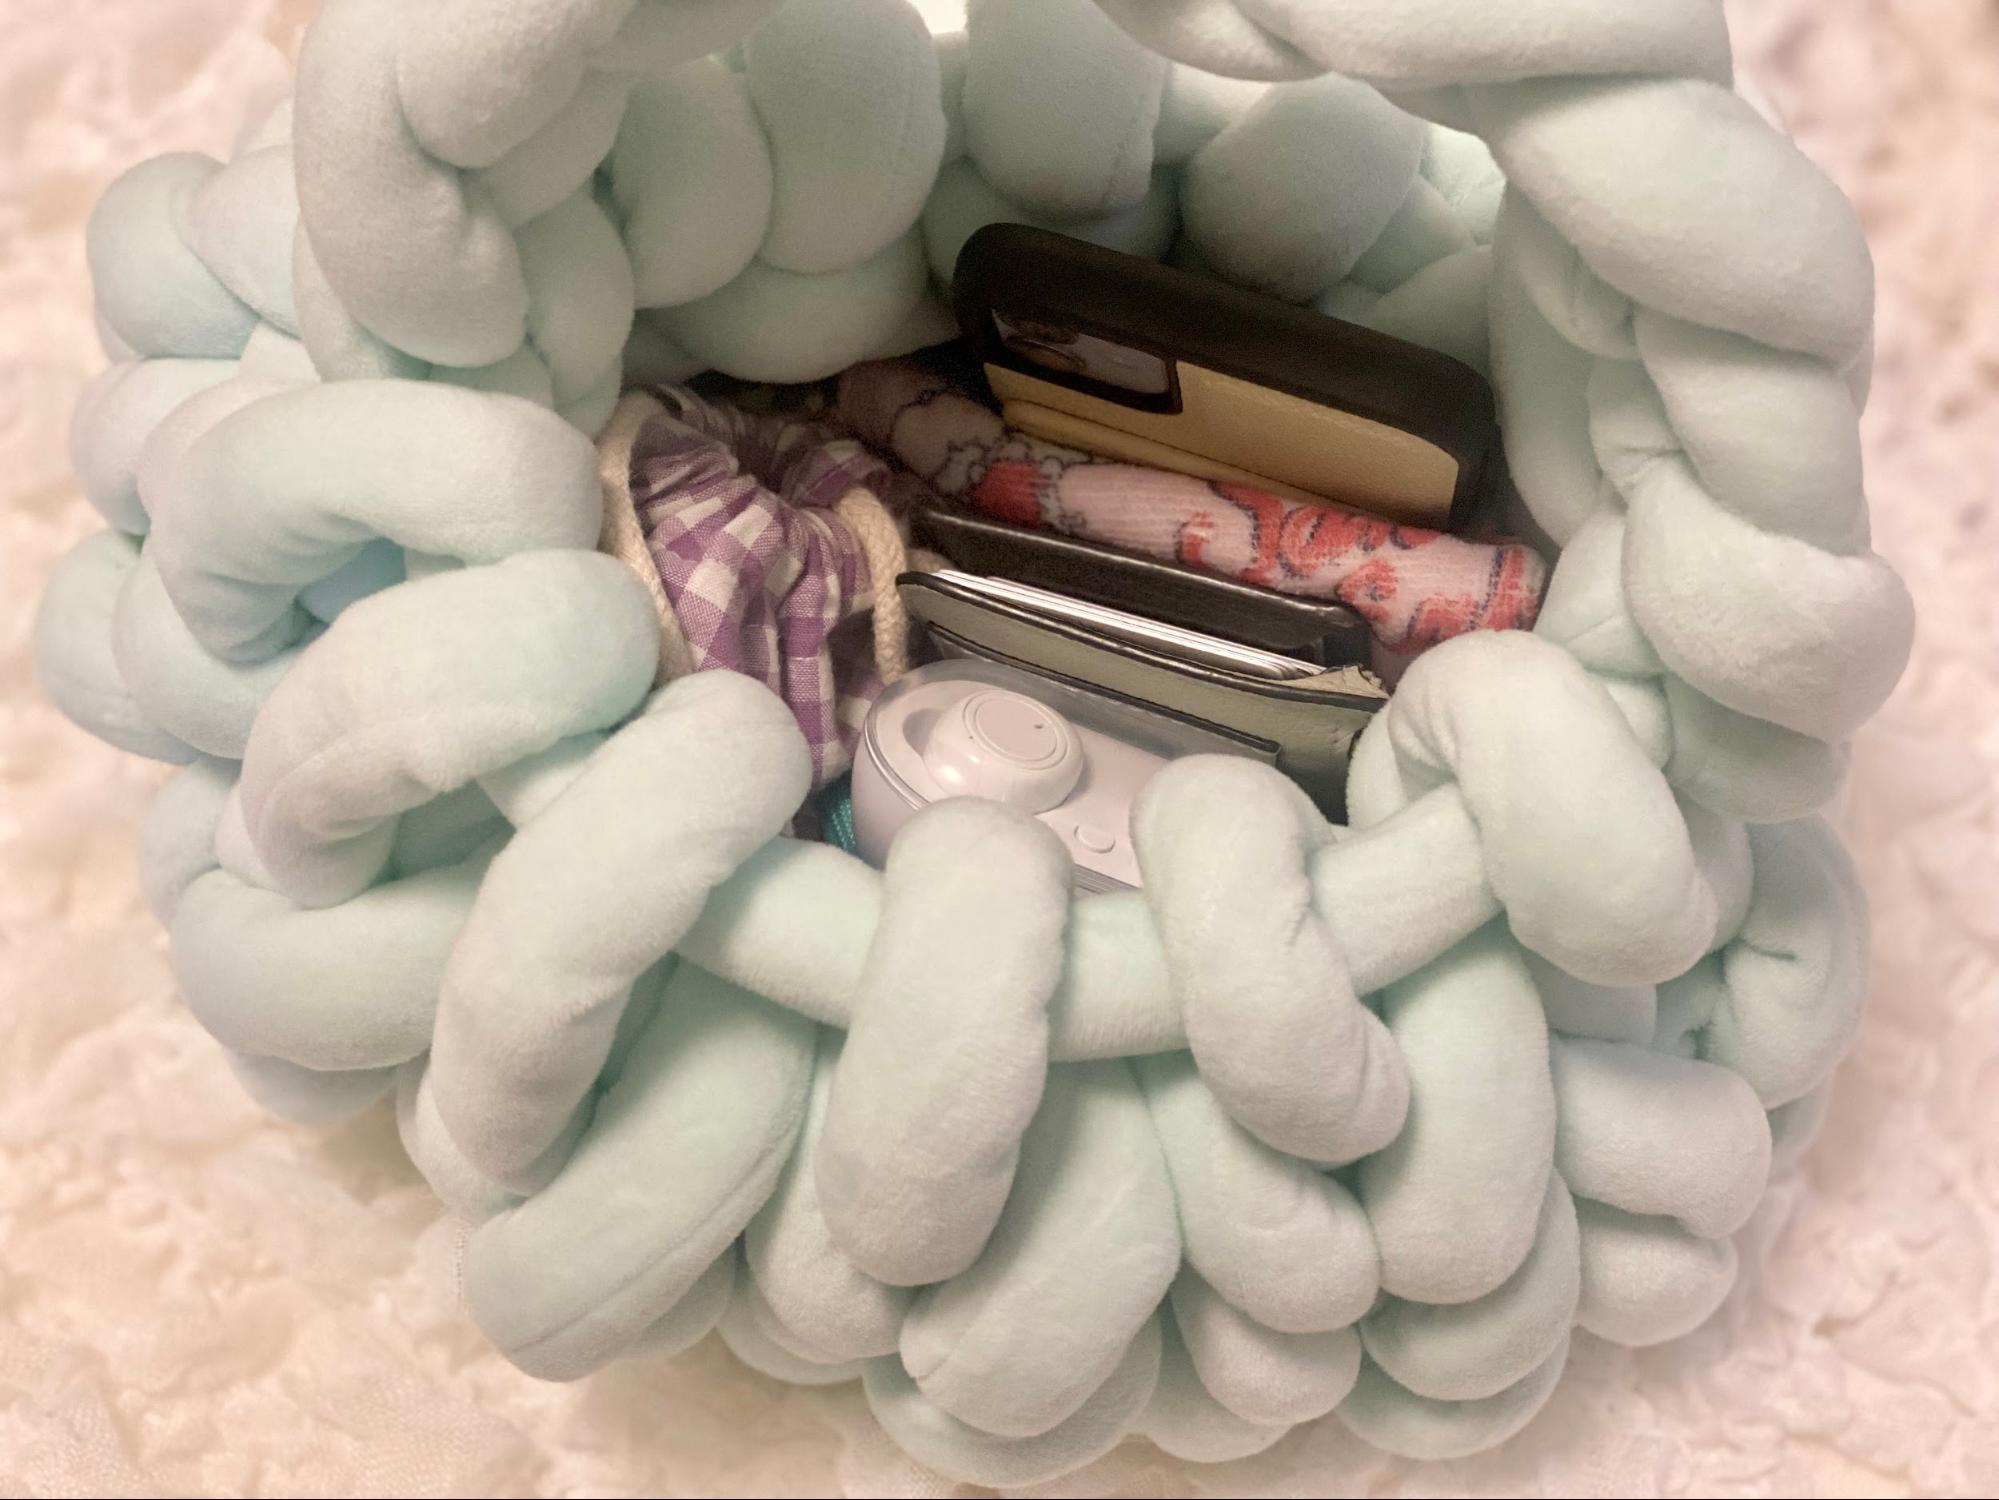
In the size I made this time, the minimum necessary items such as a wallet, smart phone, card case, pouch, handkerchief, and earphones fit well. Even with this much in, there is still plenty of room!
It took about 30 minutes to make. Easy to make even for a novice knitter. If you make it yourself, you will feel attached to it and it will become even more cute. It has enough functionality as a bag, so you will want to take it with you to various places.
Coordinates with "Mando Bag"

The mando bag is an excellent item that can be matched with various fashions simply by changing the color and size. From here, I will introduce the coordination that matches each of the four colors of "Mando Bag" that I made this time.
Beige x Mando Bag
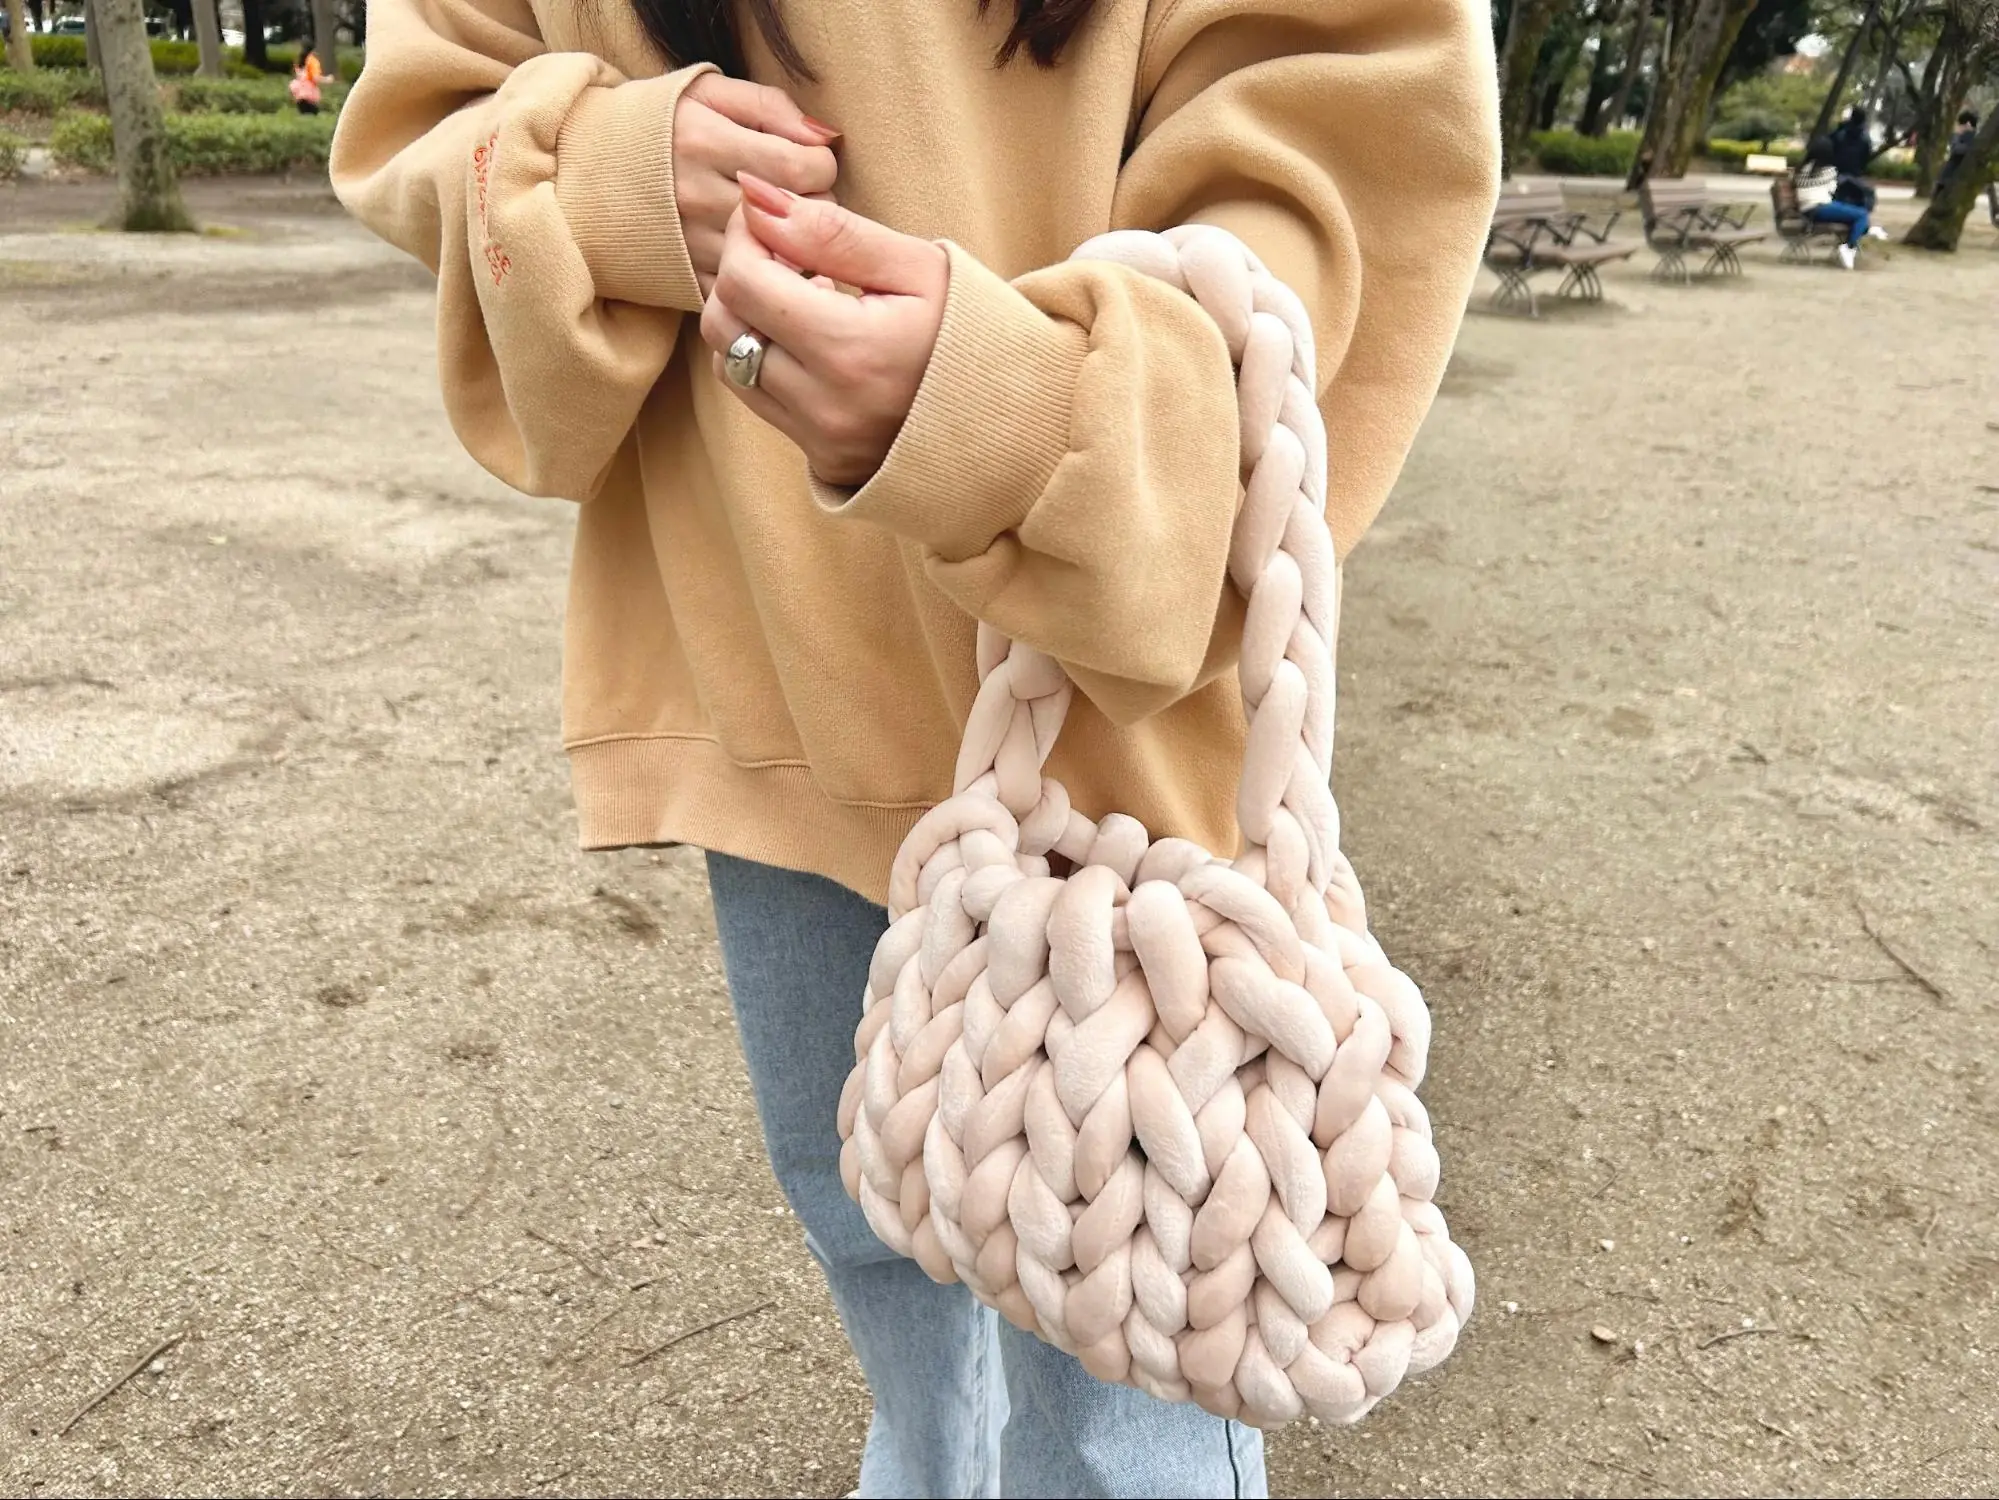
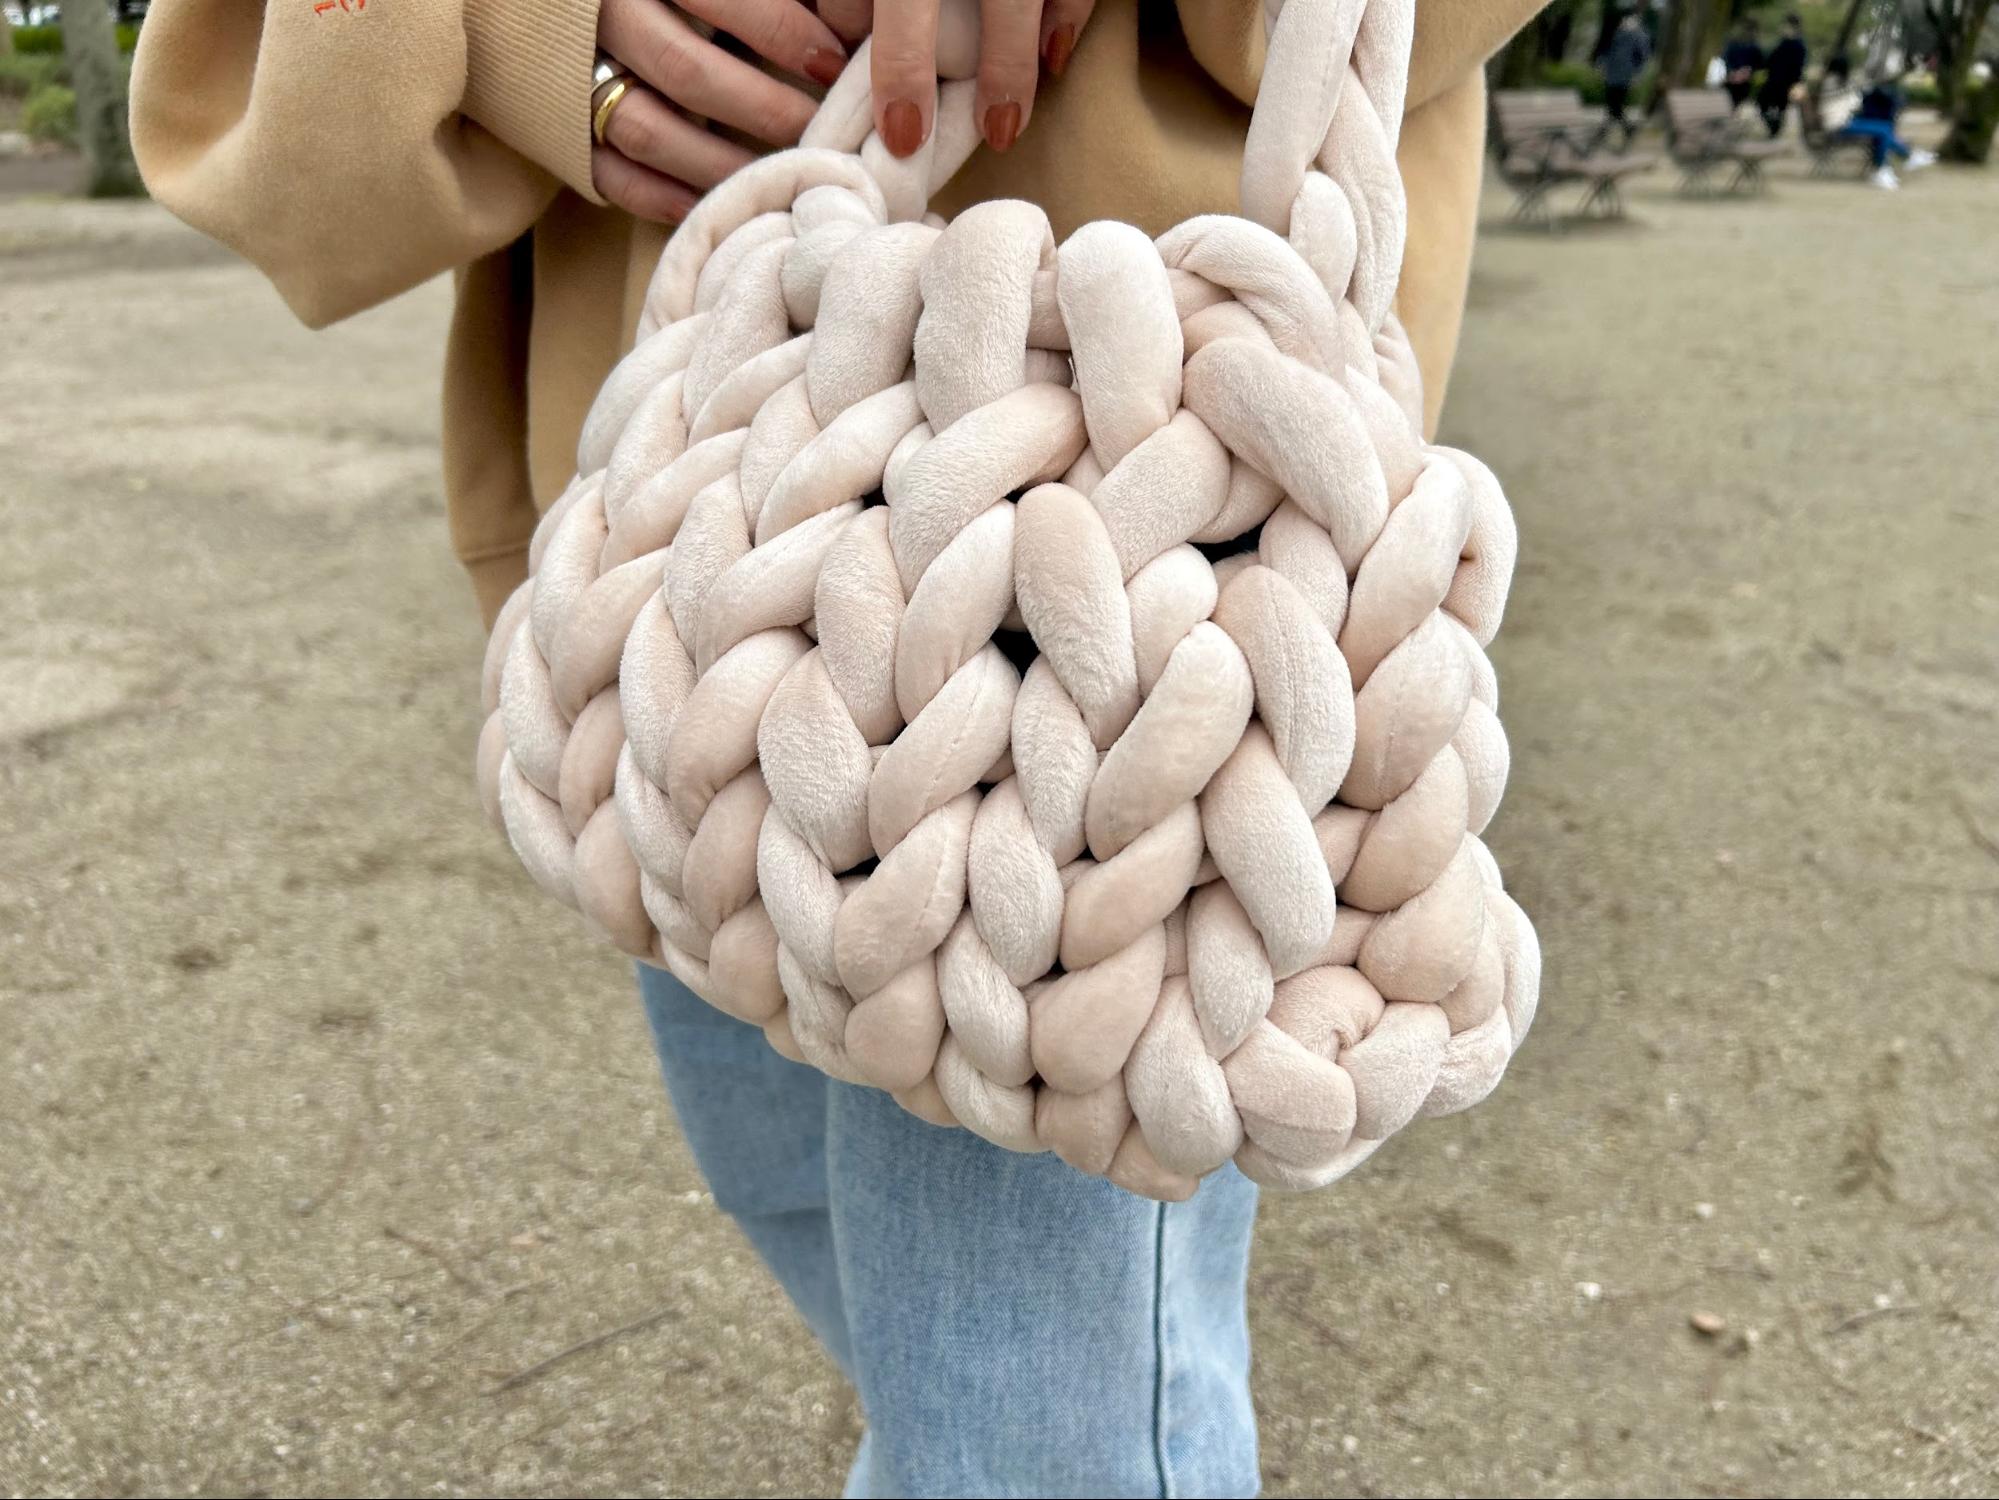
Beige, which has a mature image, is surprisingly compatible with casual styles. It is also cute to match with similar color sweatshirts and hoodies. If you have this one, you can enjoy cute and mature coordination.
Light Green x Mando Bag
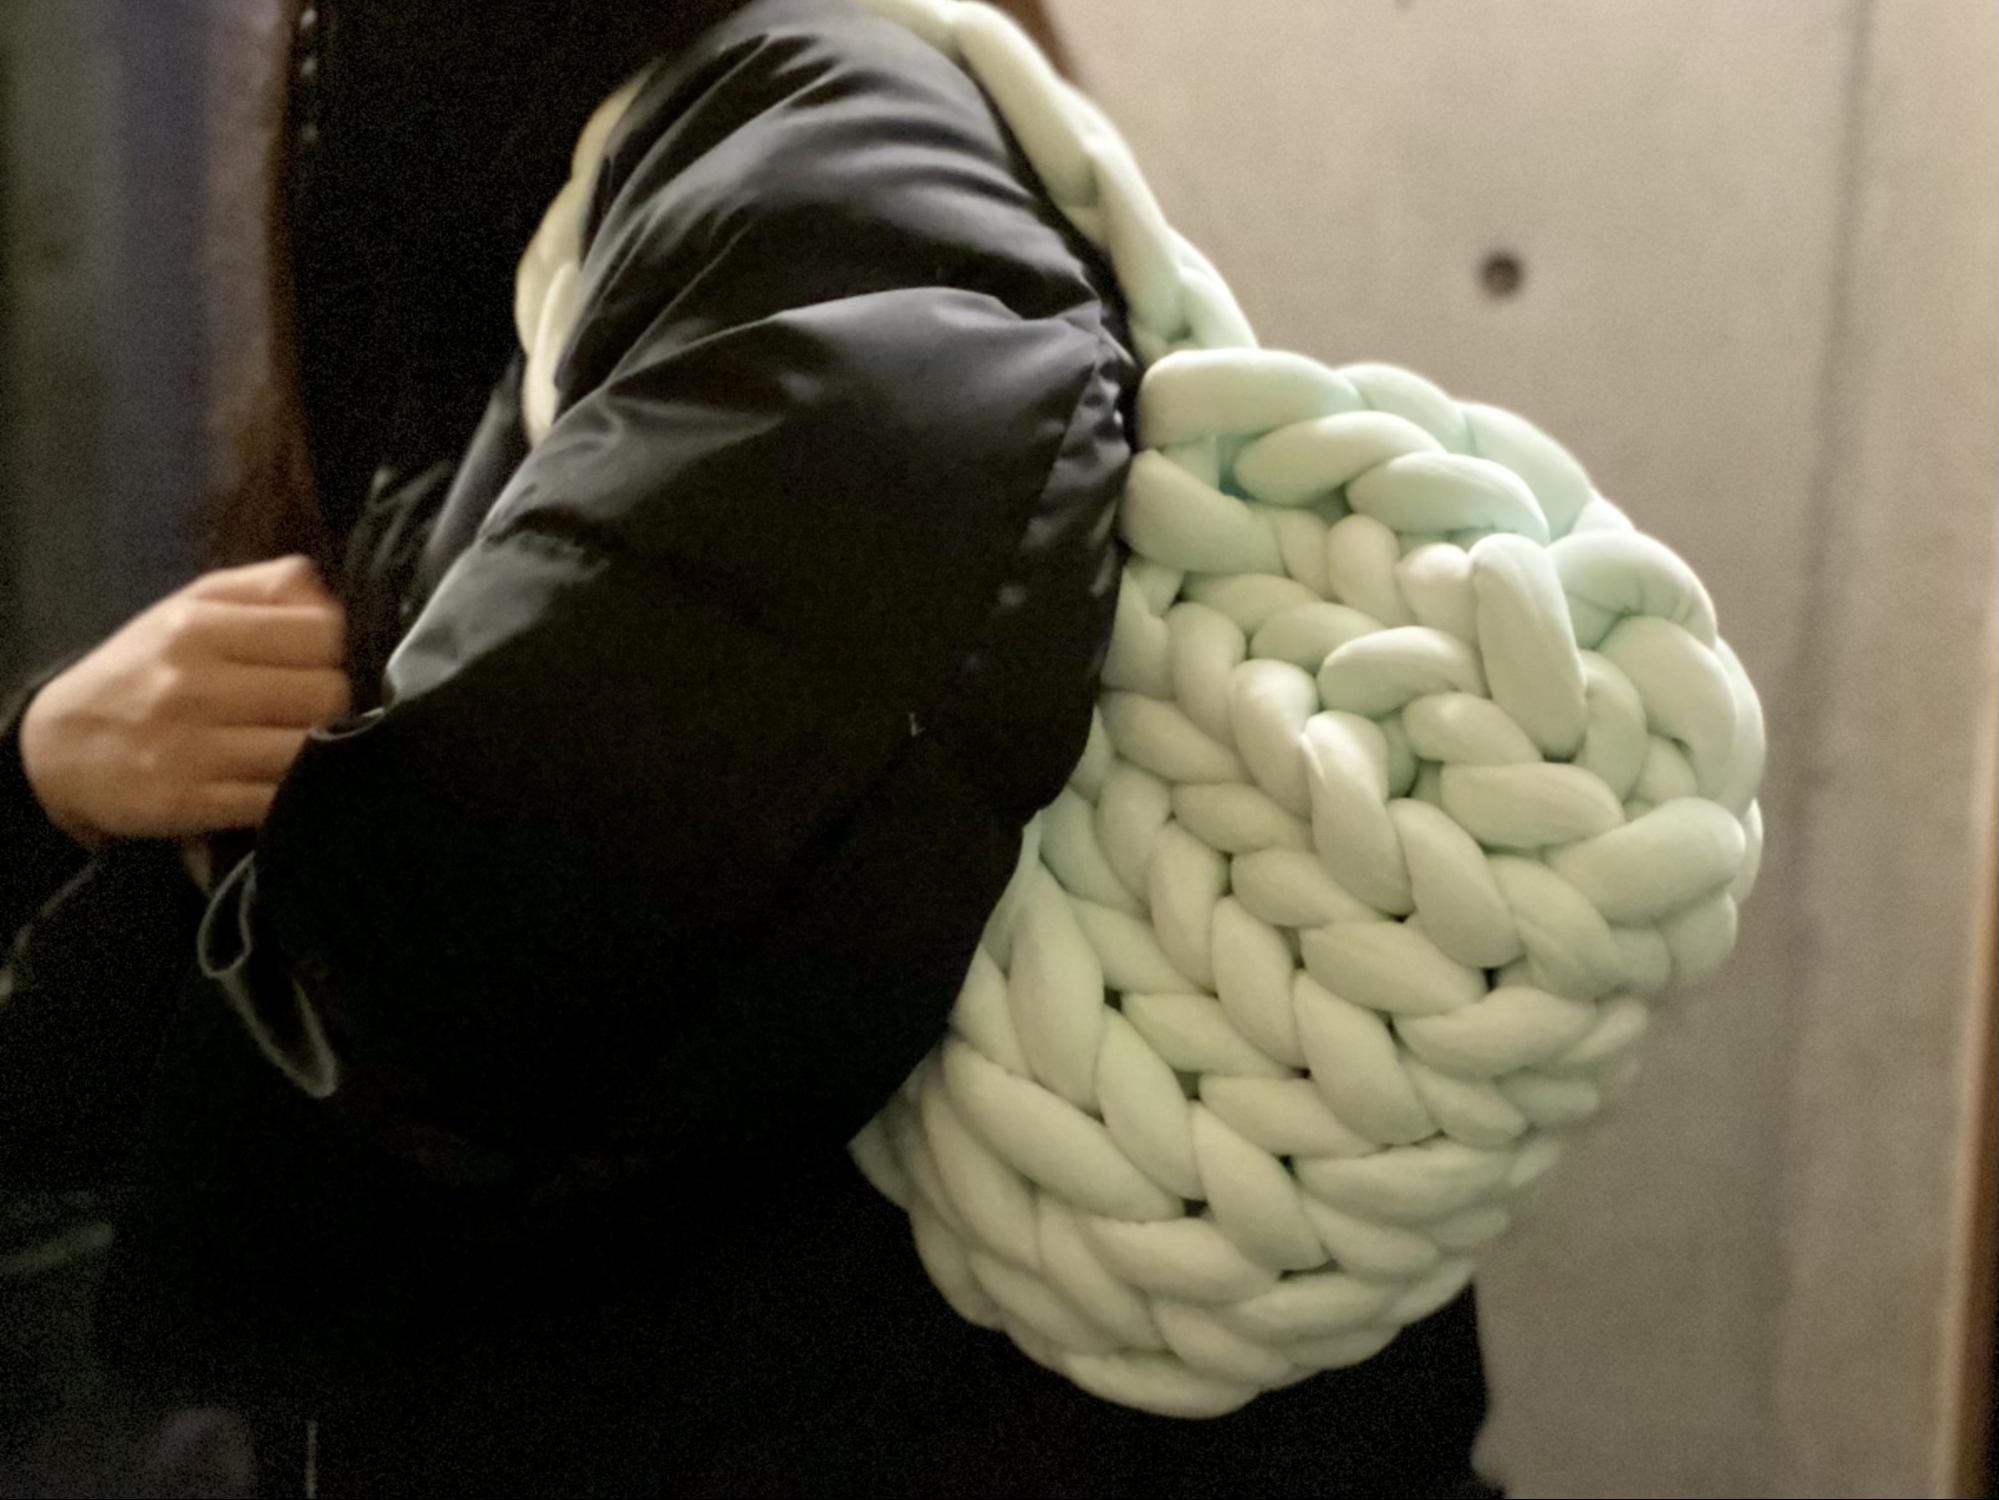
Light green is a must-have for black and white monotone outfits. The bag will become a focal point of your outfit. The degree of fashion is better at once.
In fact, color x color is also good. If you combine salmon pink with light green, you can create a bright and gorgeous image! I thought it might be difficult, but surprisingly, the light green worked well together.
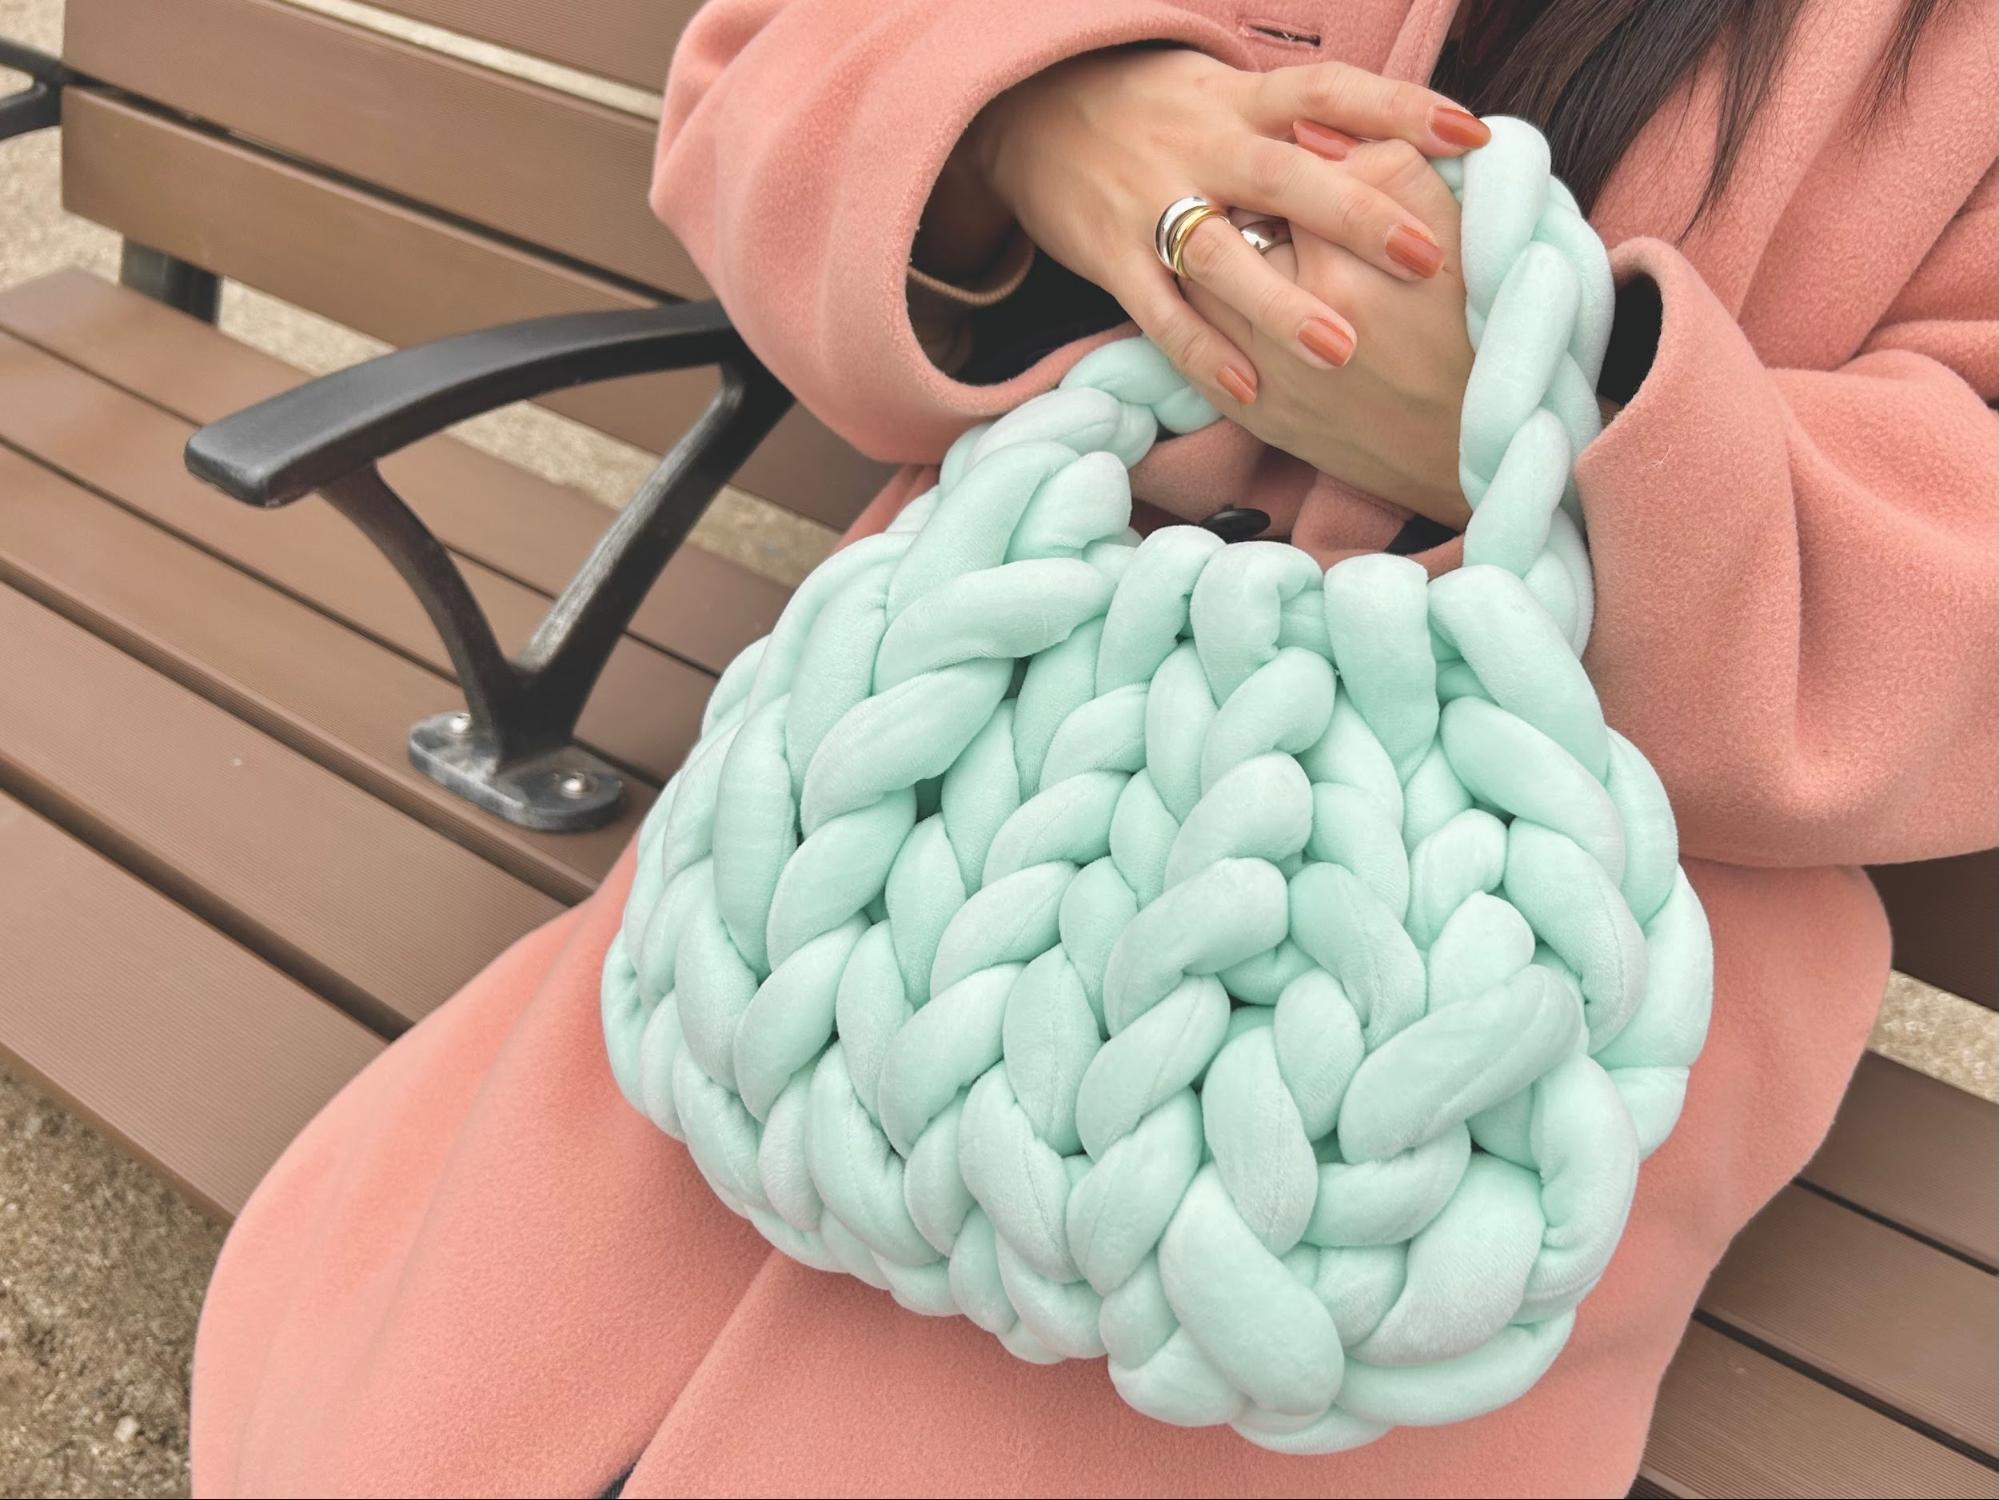
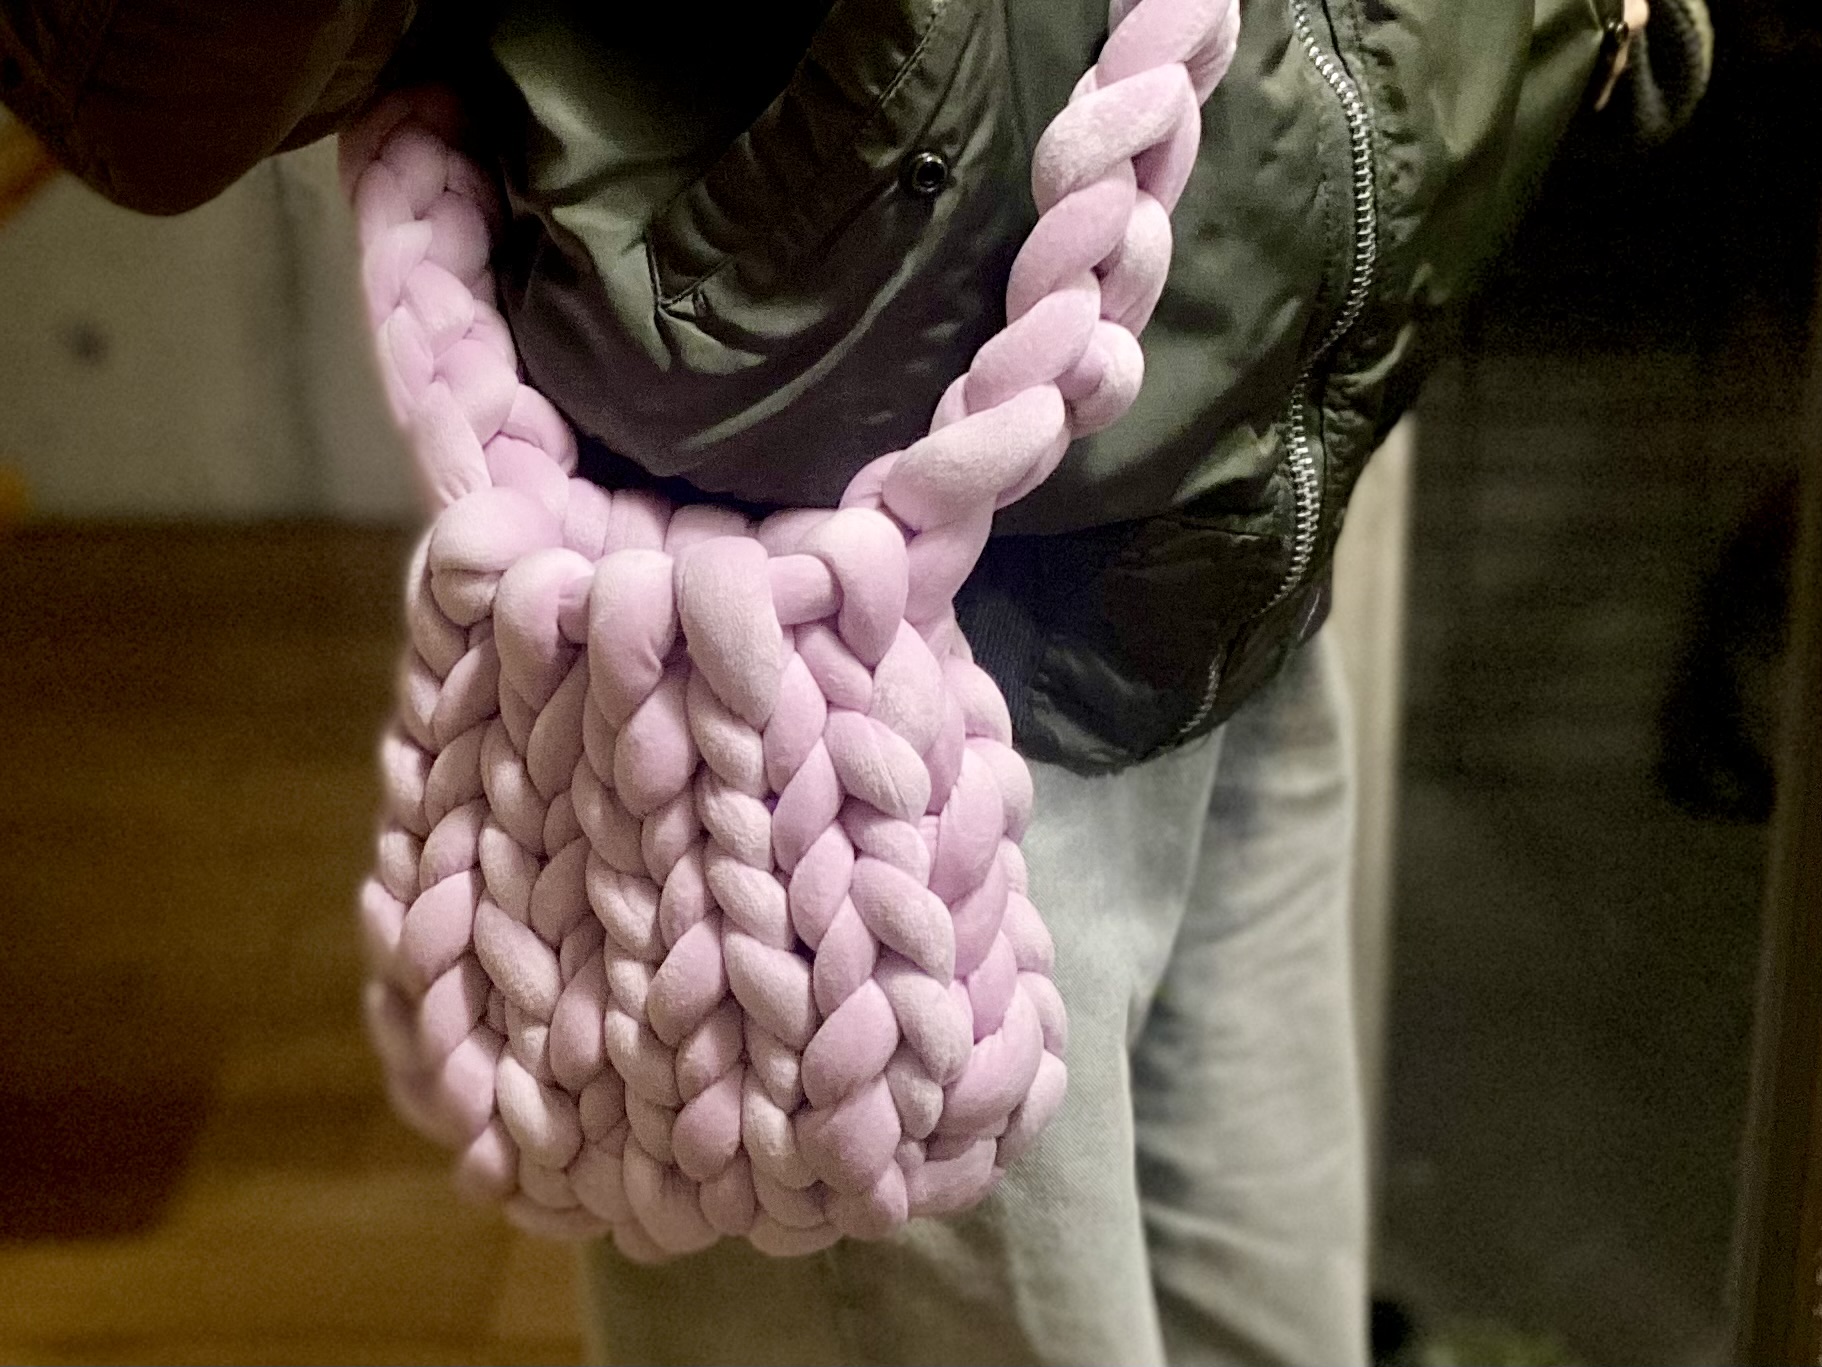
Pink x Mando Bag
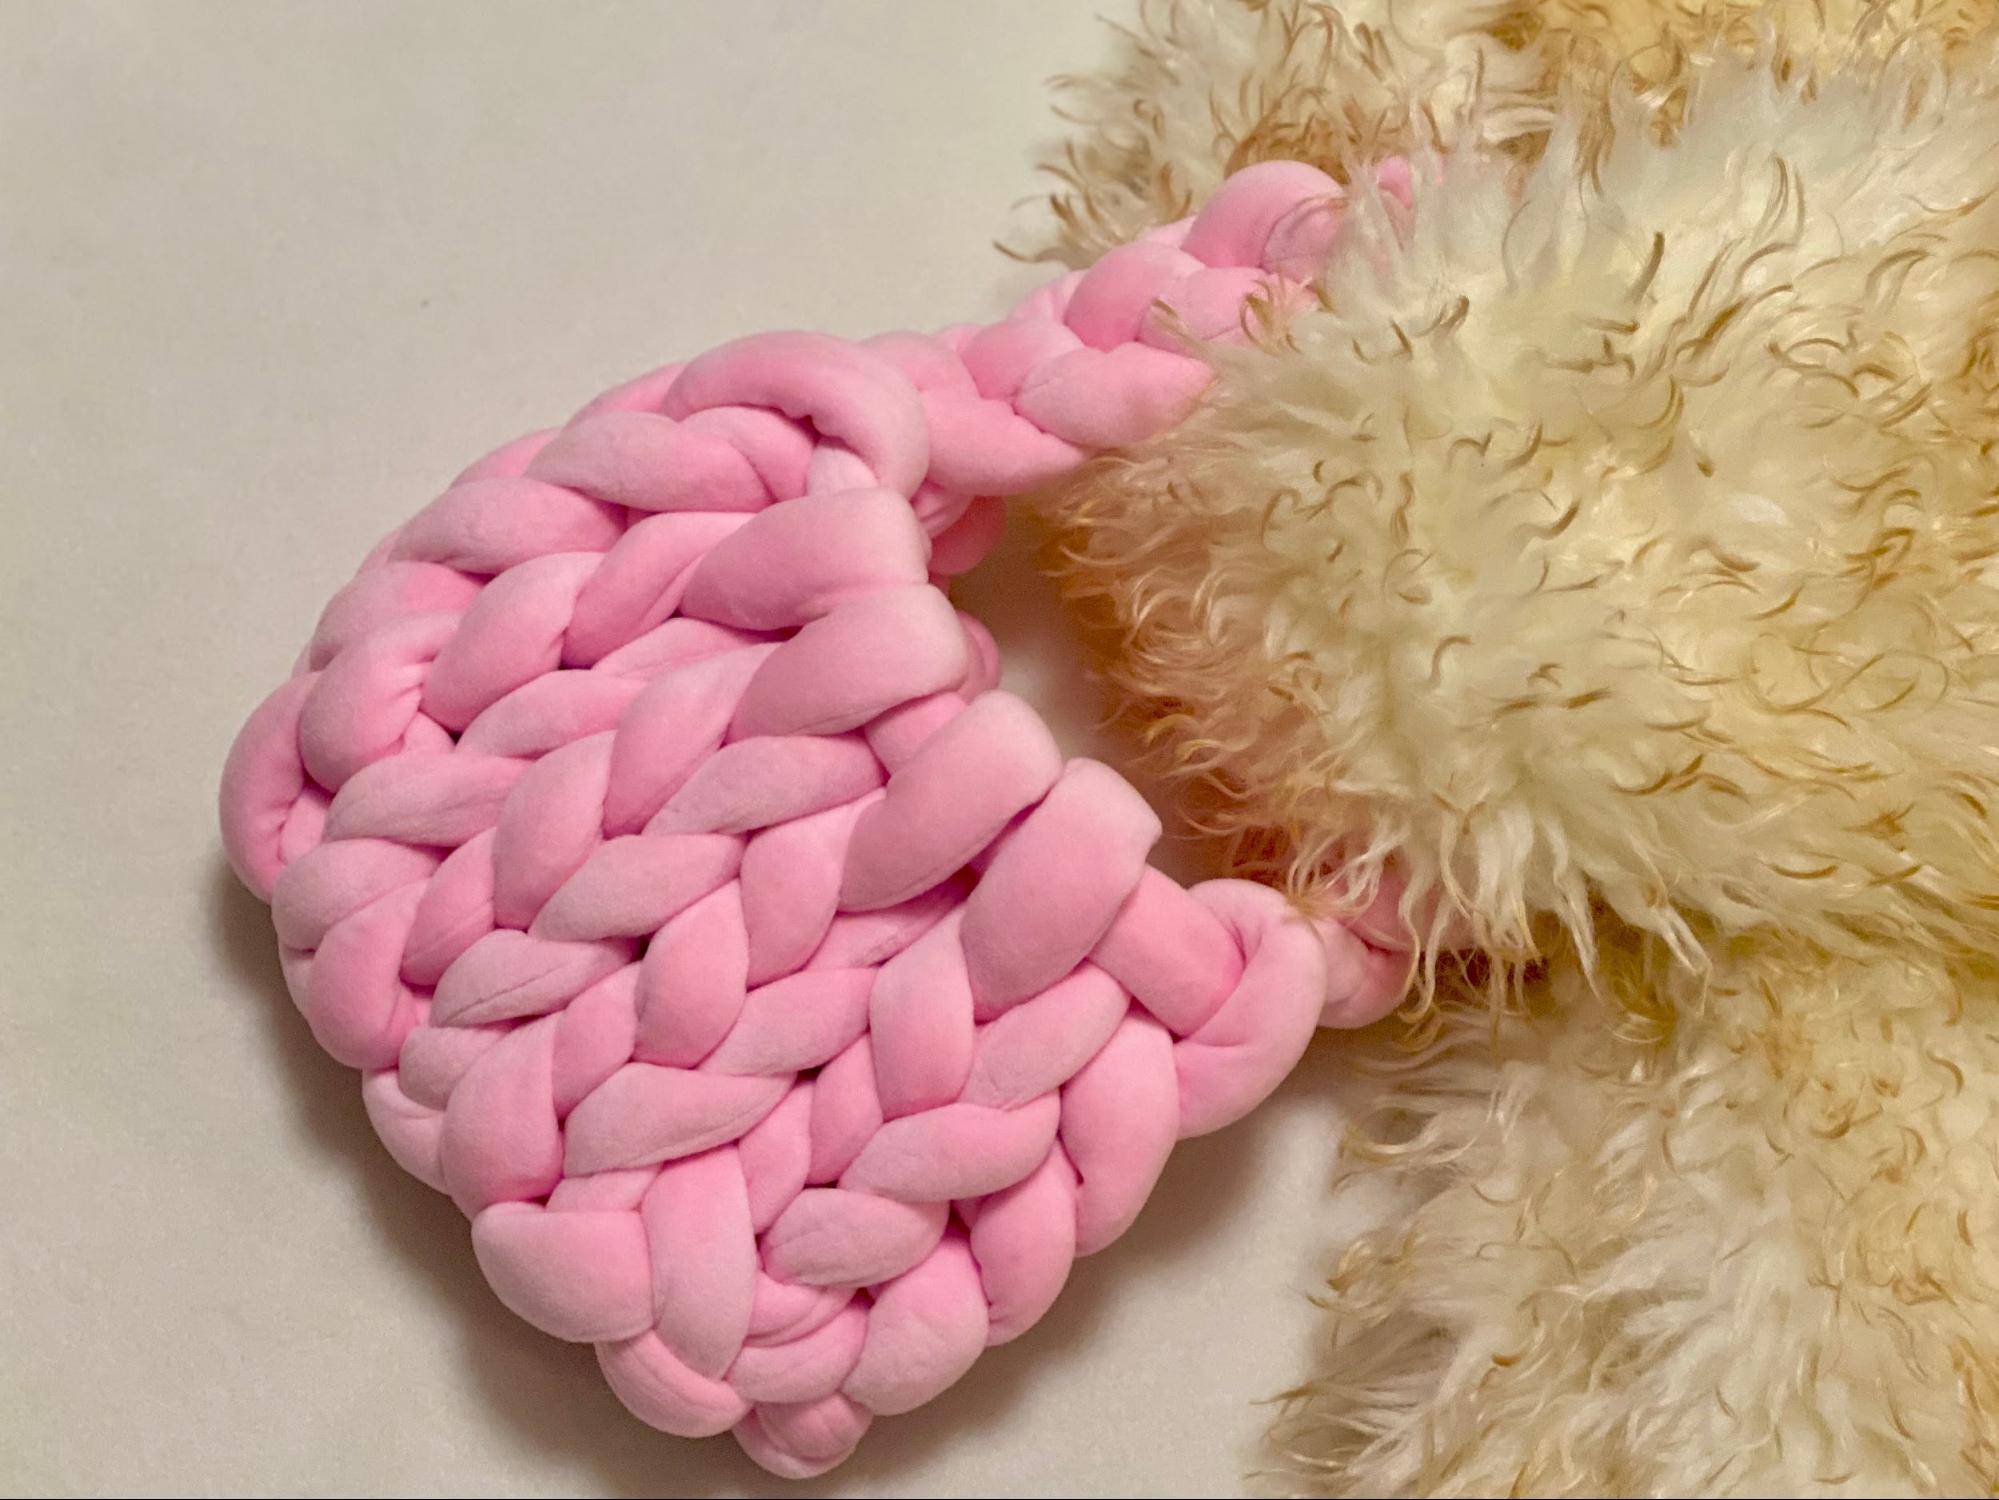
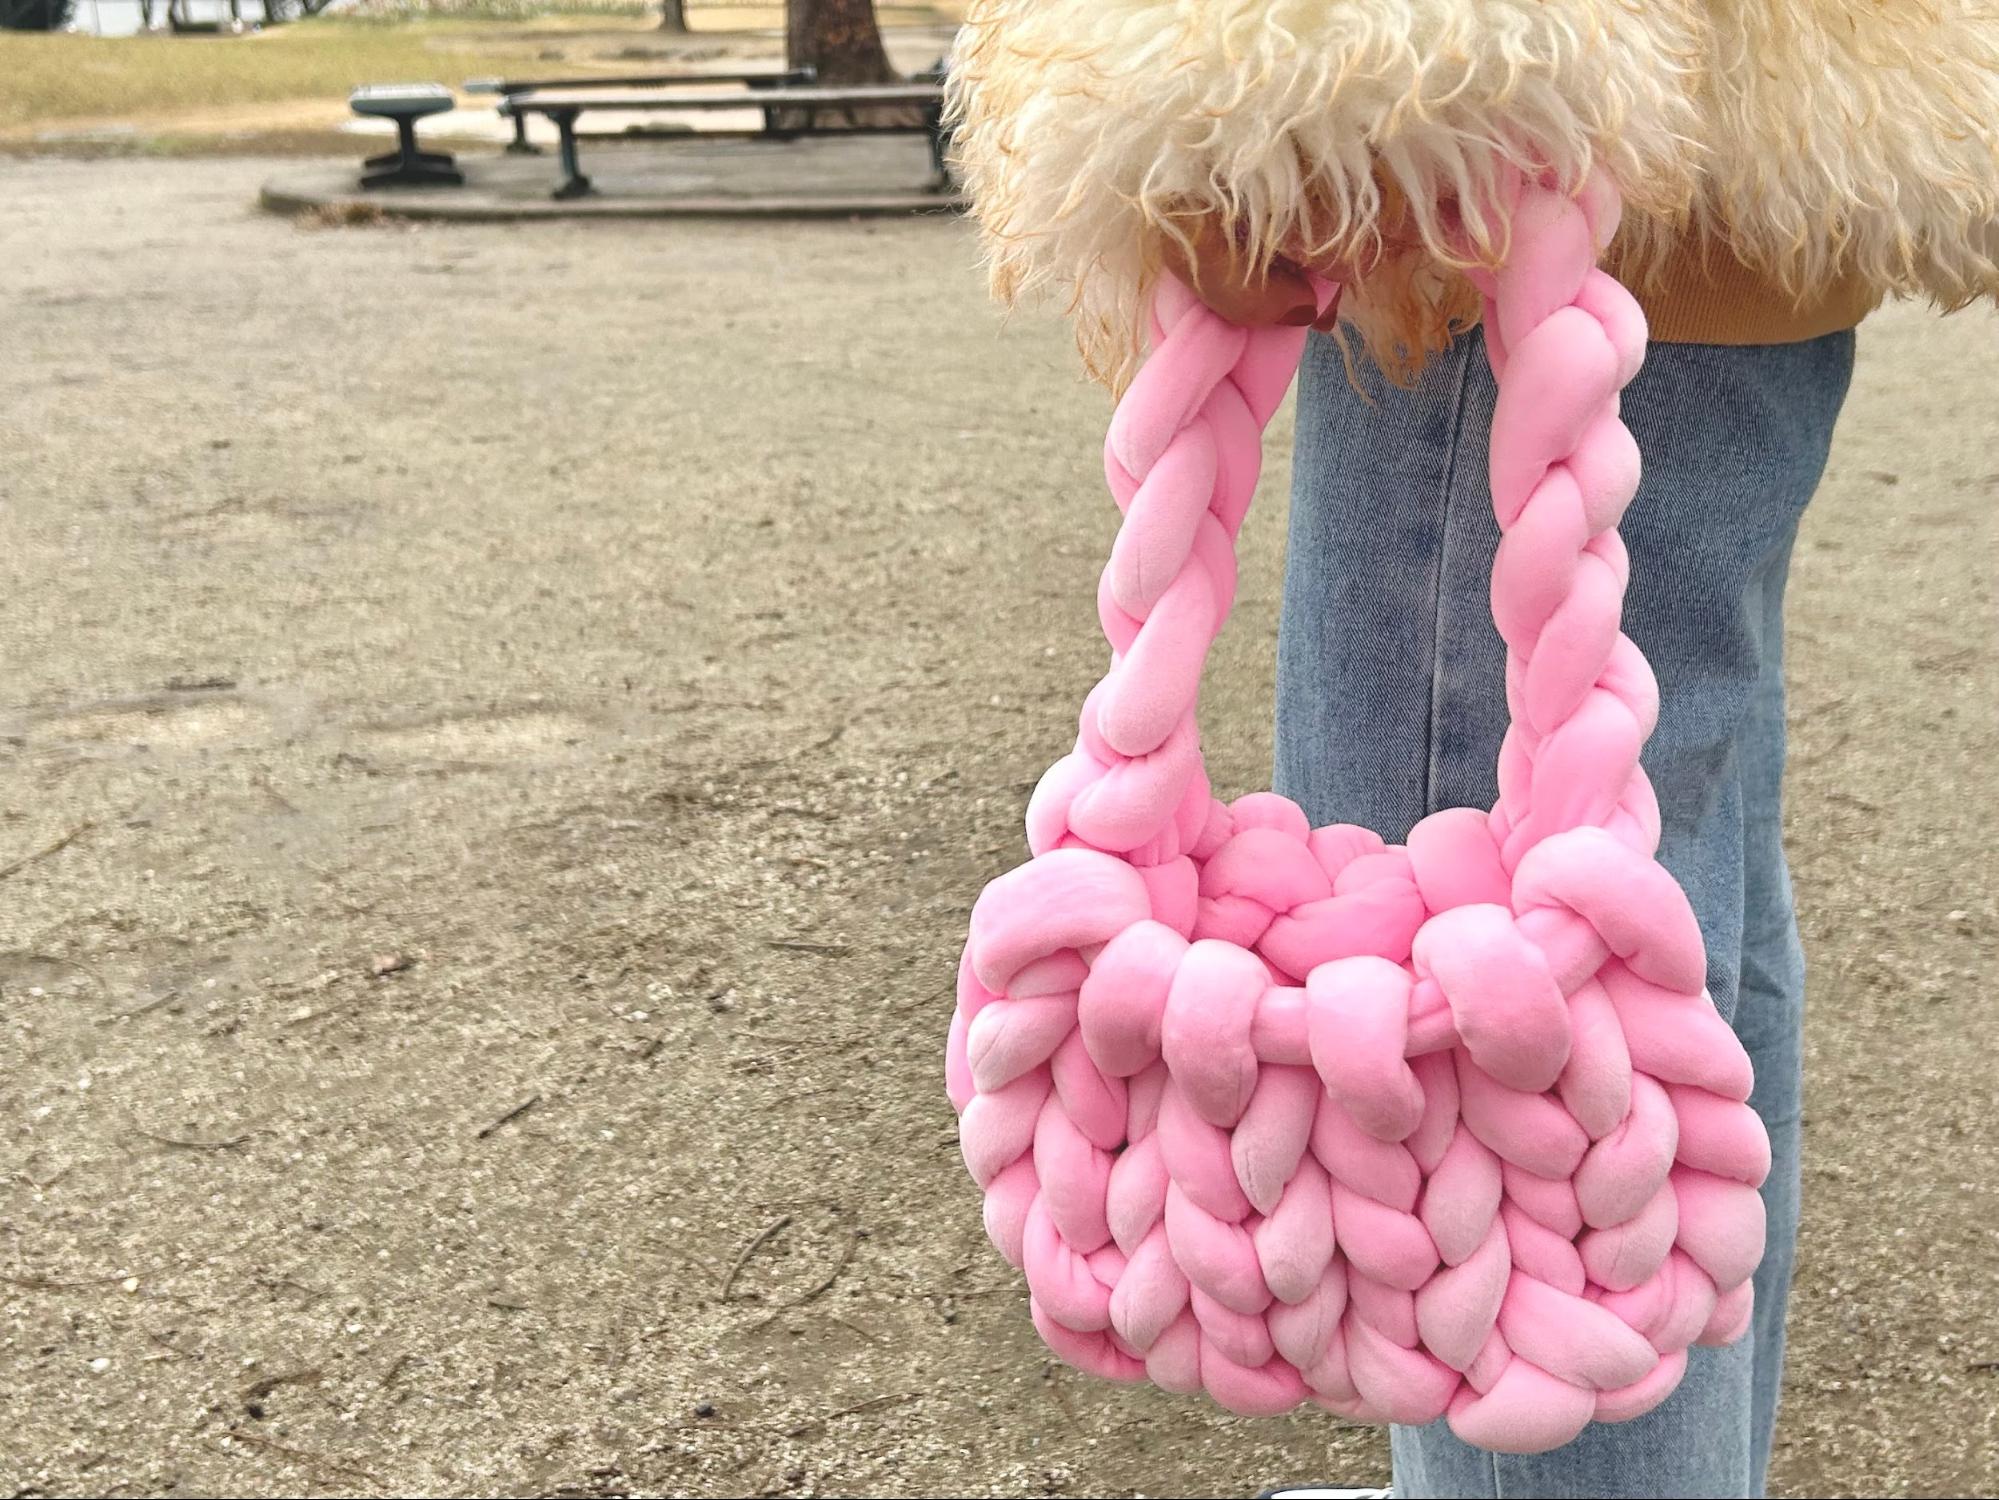
I tried matching pink with a fur jacket. The fluffy outerwear is matched with a fluffy mando bag for a more cute look. If you make the bag in a small size, it will be easy to match with a voluminous outerwear!
Purple x Mando Bag
A purple mandu bag with long handles can be used as a shoulder bag. Pale purple goes great with green and khaki! With a casual style and a bulky mandu bag, the sweet and spicy mix coordination is cute.
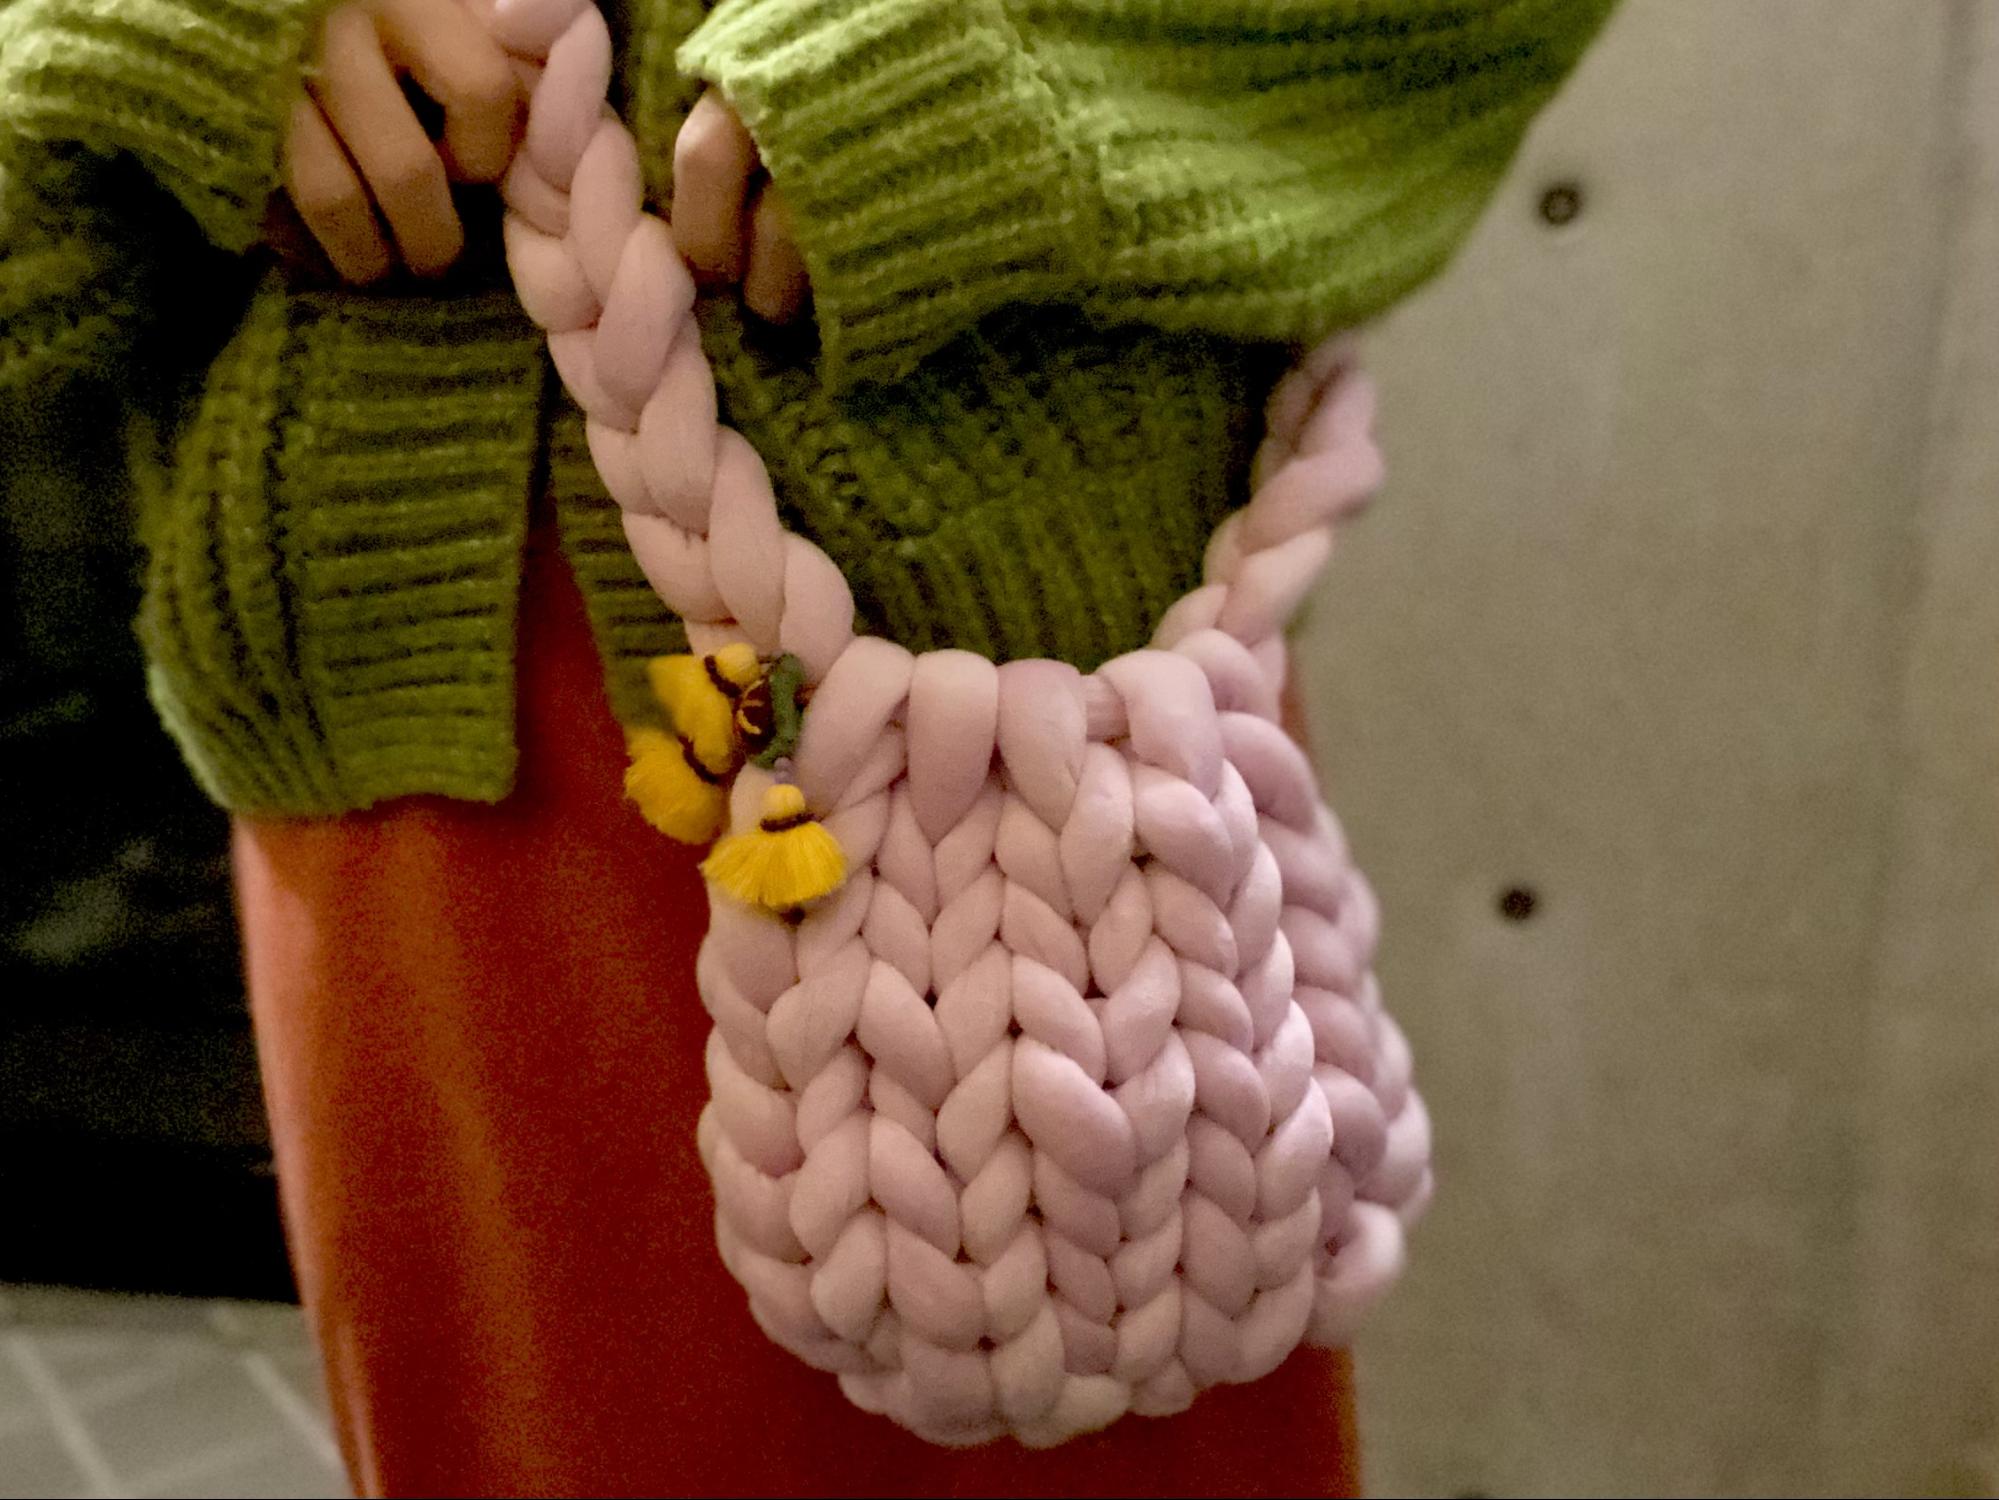
If you attach key holders or decorations to the mandu bag, it will transform into a special one-of-a-kind bag! You can enjoy more original coordination. It's also cute to customize it with hair accessories.

The trendy "mando bag" that anyone can easily make.
The ability to make the size and shape to one's own preference is another attraction of handmade products. Even if you are clumsy, once you get the hang of it, it is easy to make. We encourage you to try your hand at making your own mando bag!

![[Nagoya Campus] Baseball Class Amazing Baseball Partner](https://life-designs.jp/wp/wp-content/uploads/2023/02/230215143532_store_request_866605779.jpeg)
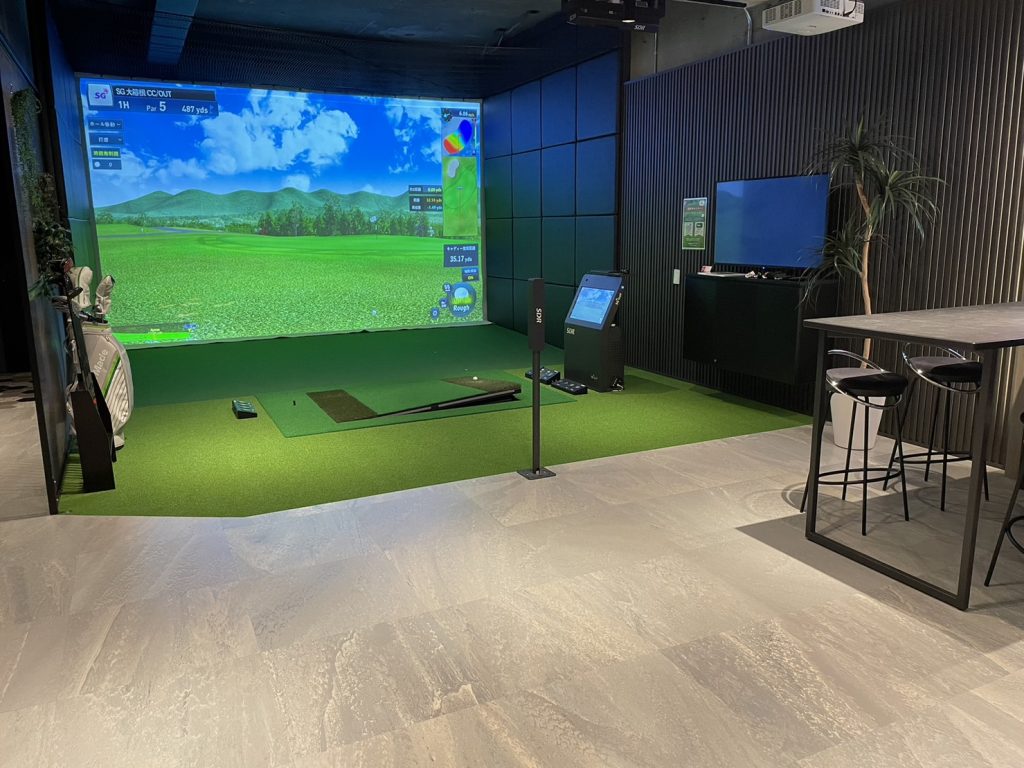
![[15 selections] Introduction of Indoor Golf Place (Indoor Driving Range) in Nagoya!](https://life-designs.jp/wp/wp-content/uploads/2023/04/2766befb124ad6dcc46313963d47f738-1024x683.jpg)
![[Tenpaku] The Tokai region's first pitching academy specializing in elementary school students: "Pitching Foundation - Building the Basics of Pitching" - Improve your pitching speed and develop a form that prevents injury!](https://life-designs.jp/wp/wp-content/uploads/2024/06/d2d071e3d911752d20b1d6abe42a4da3-1024x683.jpg)
![[Nagoya] Want to Find an Exciting Book? A Report on Secondhand and Antiquarian Booksellers](https://life-designs.jp/wp/wp-content/uploads/2023/07/IMG_6928-1024x768.jpg)

![[Indoor Facilities] Where to Go on Rainy Days in Tokai Area! For Family Outings!](https://life-designs.jp/wp/wp-content/uploads/2023/07/FotoJet-23.jpg)


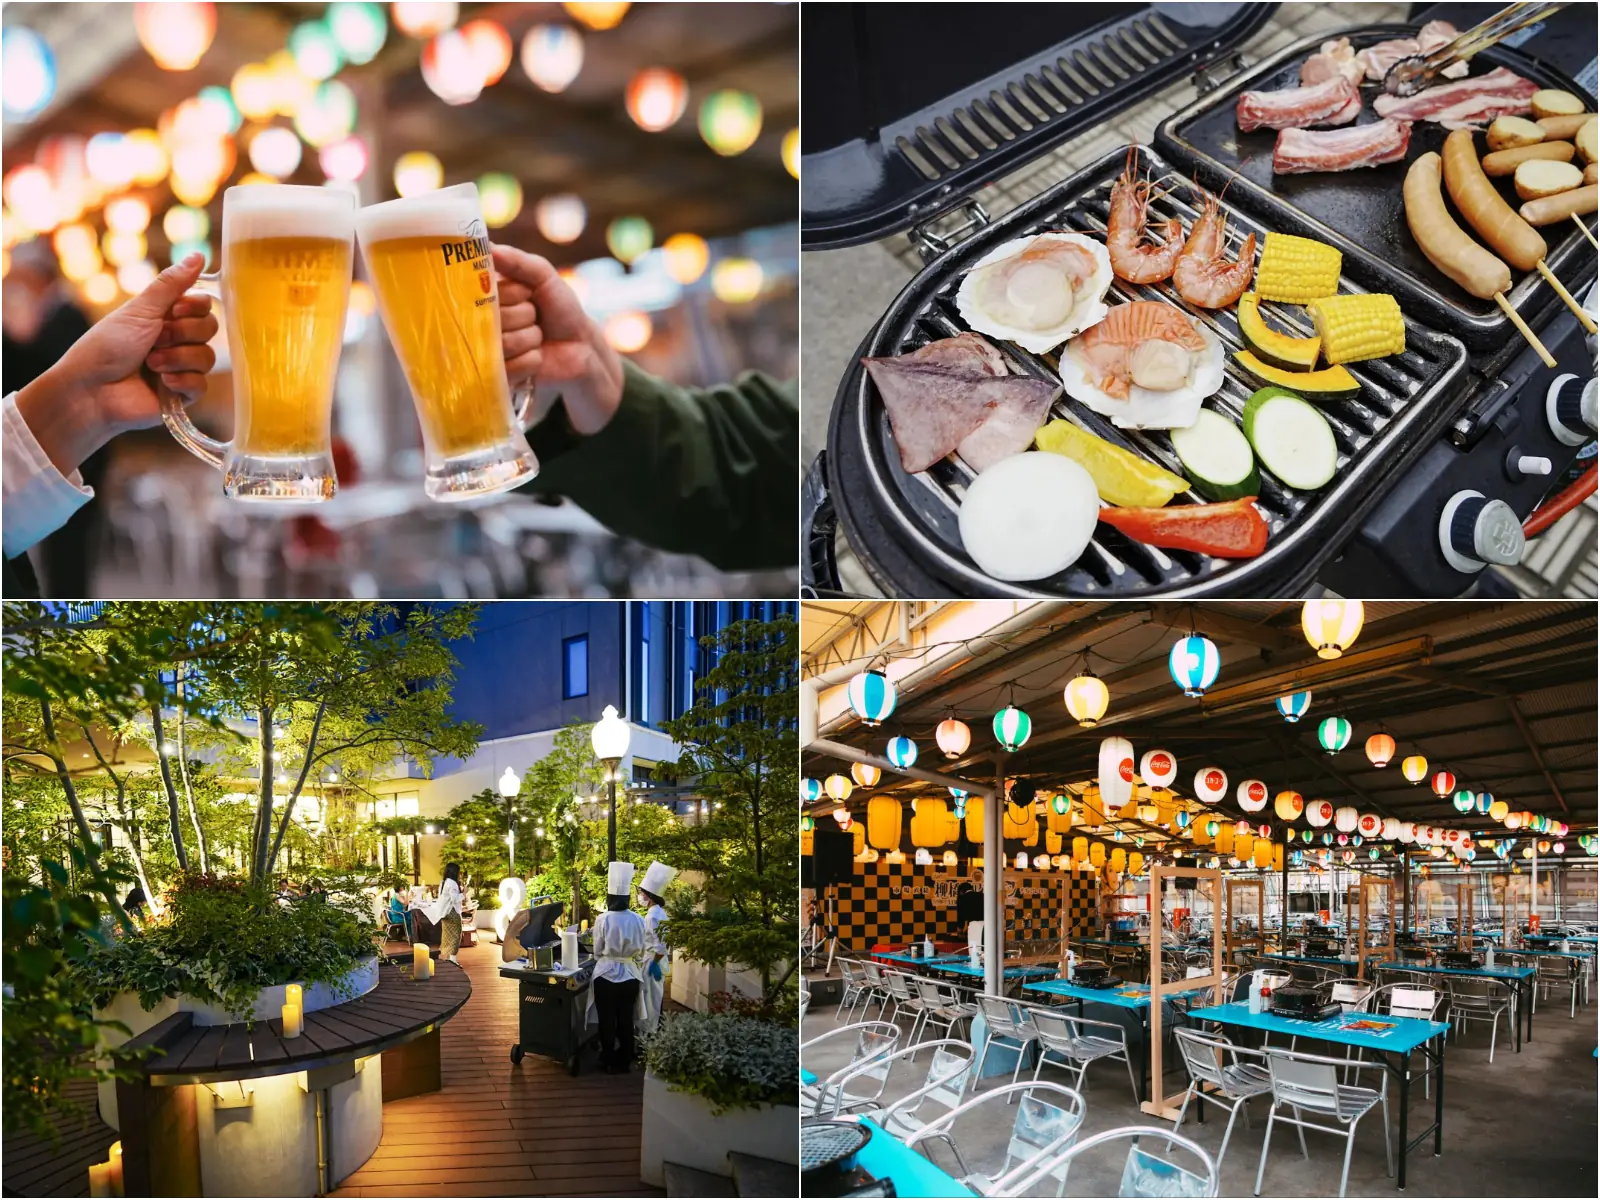
![[Tokai Area] Place to Go on Rainy Days!](https://life-designs.jp/wp/wp-content/uploads/2022/03/f76405aaa33944a4ba88a131fbc56523-768x435.png)
![[Nagoya-meshi] Nagoya's Speciality Dishes](https://life-designs.jp/wp/wp-content/uploads/2022/06/5ba2ca8c038fd4af7527bc0826367cfb-768x435.png)
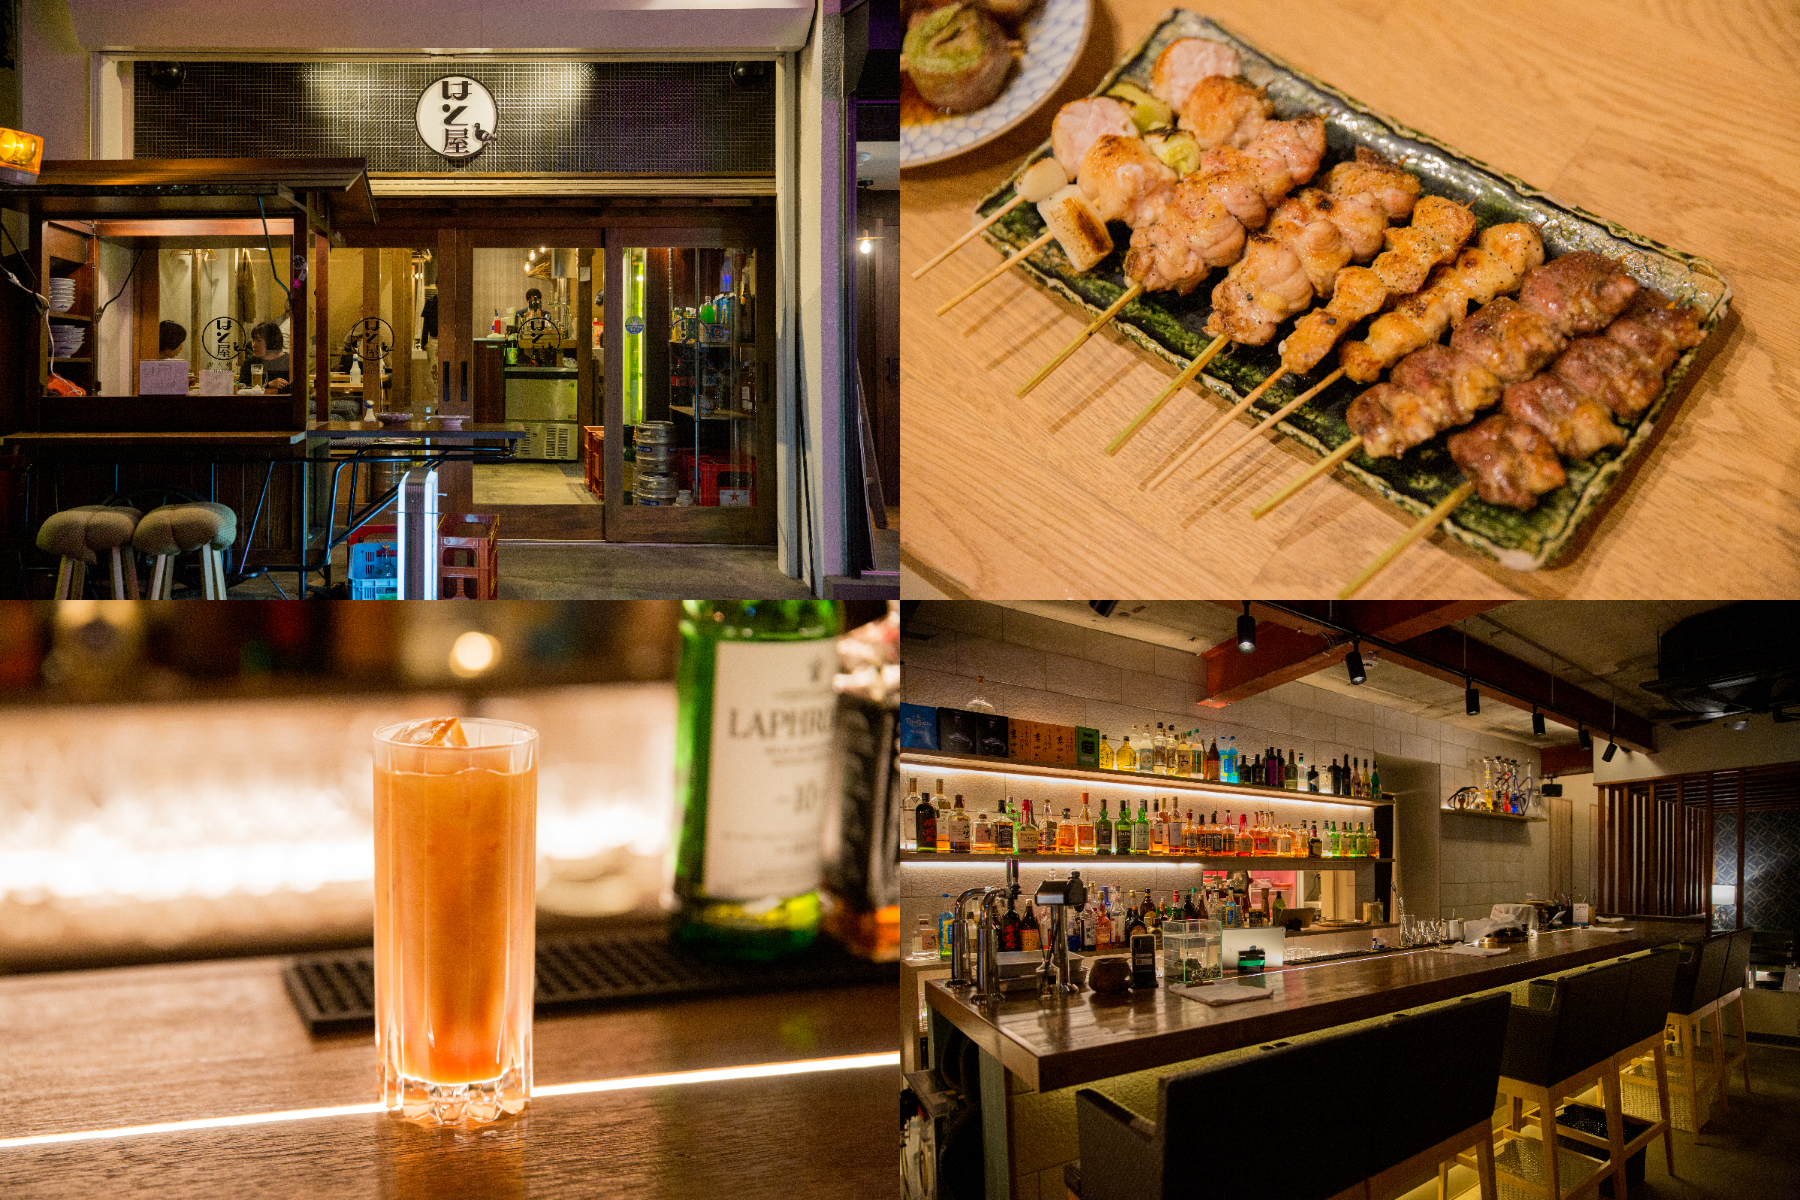
![[Osu Special Feature] A City of History and Uniqueness](https://life-designs.jp/wp/wp-content/uploads/2022/03/01_Osu-1-1024x580.png)
![[Special Feature] Enjoy Your Day at a Park!](https://life-designs.jp/wp/wp-content/uploads/2019/12/LD_banner_w1920x1088_park-1-1024x580.jpg)
![[Ghibli Park] Beginner's Guide](https://life-designs.jp/wp/wp-content/uploads/2023/07/ghiblipark_w1920h1088_20240422-1024x580.png)


![Onigiri is hot right now! Summary of Osu's Onigiri Specialty Shops [5 selections].](https://life-designs.jp/wp/wp-content/uploads/2023/11/onigiri-1024x768.jpg)
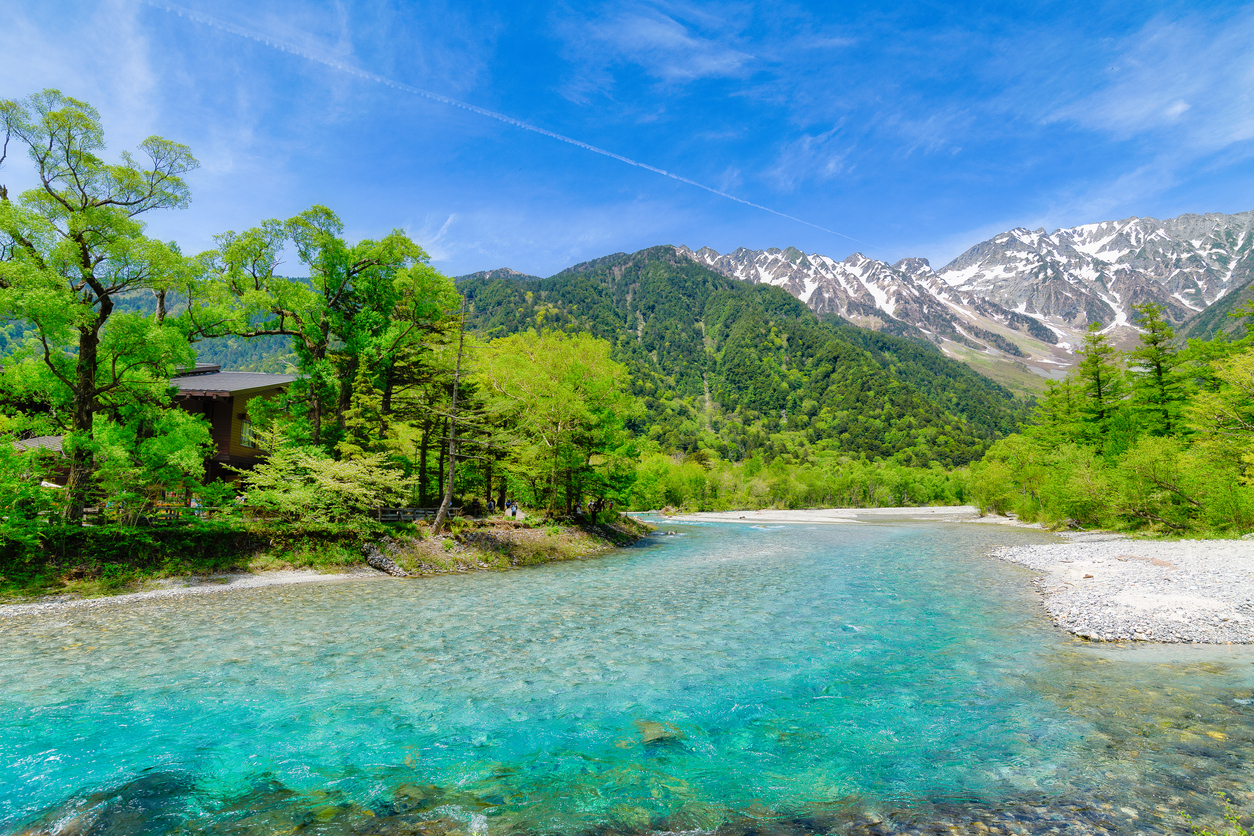
![[Within 2hrs by Car] 12 Outing Areas where You can Go on a Day Trip from Nagoya!](https://life-designs.jp/wp/wp-content/uploads/2023/07/odekake12_w1200h900_20240422-768x576.png)
![[2 hours from Nagoya] From mandarin orange picking to local food and contemporary art. Recommended for autumn and winter! A day trip plan to fully enjoy Minami-Ise Town](https://life-designs.jp/wp/wp-content/uploads/2019/12/image17-7-150x100.jpg)
![[14 Selections] Recommended spots to spend the weekend in Kakuozan area of Nagoya](https://life-designs.jp/wp/wp-content/uploads/2022/07/Kakuozan-spot_w1920h1088_240605-328x186.png)