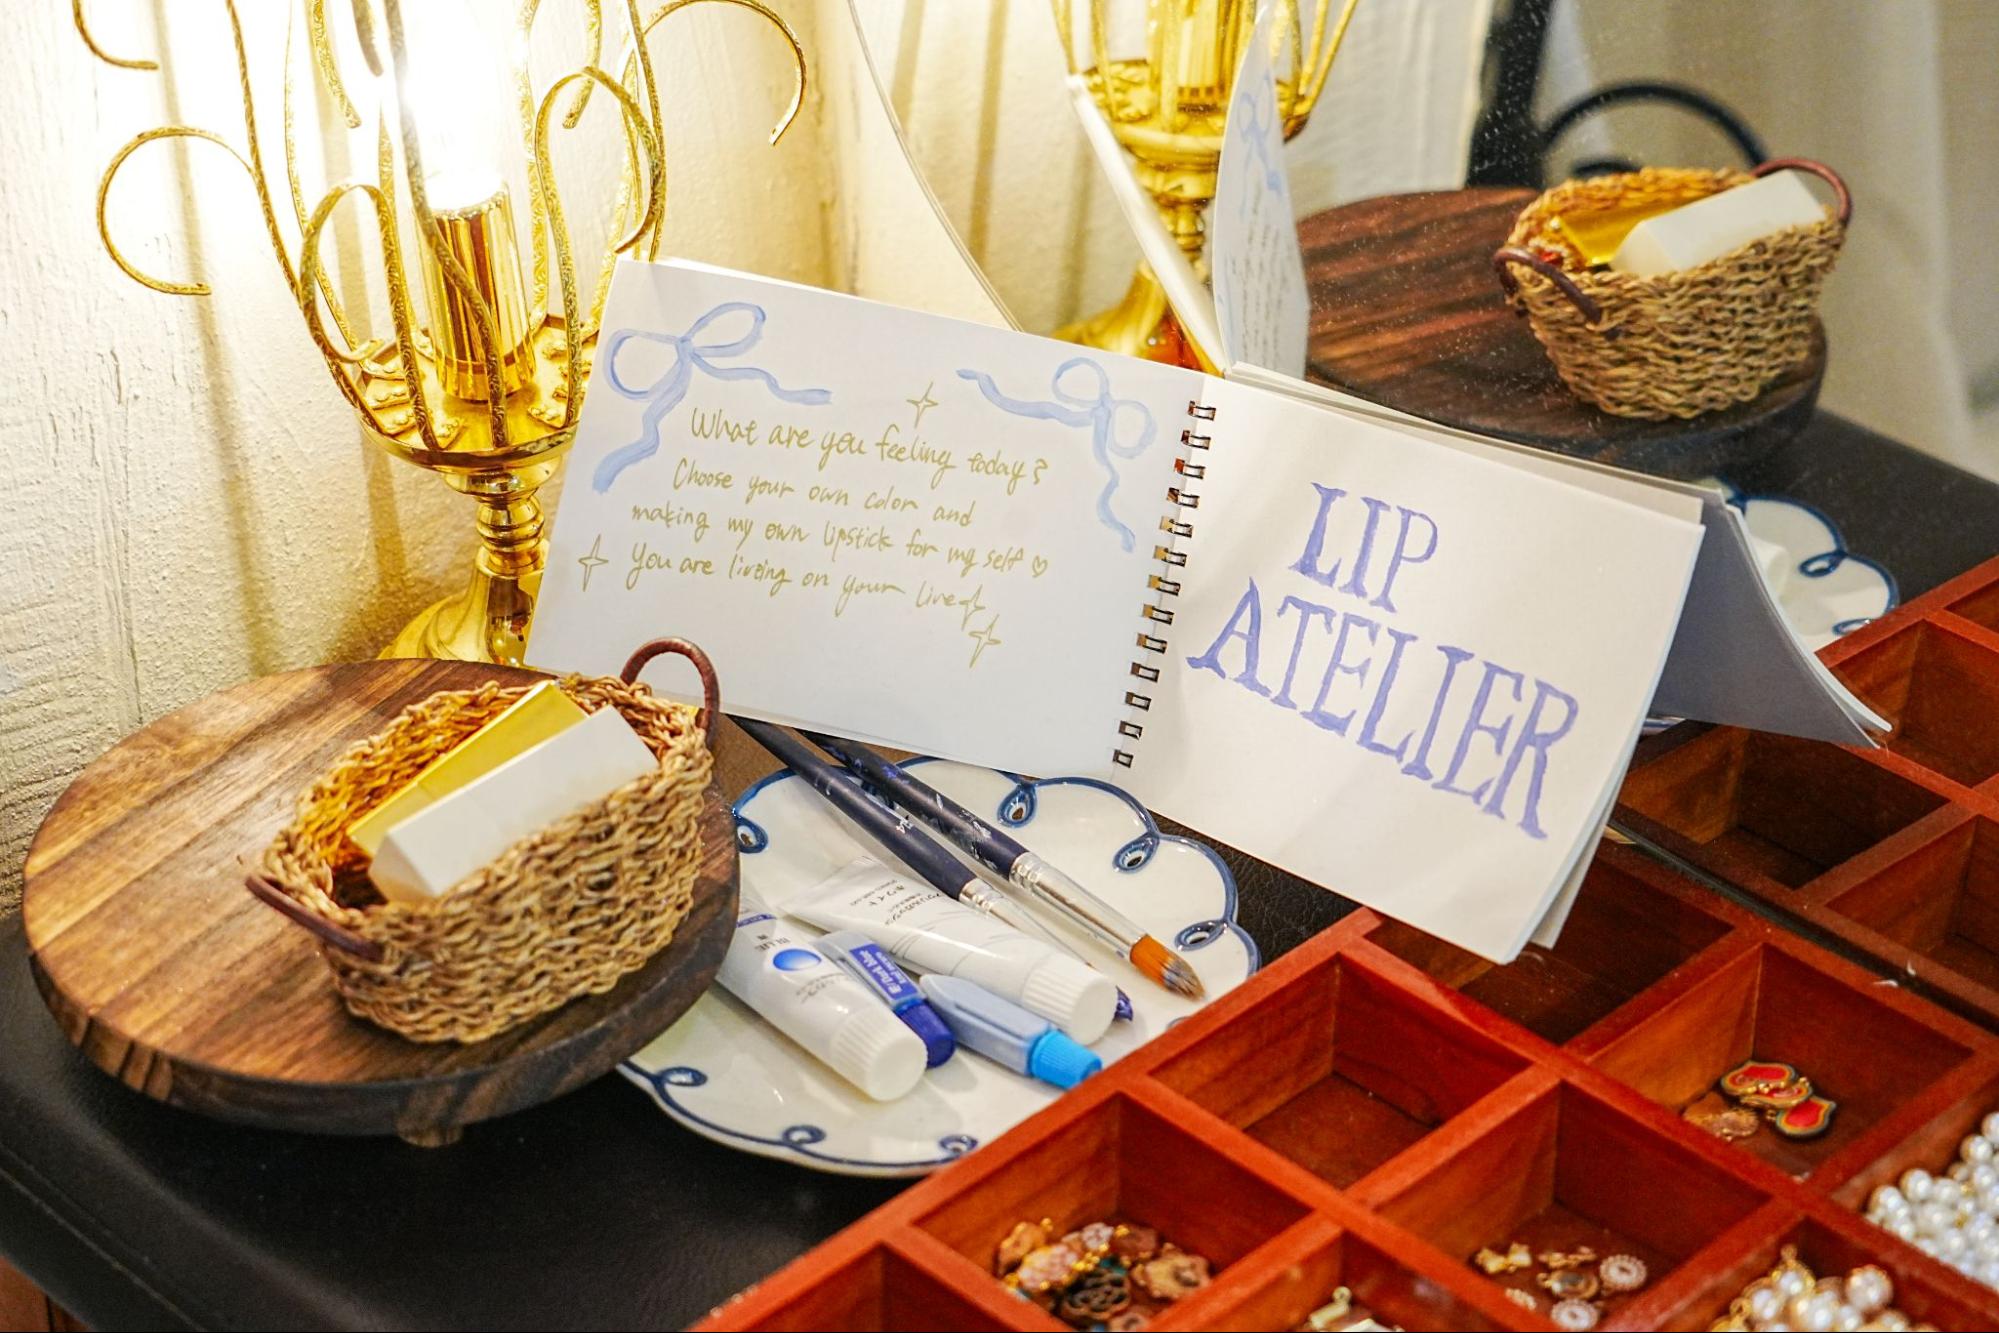
LIP ATELIER, a popular store that opened in Osu, Nagoya in June 2024
This is an atelier where you can experience making the world's one and only original lipstick. The handmade lipstick experience, which has been popular in South Korea and Hong Kong, has now arrived in Nagoya for the first time, following Tokyo and Osaka! It is now a hot spot on SNS and other social networking sites.
Table of Contents
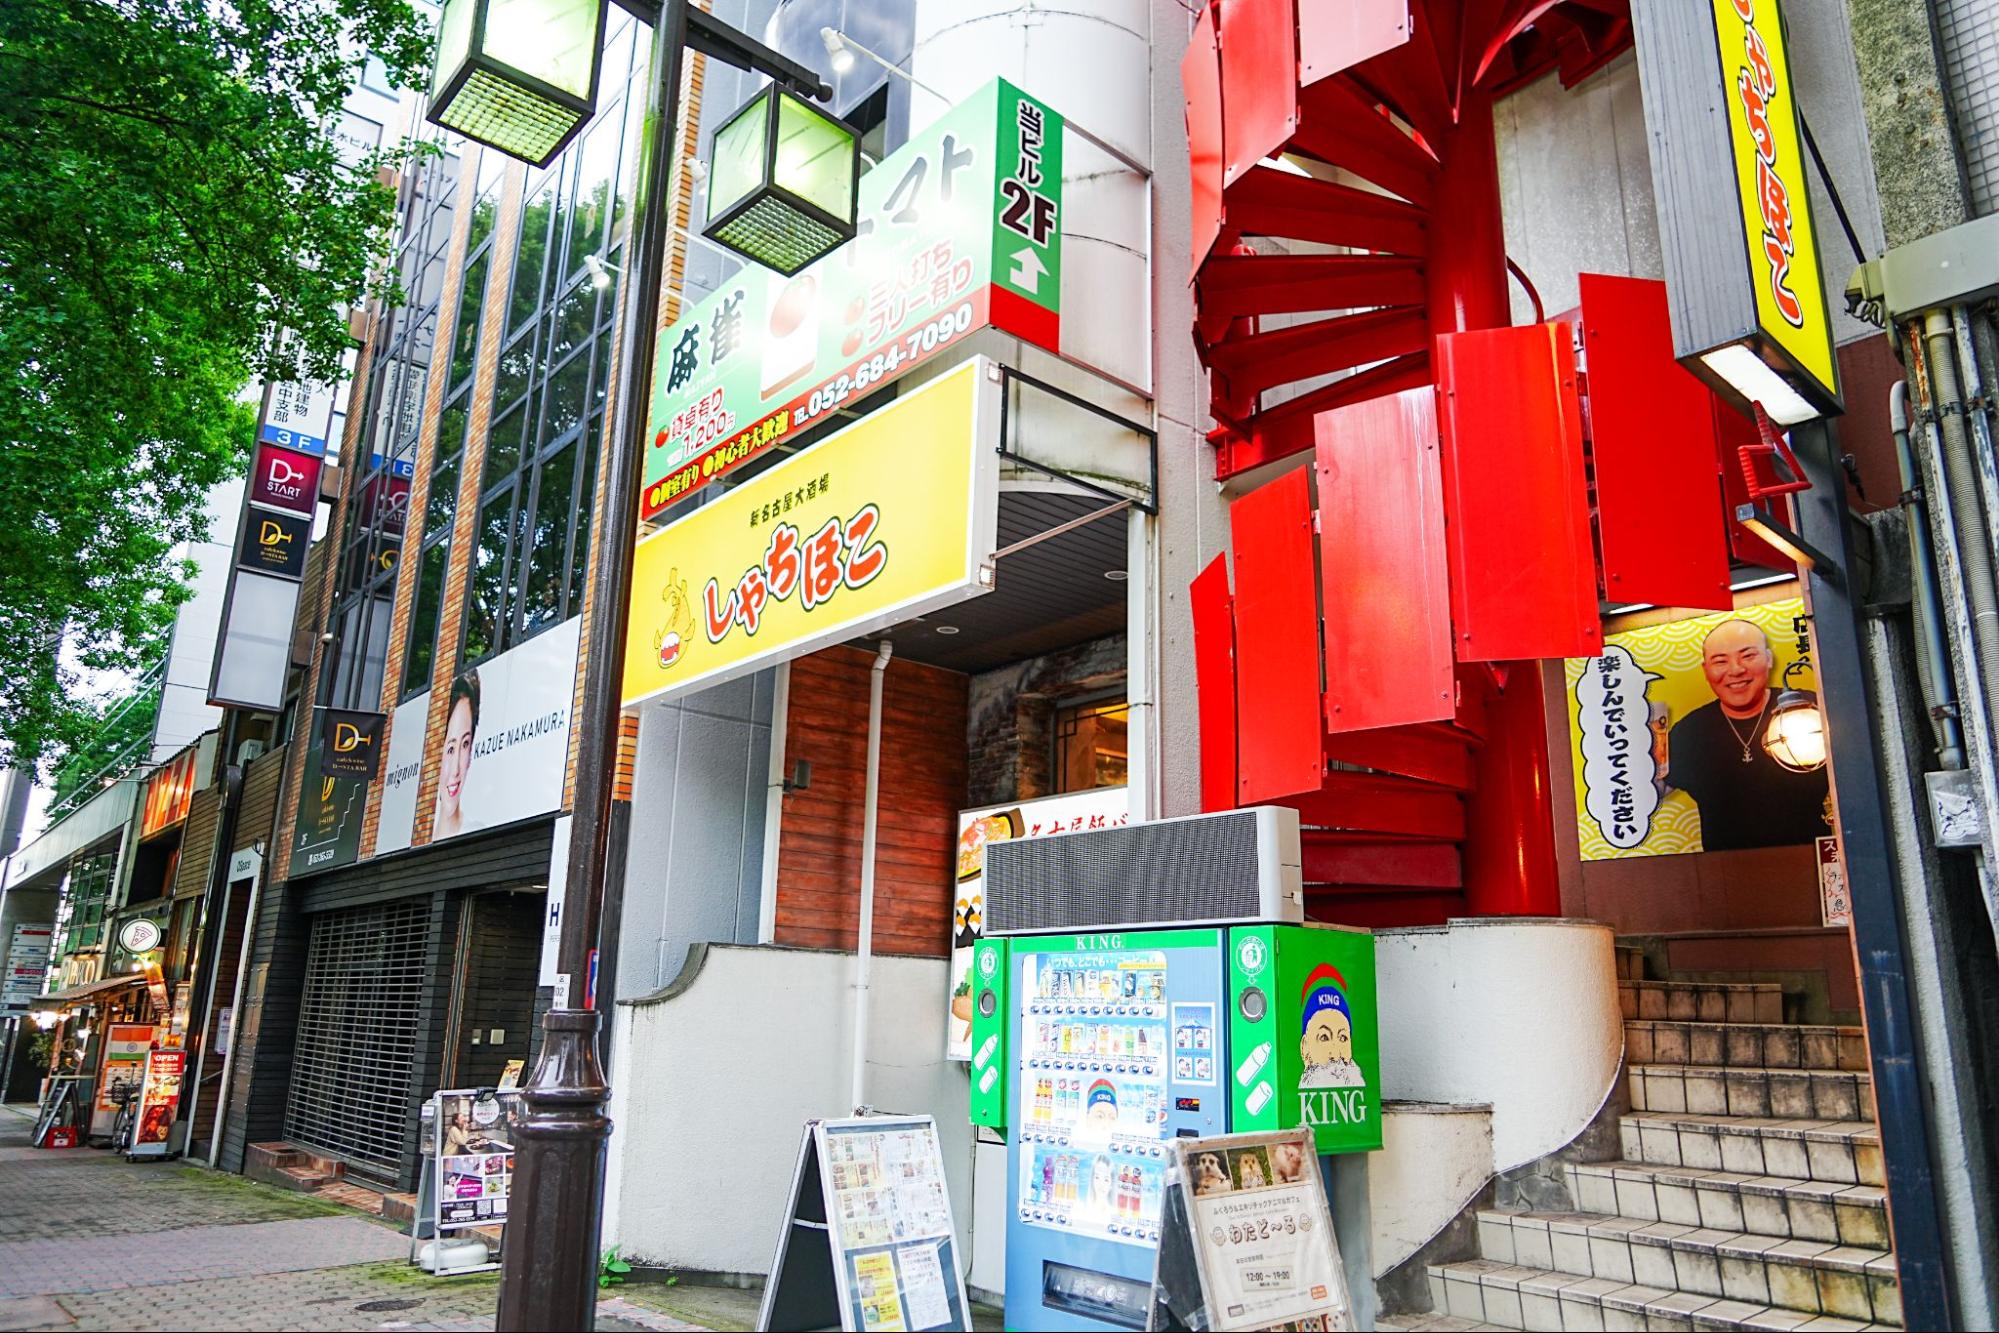
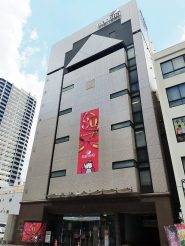
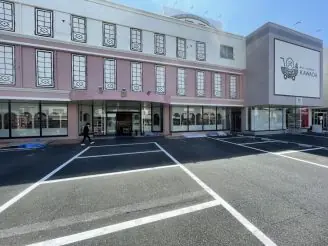
Sunport Yaba Building, where "LIP ATELIER" is located
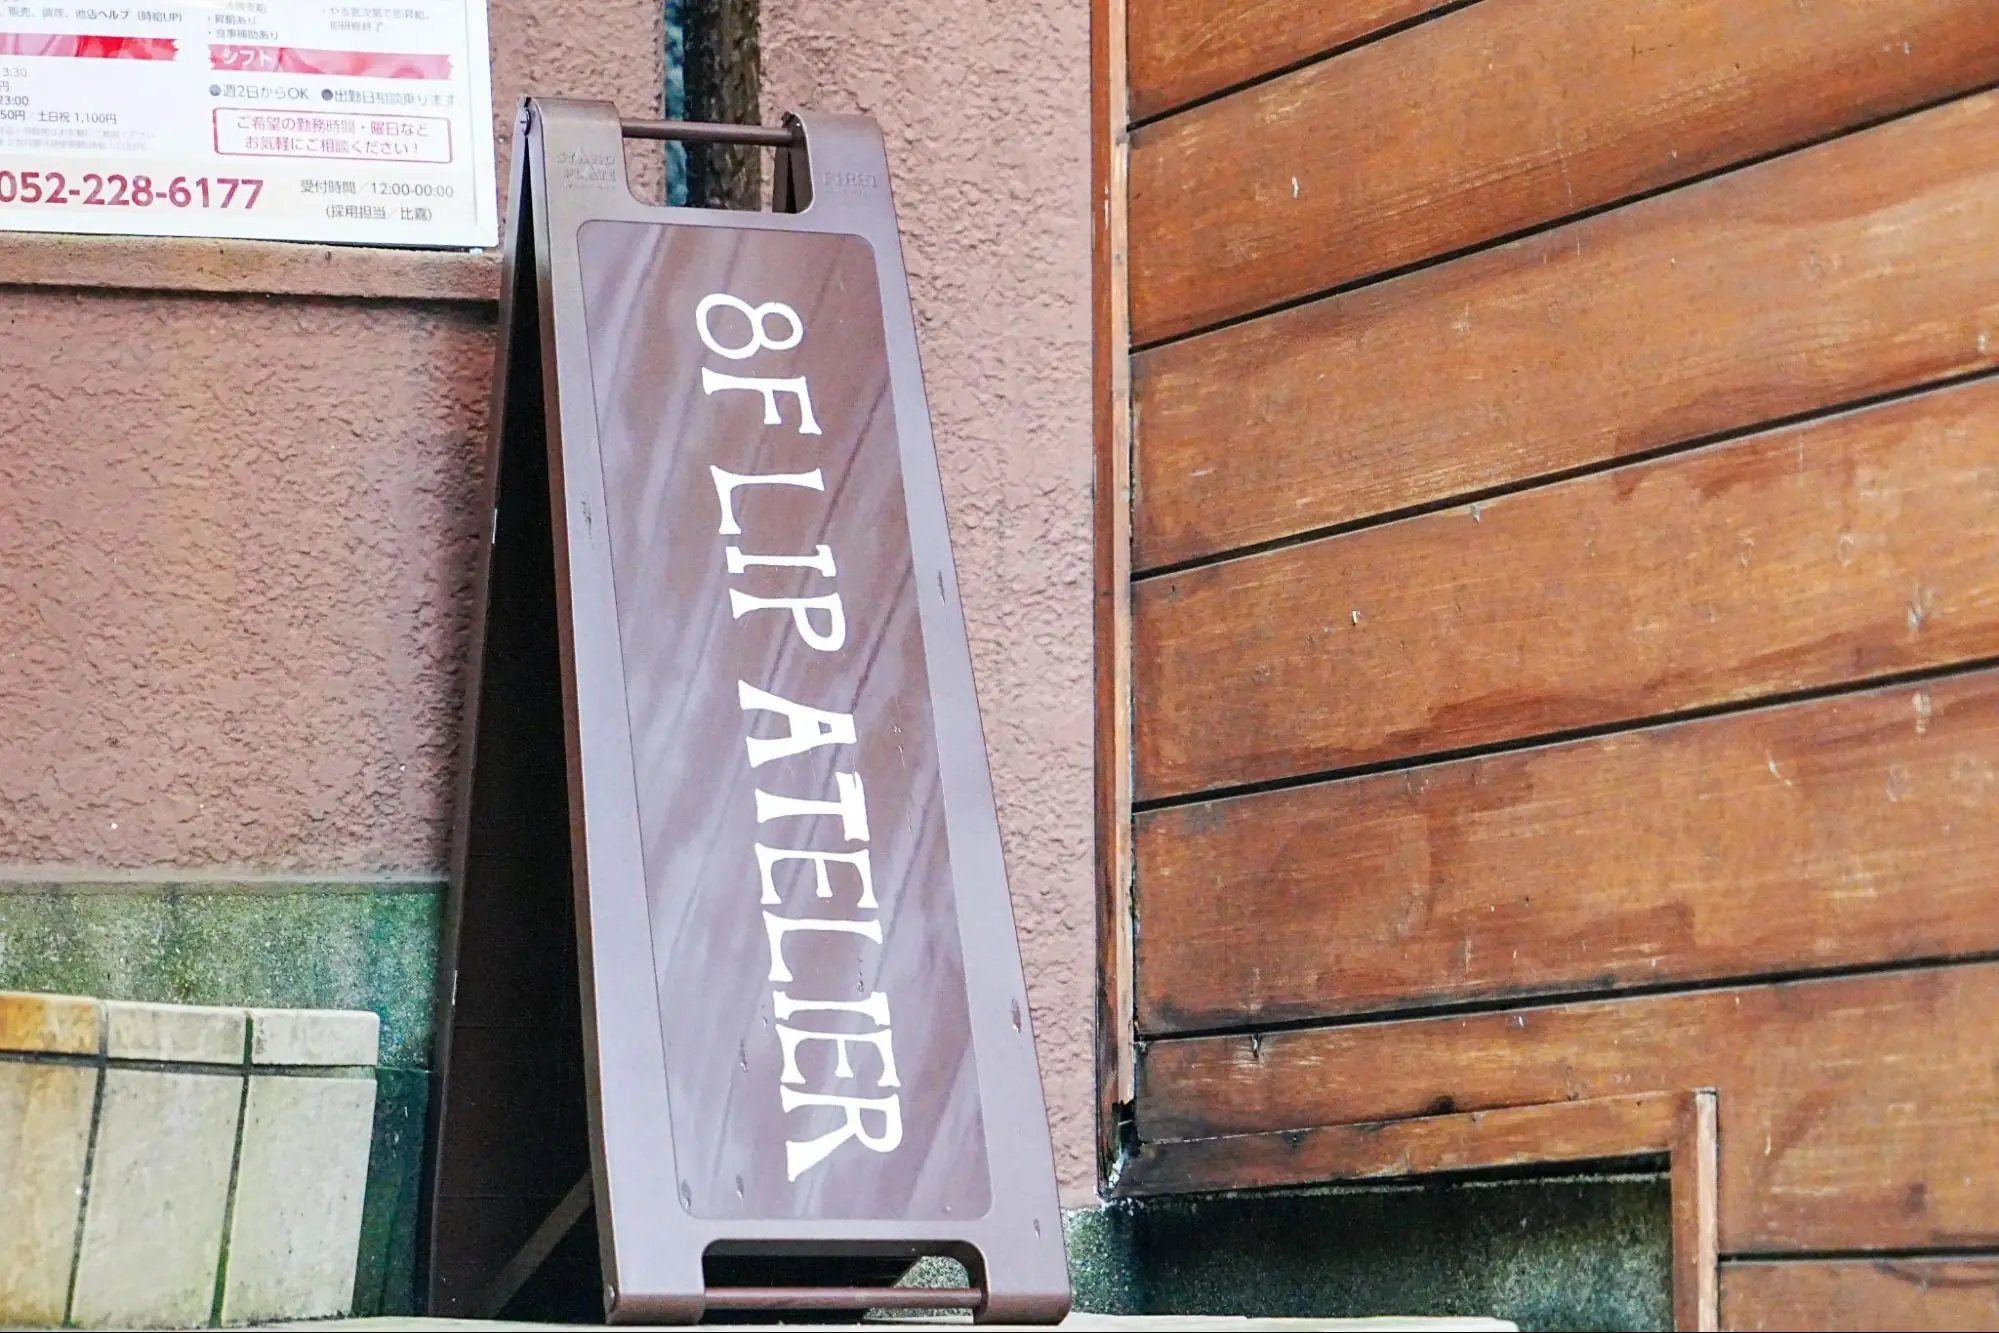
Look for this signboard
It is located about a 3-minute walk from Exit 4 of Yabacho Nagoya Municipal Subway. It is on the 8th floor of the Sunport Yaba Building, which also houses the karaoke bar Maneki Neko and other restaurants.
It's a little difficult to find, so look for the sign that says "LIP ATELIER"!
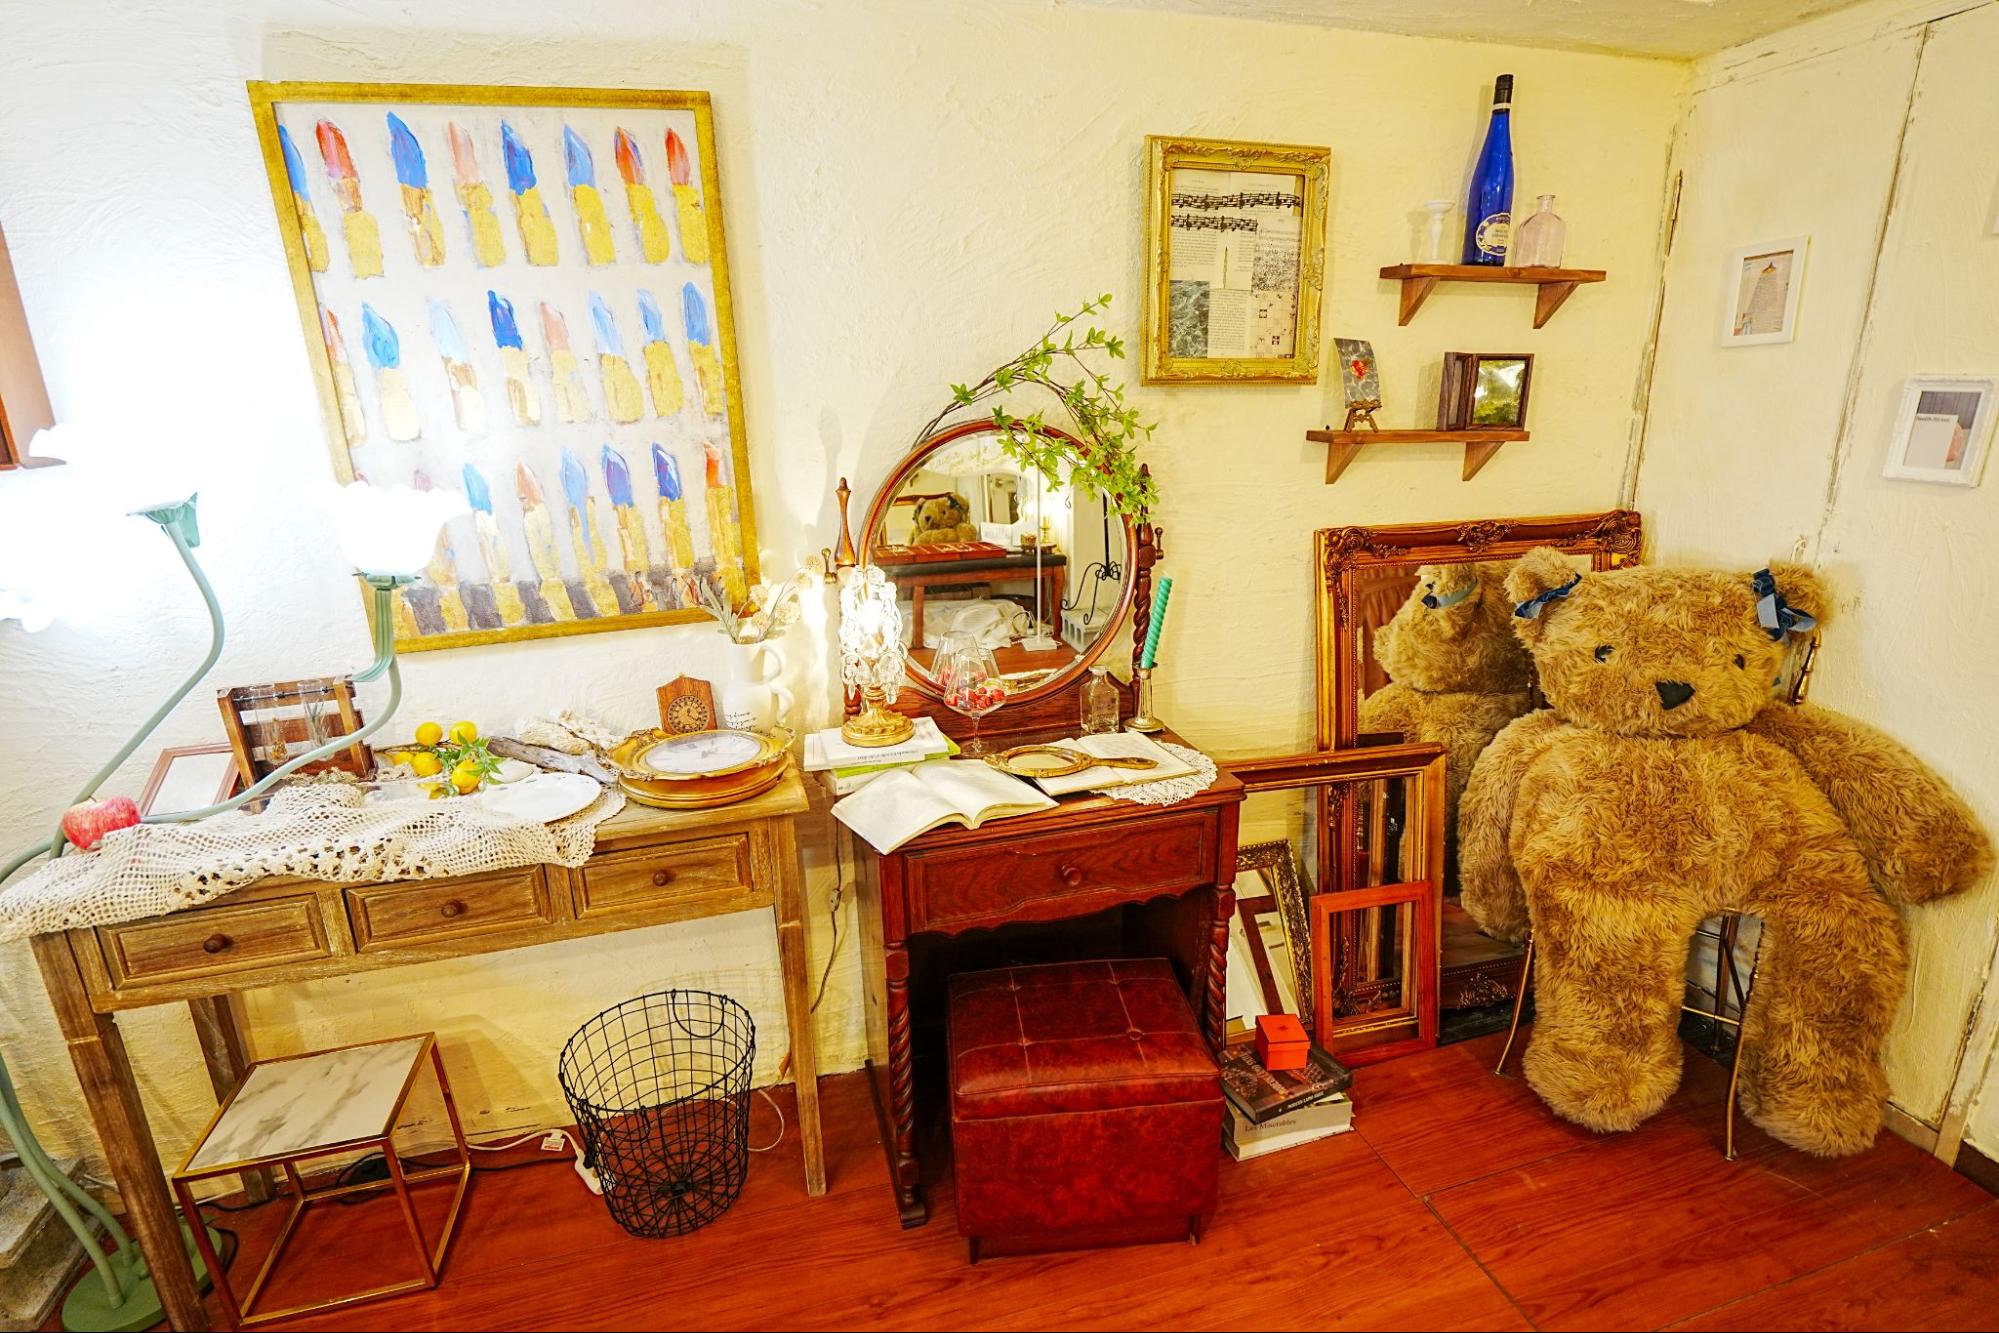
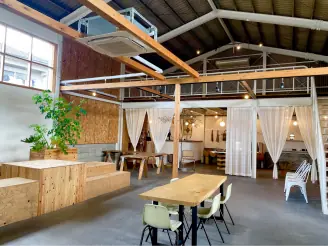
A large teddy bear welcomes you
Antique and stylish space
Once inside, you will find a space with an outstanding world view, decorated with antique-style interior and cute stuffed bears. The many fashionable knick-knacks lined up in a row are so cute that you can't help but exclaim, "How cute! You can't help but exclaim, "How cute!
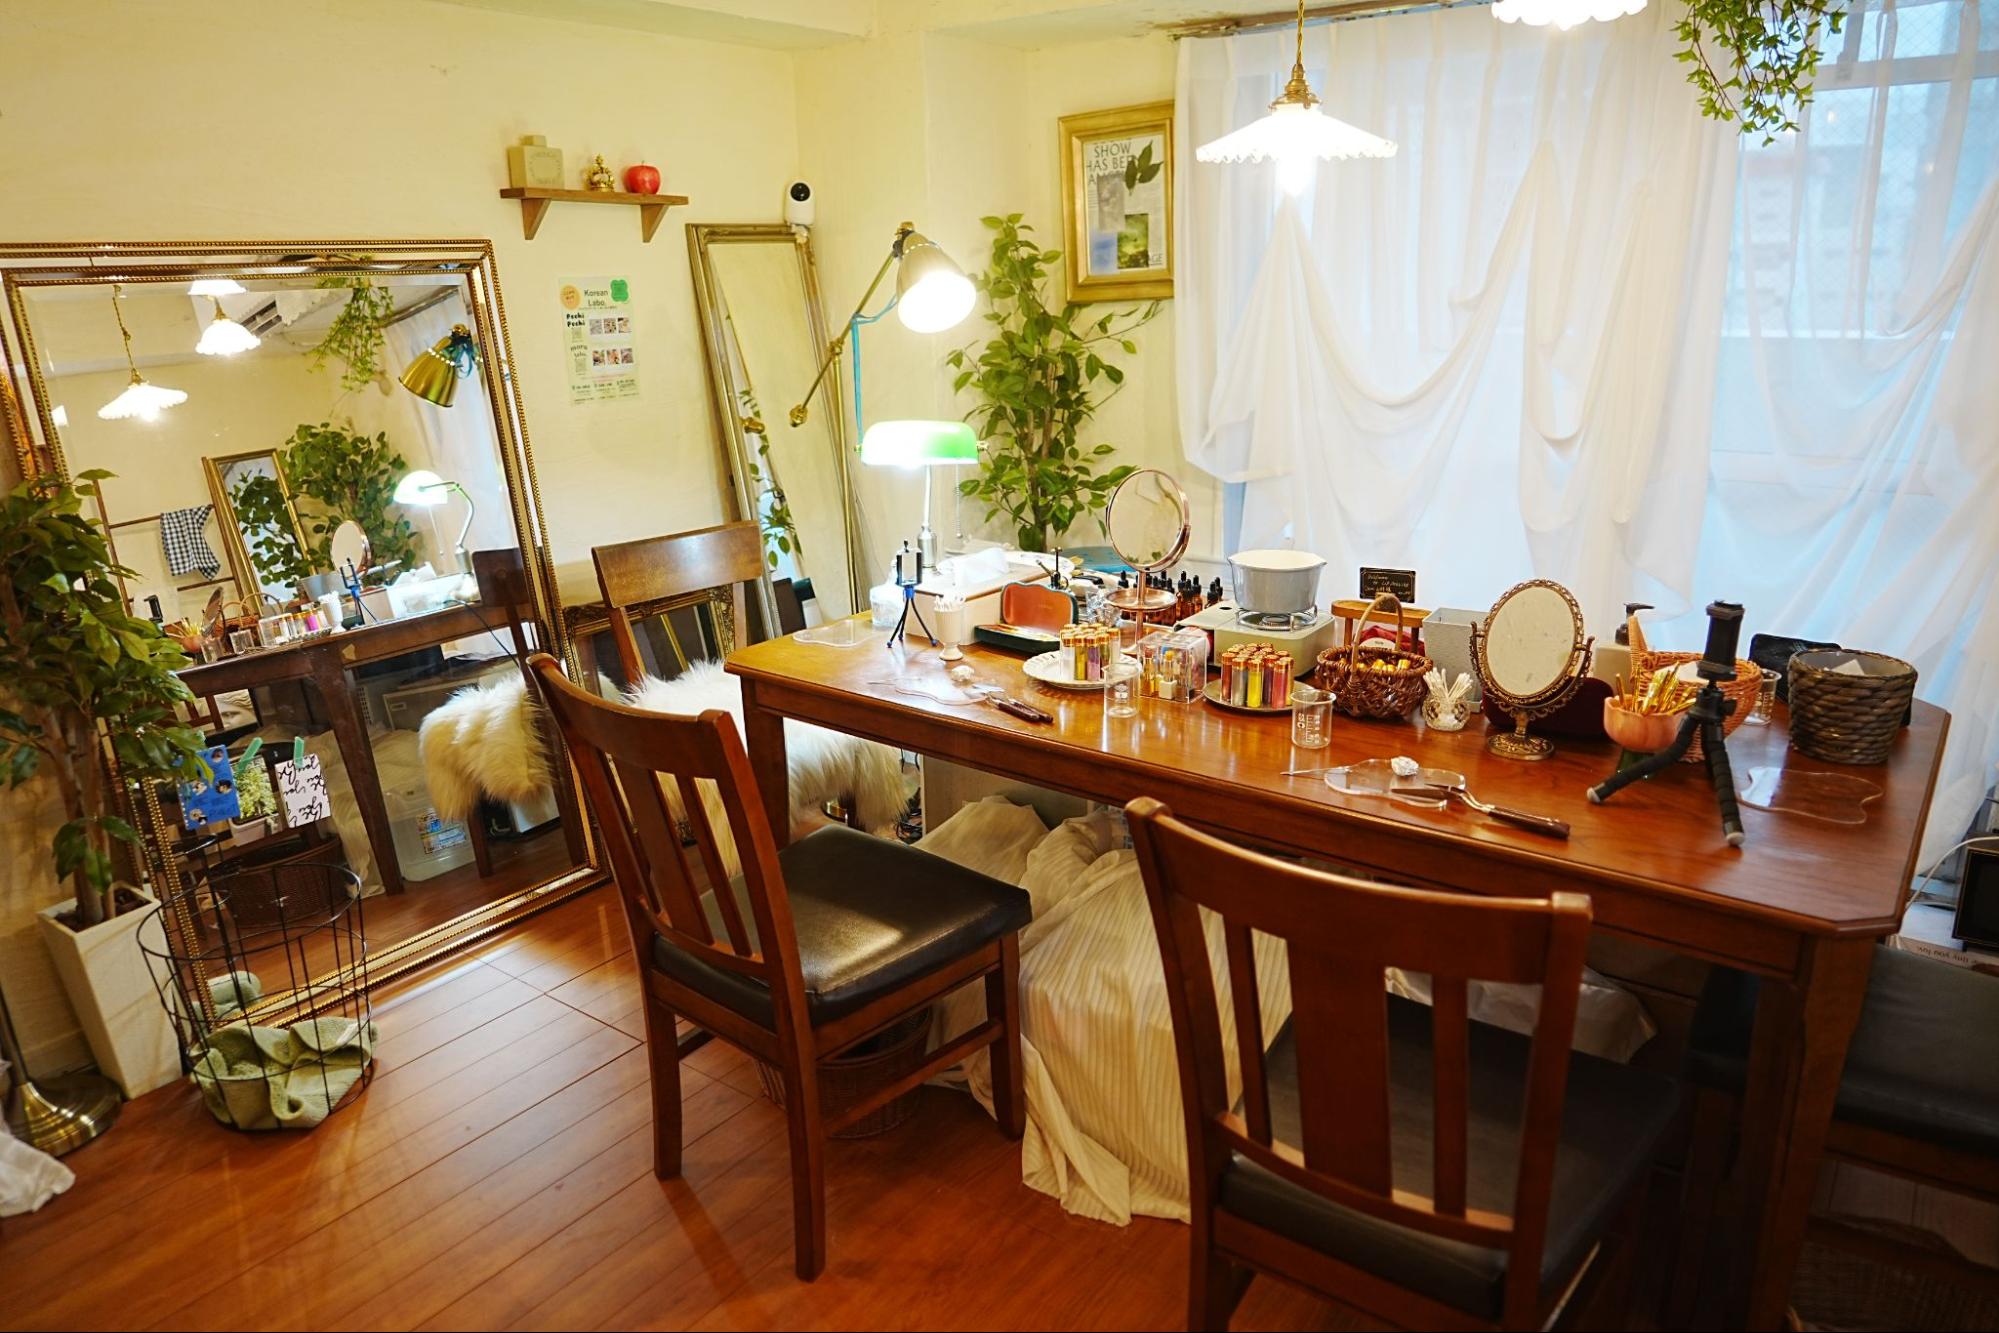
Space for lip crafting experience
The lip crafting experience is limited to eight groups per day. Reservations are required, so you can immerse yourself in the experience in a private setting!
Reservations are accepted on the web from 0:00 a.m. two weeks (14 days) prior to the desired date of visit. The basic fee is 10,000 yen for two people, and one of each can be made. (1 to 4 people can be accommodated per group; if you would like more than 5 people, you will need to confirm by DM.)
Experience making your very own one-of-a-kind lipstick!
From here, we will send you a report on our experience in lipstick production! Here is a summary of the production process and key points.
If you're interested in going, please use this article as a reference.
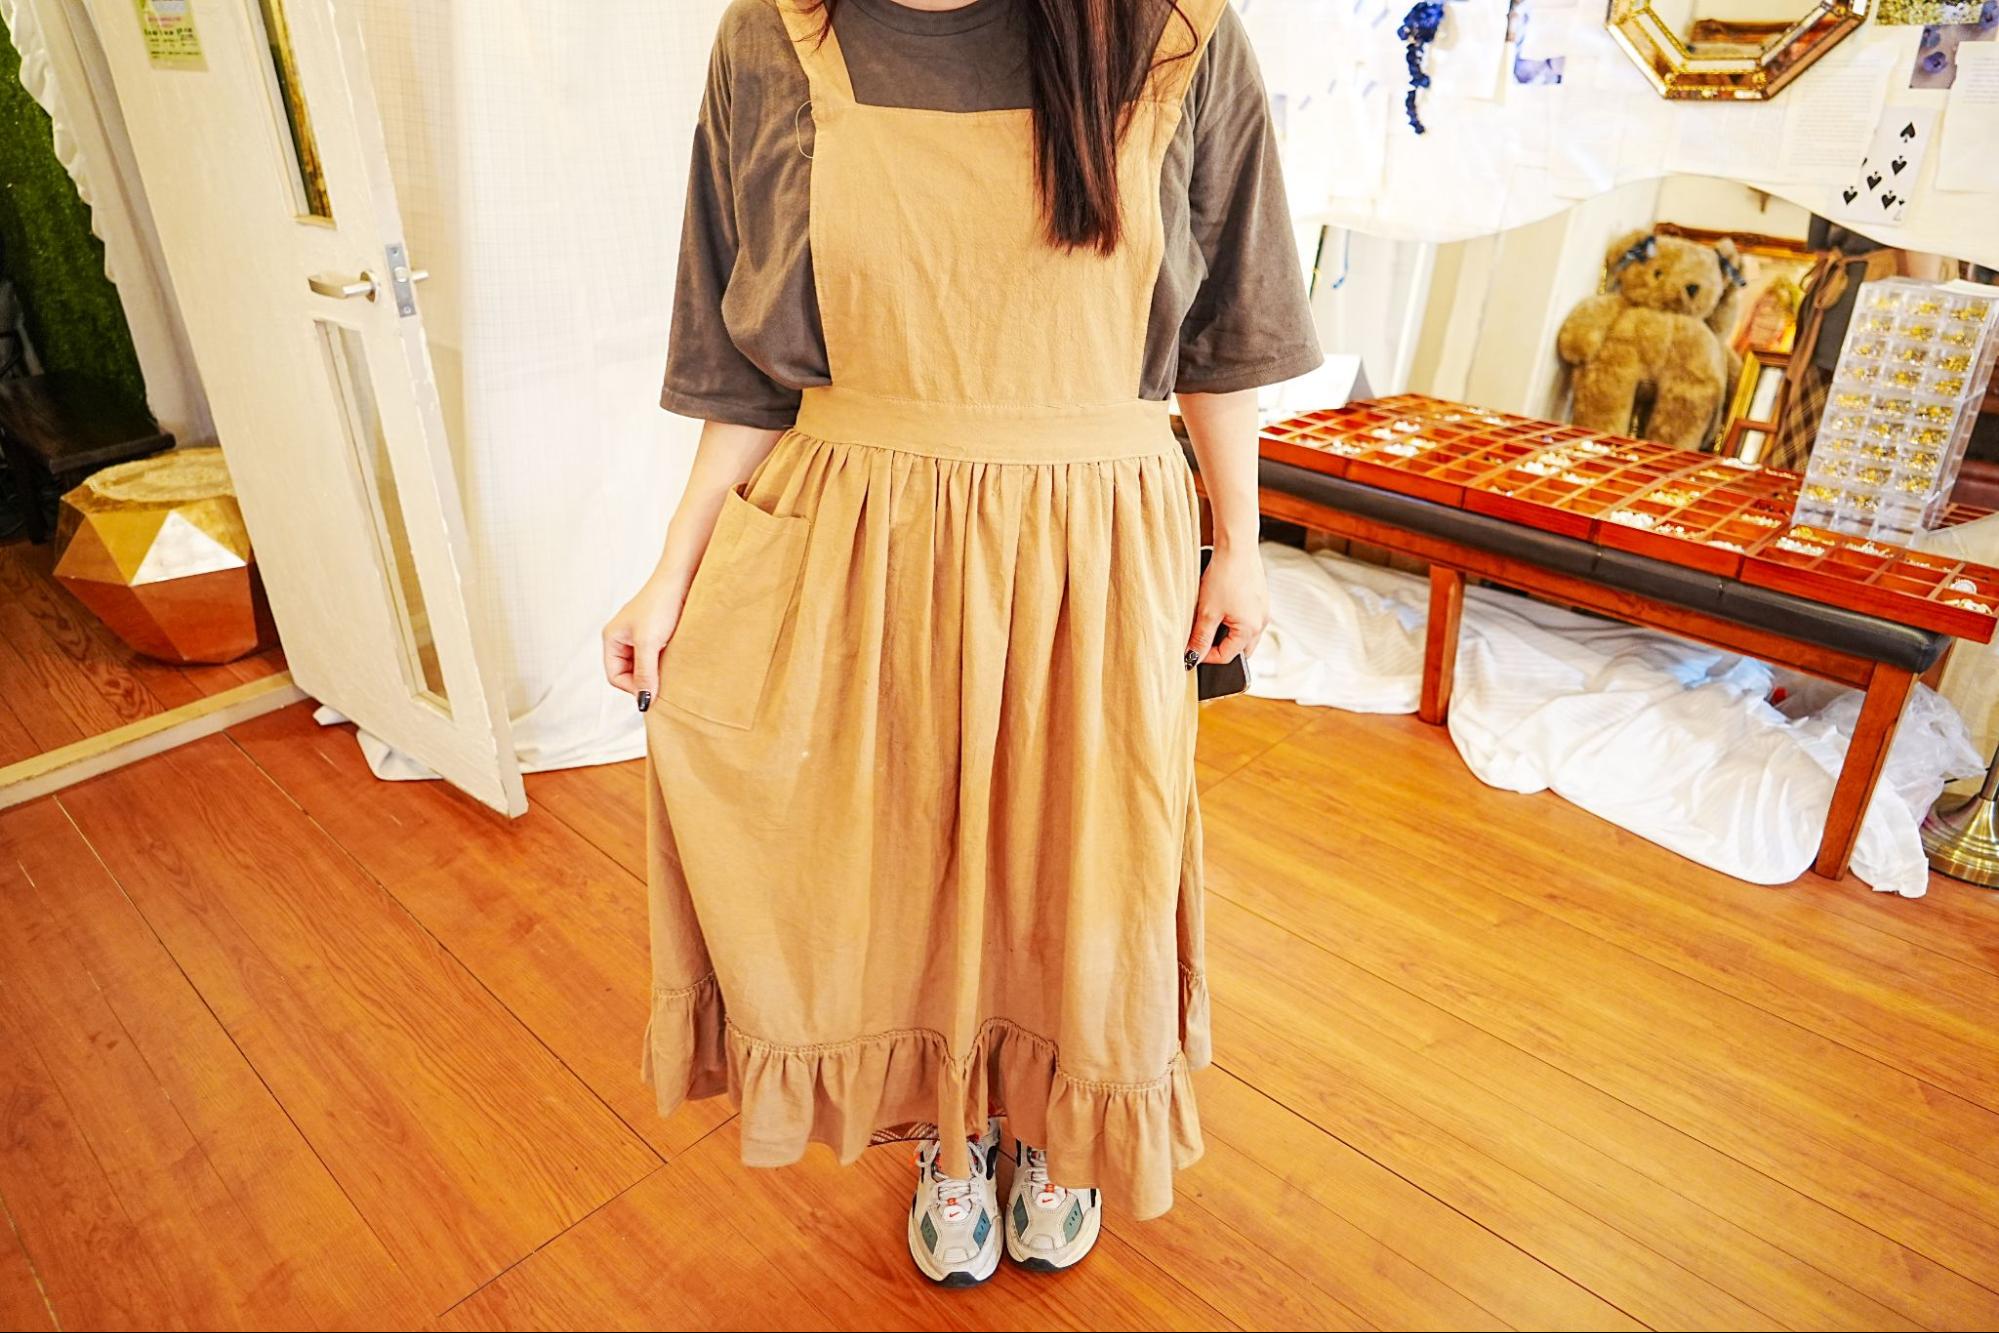
A cute apron will lift your spirits!
Checking precautions
Before starting, you will check your confirmation in electronic written form. Please note that this is a workshop style where you make your own lips with your own hands. Since the production of cosmetics is regulated by law, it is not acceptable to ask the store staff to make the lipstick for you or to make your own lipstick for someone else.
Be sure to understand the points to check in advance and enjoy the experience!
Choose your favorite scent from 11 different flavors
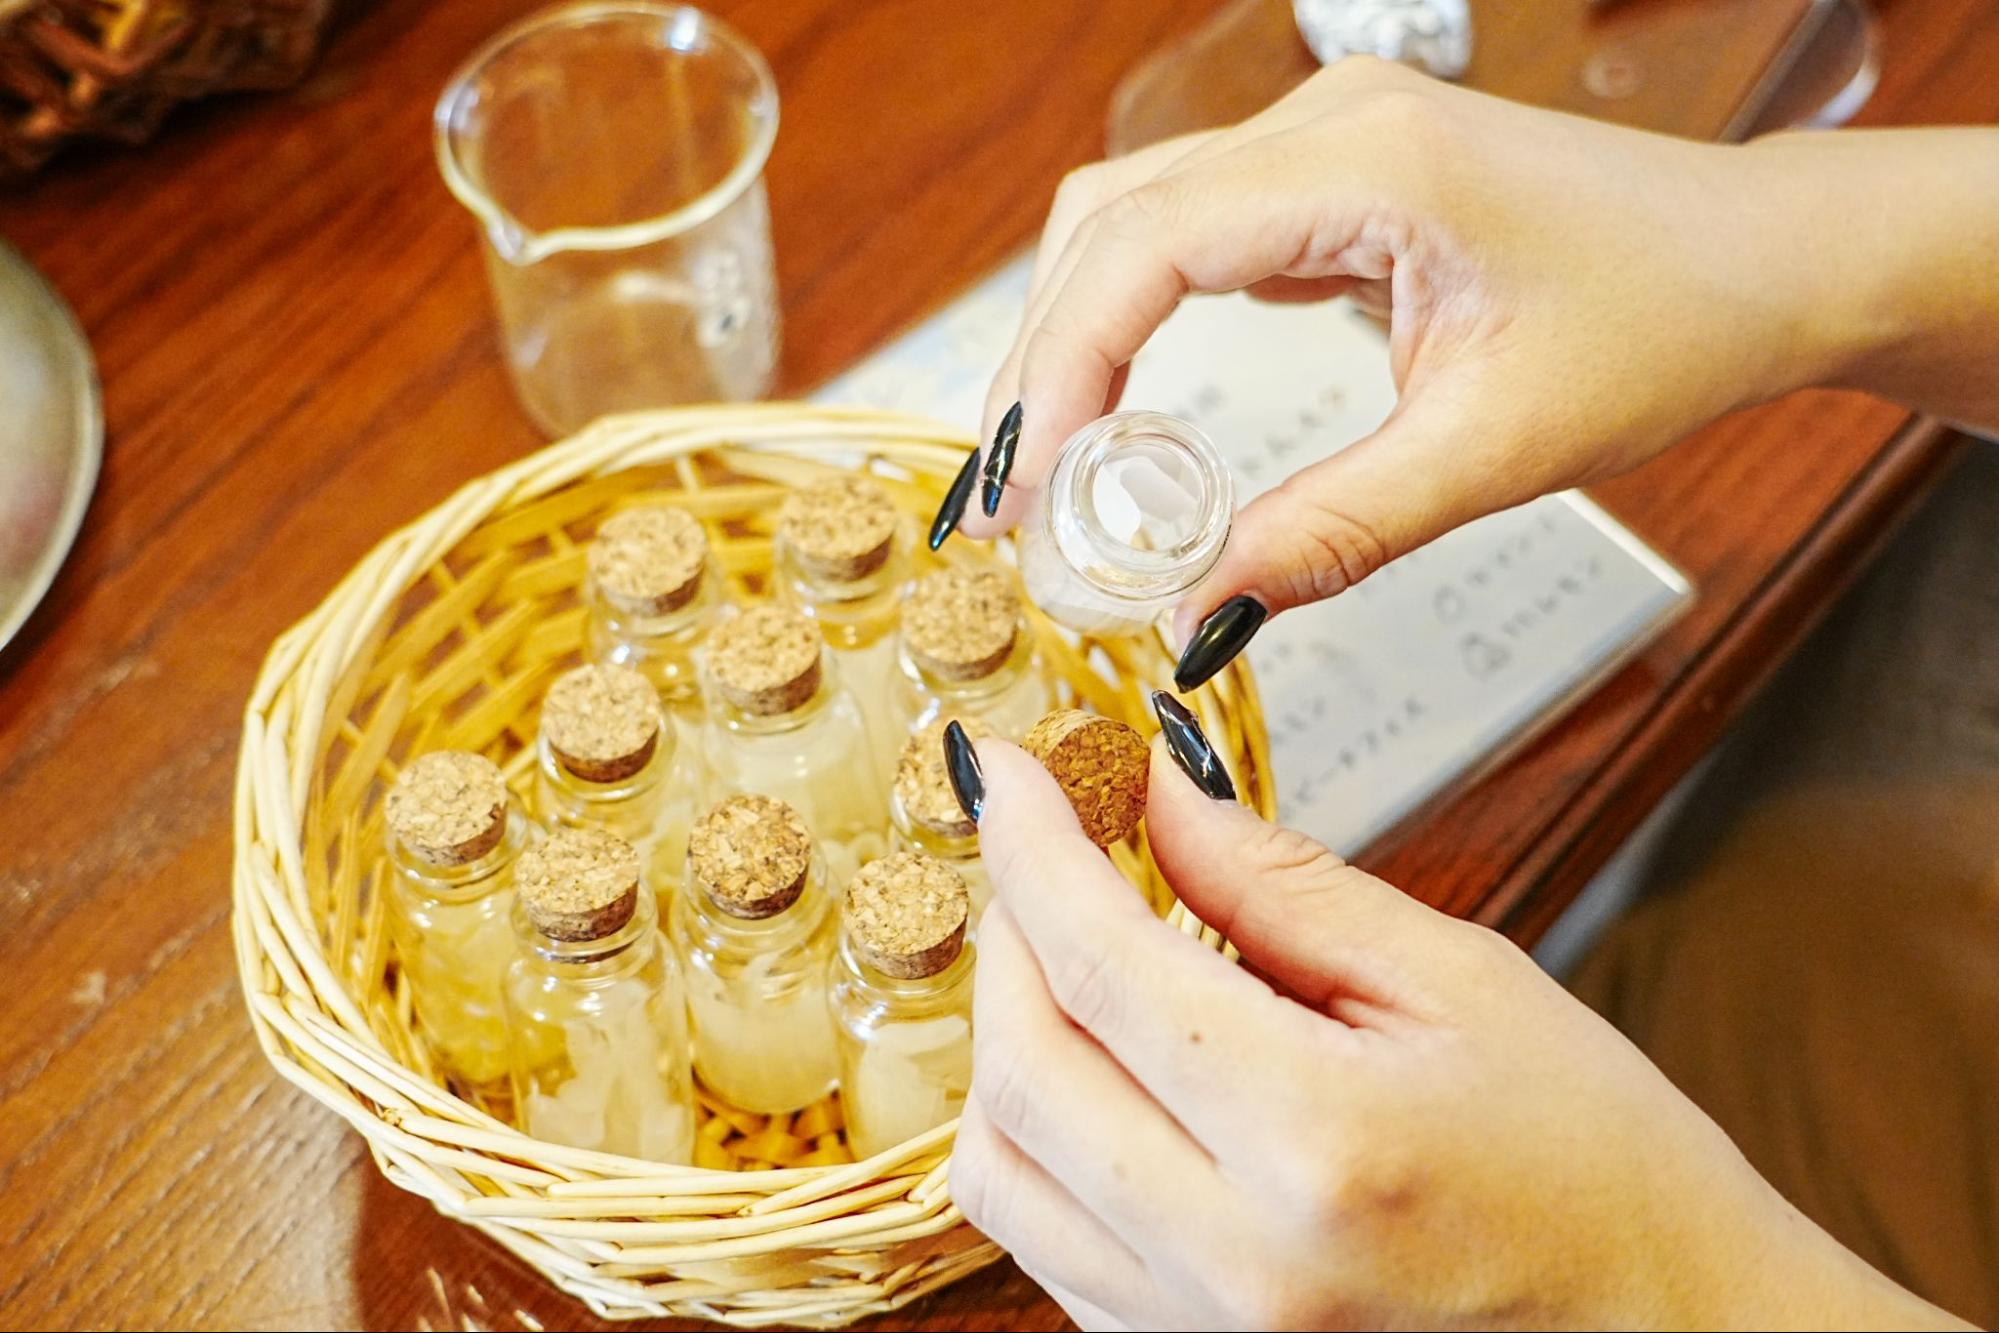
11 different flavors
First, choose your favorite scent from 11 different flavors.
The most popular flavor is "Black Tea," which has a refreshing aroma unique to black tea. Think carefully about how it will look on your lips.
This time, I chose "Wood," which has a sophisticated scent.
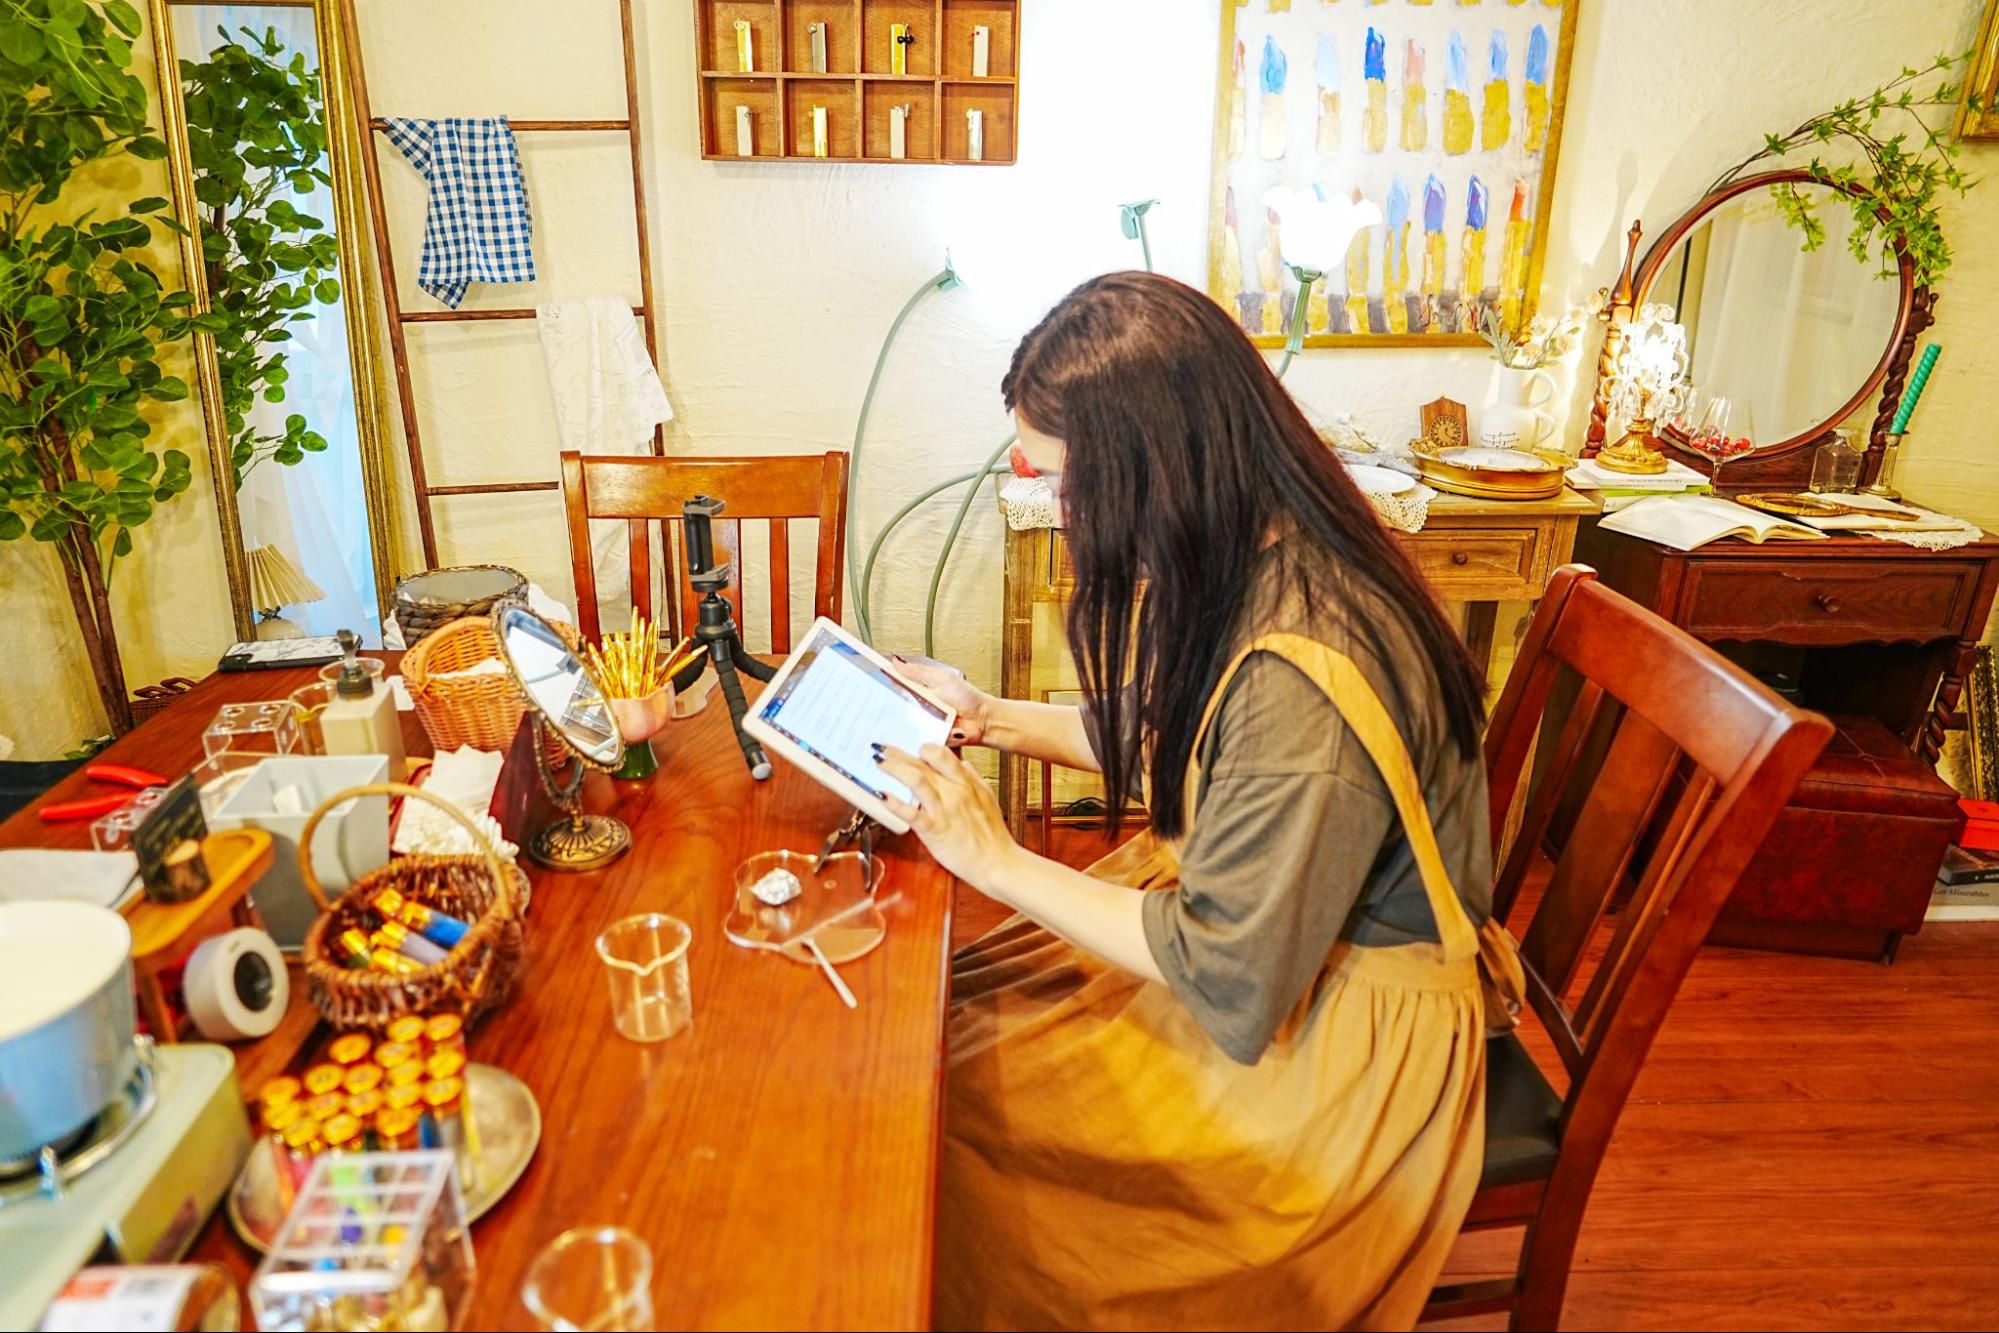
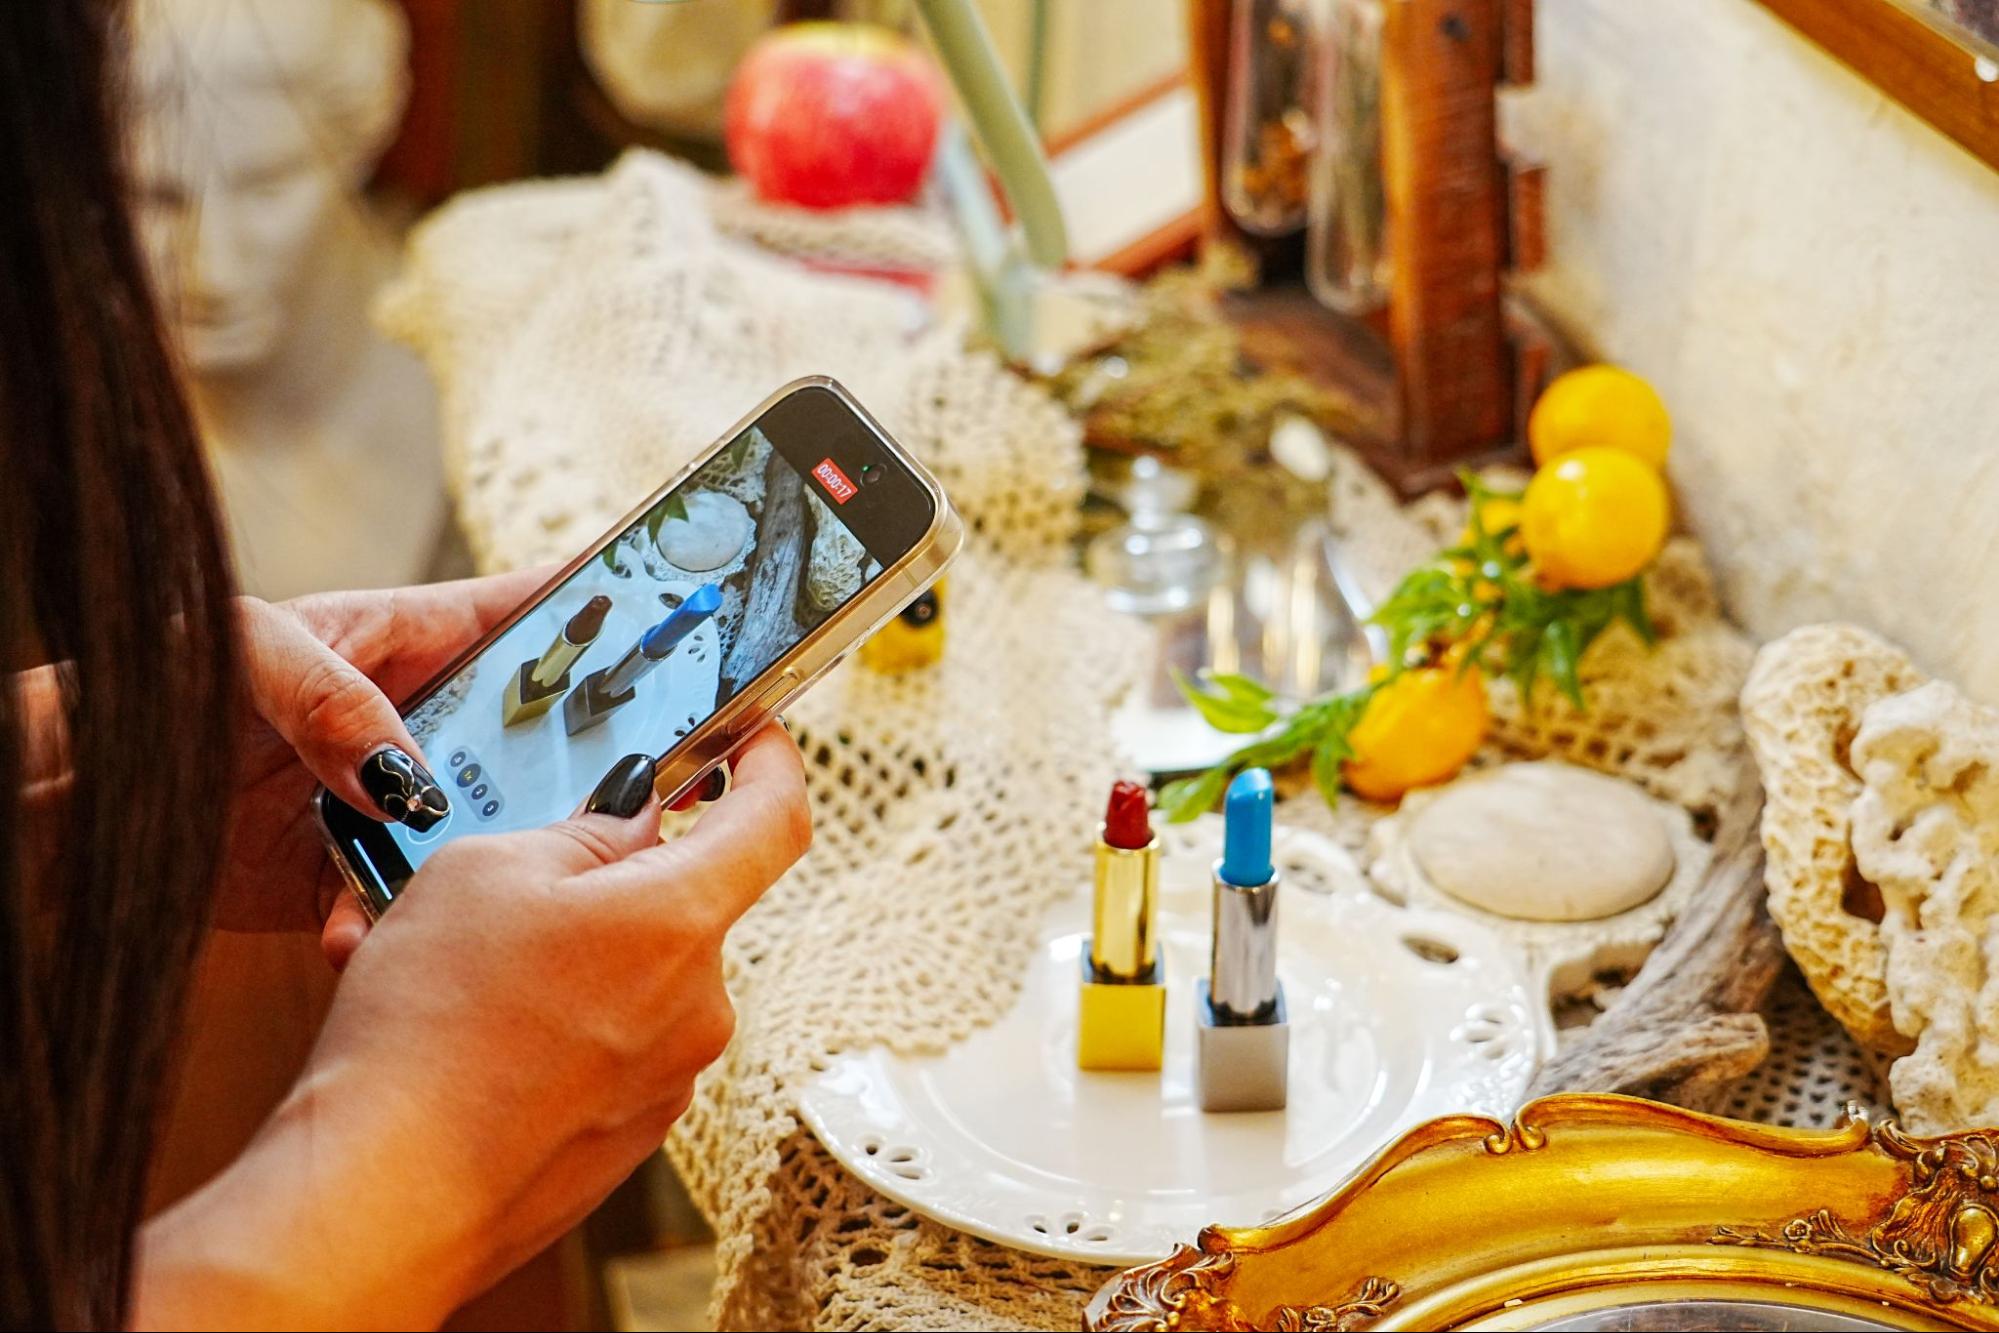
There is a smartphone stand on the table that you can use freely. You can also take videos or time-lapse videos of the crafting process.
Choose your favorite color from a variety of colors to suit your taste

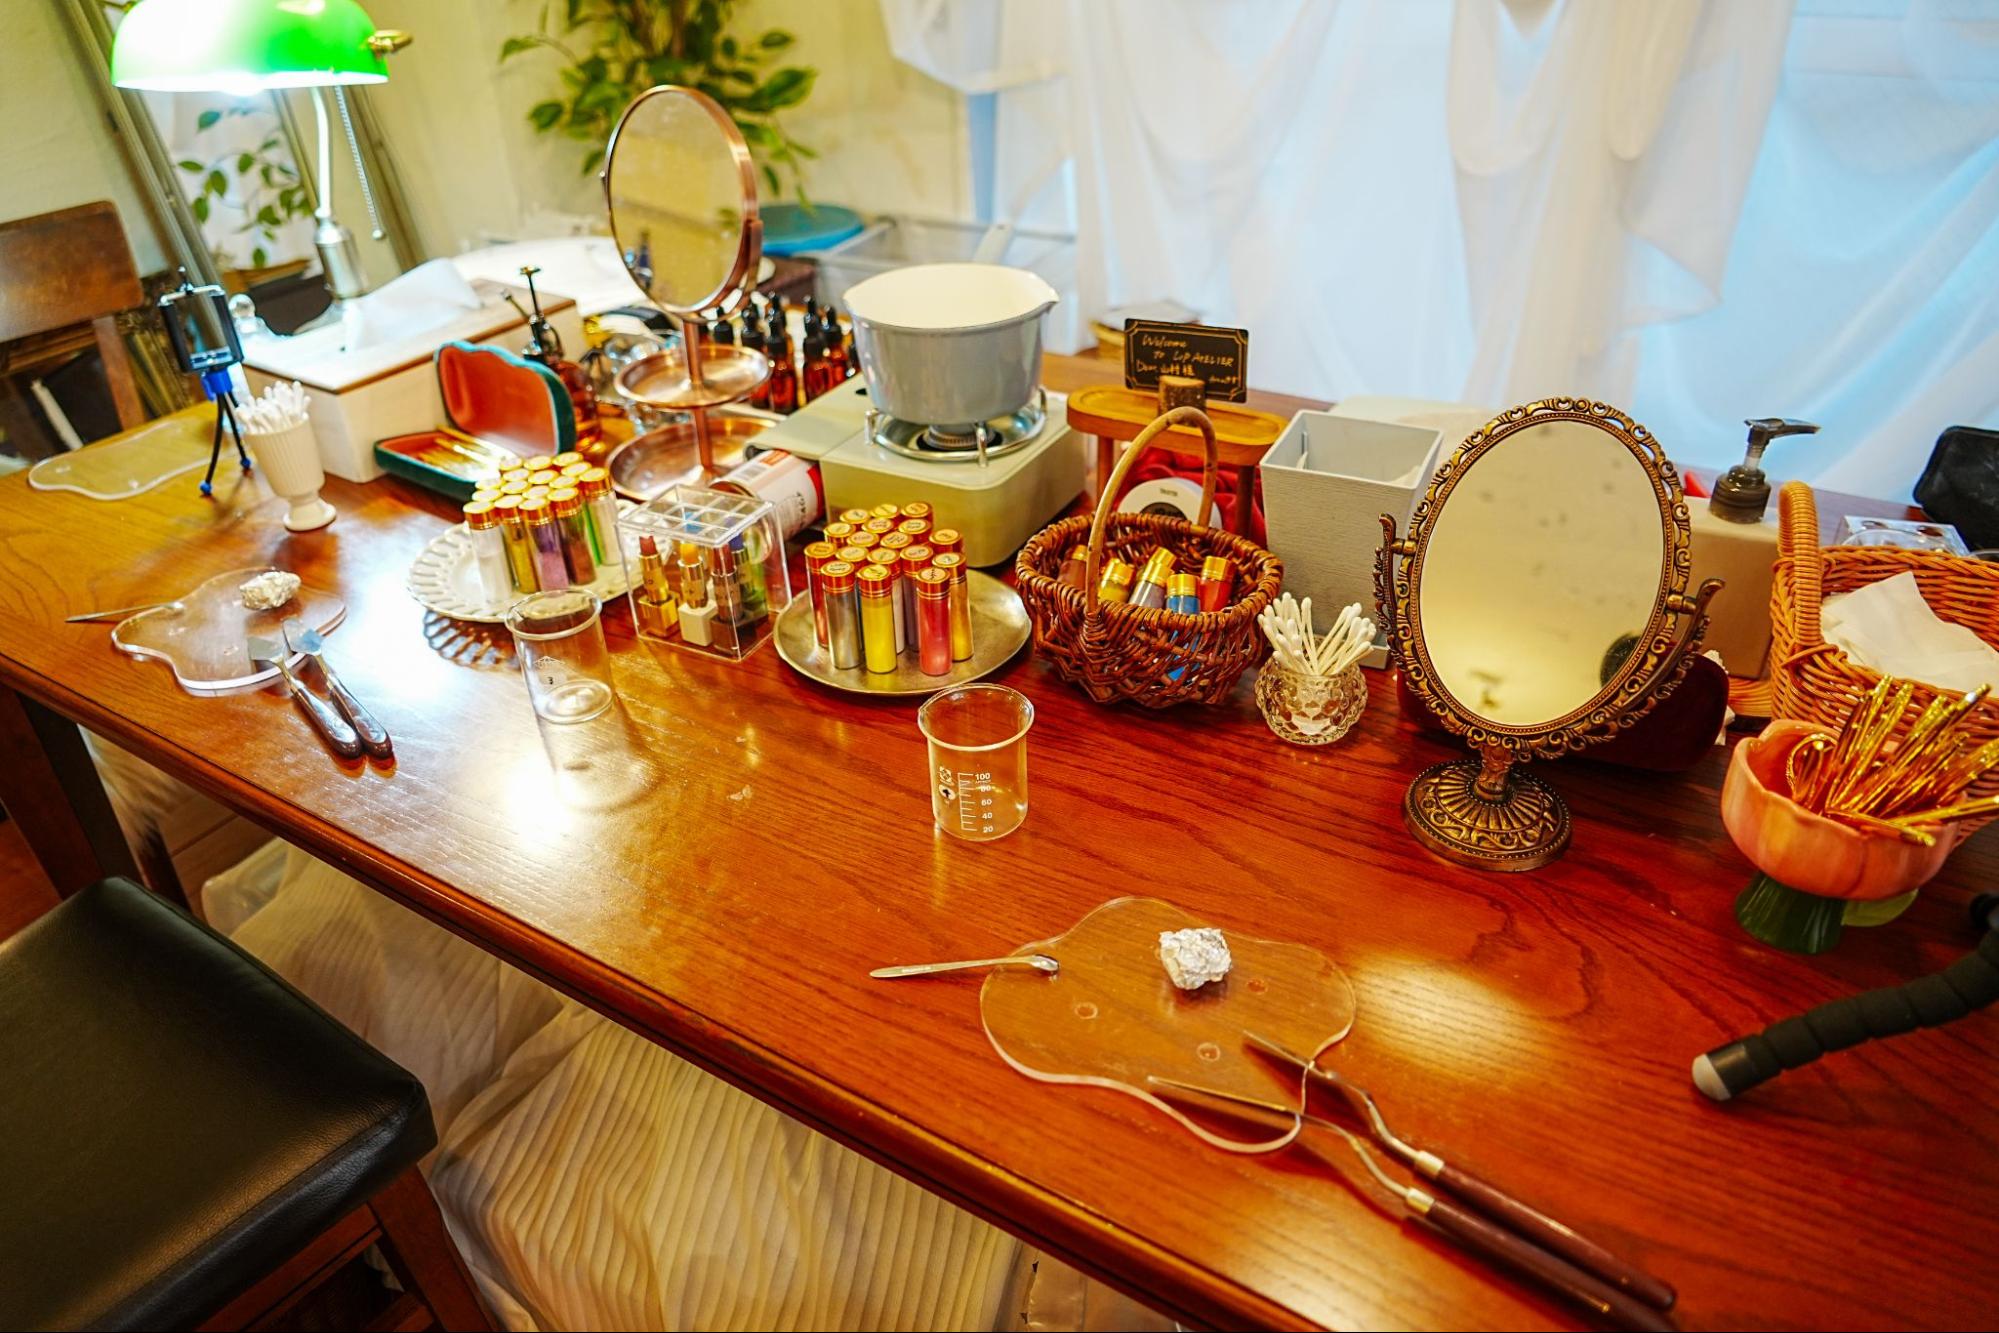
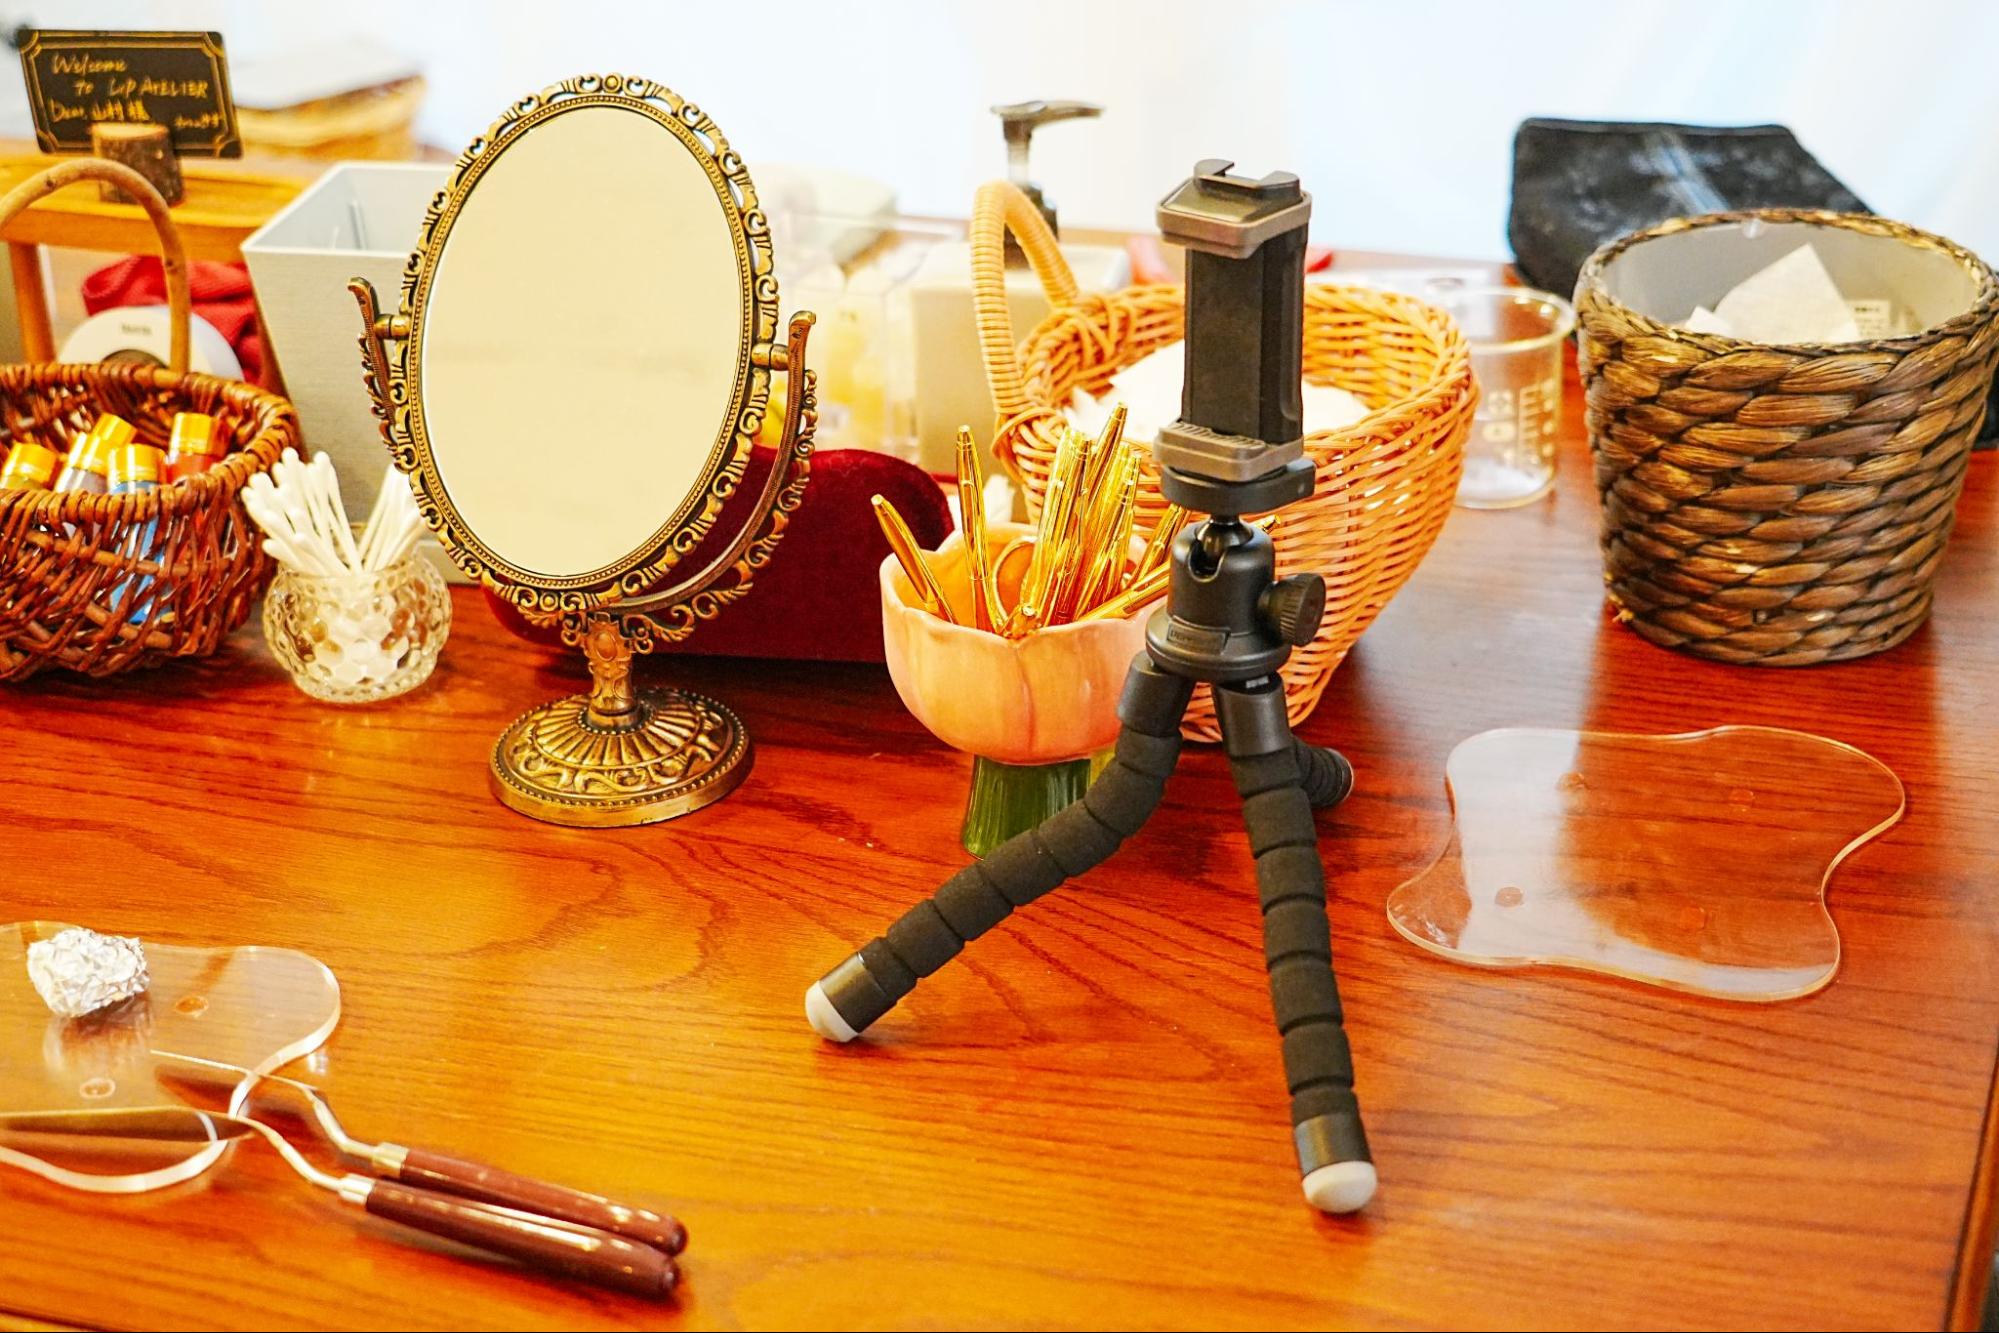
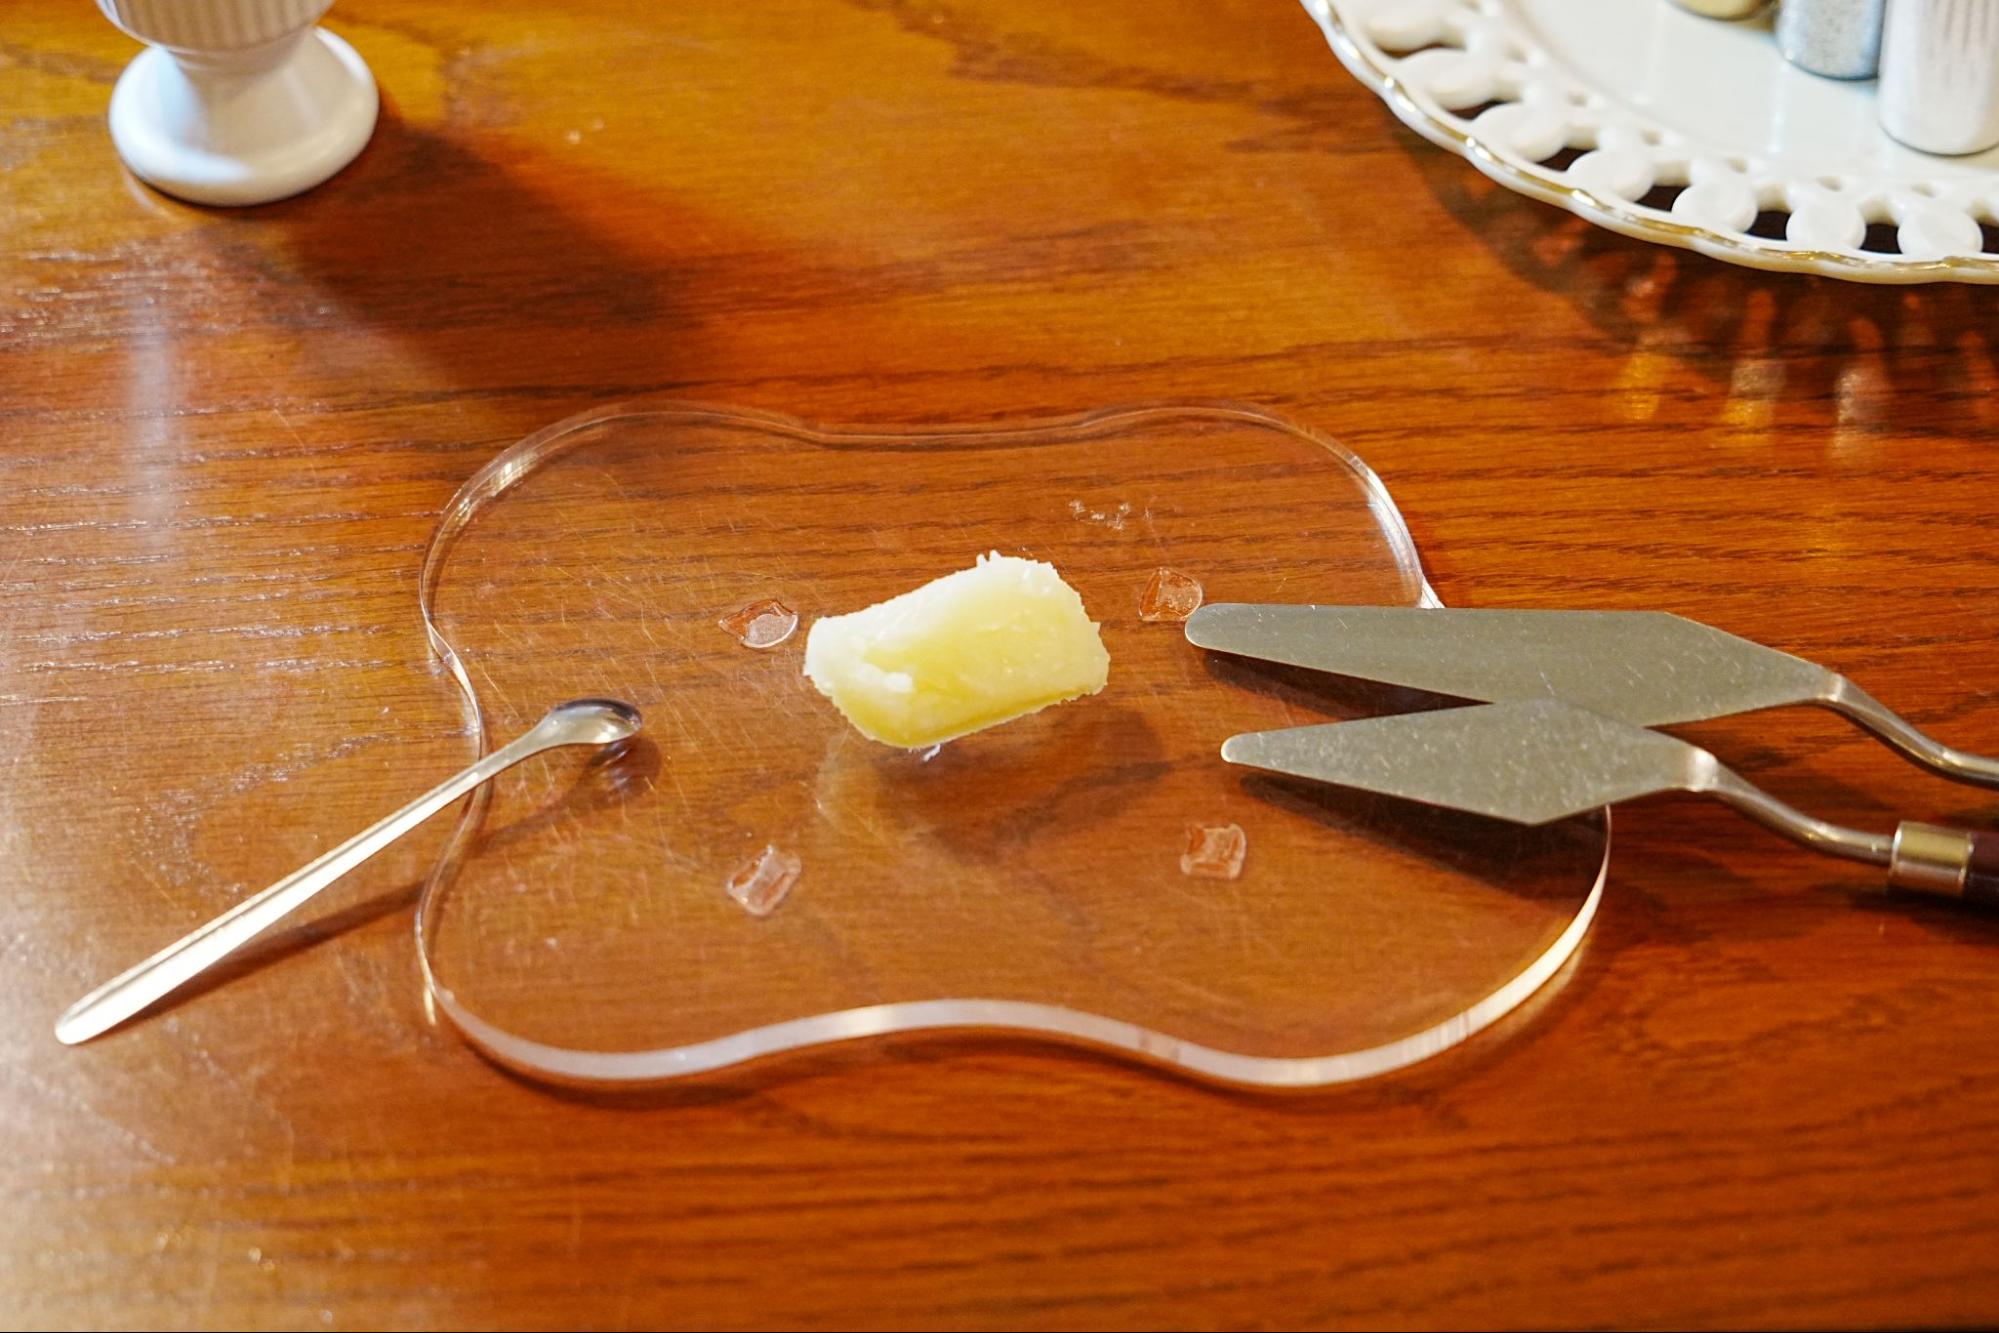
Even the tools themselves are picturesque and adorable
Set on top of an acrylic board are two spatulas, a small spoon, and a lip balm.
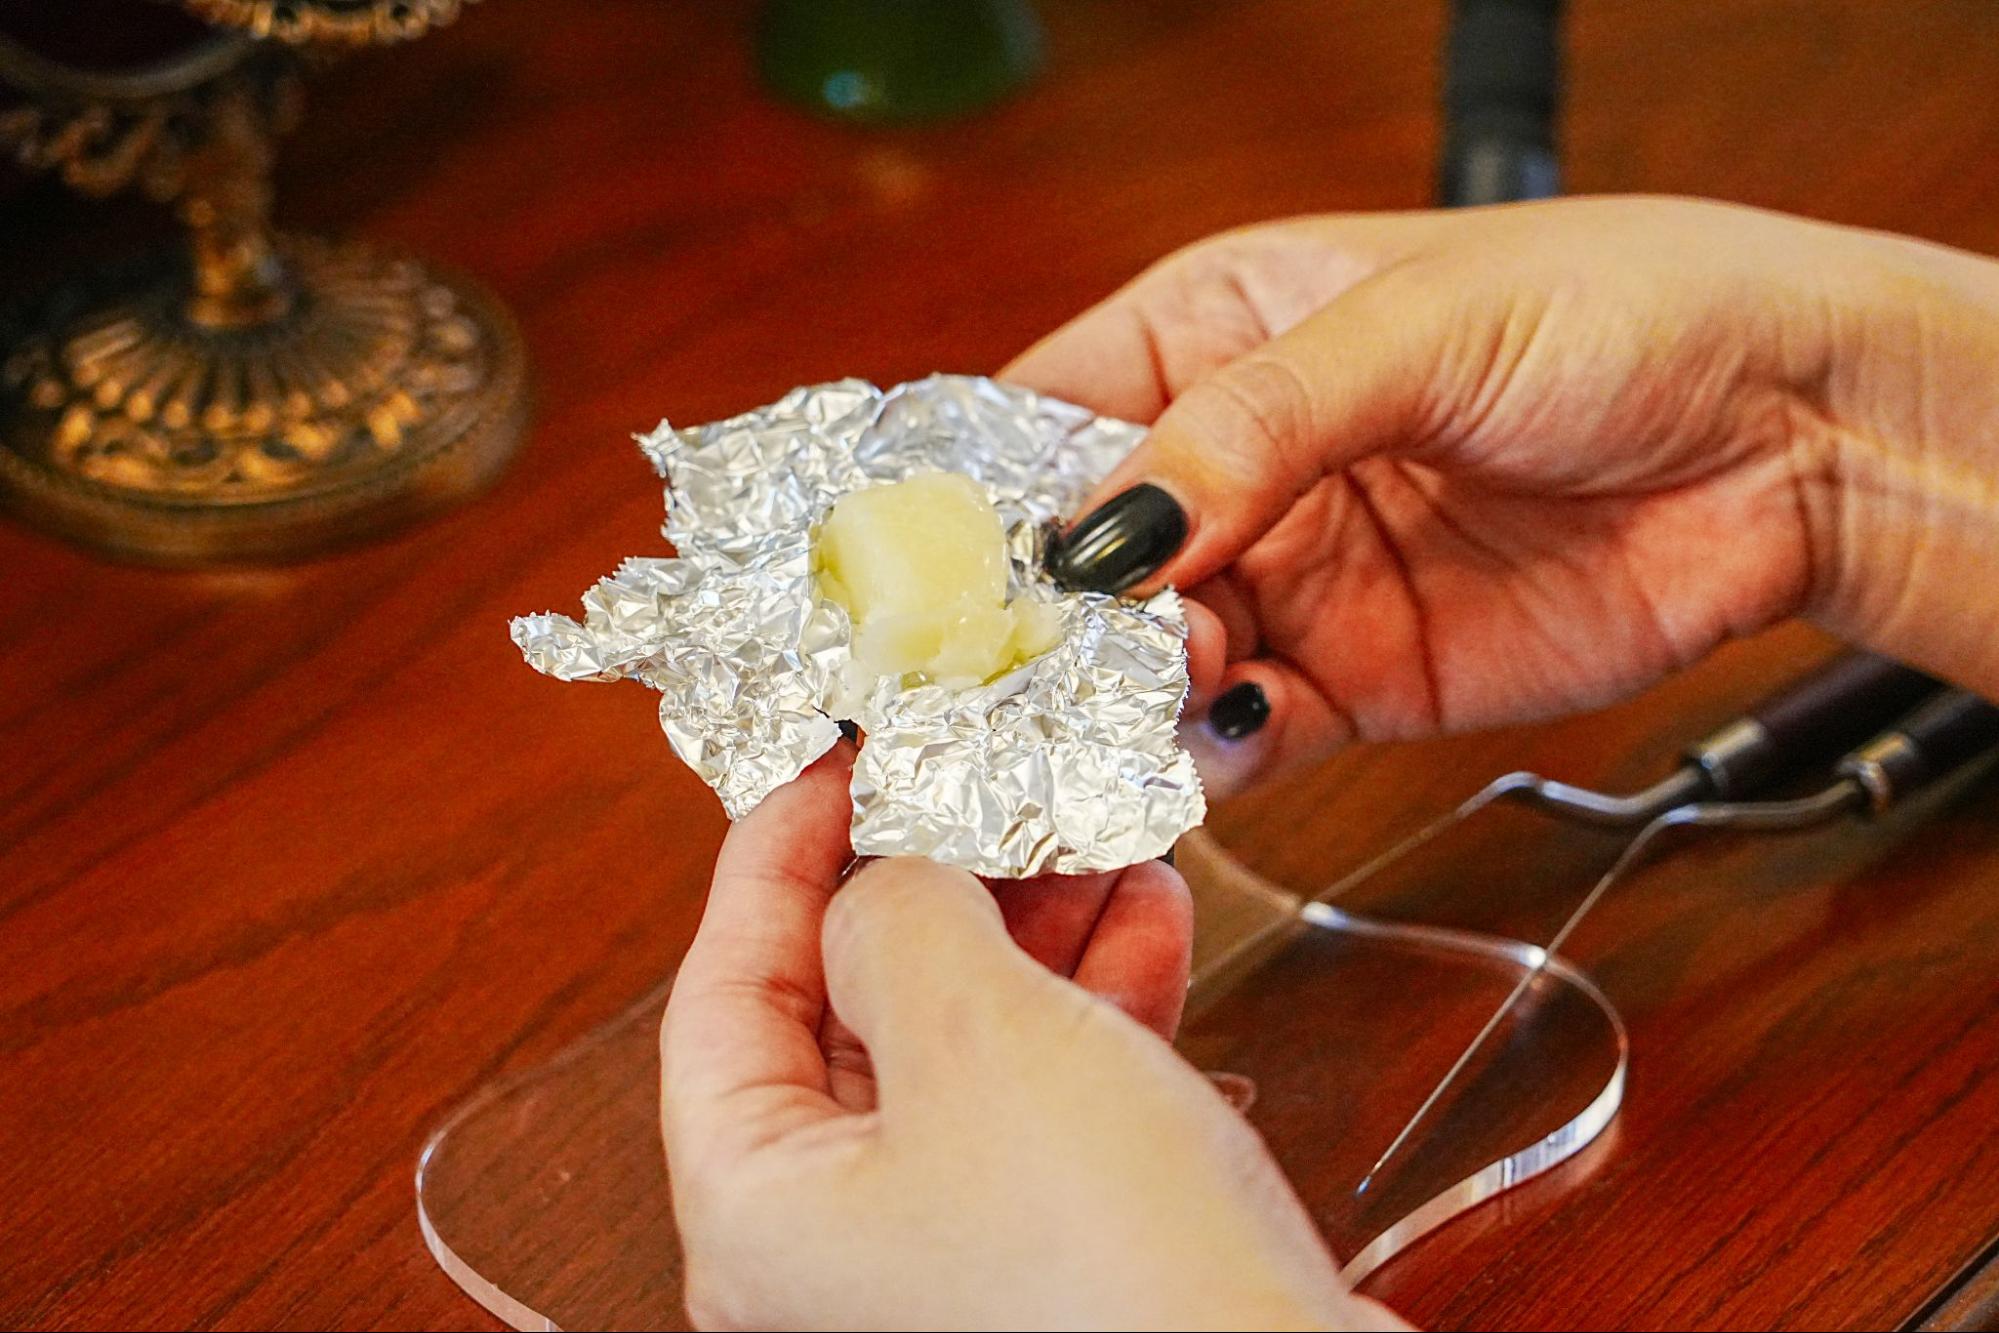
First, the balm wrapped in aluminum foil is placed on an acrylic board. From here, color is added to the colorless balm to mix it.
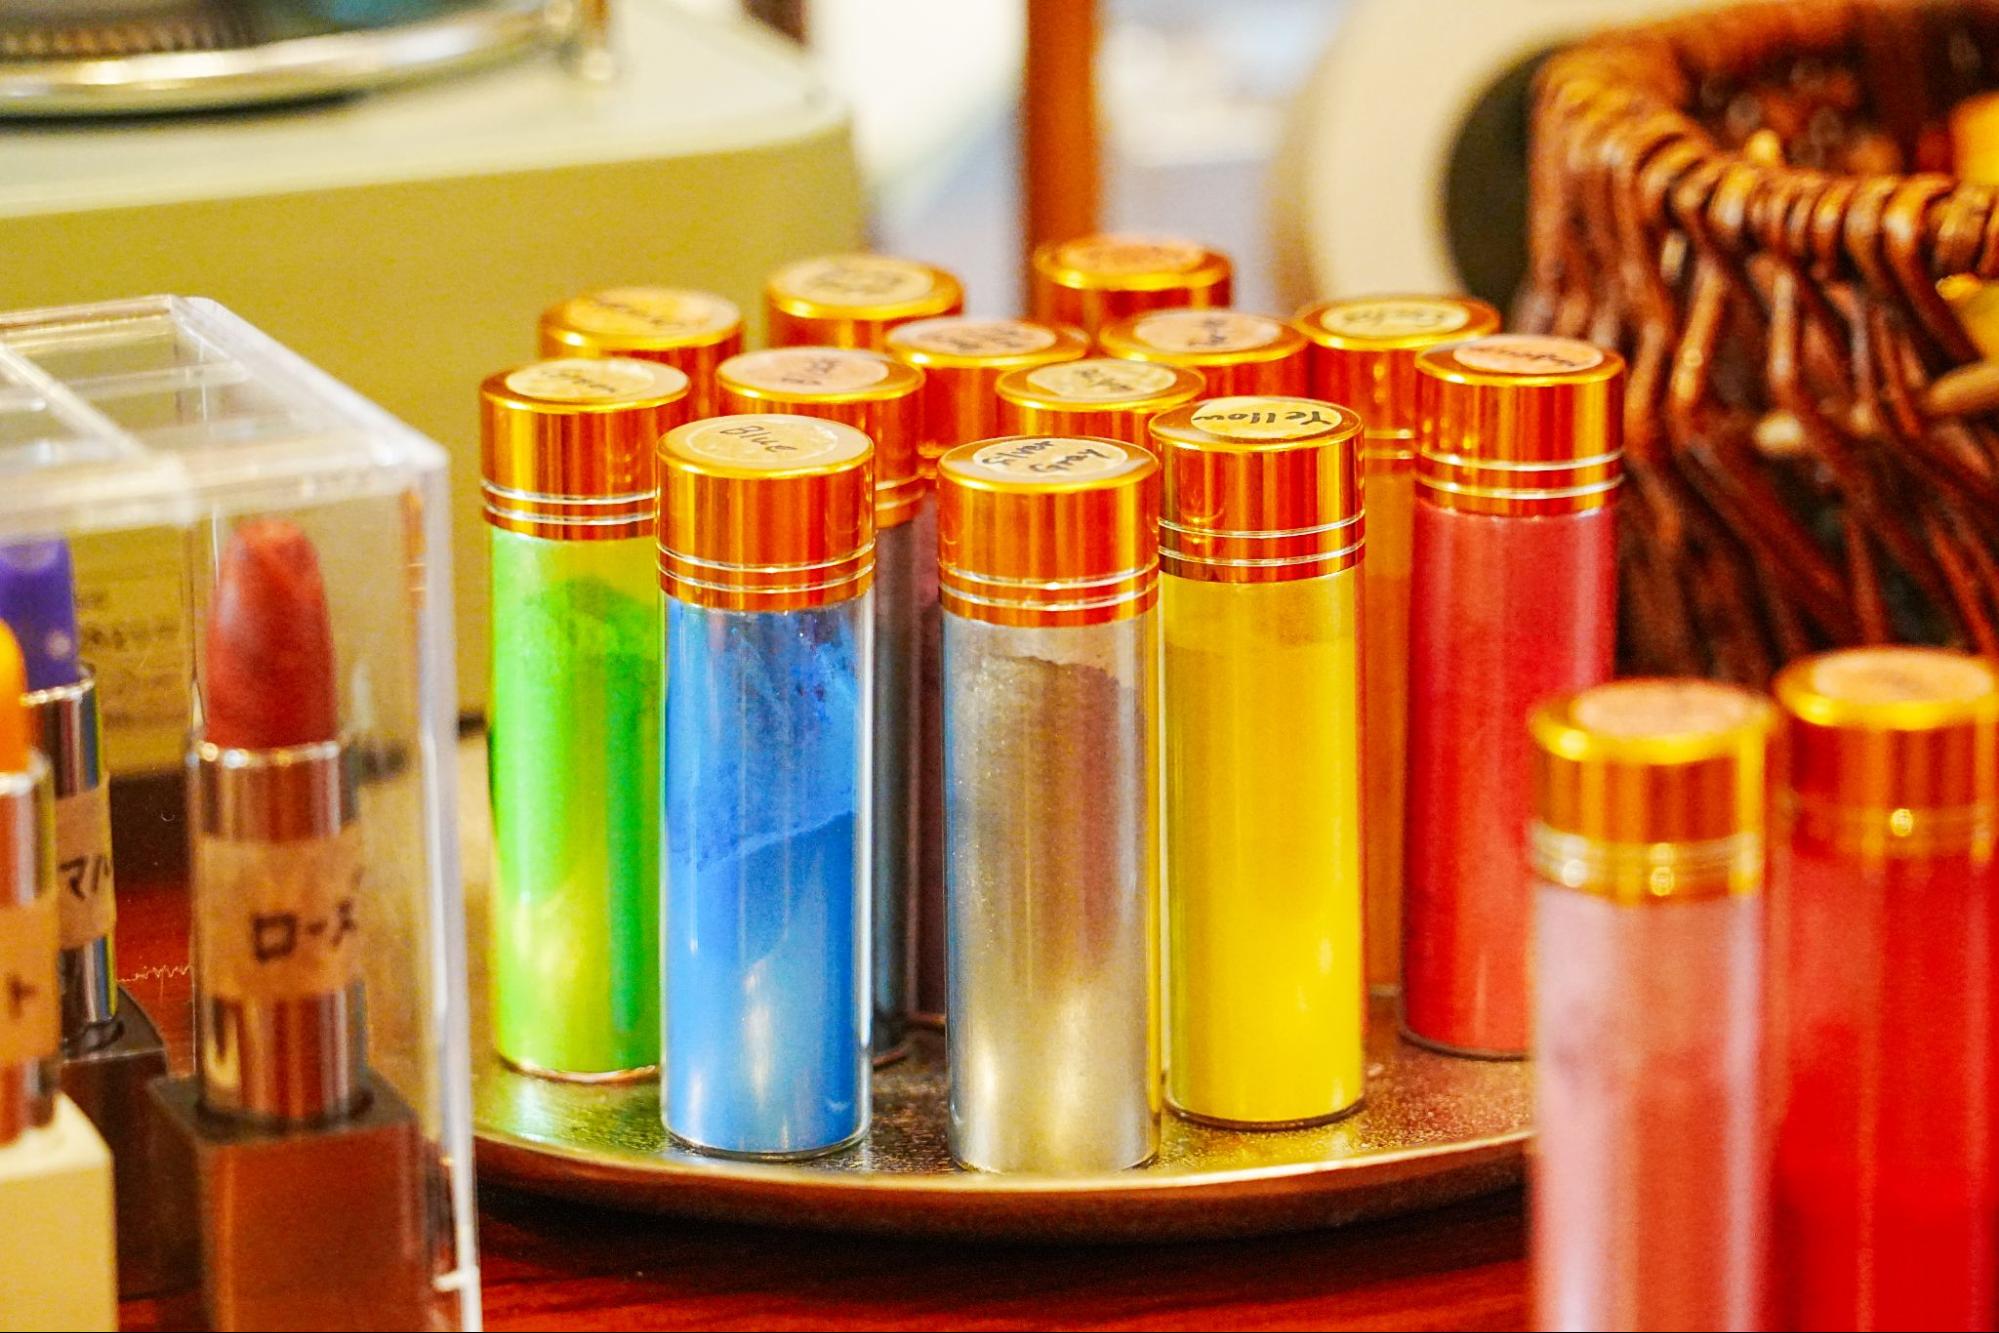
Available in many colors.

There are more than 30 colors to choose from! With a diverse assortment, choosing the right one is exciting. In addition to colors, there are a wide variety of types, including matte and glossy types.
Most of the colors are shades of red & pink, but there are also unique colors such as yellow, blue and green. We recommend that you make them in your favorite color!
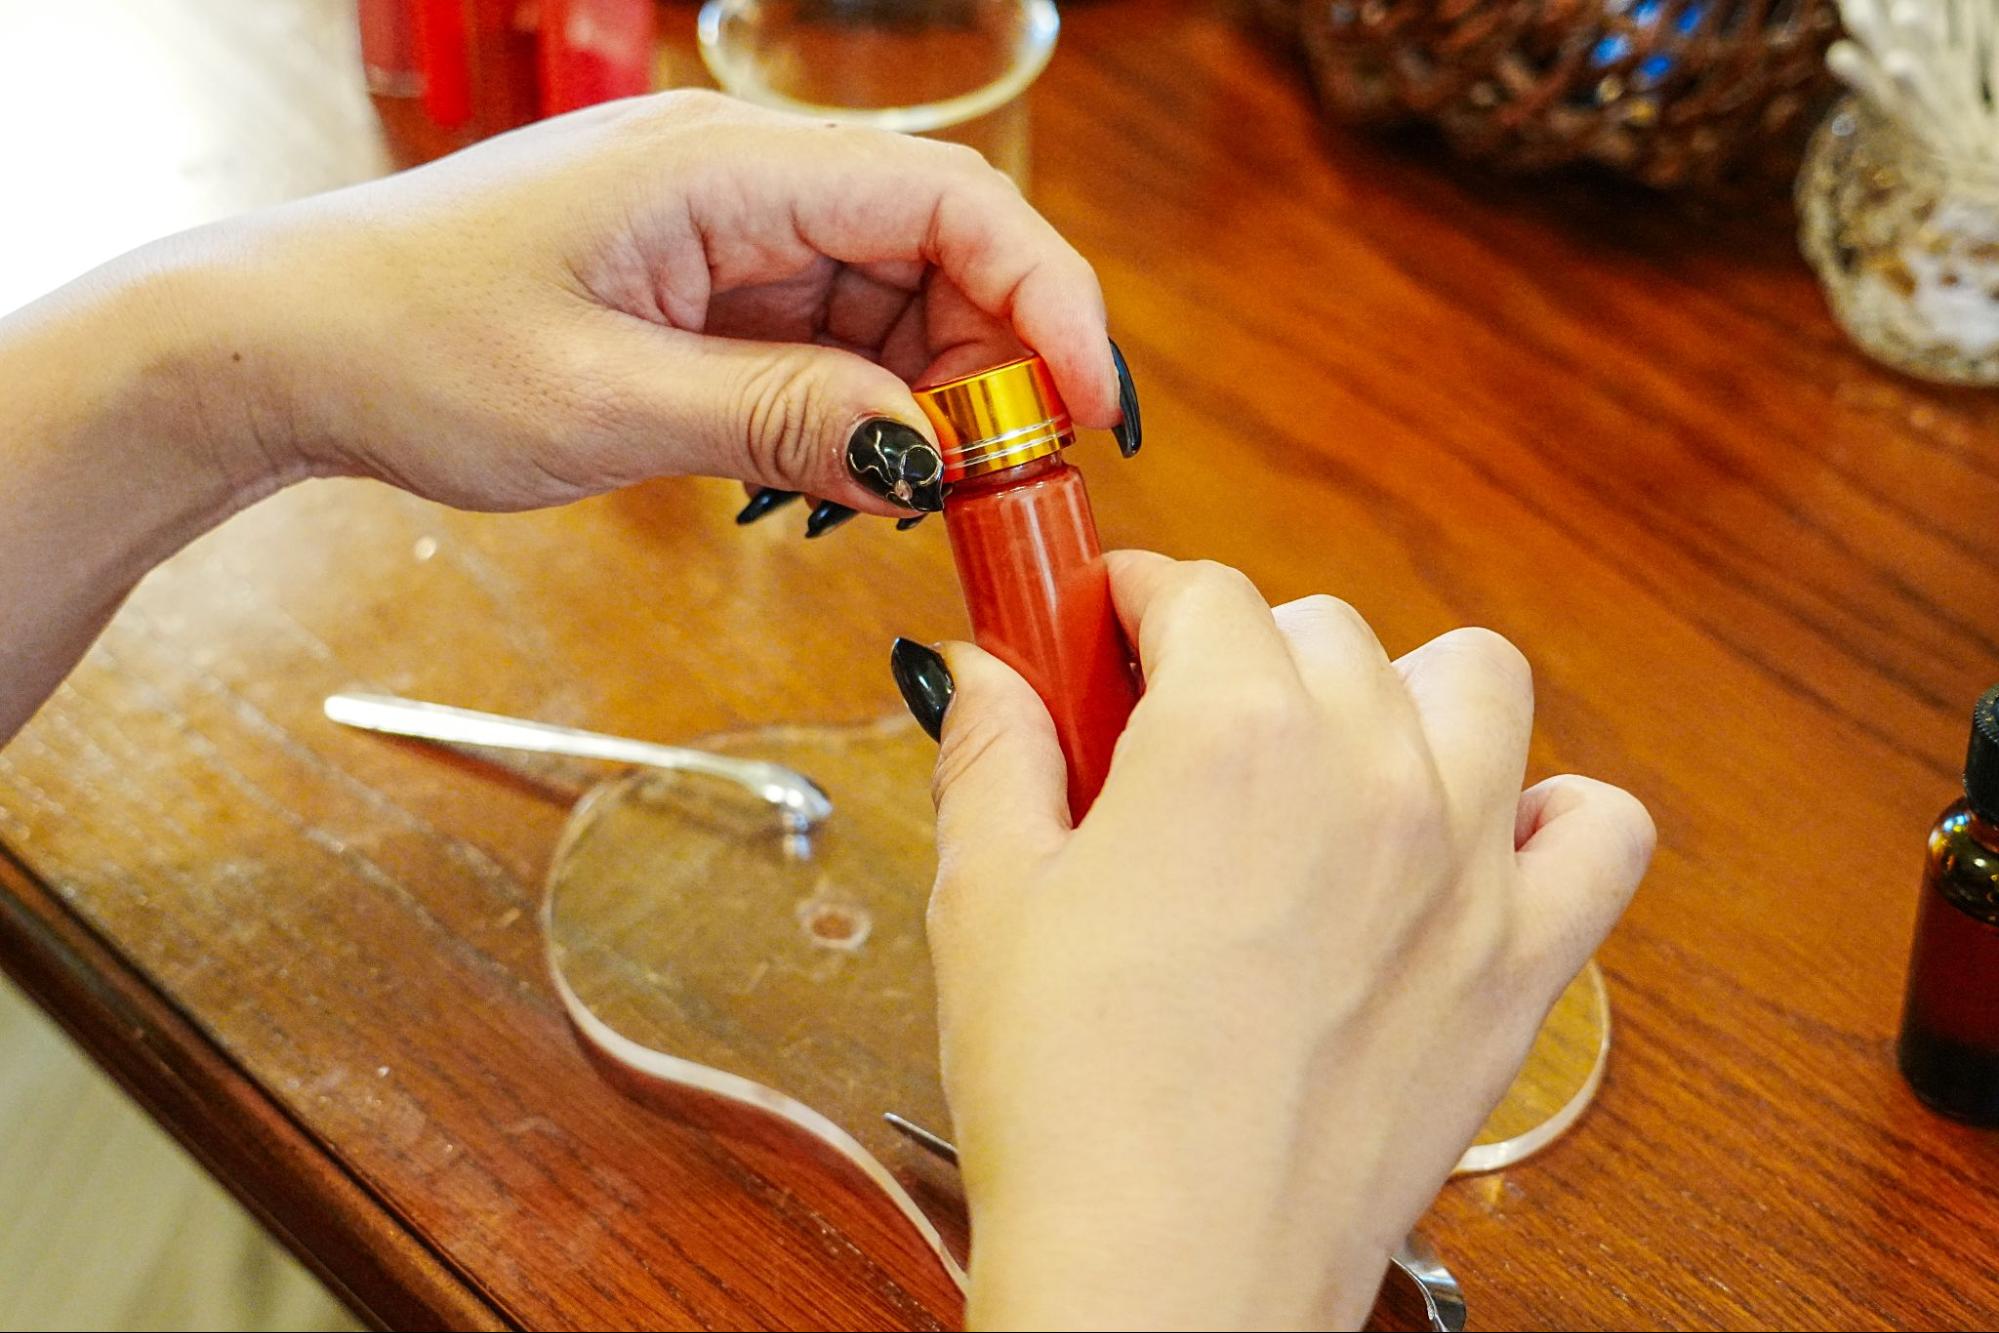
The base color for this time is a matte red.
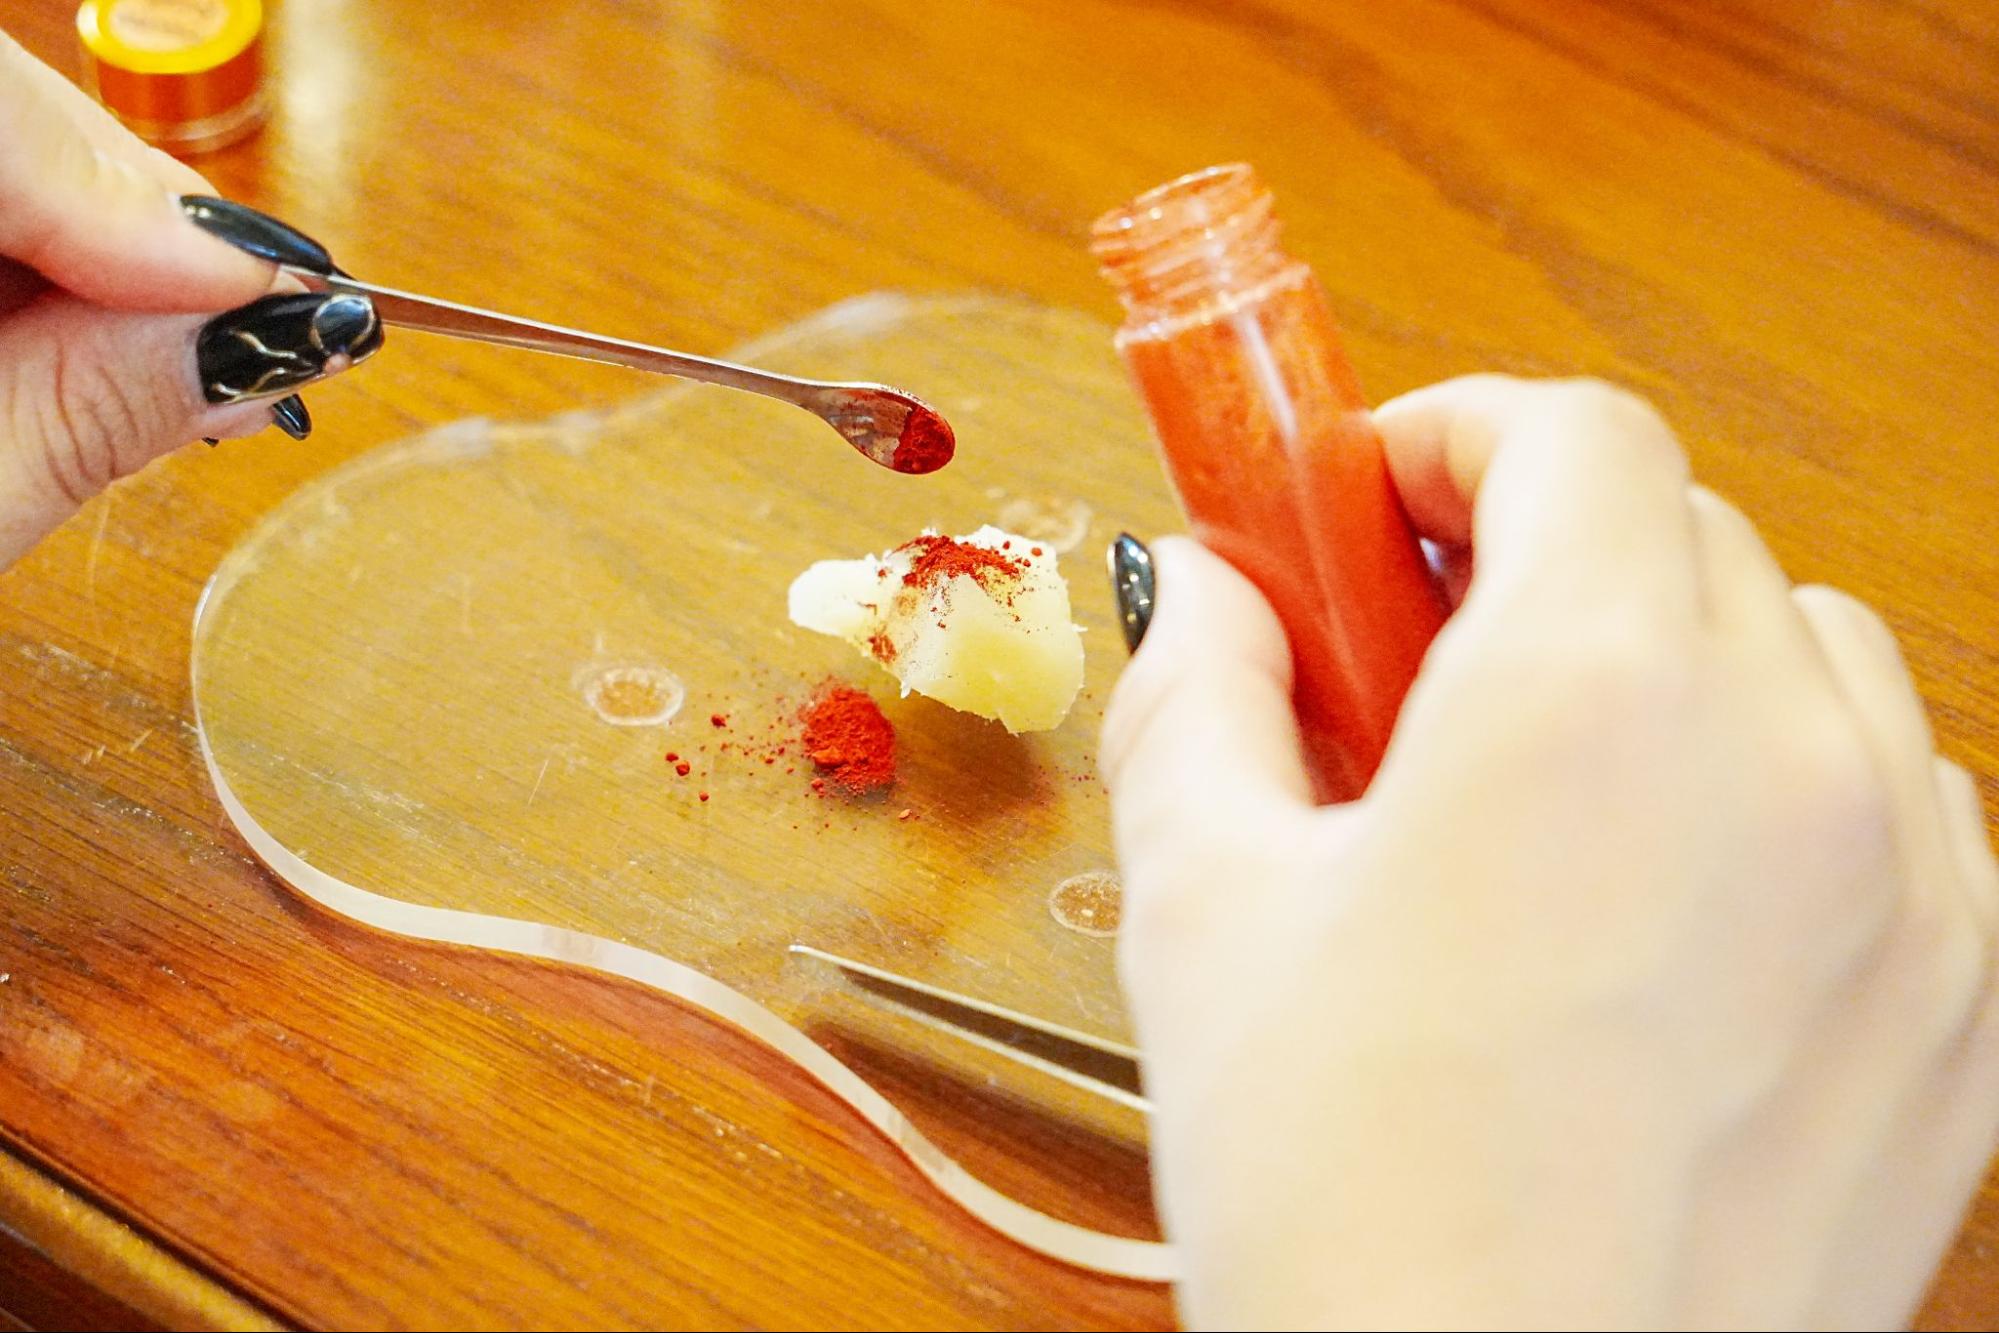
Take about a spoonful and apply it on the balm.
Once you have decided on the base color, blend it with the balm. Use about one spoonful of color.
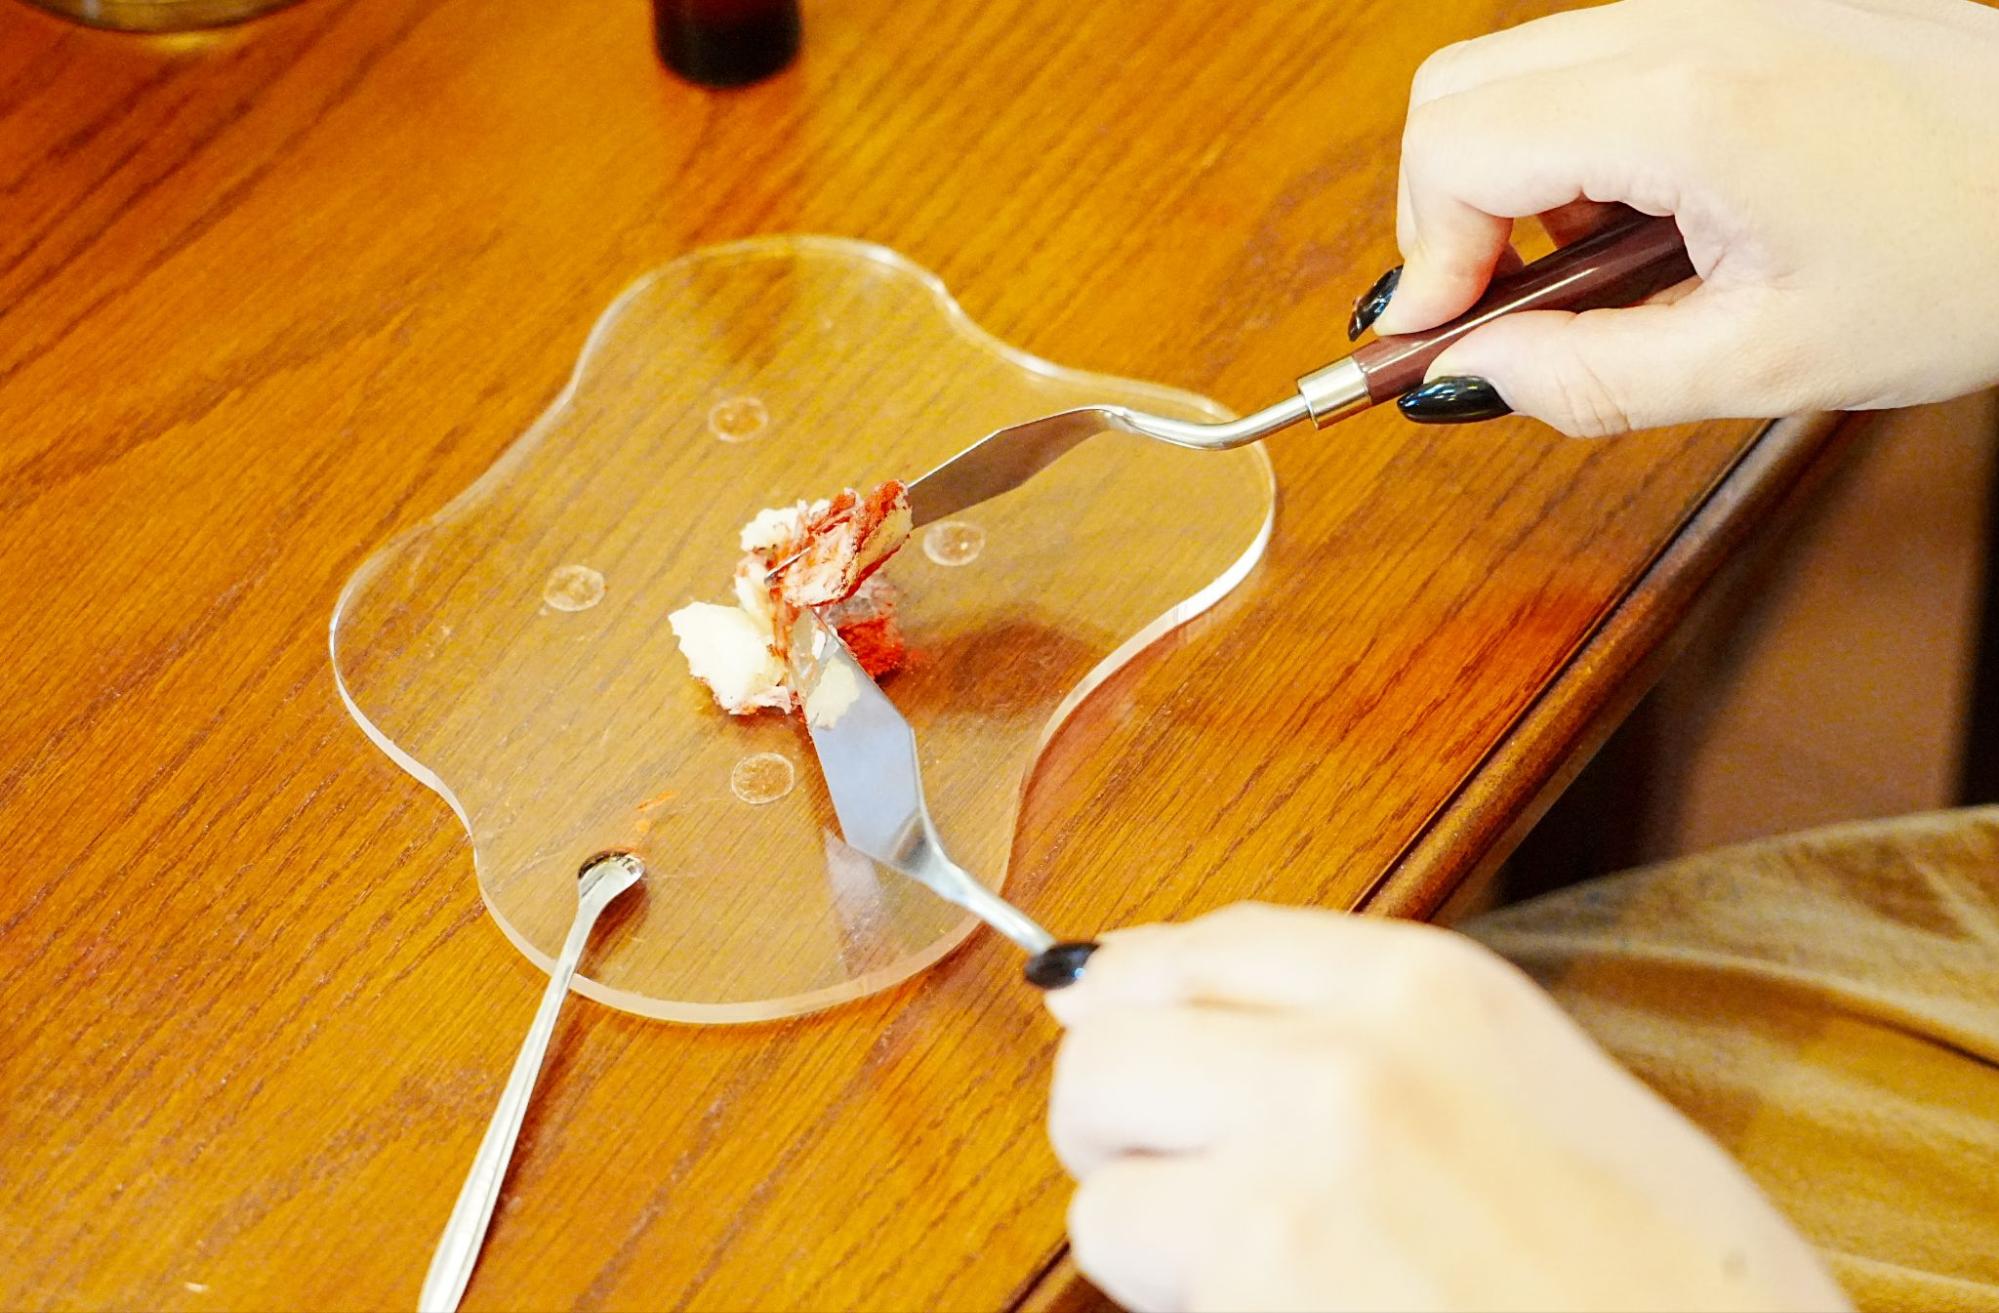
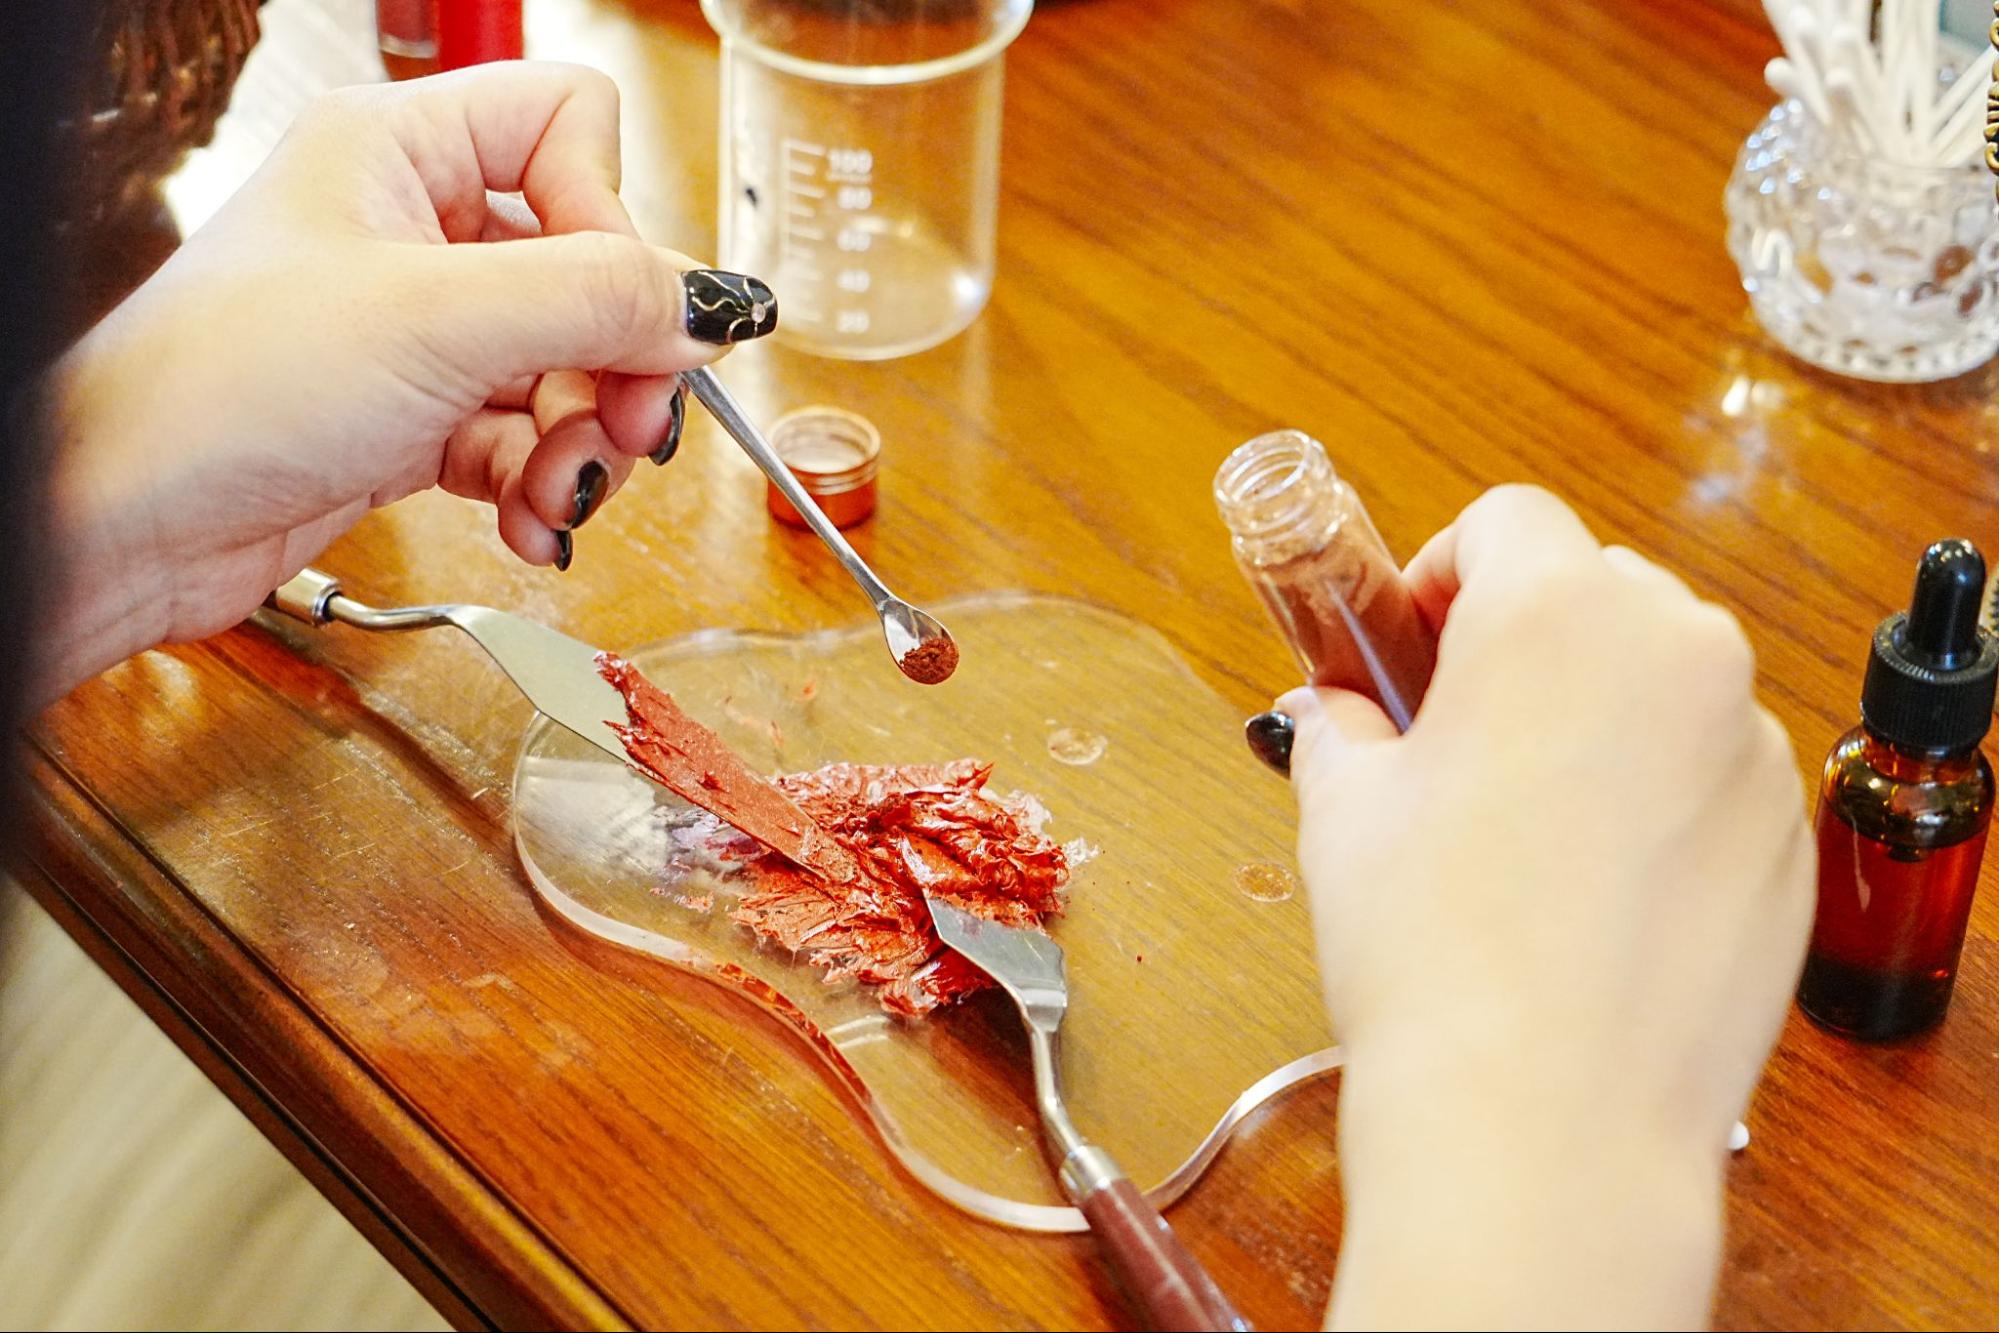
Mix using a spatula
Use two spatulas to mix. The key is to cut the balm at first. Once it starts to blend, mix it thoroughly as if you're kneading it!
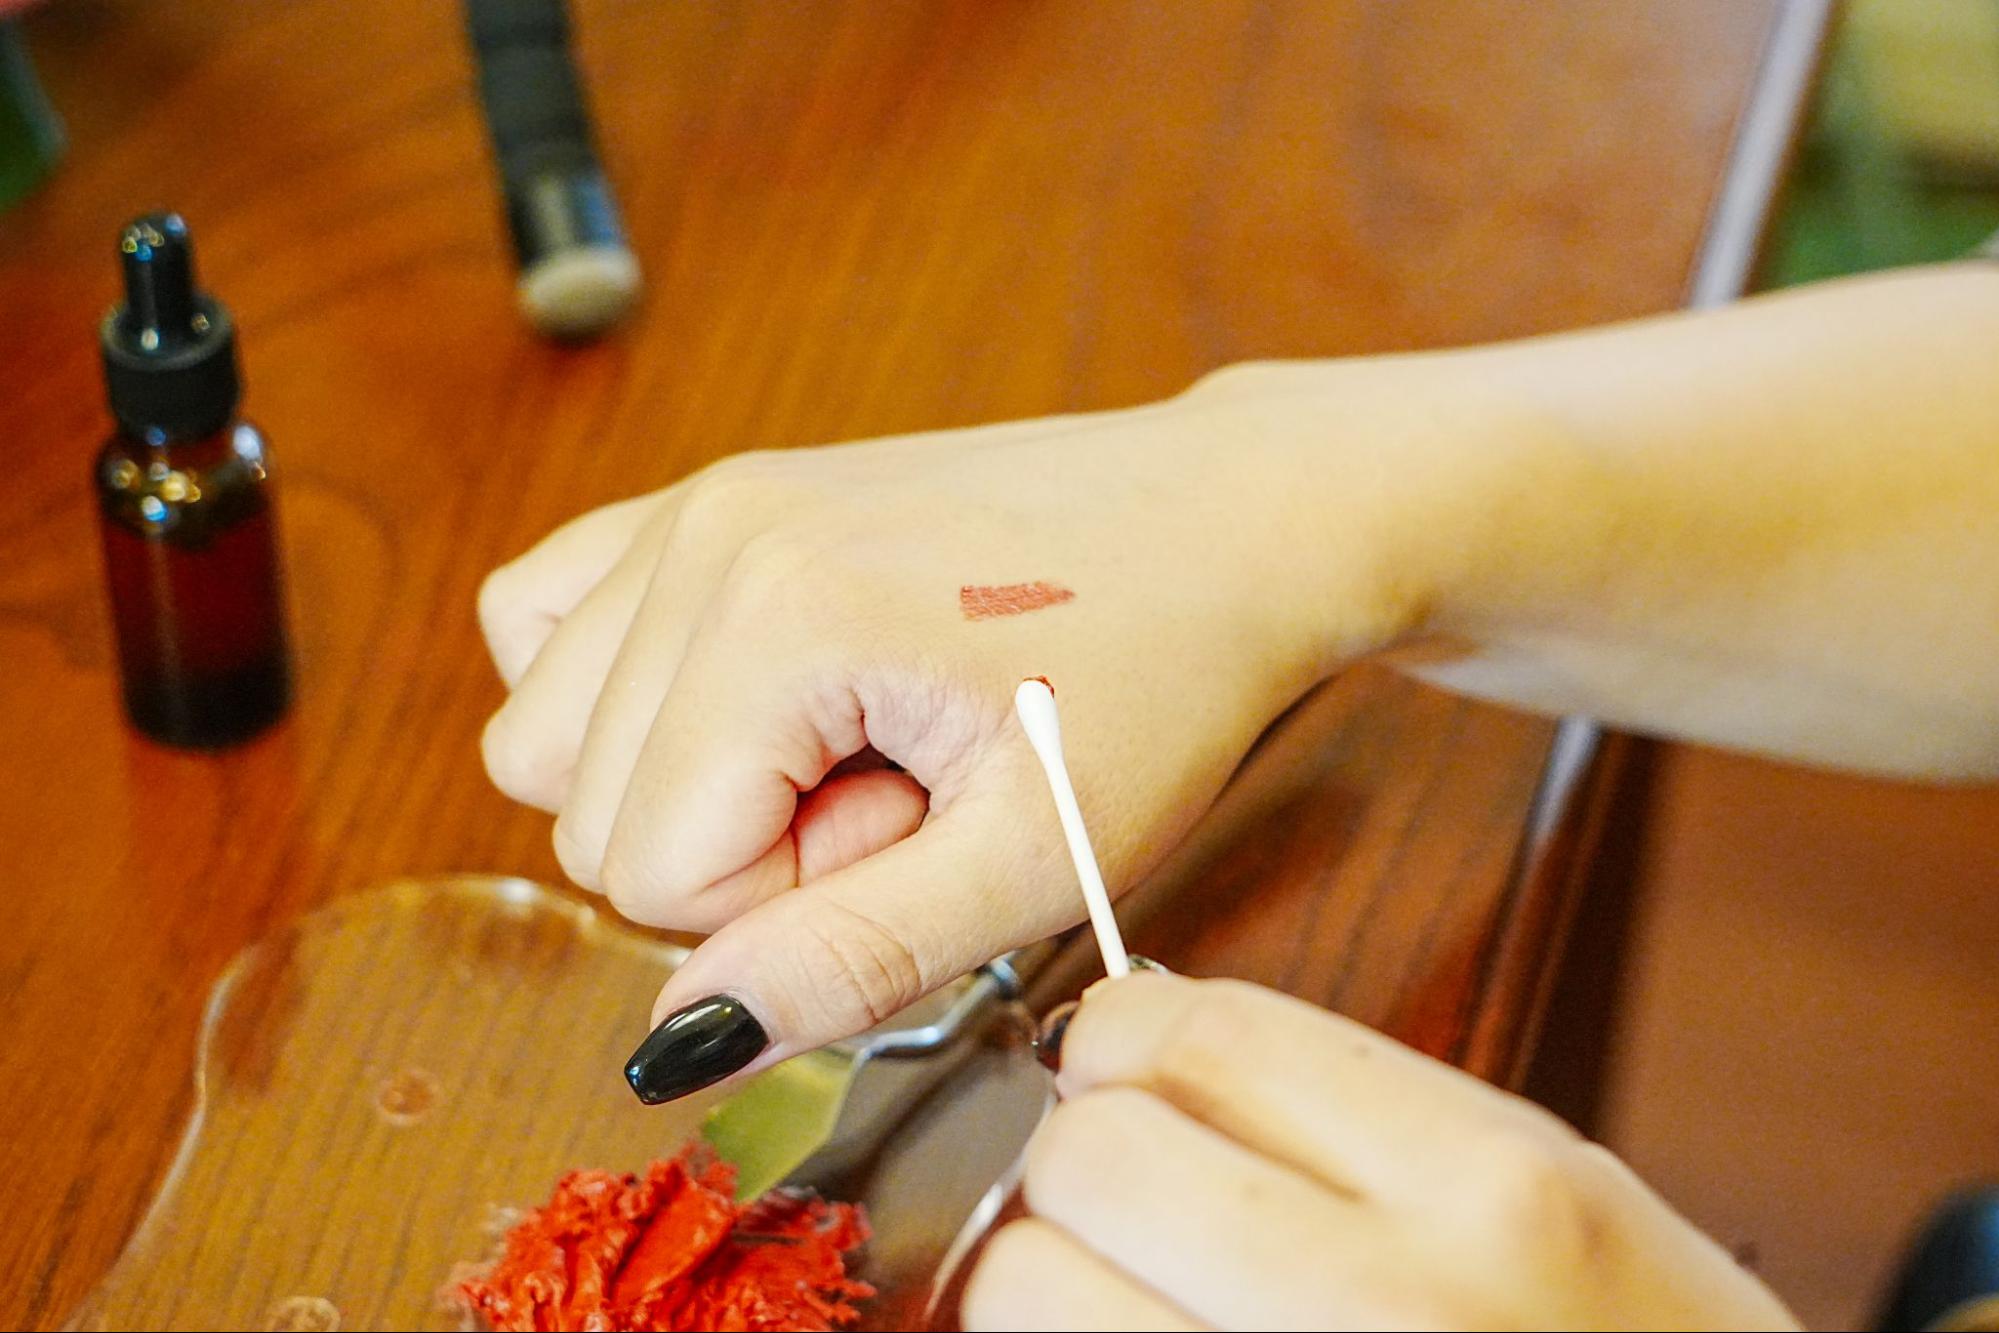
Check the color!
Use a cotton swab to test the color on the back of your hand. While visualizing how it will look on your lips, mix the color until you find the color you like.
I wanted to create a mature finish to go with the "wood" flavor, so I gradually adjusted the color using brown tones. I kept mixing until I got the desired "red brown" color.
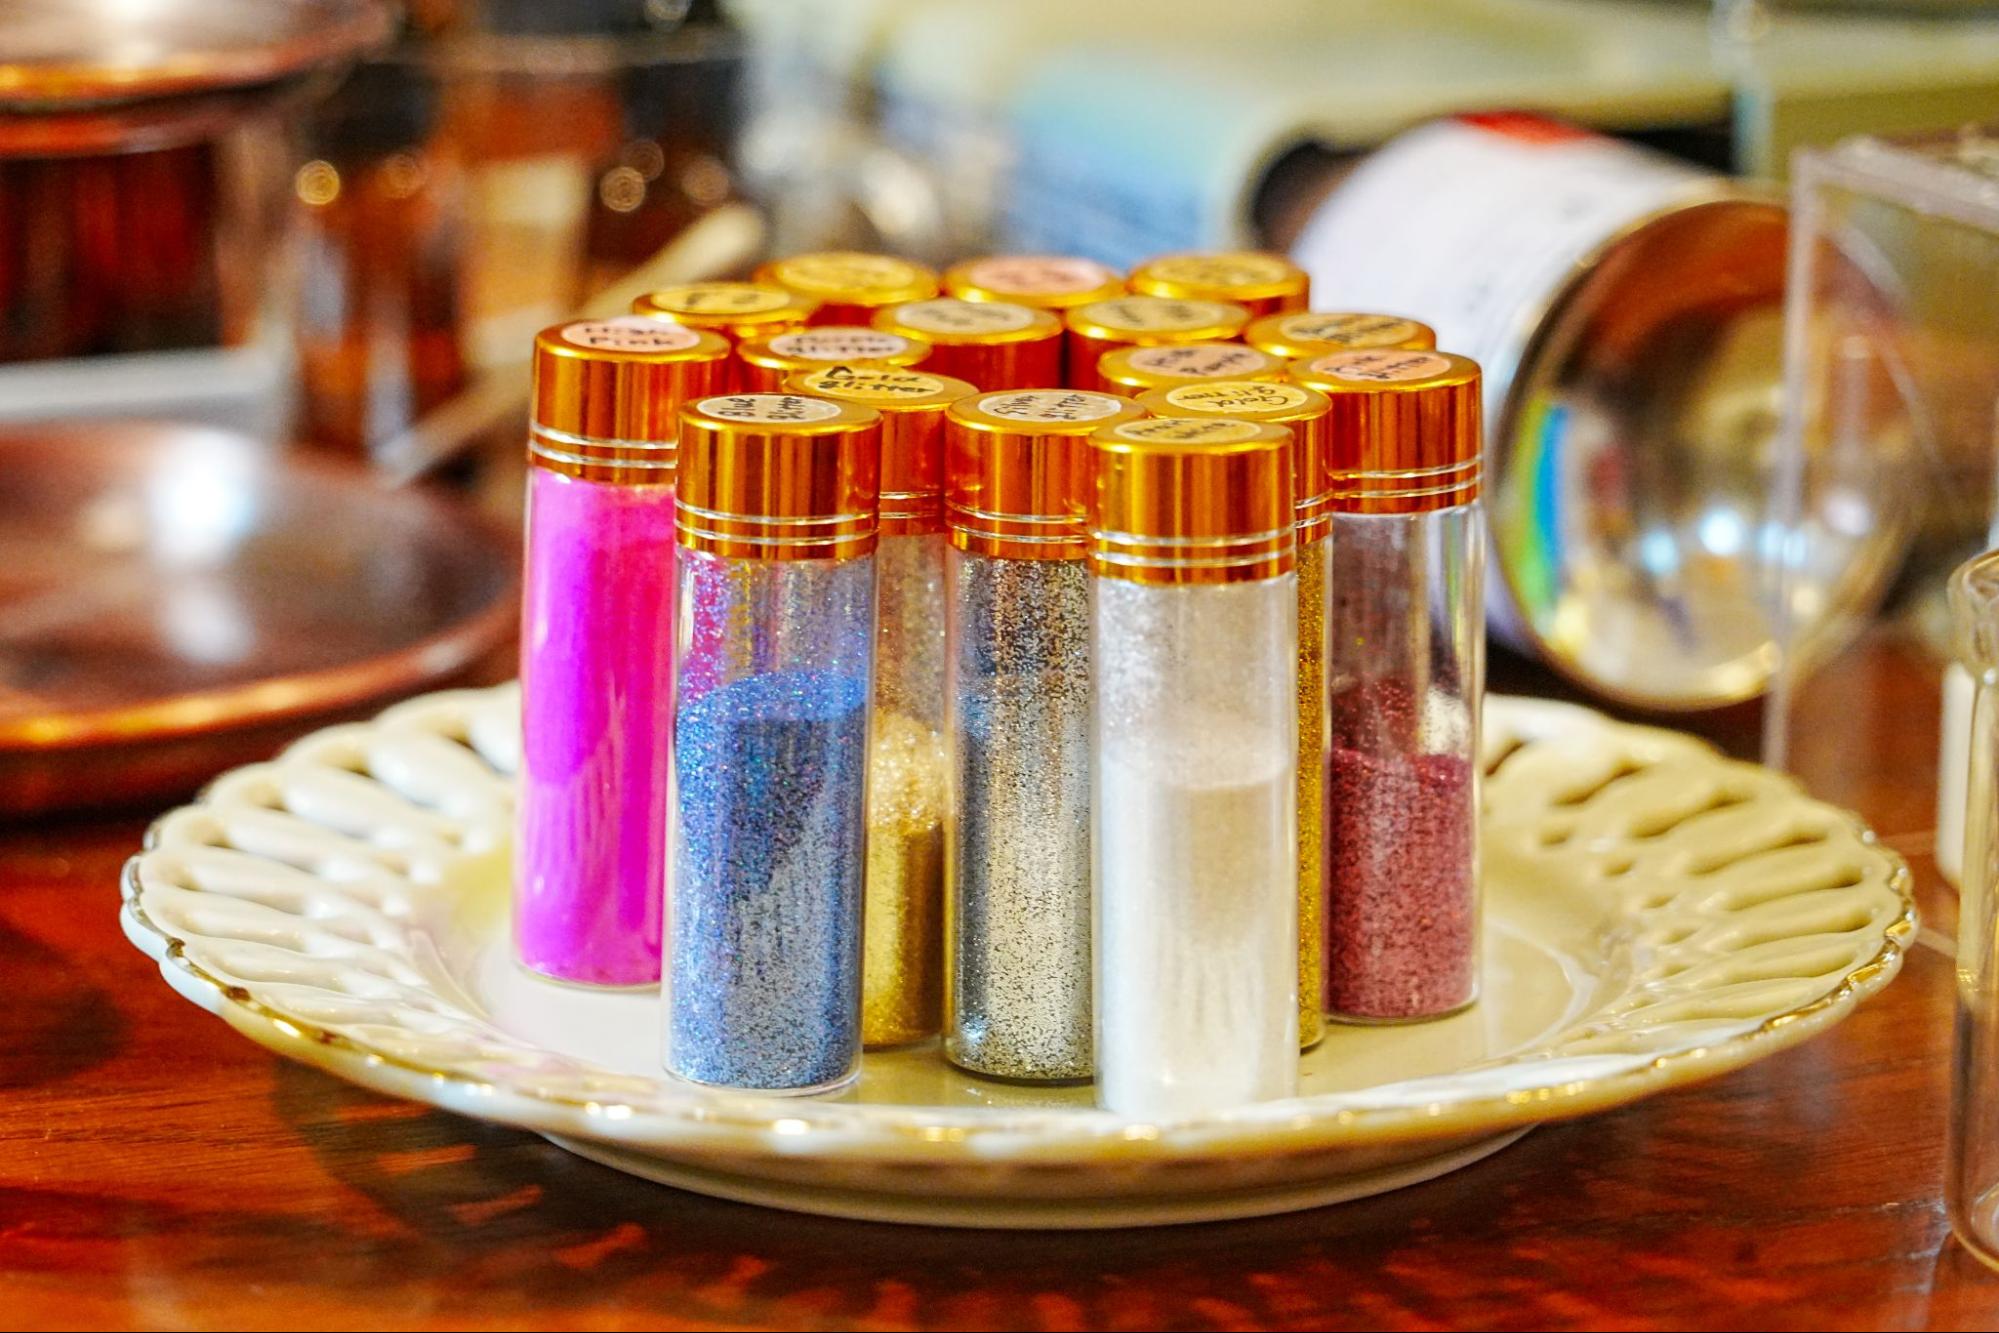
A wide variety of glitter
Adding glitters as a finishing touch is also popular! Enjoy the freedom to mix and match according to your individual tastes, whether you want a matte finish or a glittery finish with lame.
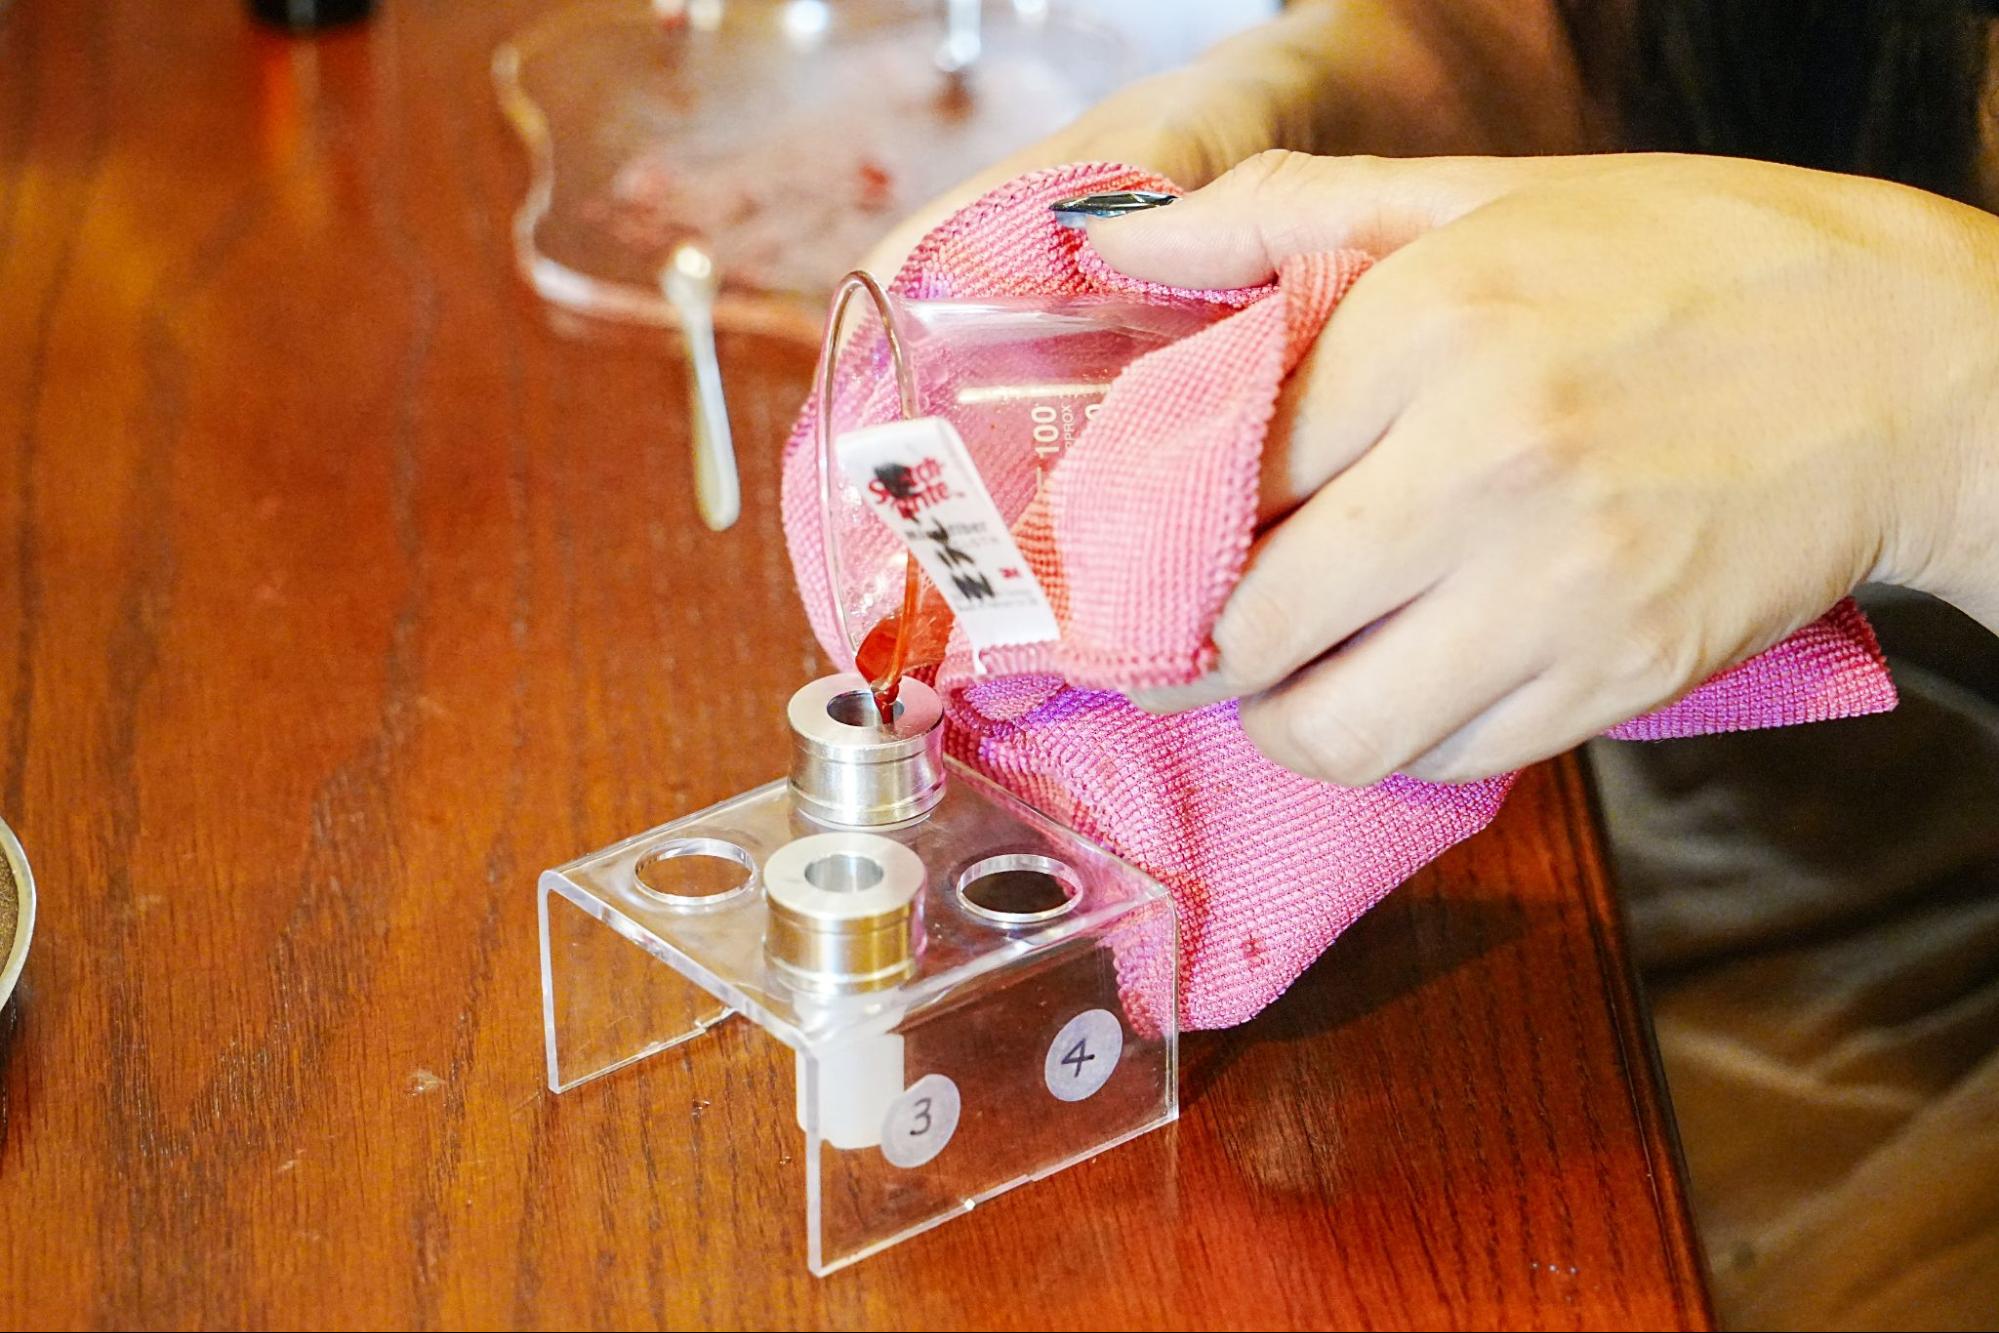
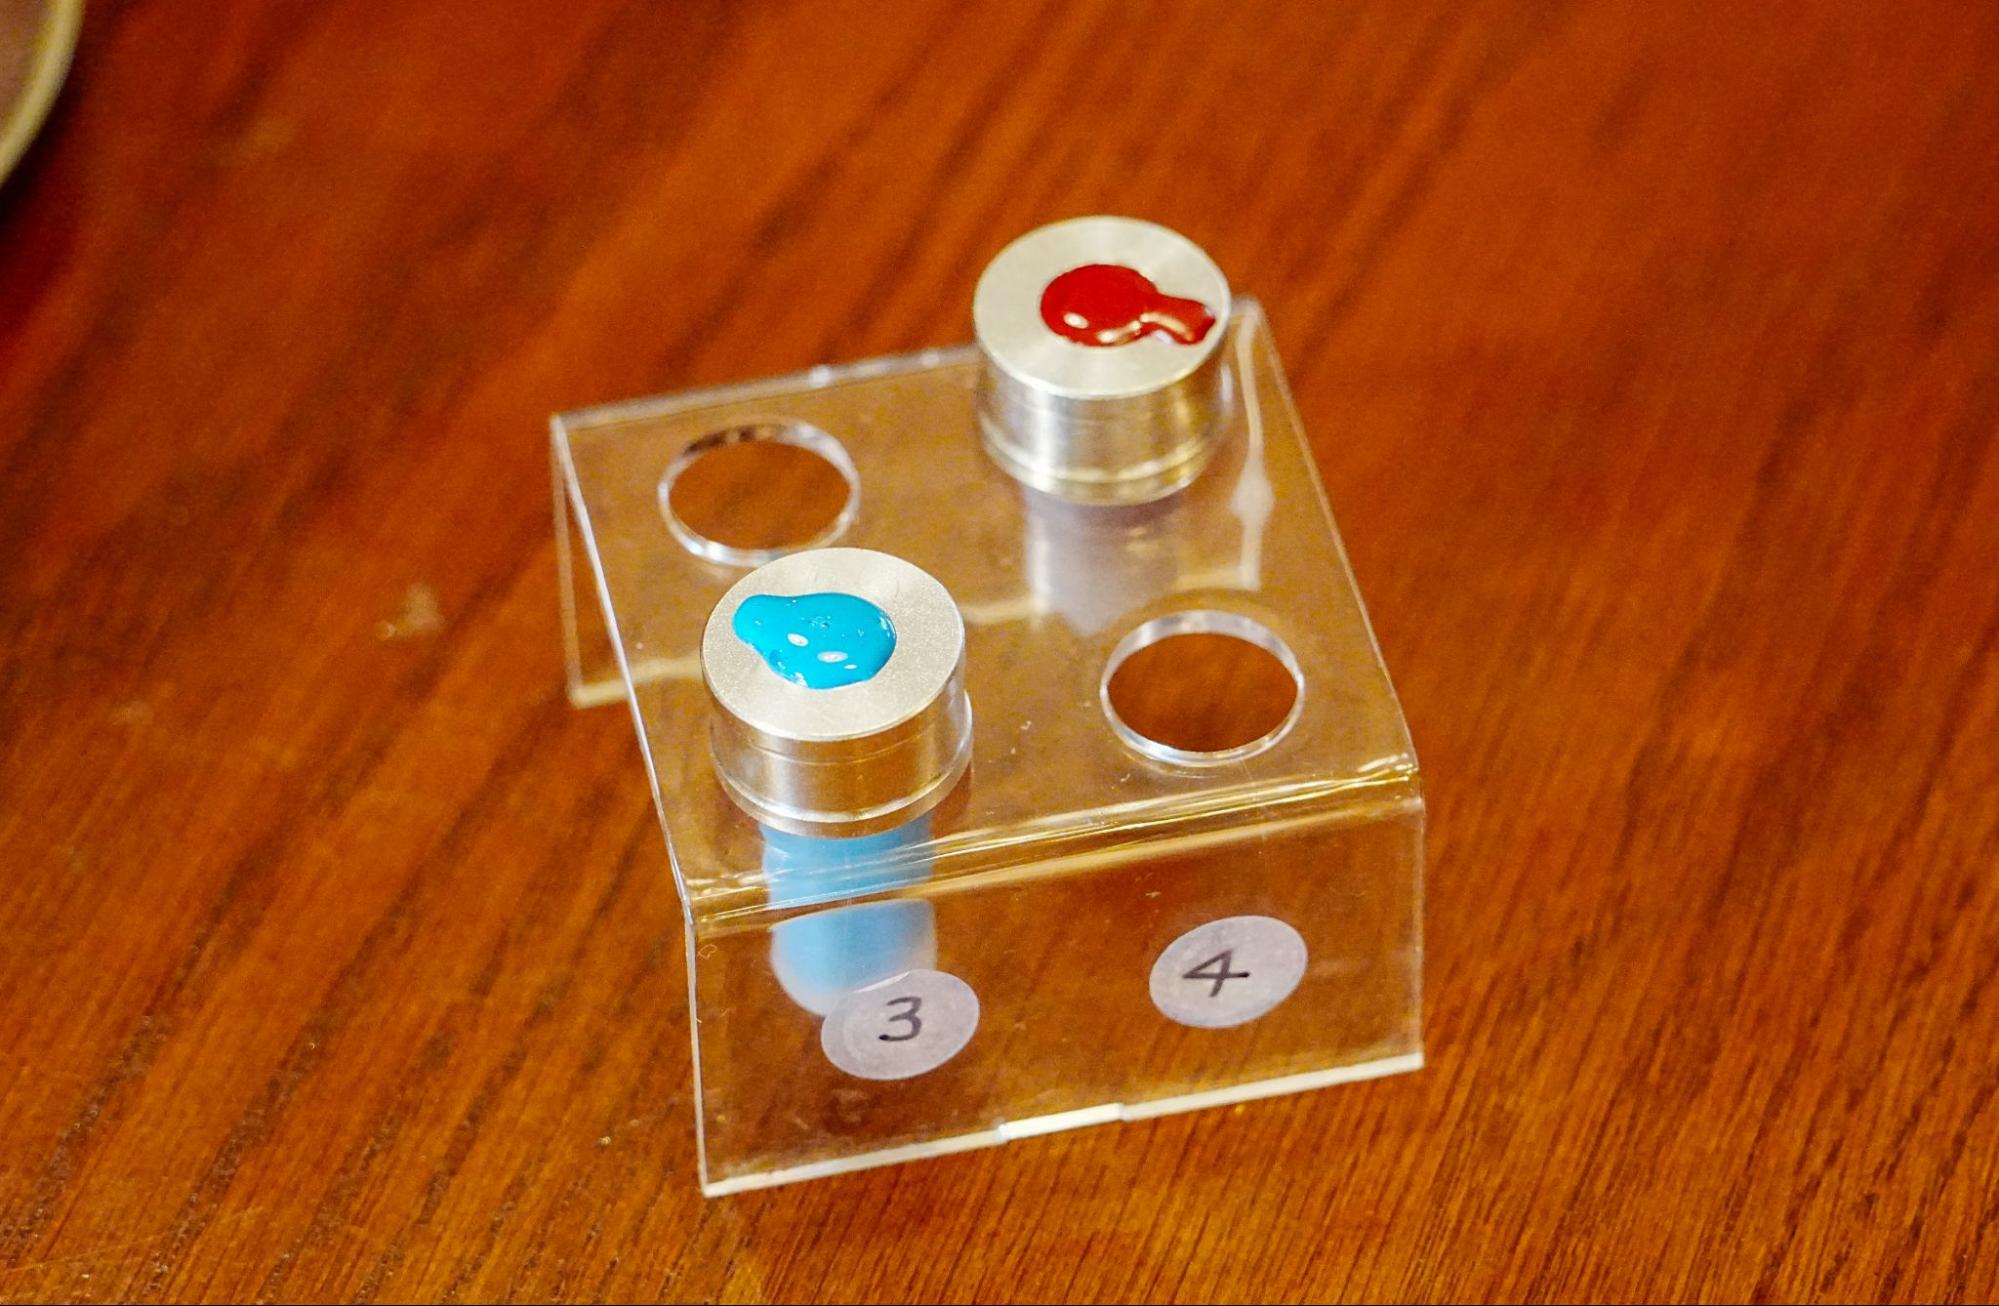
Add fragrance and pour the balm into the mold.

After the color has been mixed, place the balm in the bottom of the beaker and scent it with the first flavor you decided on! The right amount is about 1-3 drops. For a subtle fragrance, add 1 drop. If you want a stronger fragrance, add 2 to 3 drops.
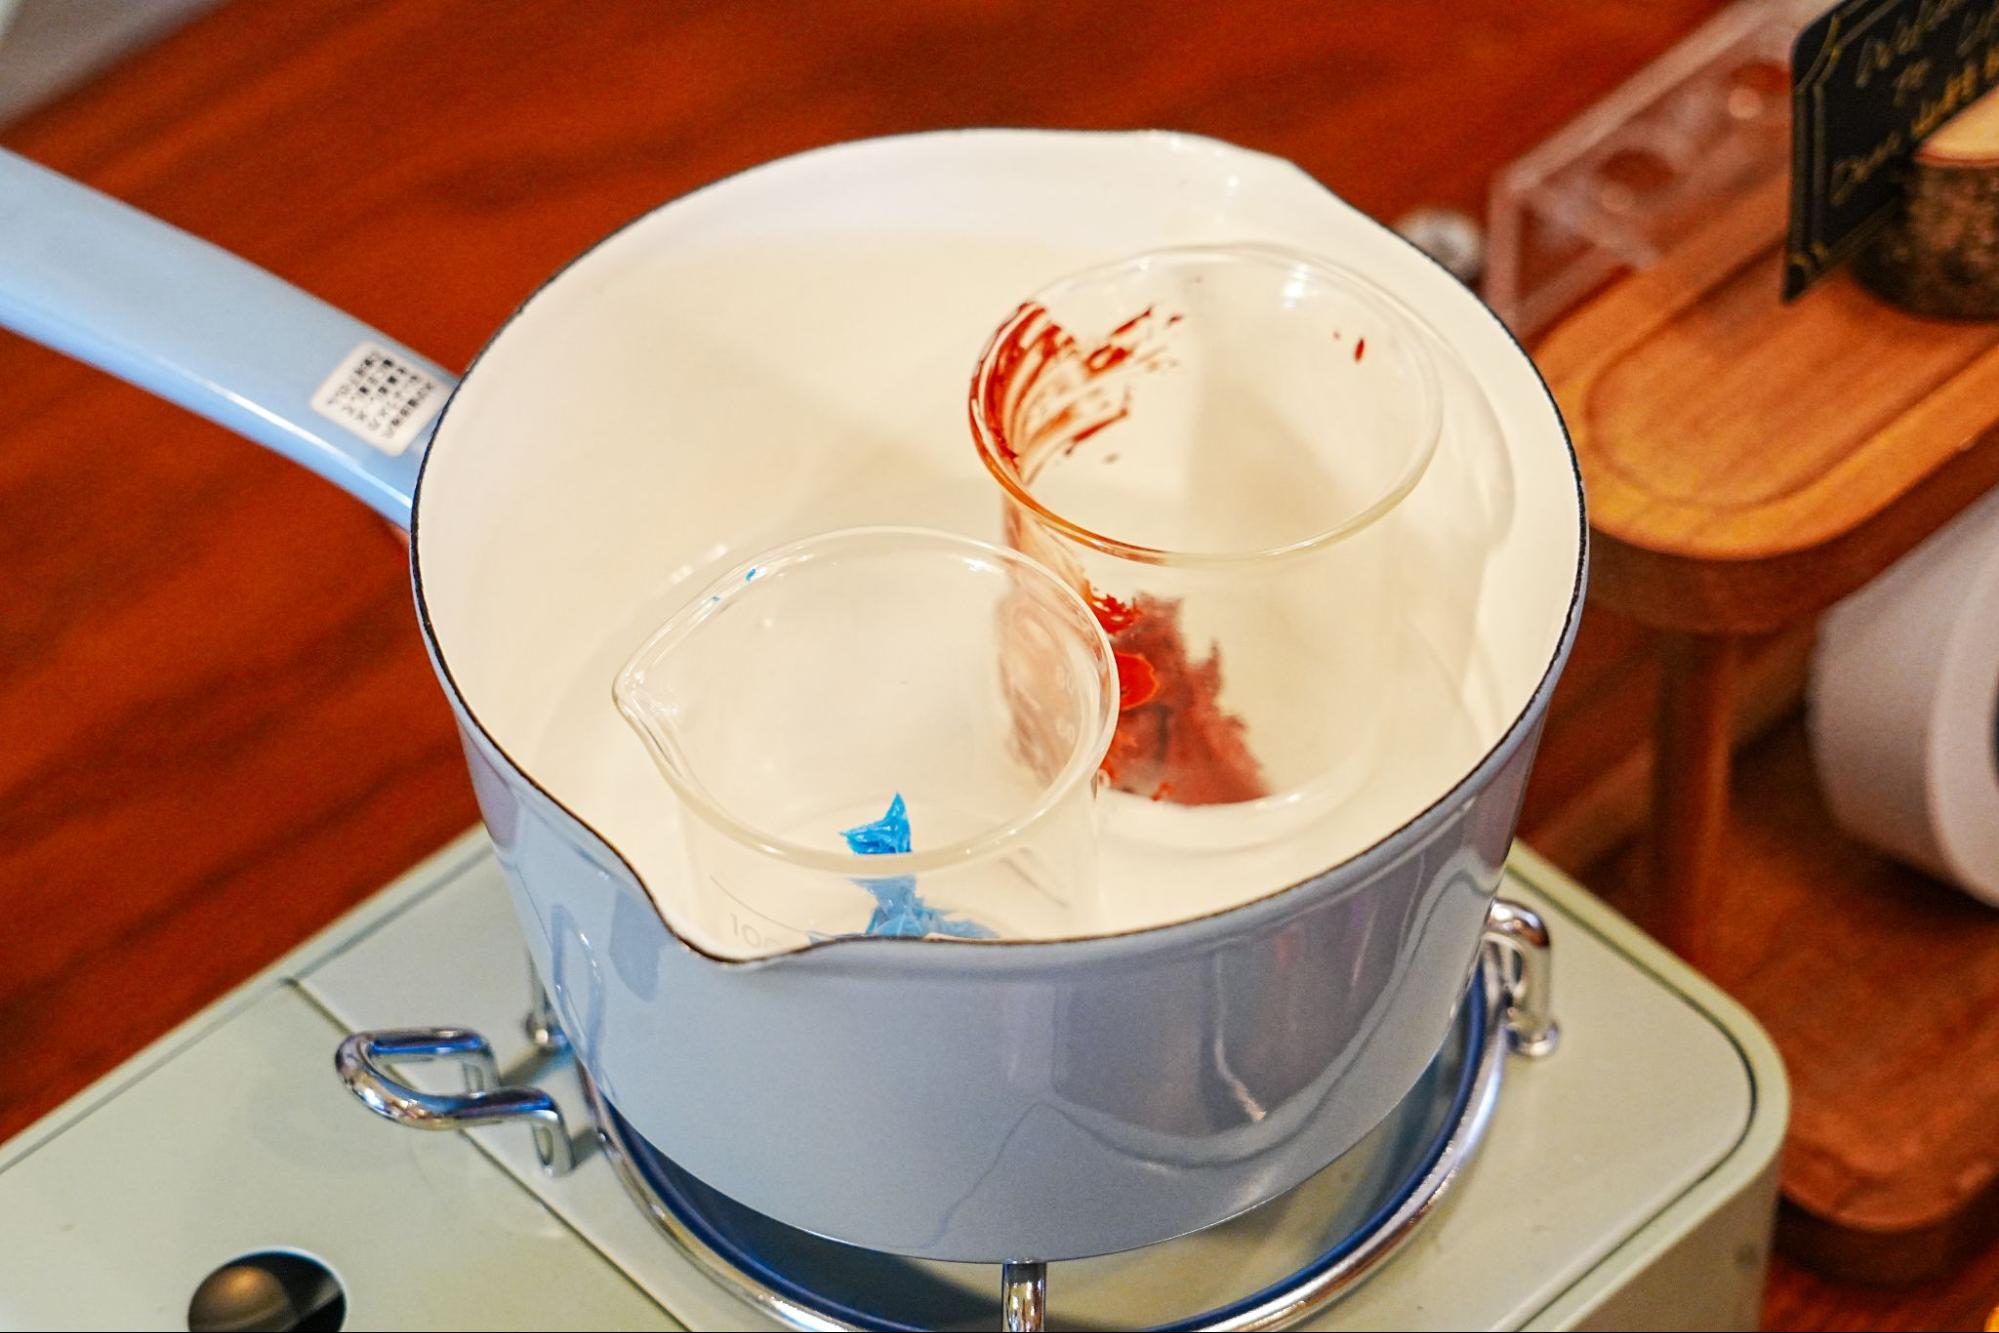
Once you've added the scent, melt the balm in a hot water bath. The balm will gradually melt, and the color and scent will mix together.
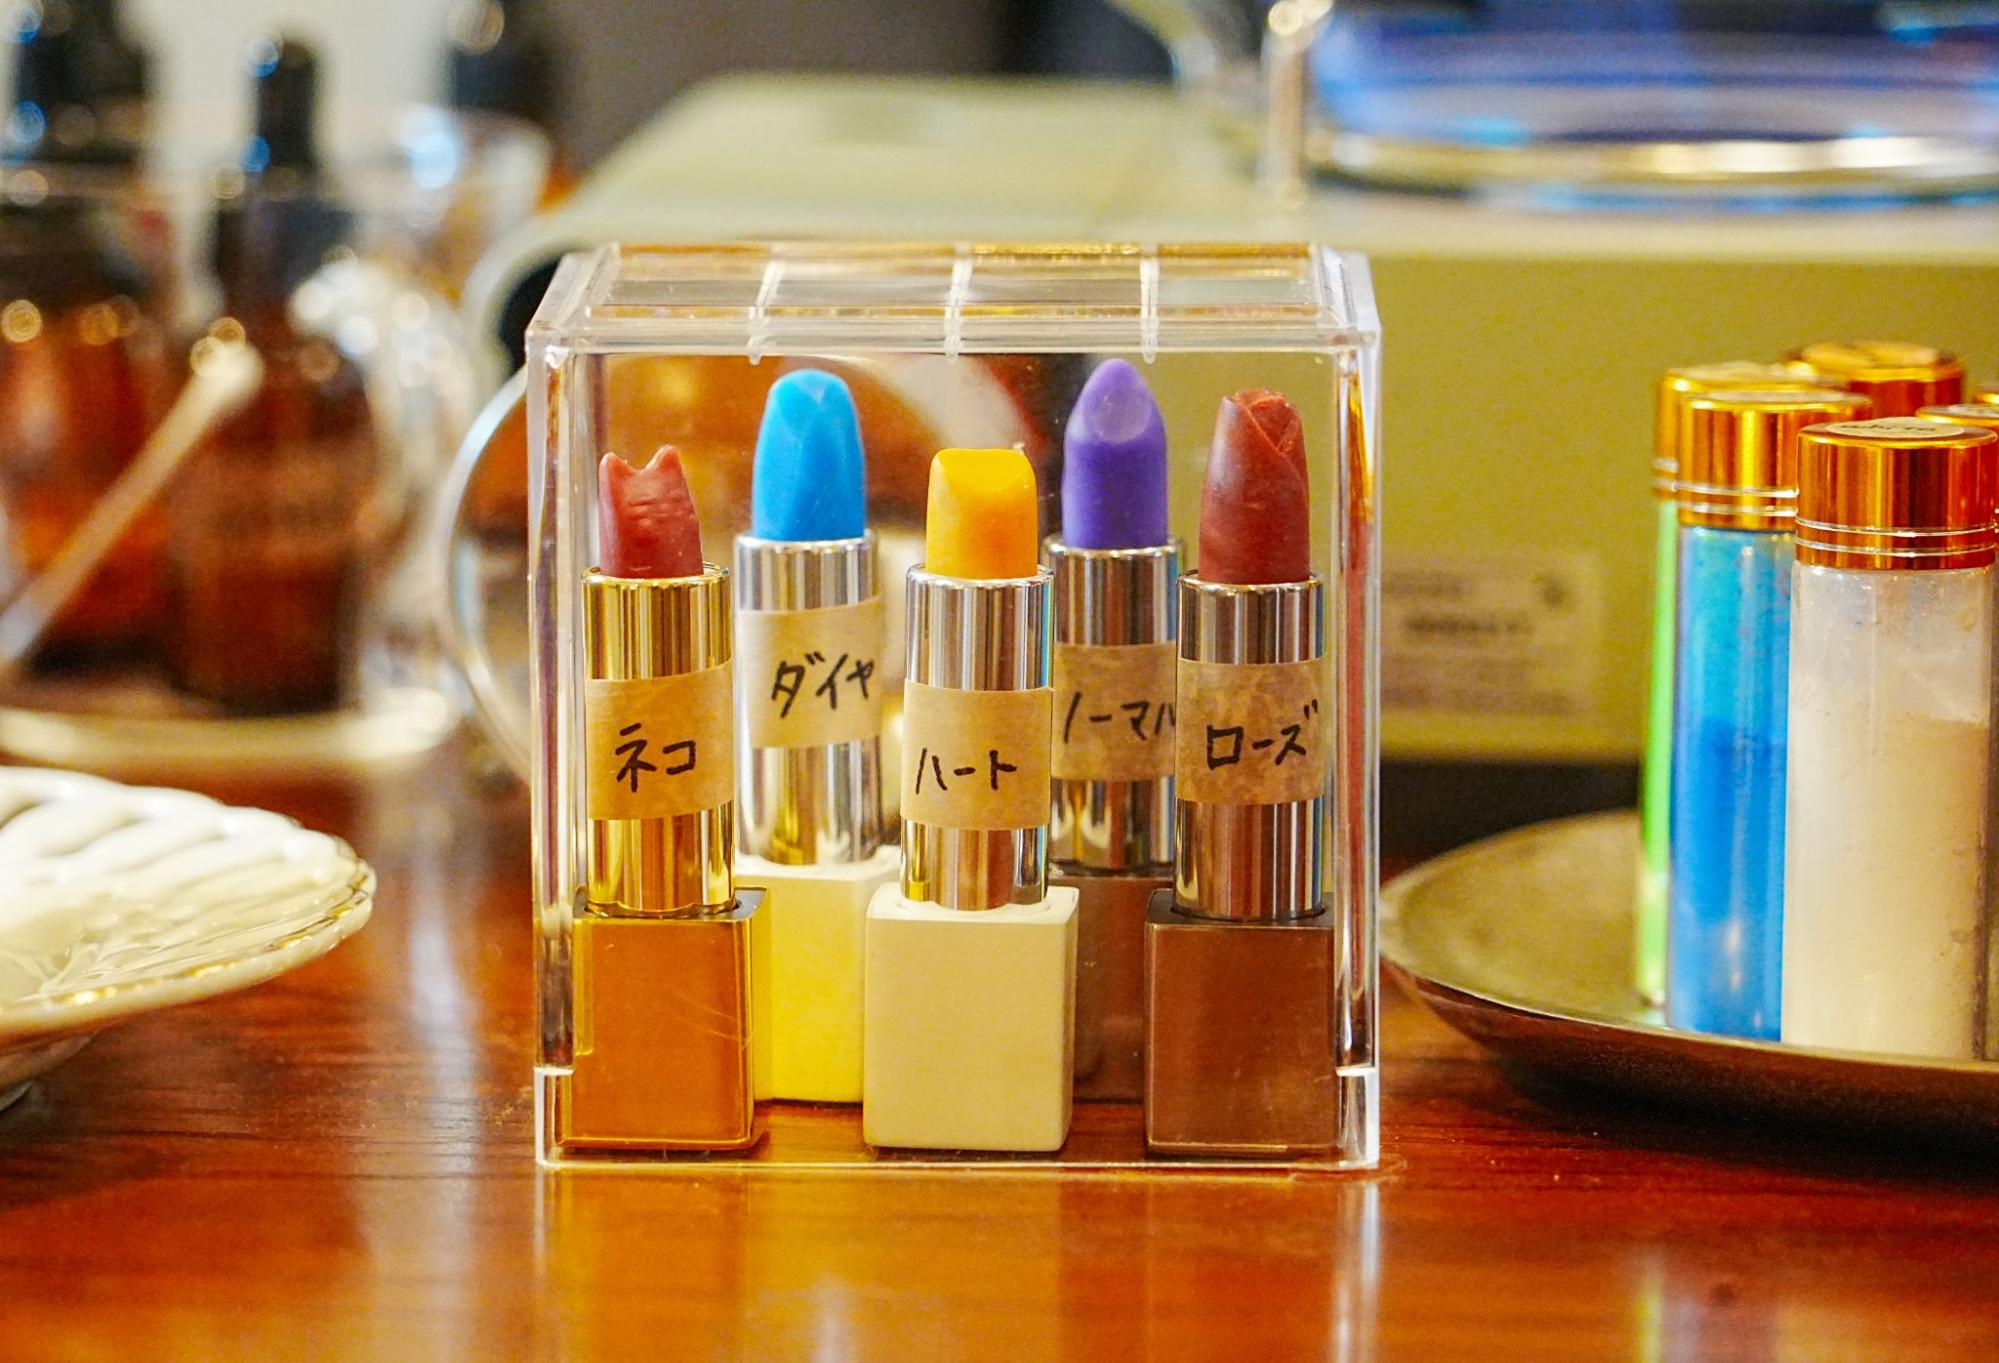
Five types of lip shapes
While you wait for the balm to melt, choose your lip shape from a total of five options.
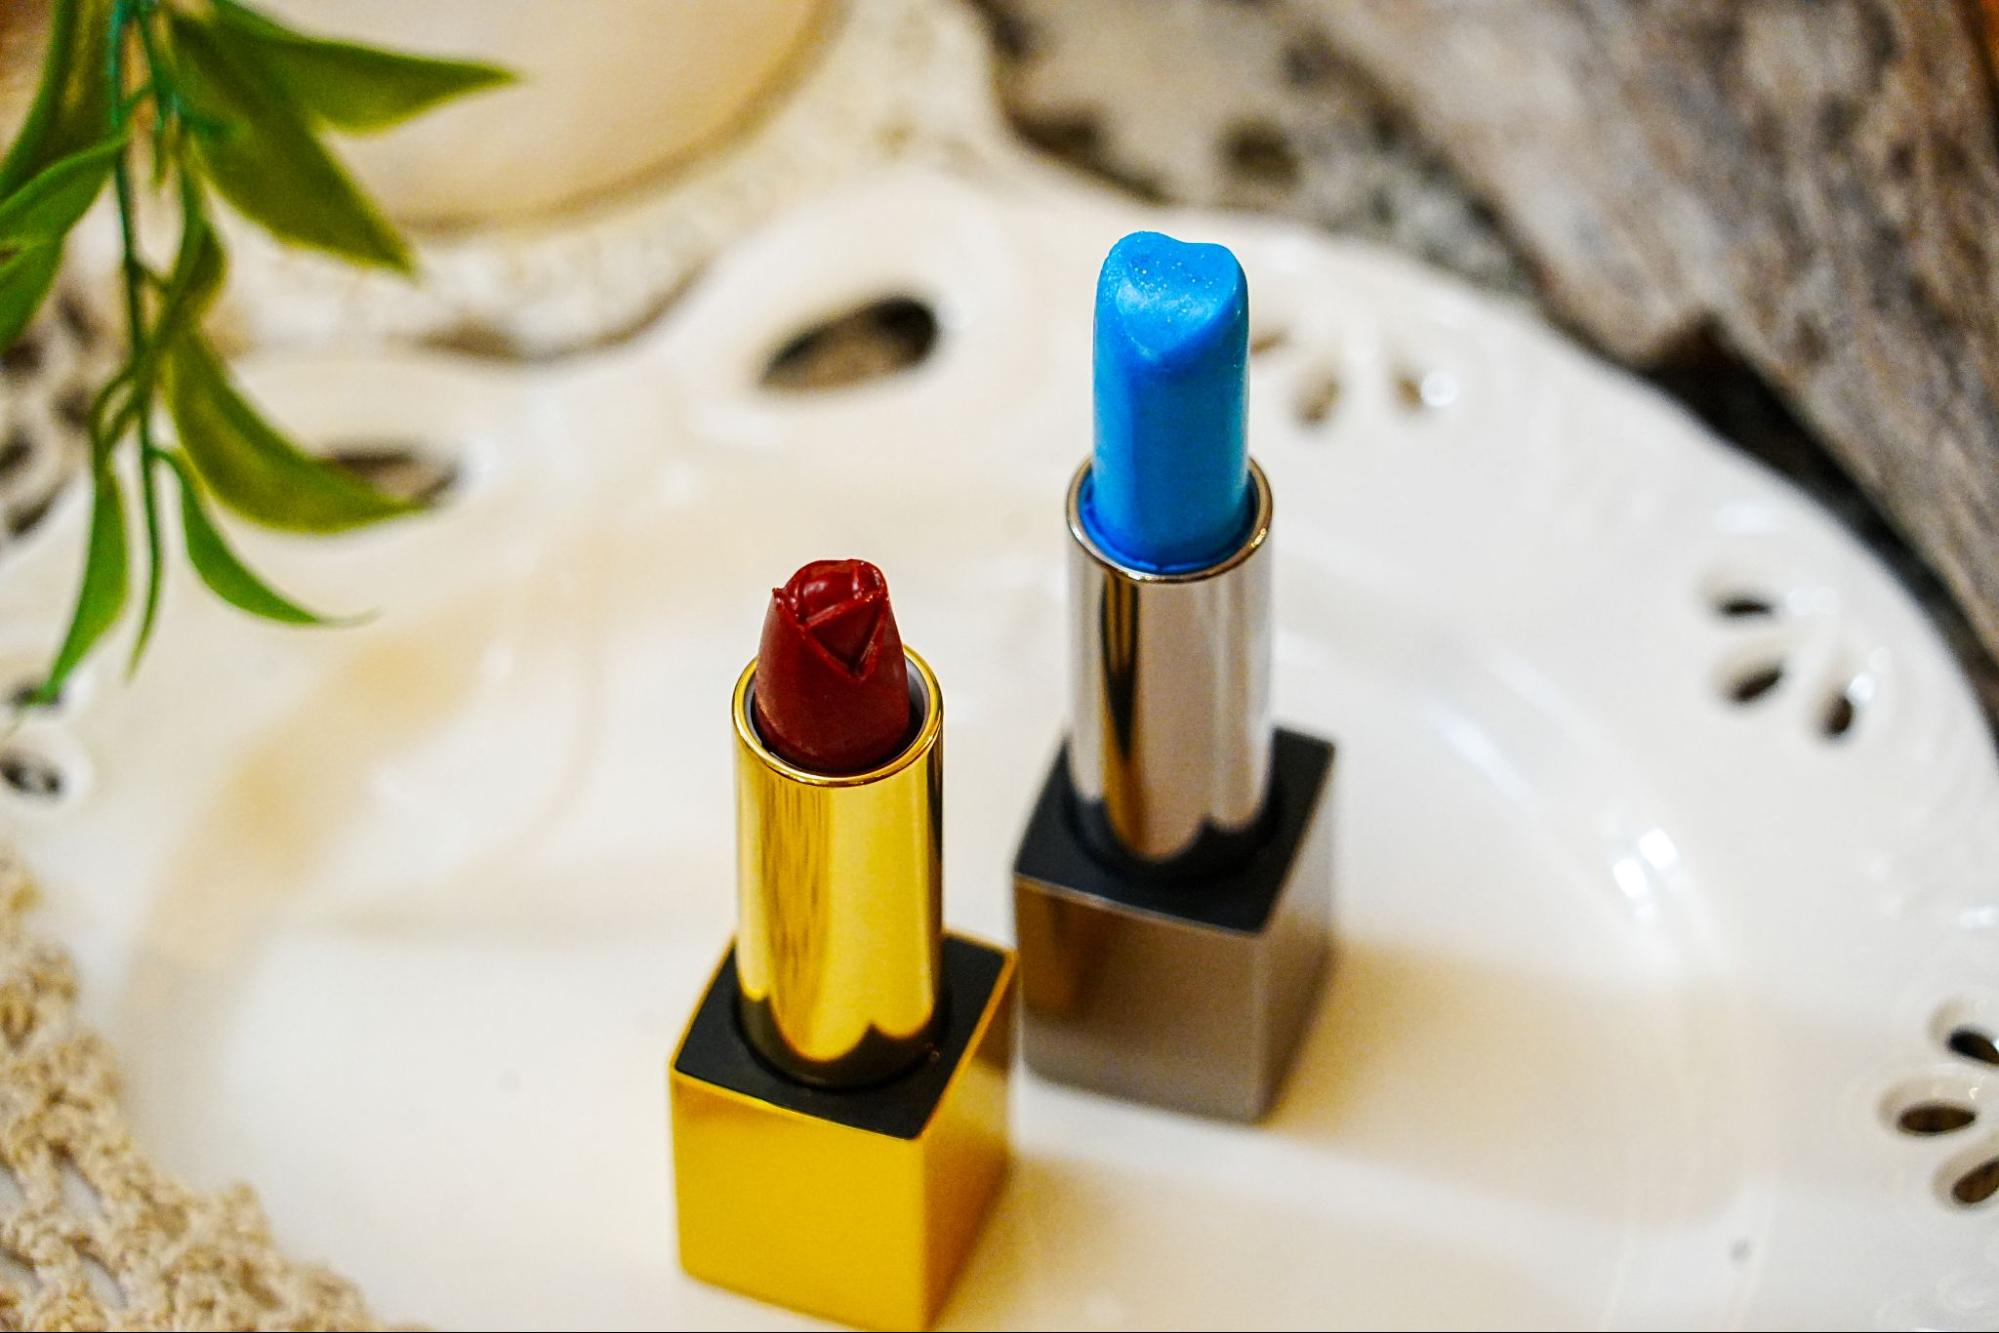
There are lots of interesting shapes, including cute cat shapes and the popular heart shape! This time, I chose the rose shape to match the color.
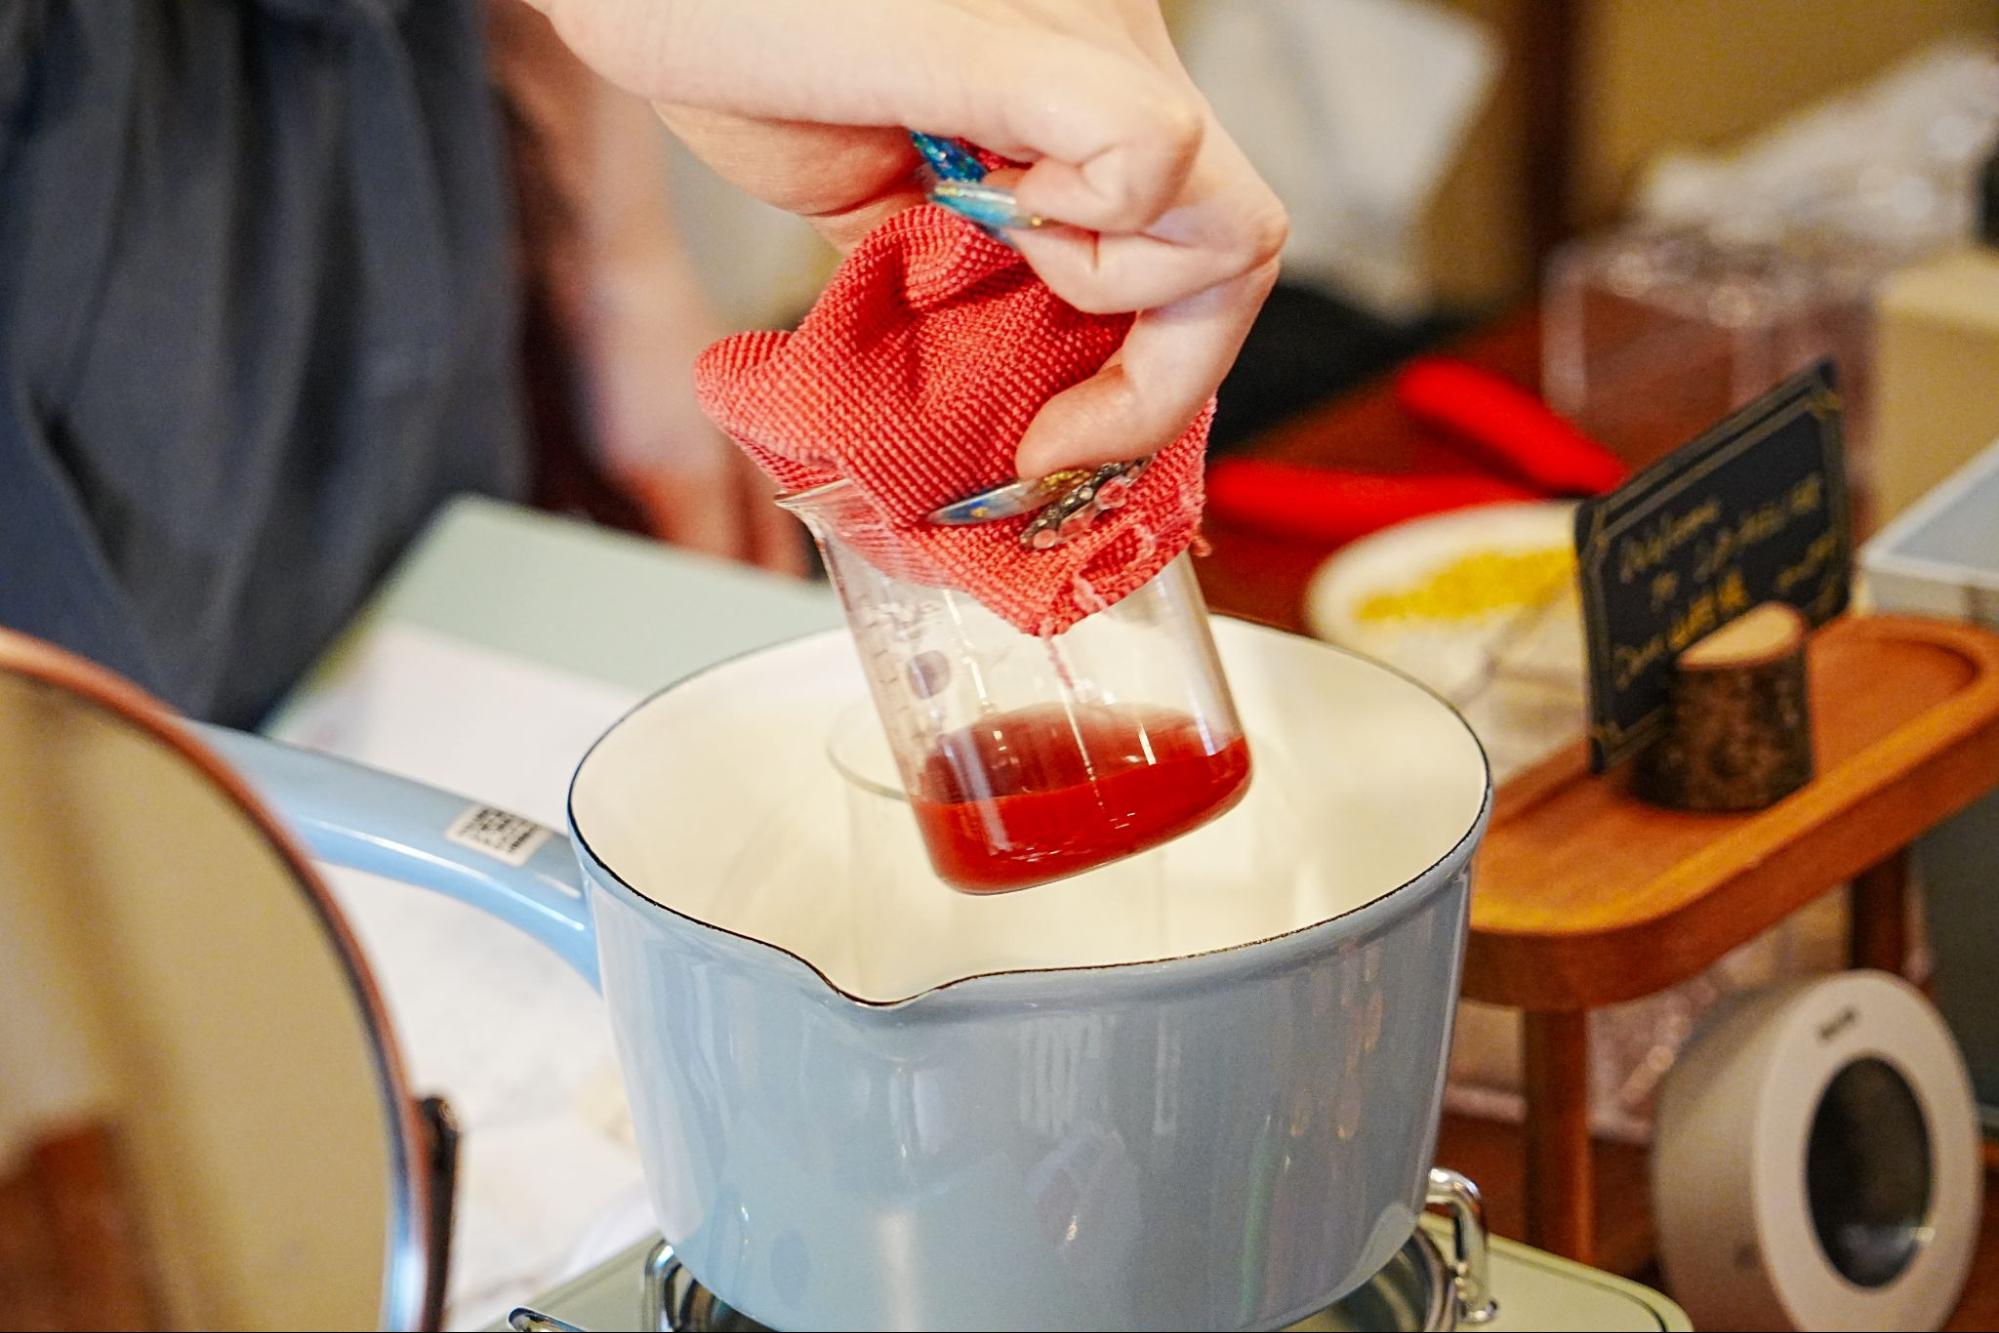
Be careful, the beaker is hot!
Be careful not to spill it.
Pour the melted balm into the lip mold. The beaker is hot at this point, so be careful not to burn yourself as you pour it in.
Once the mixture is filled, refrigerate to harden. I managed to get it right and breathed a sigh of relief.
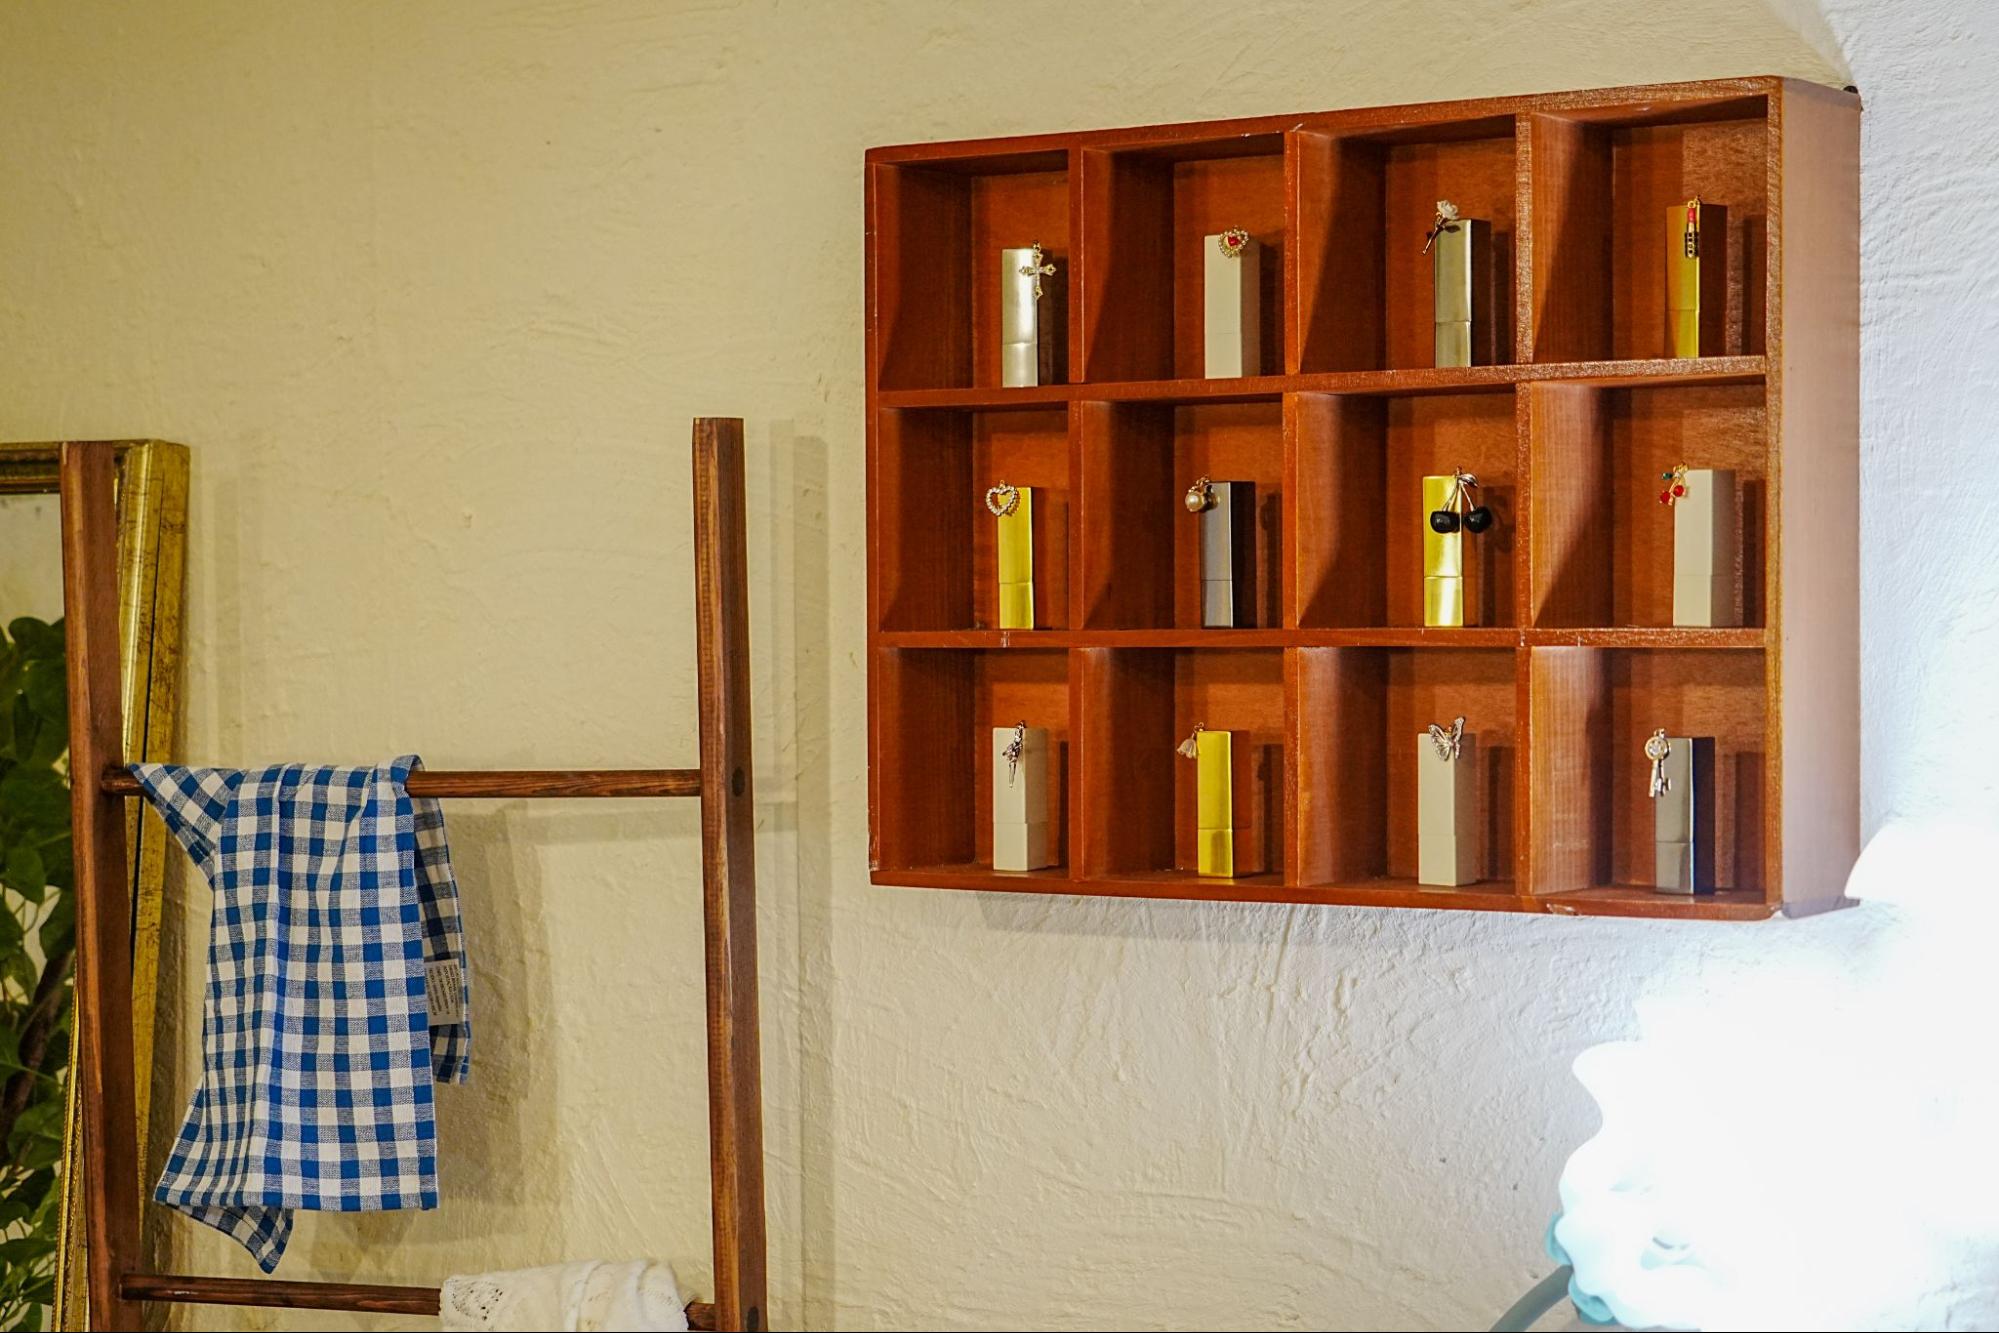
Customize your lipstick case and charms
While you wait for the lipstick to harden, choose a lip case and charm.
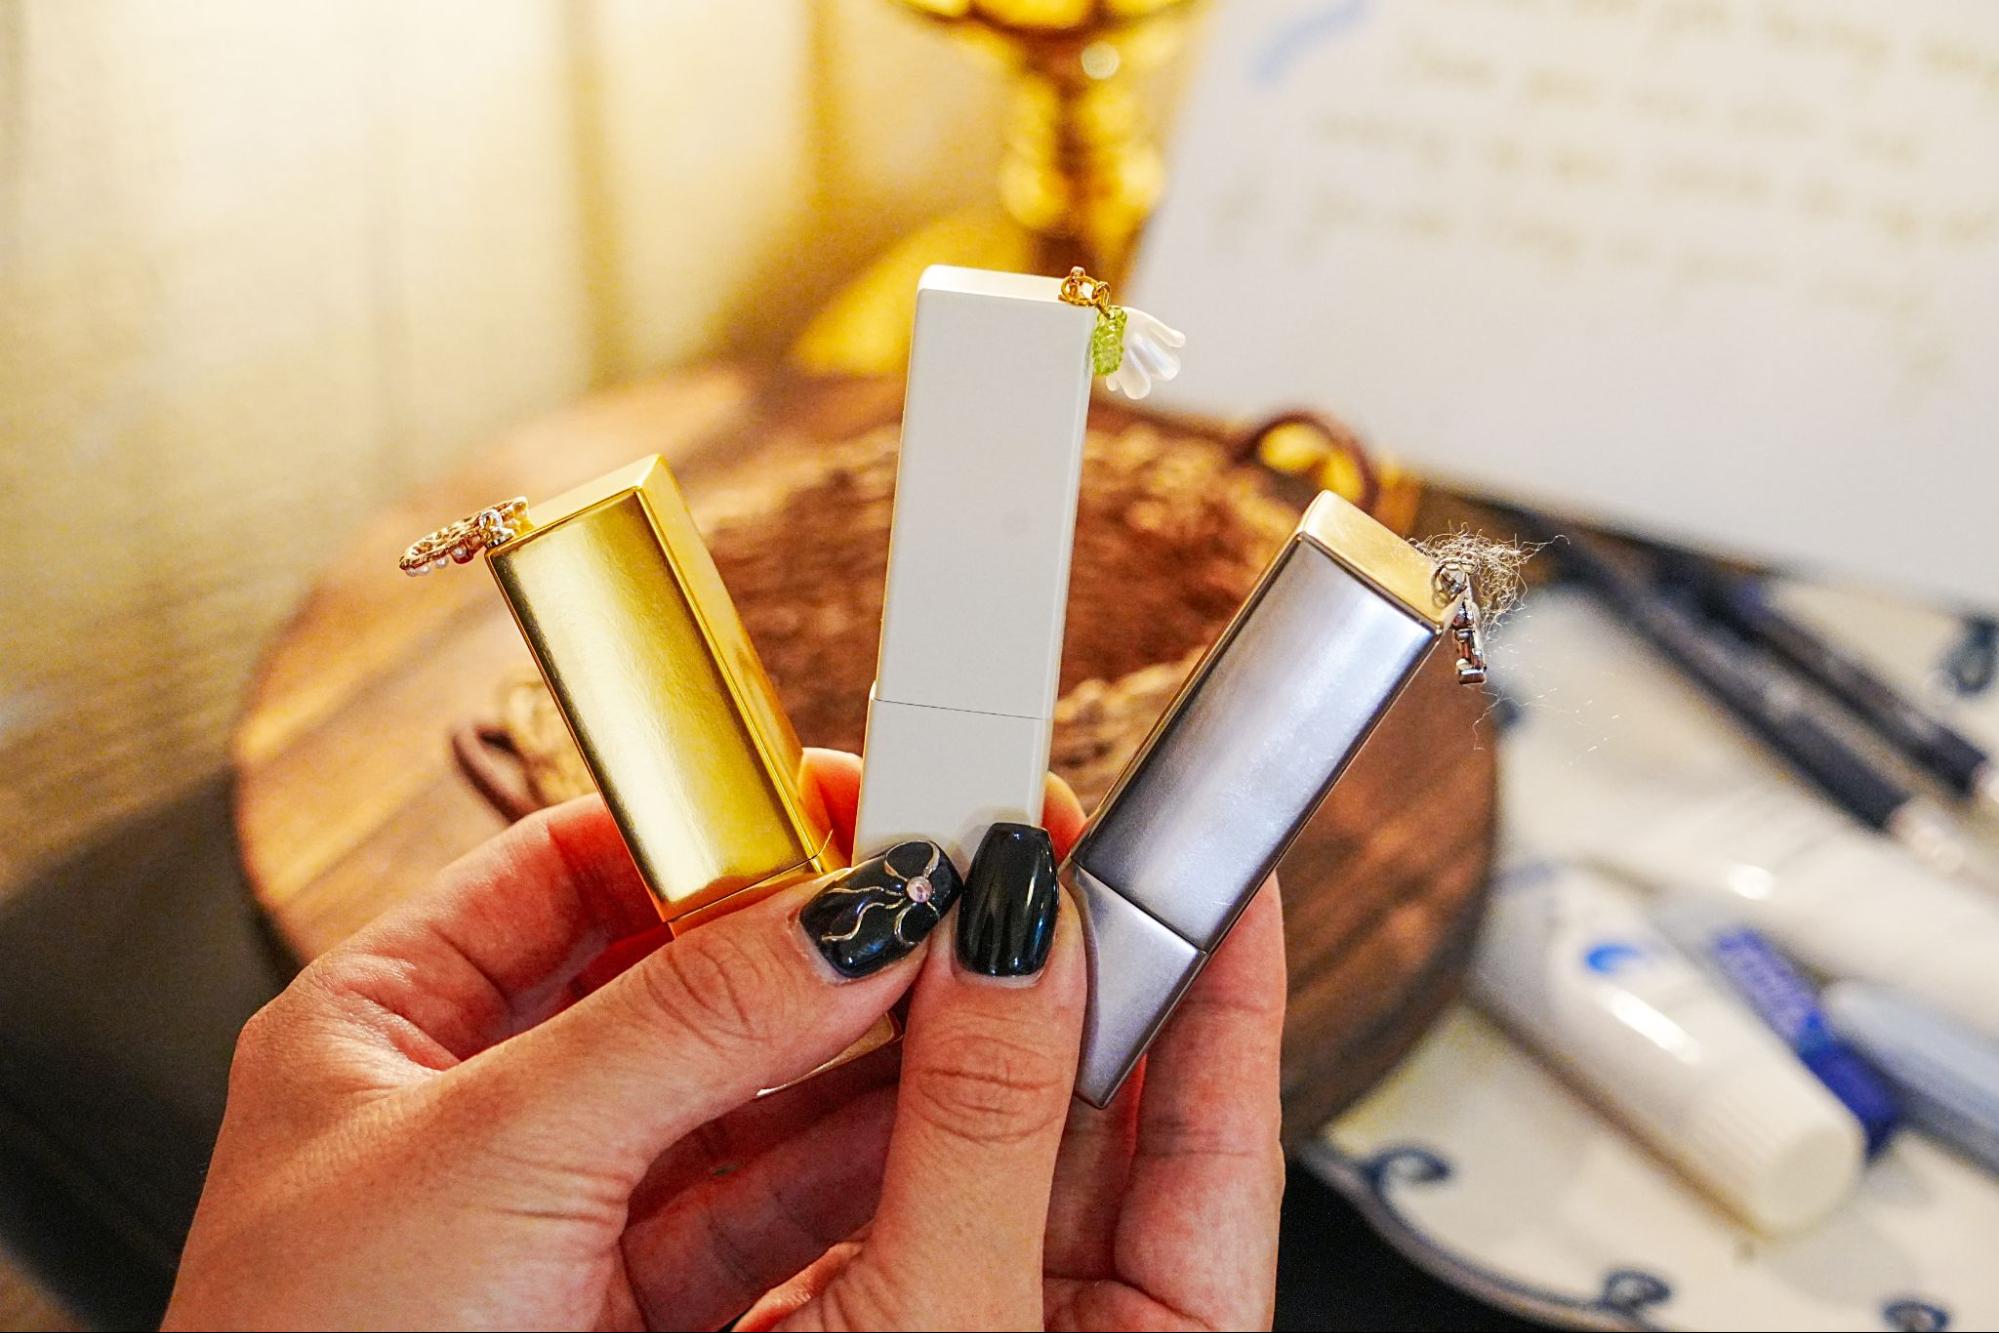
The lipstick cases come in three colors: gold, white, and silver. These cases are magnetic, so the cap closes with a click just by bringing it close.
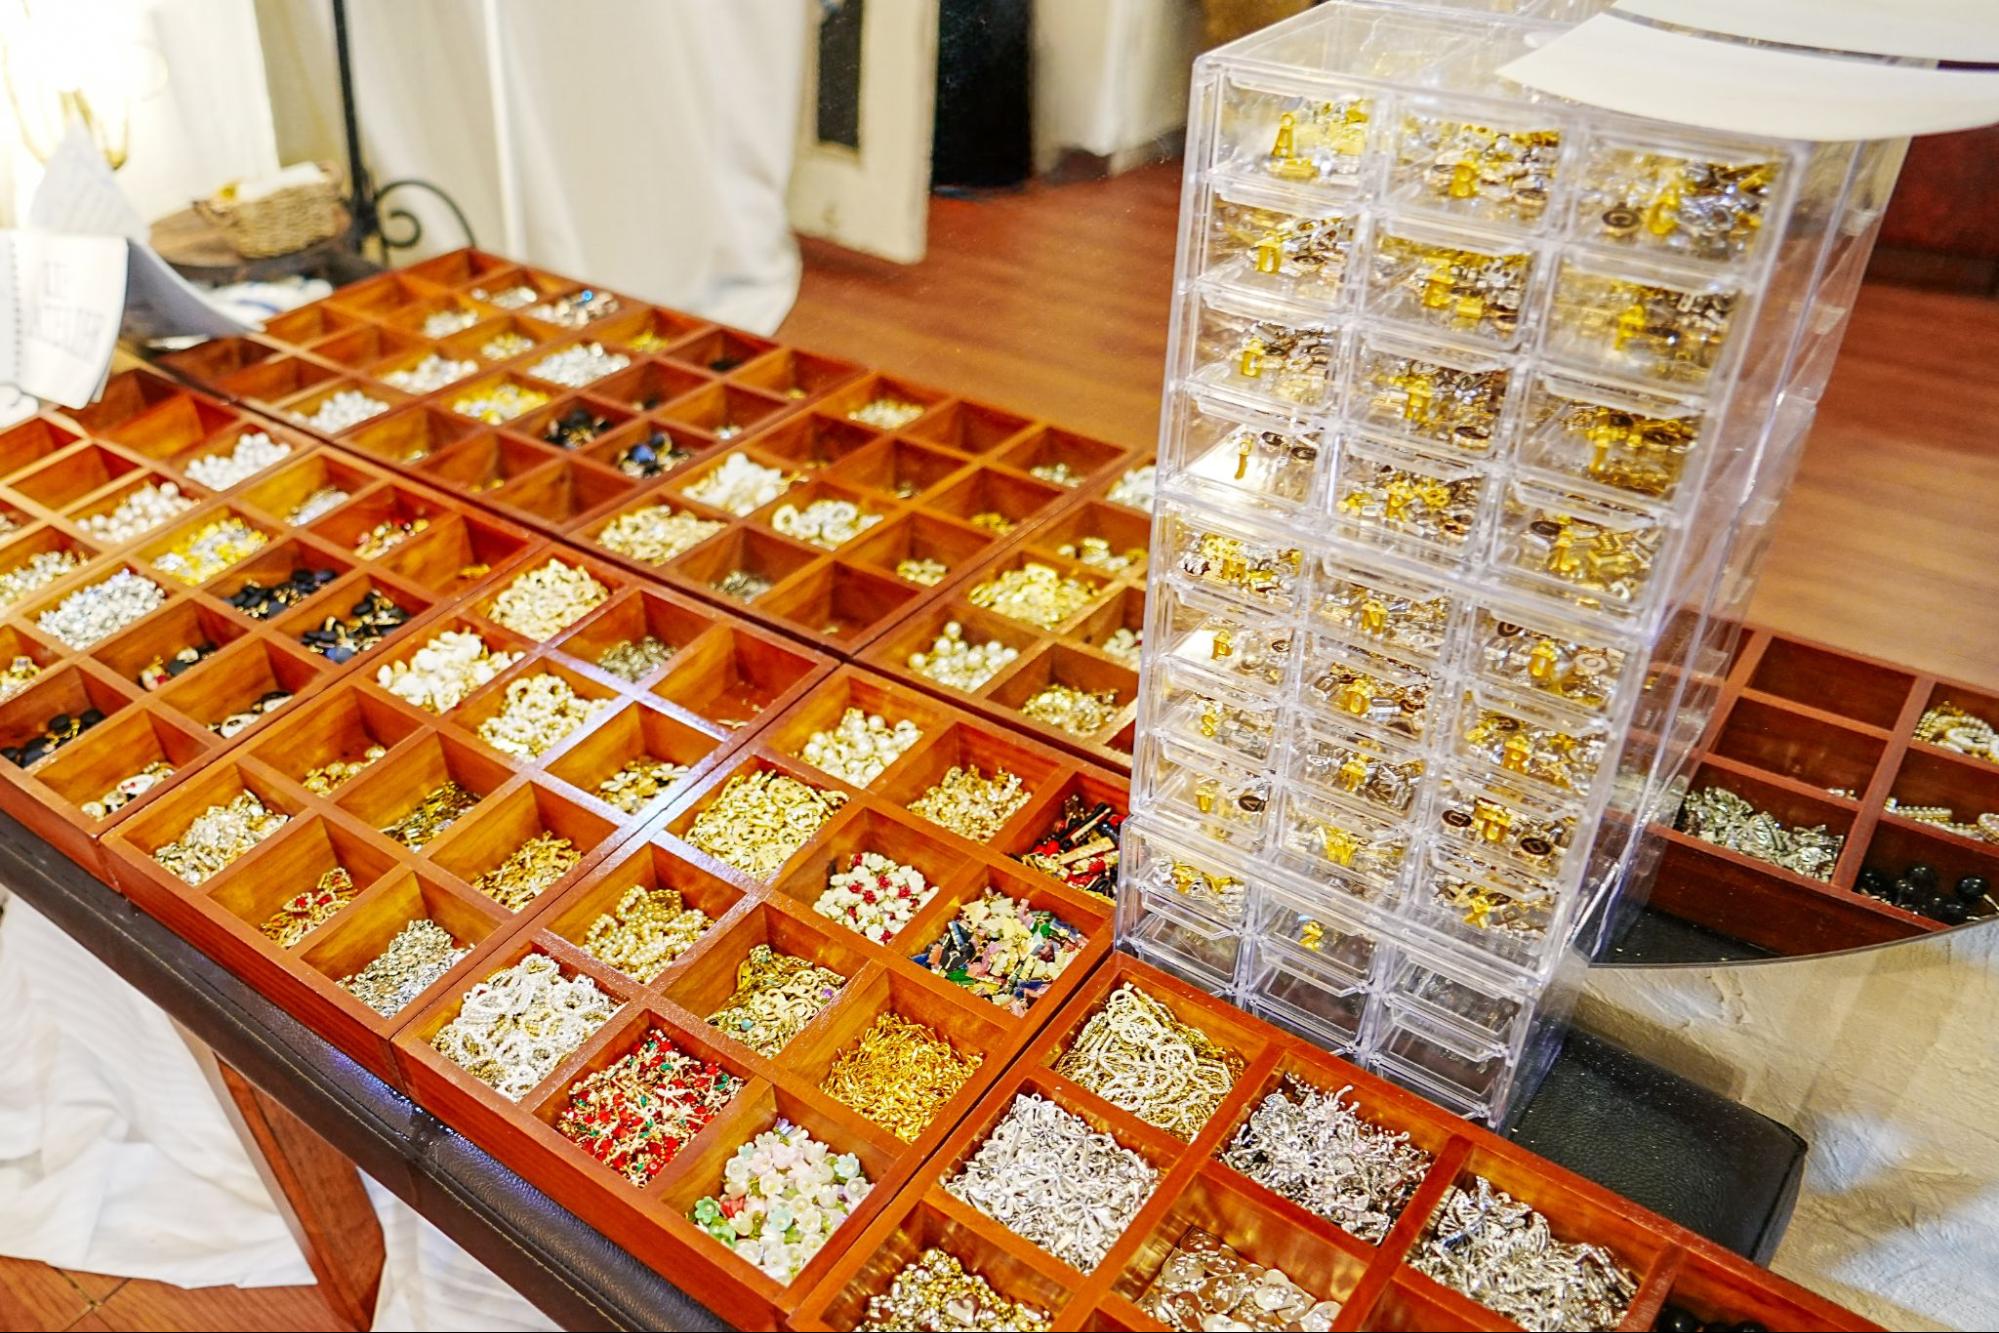
An area lined with charms spread out in one corner of the atelier
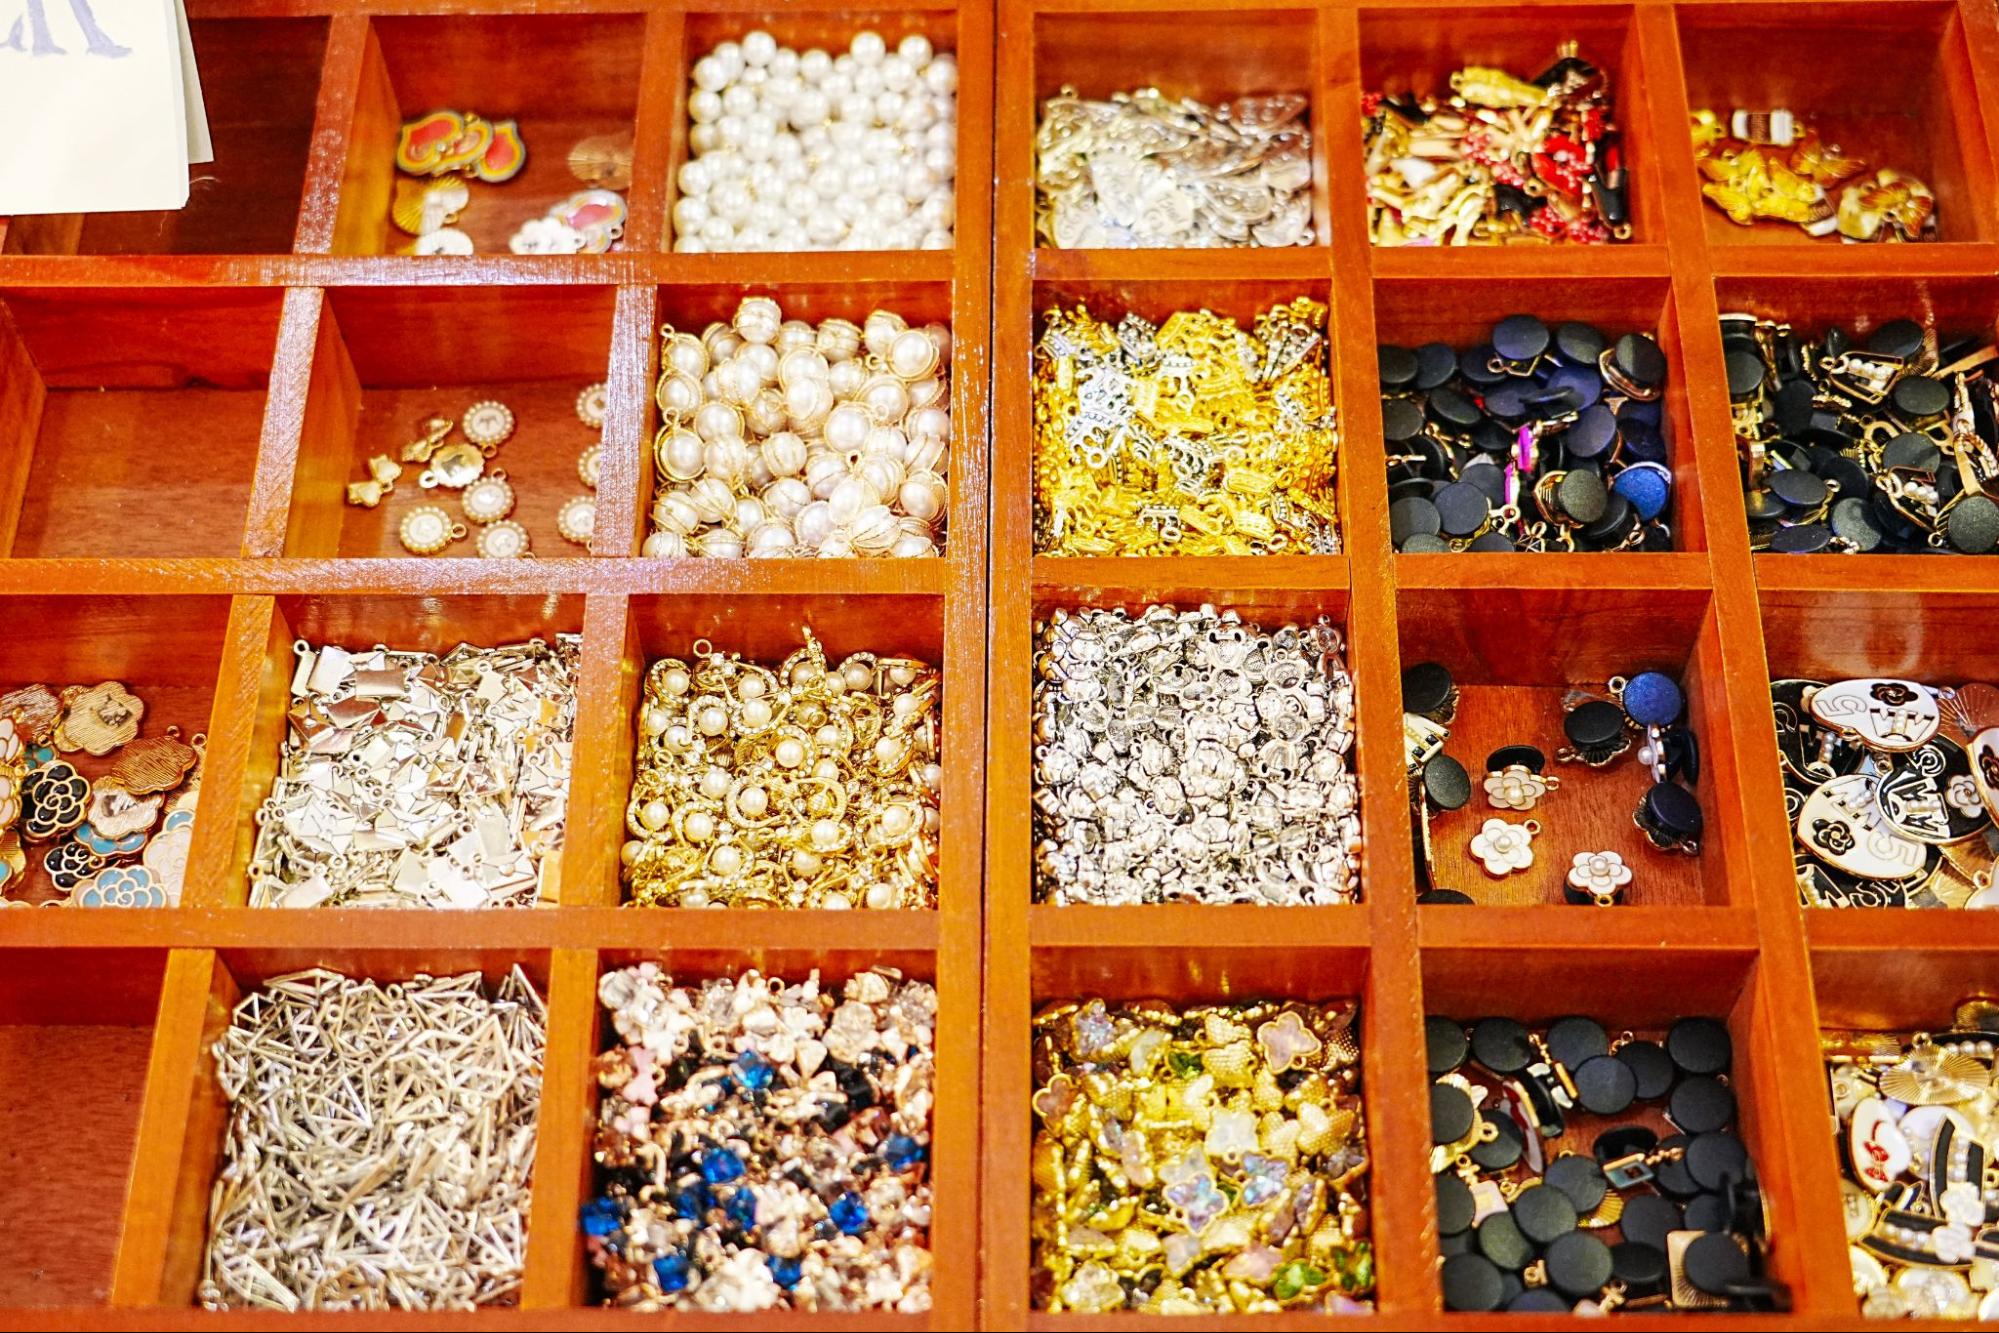
From the charms lined up in a corner of the atelier, you can choose one to set on the cap of your lip case.
There are over 150 types of charms! From here, you can find a charm that matches your lip color, case, and preferences. Looking at the sparkling charms will make you feel like you're on a treasure hunt!
There are samples displayed in the store to help you decide.
Remove the lipstick from the mold and put the finishing touches on it!
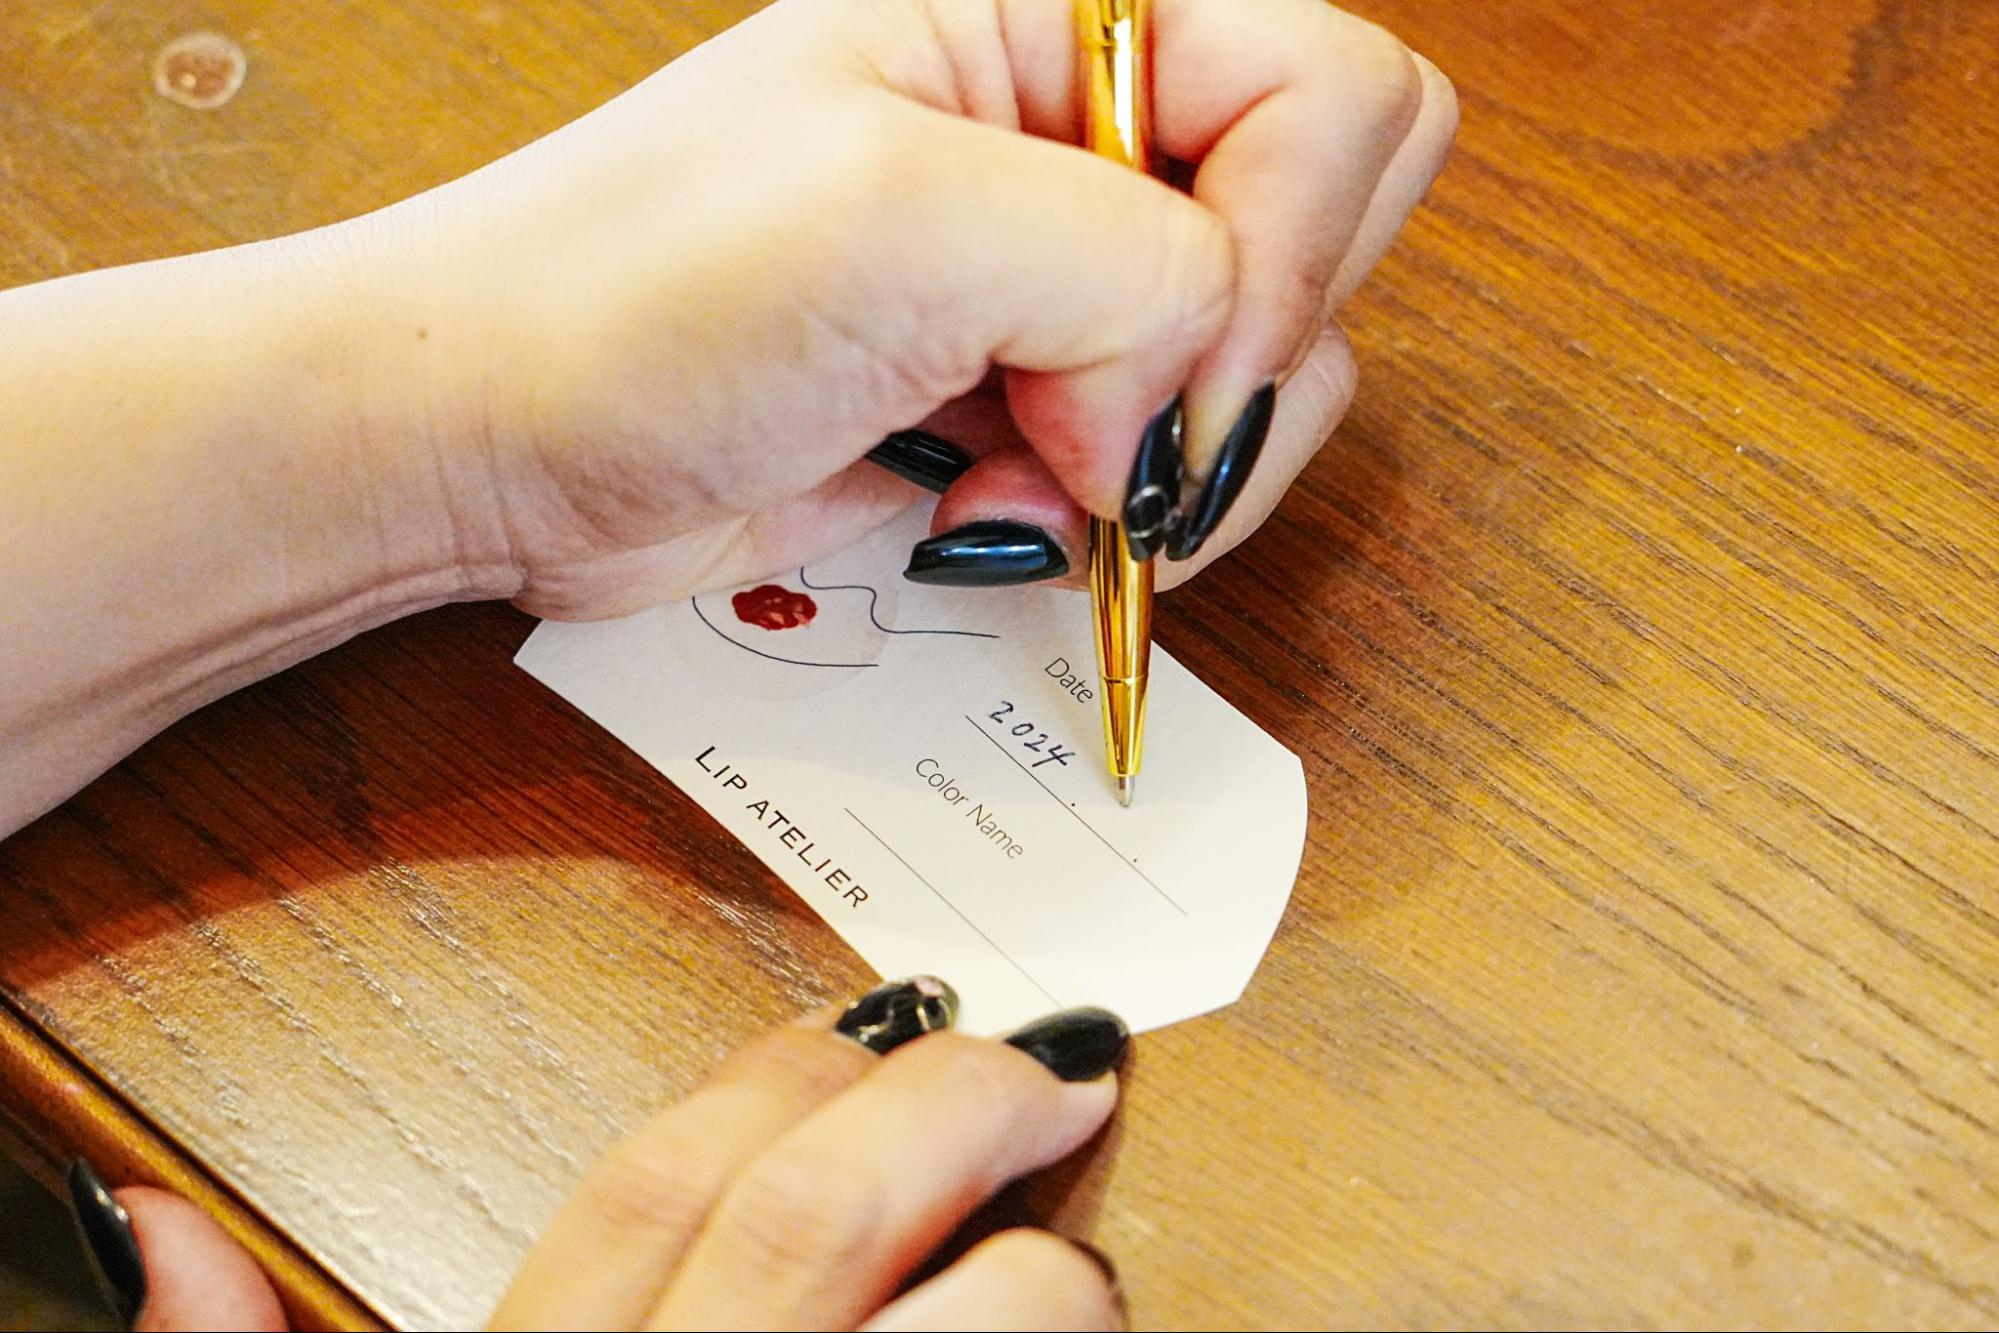
Dedicated medical records
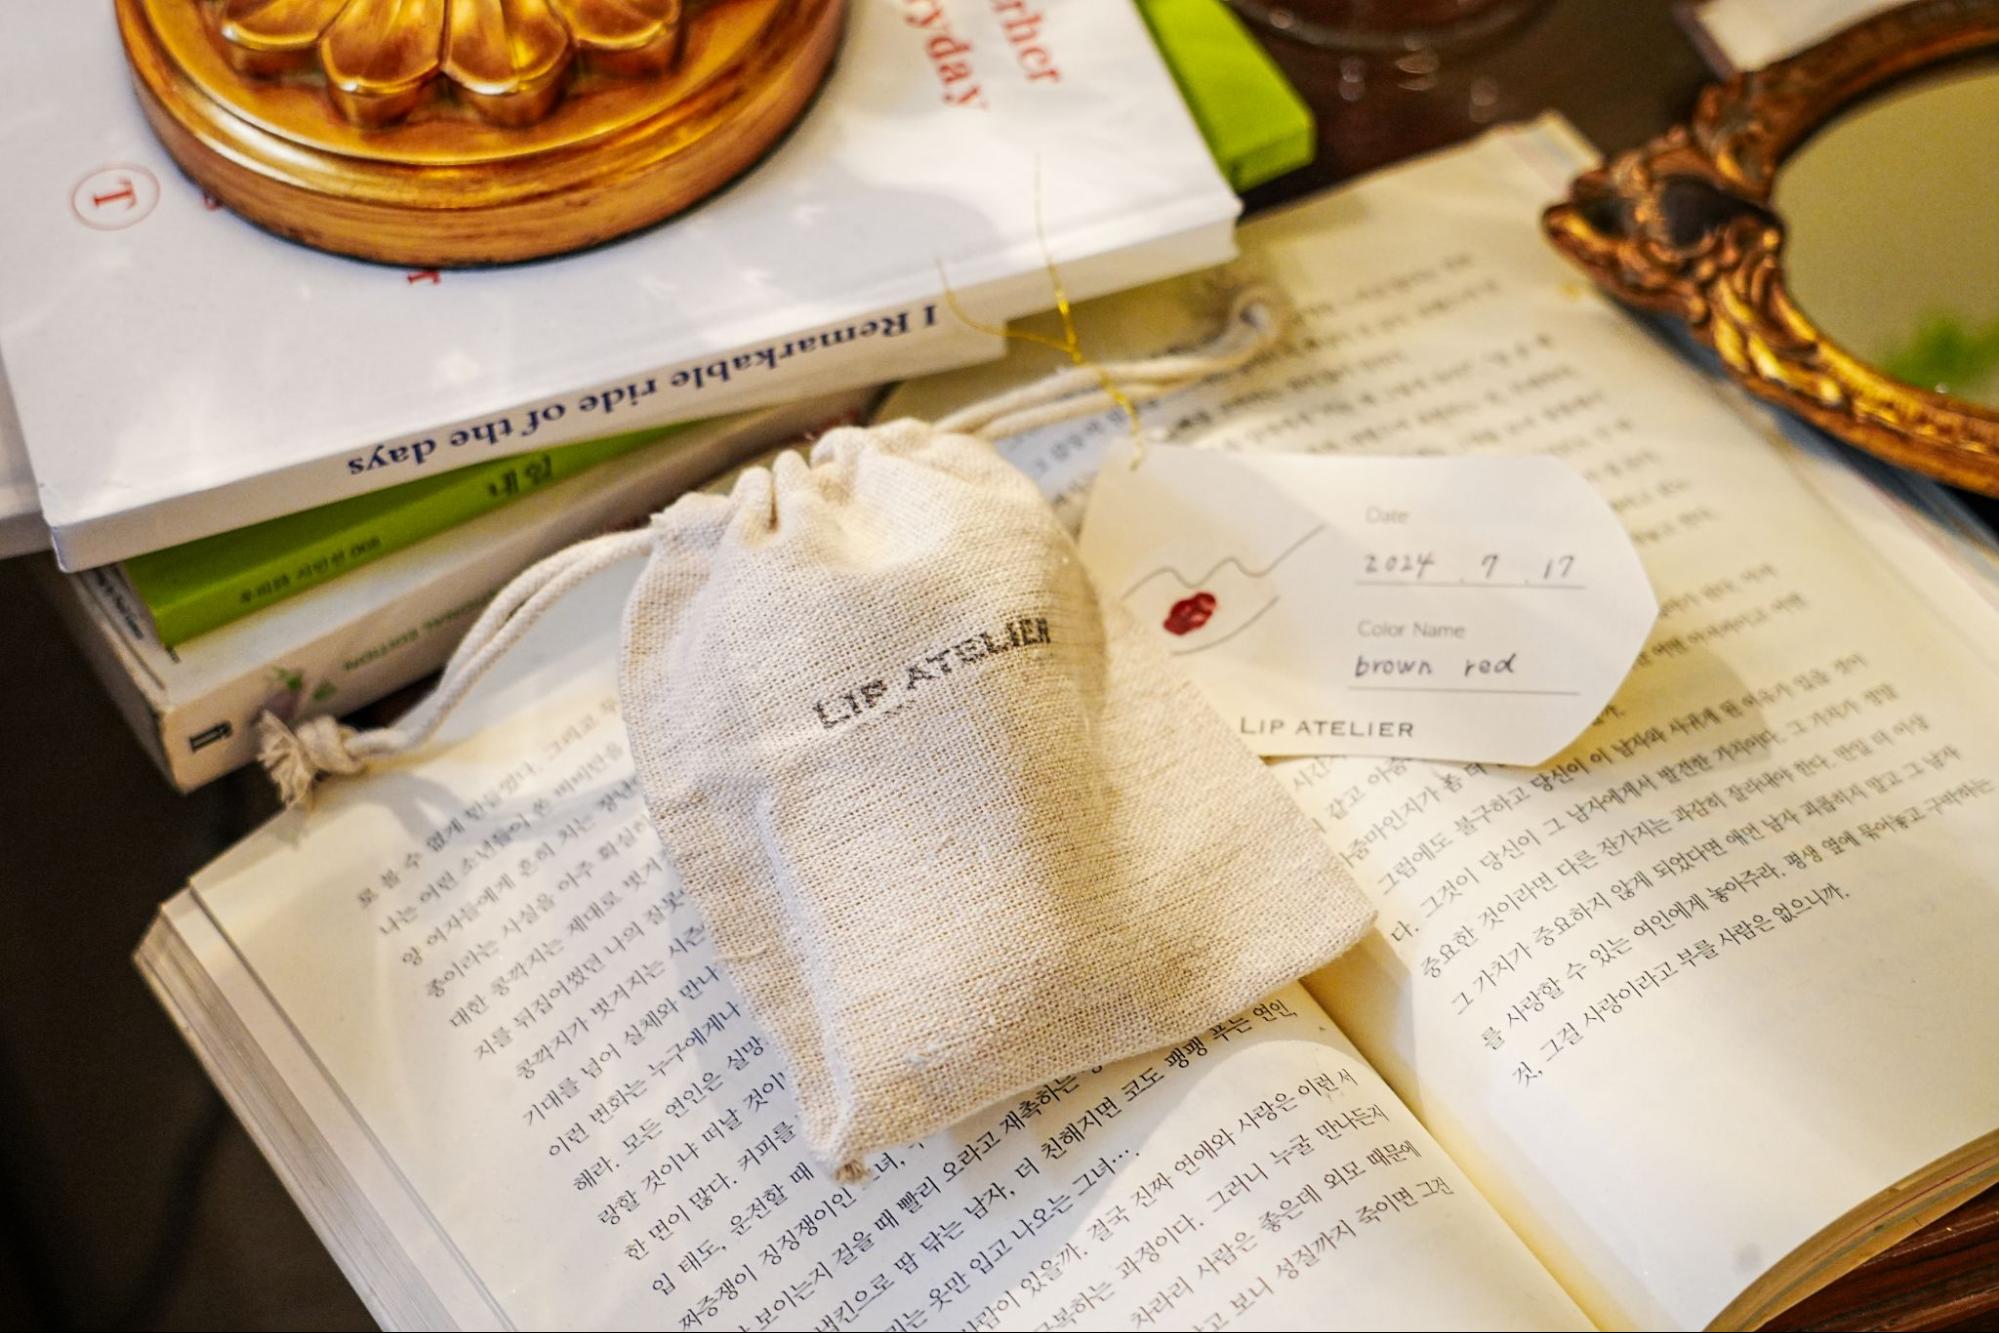
Write the date and color name on the special chart with the lip color you produced colored on it. Let's give your own original lip a special name.
Remove the lip from the mold while letting air in.
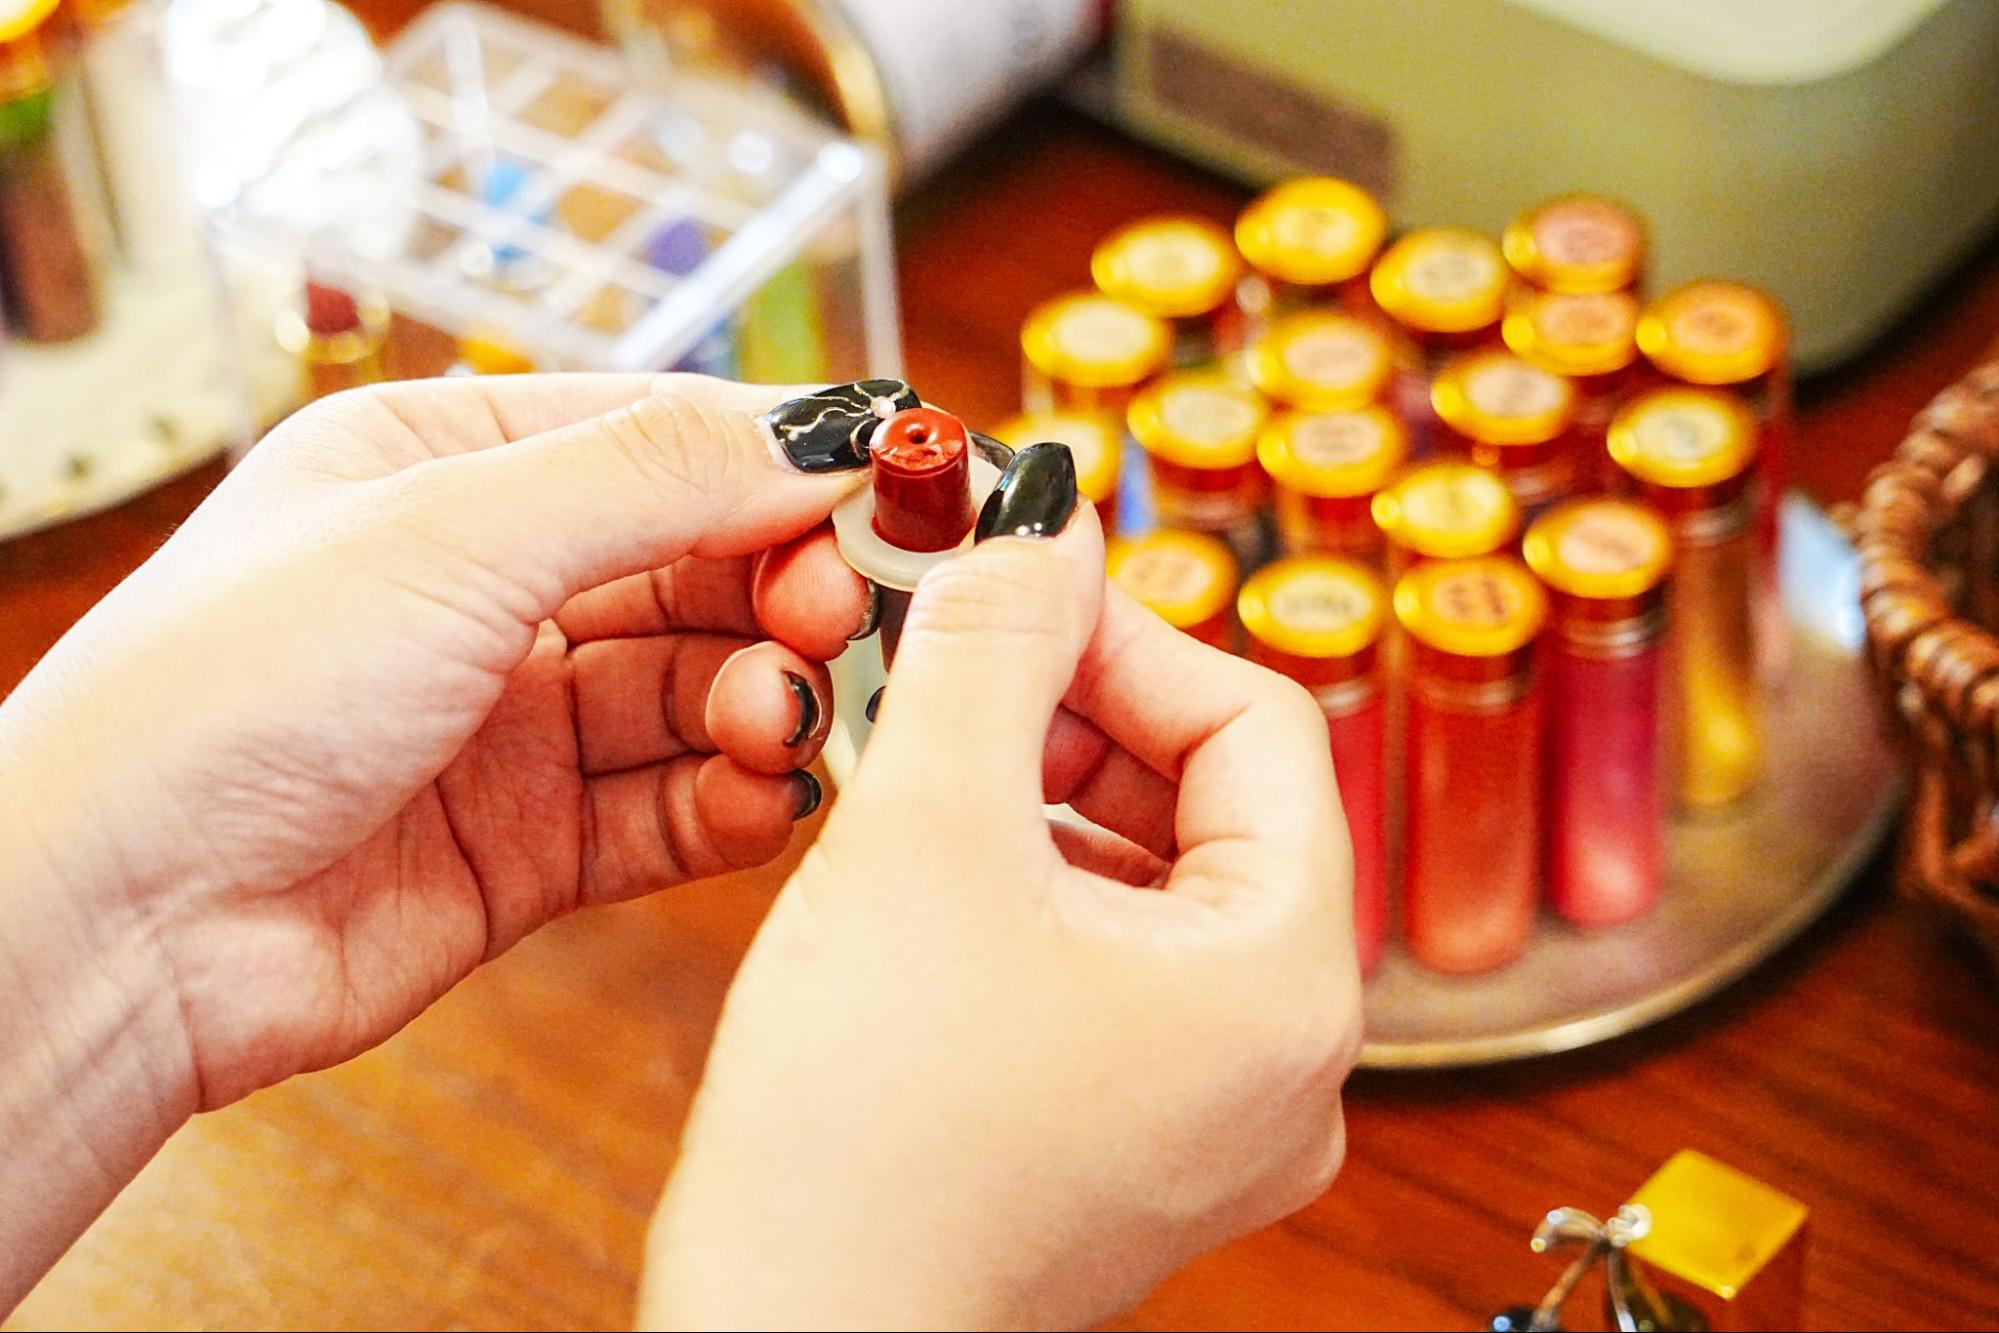
Once you're ready, the final step is to place the hardened lipstick into the case.
If you touch it forcibly or hold it poorly, the lip may break, so be careful and cautious. The staff will give you advice on how to hold it, so calm down and concentrate on the work!
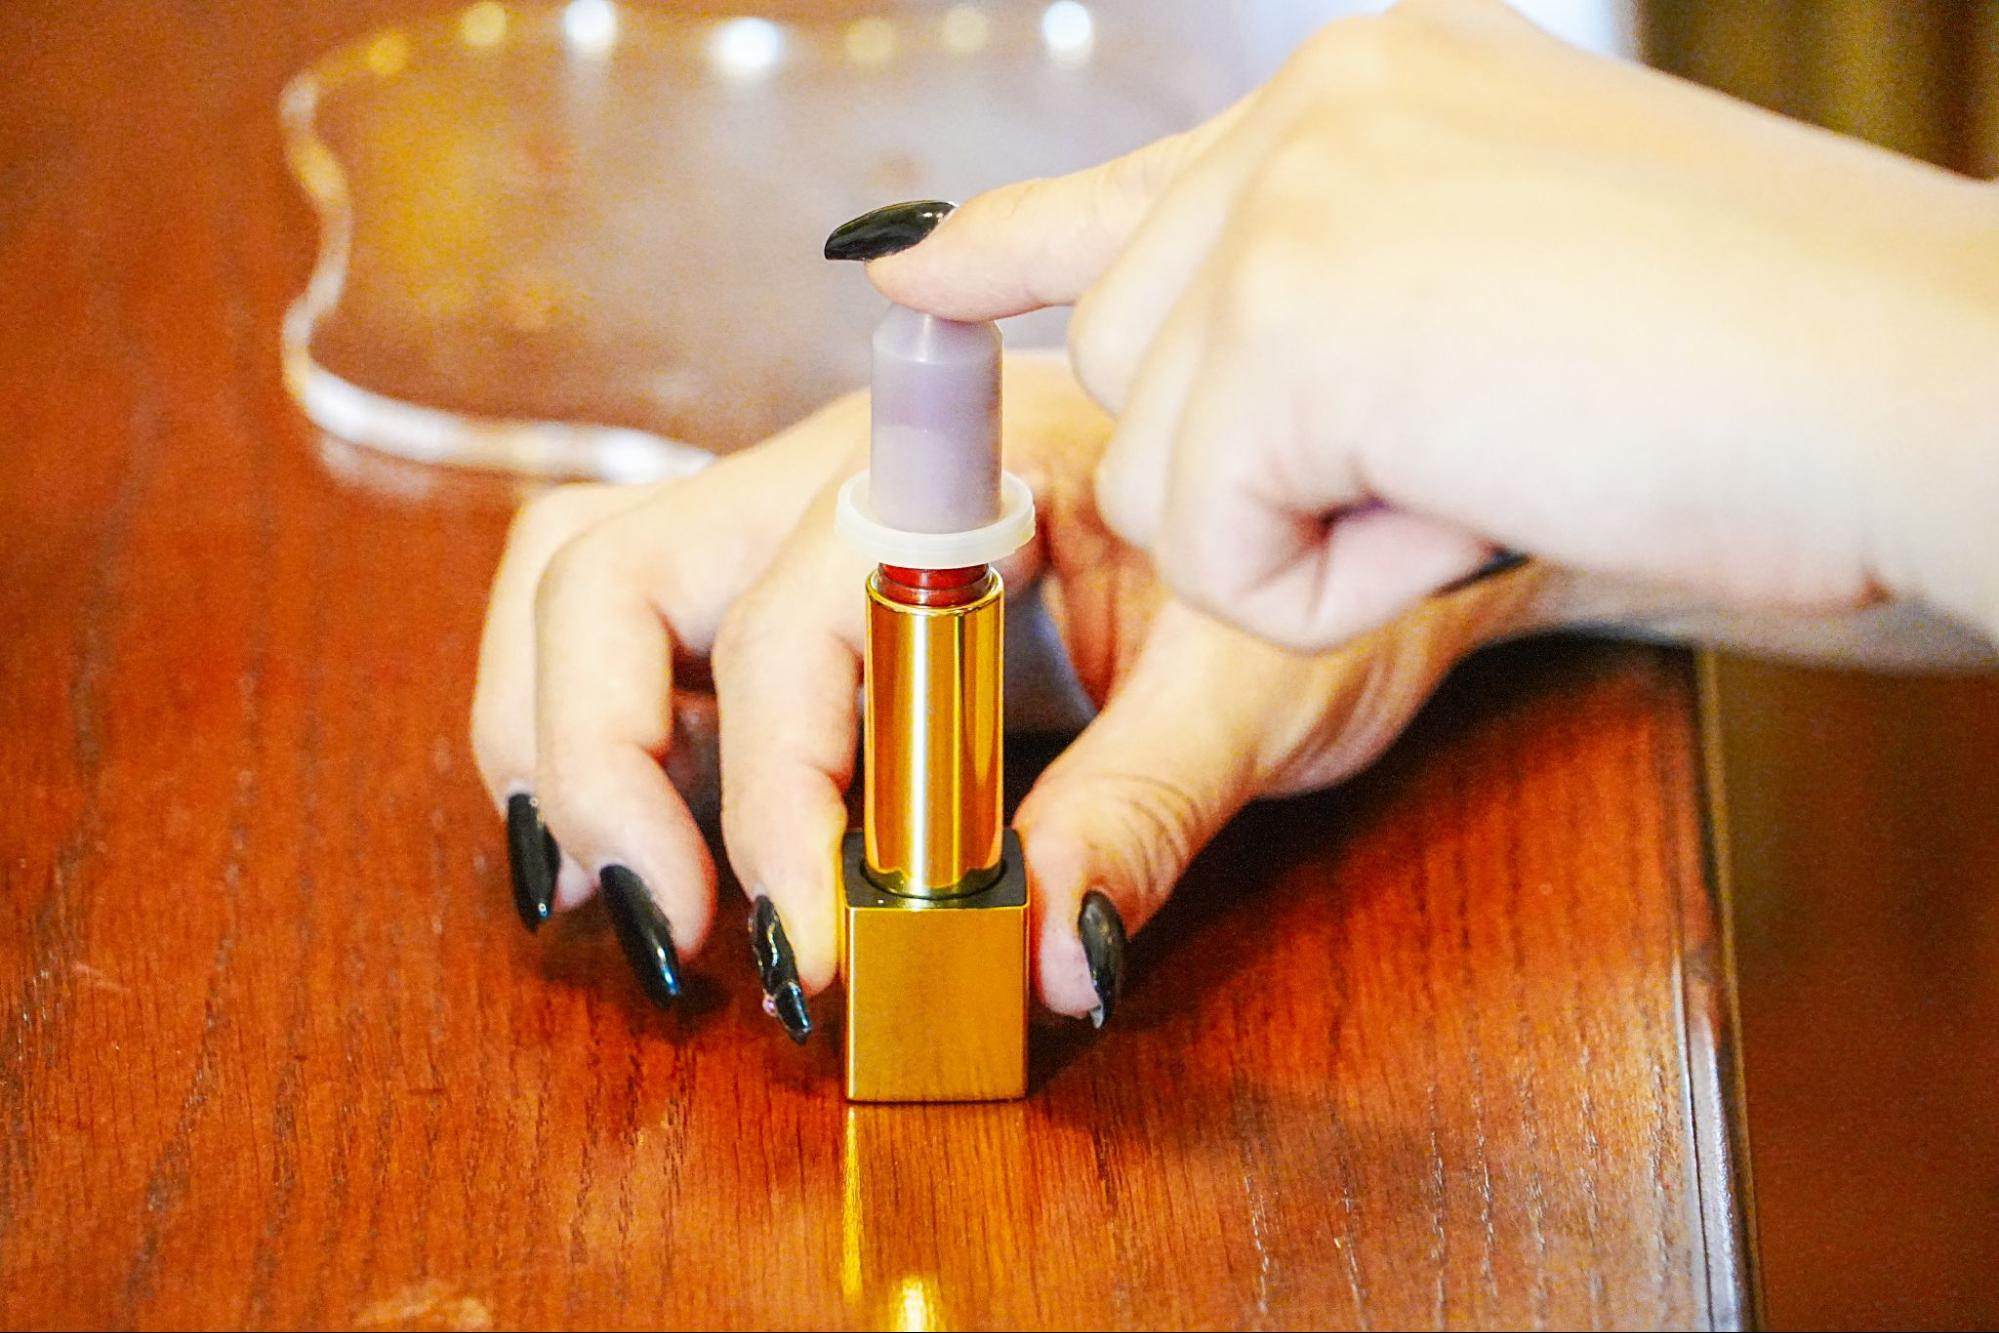
Press the stick part firmly
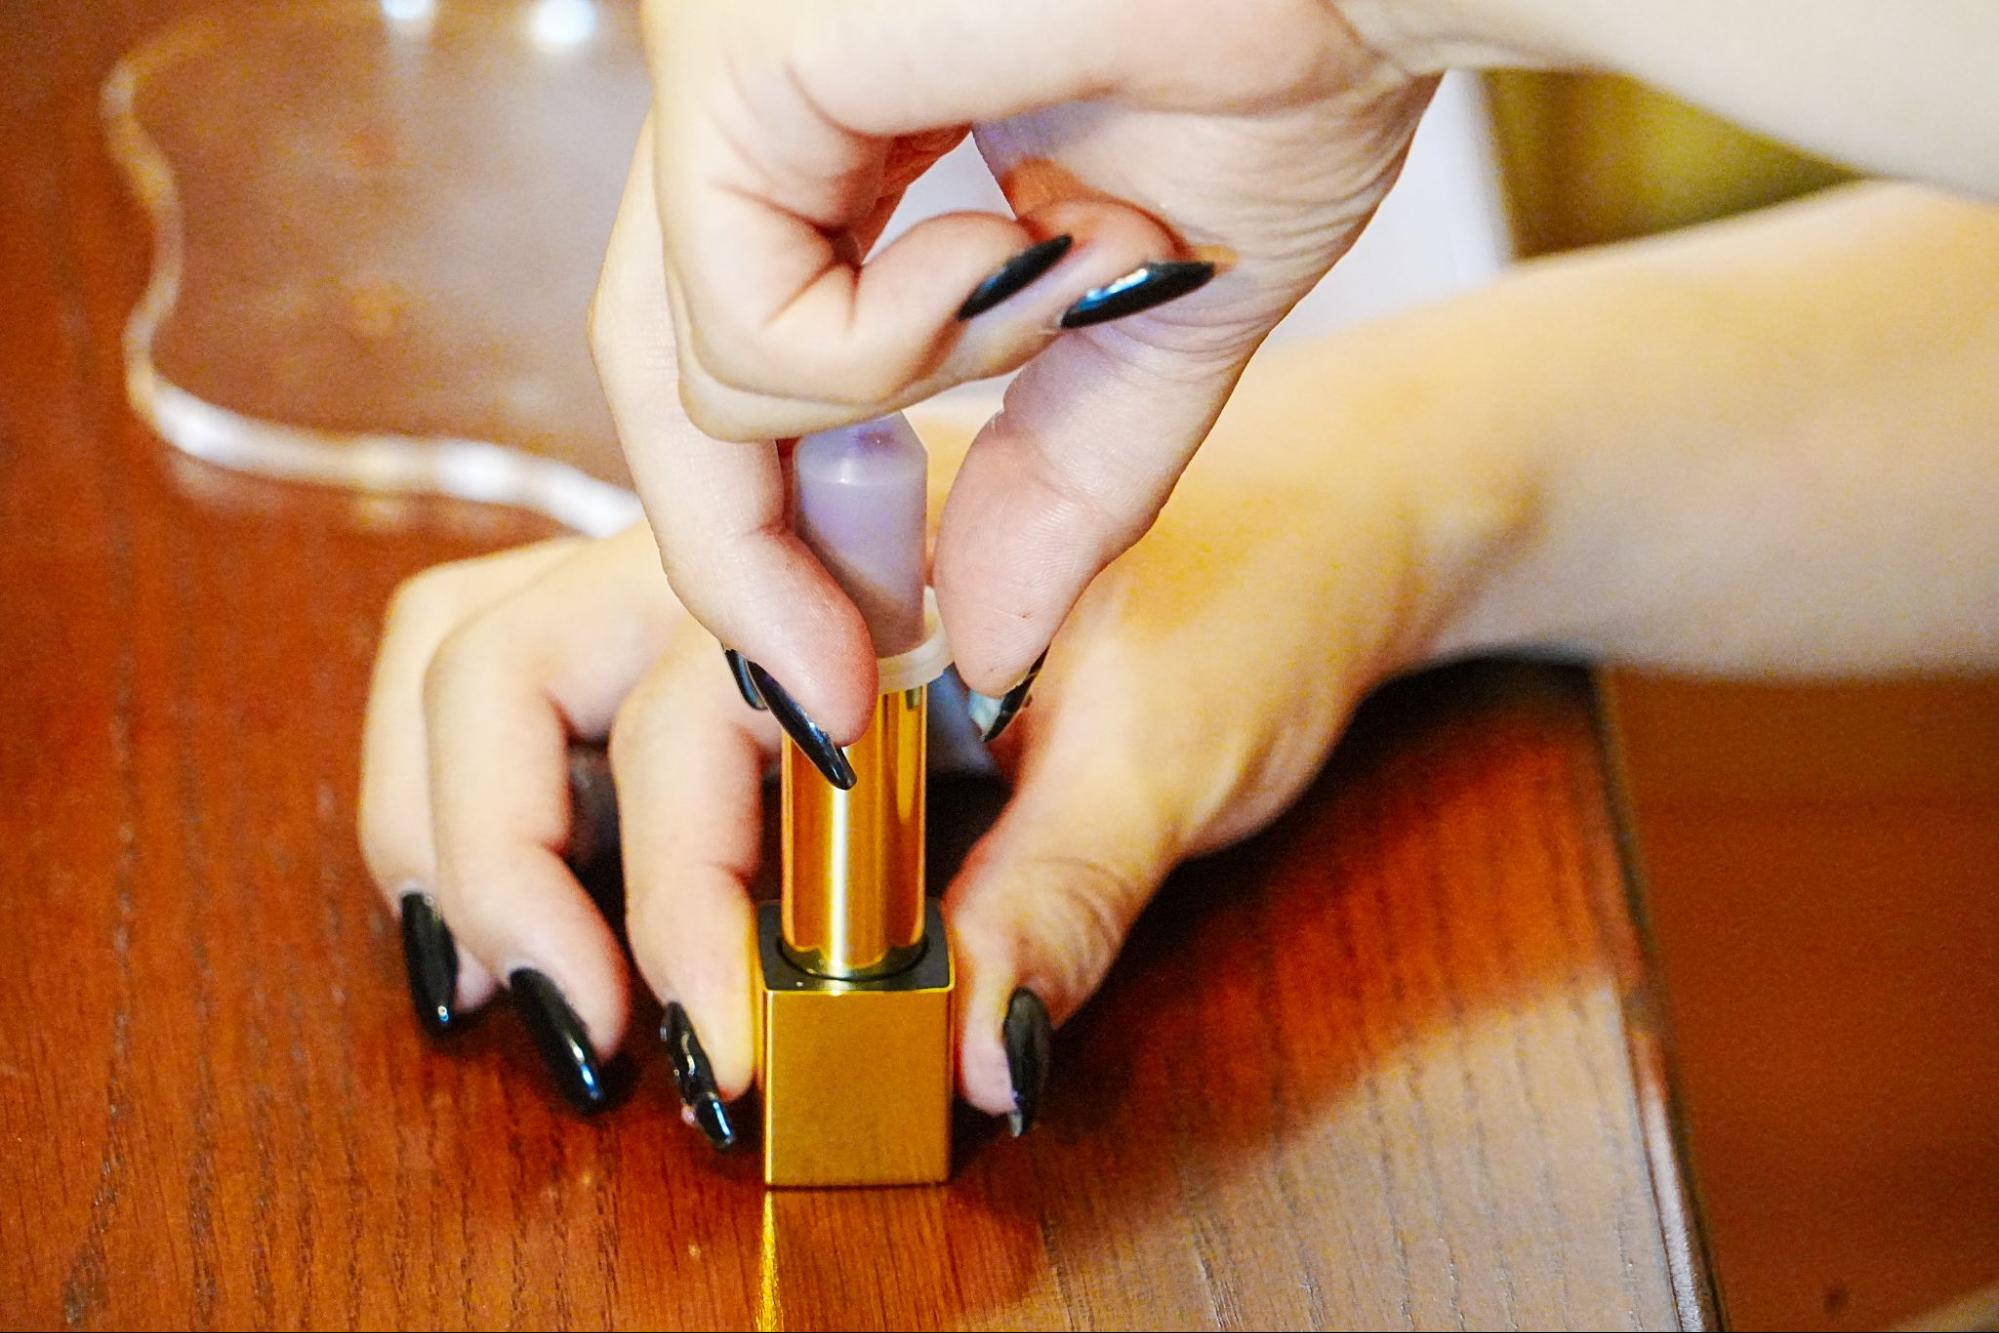
Twist it with three fingers to let the air in and remove it from the mold. A moment of tension!
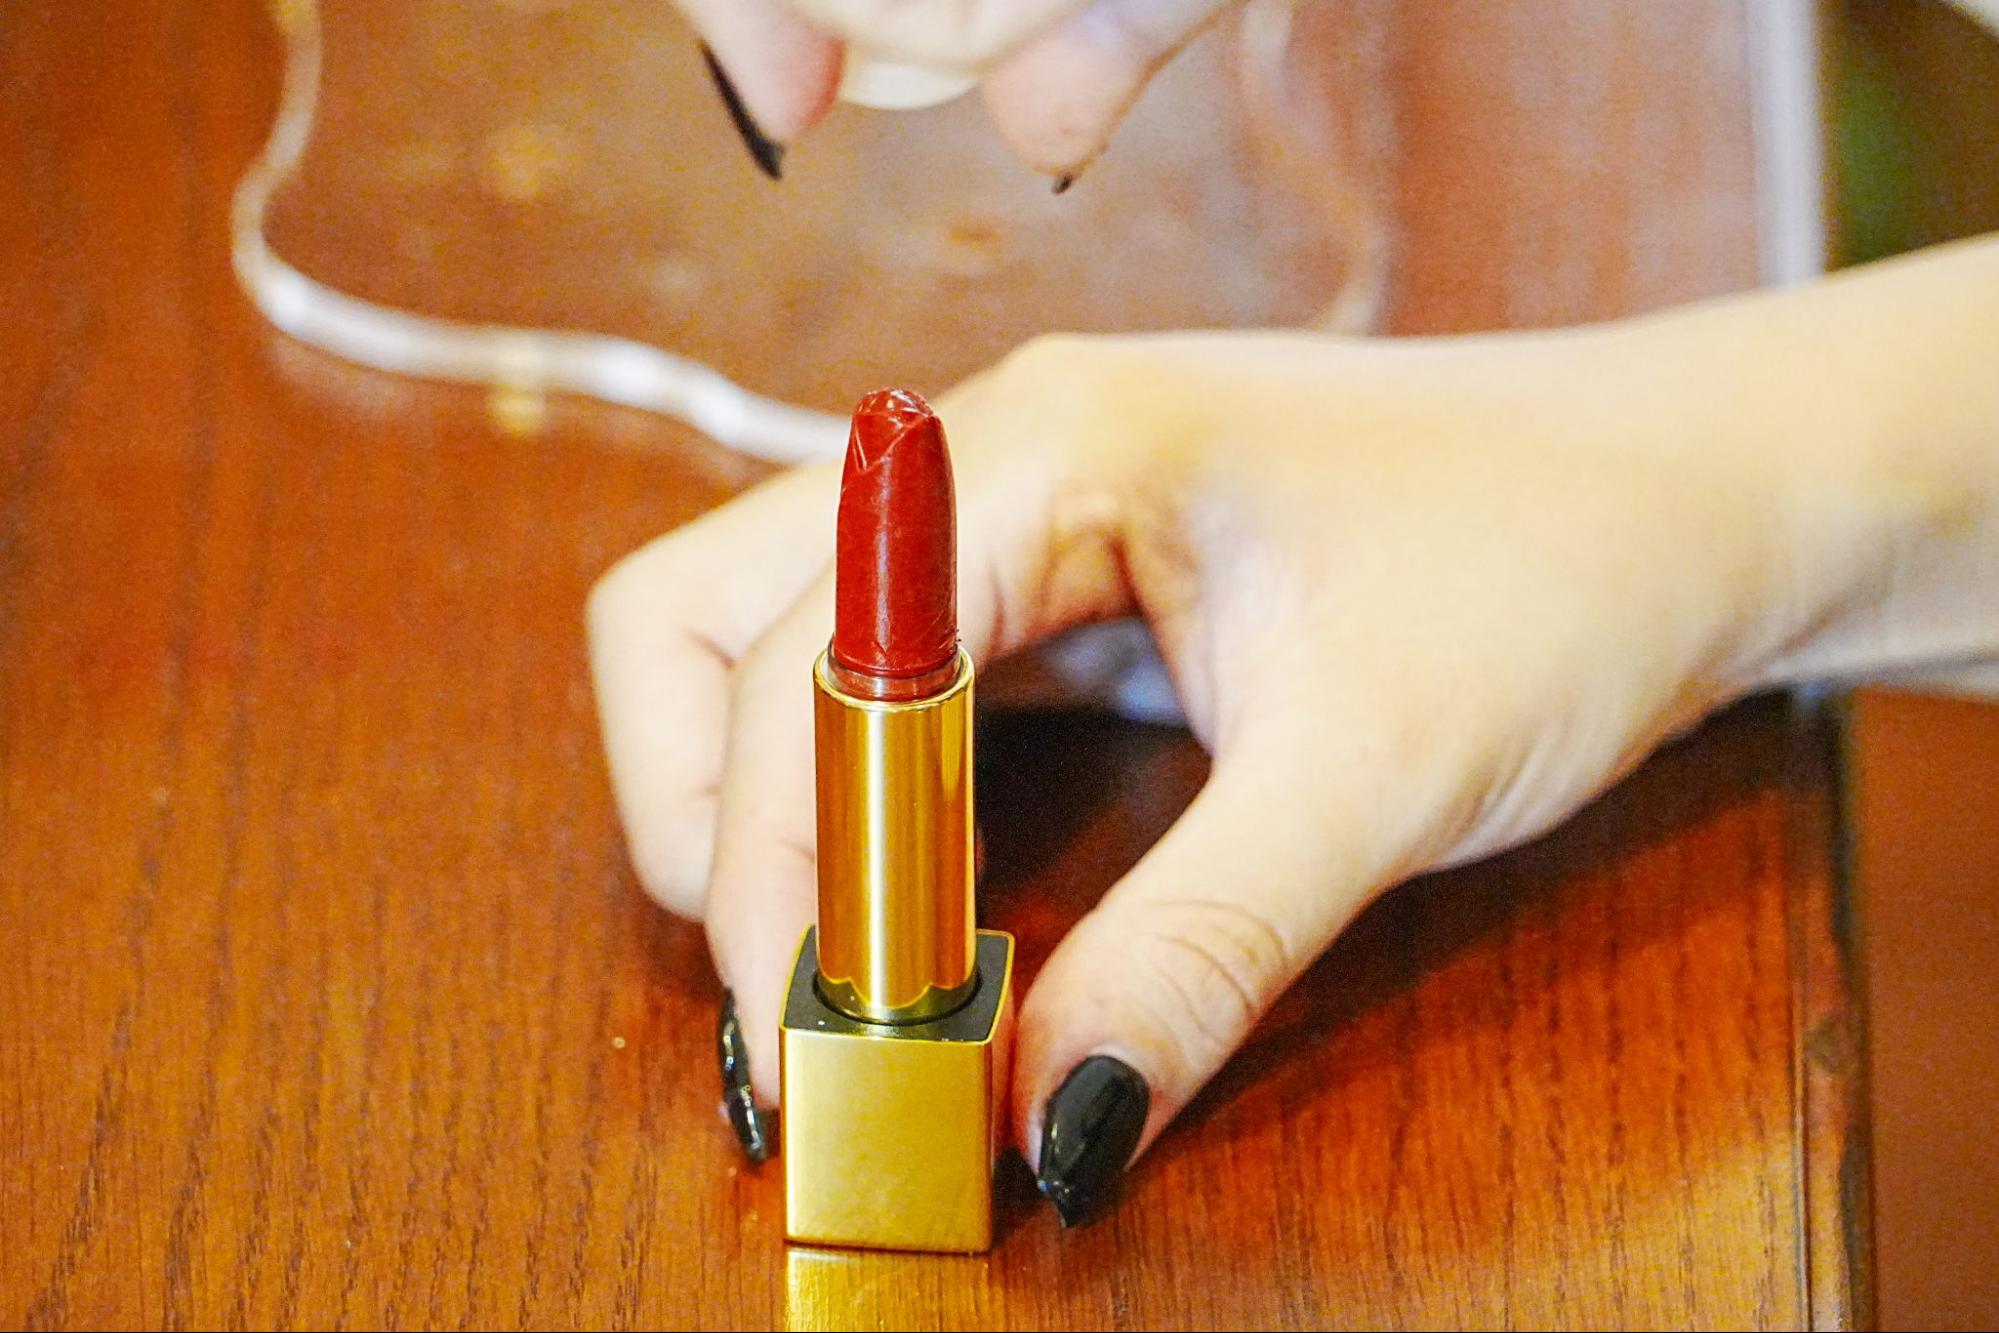
Ta-da!
Removing the lip from this mold was the most difficult part. I was fighting the fear that if I put too much force on it, it would break! I was fighting the fear that if I put too much pressure on it, it would break!
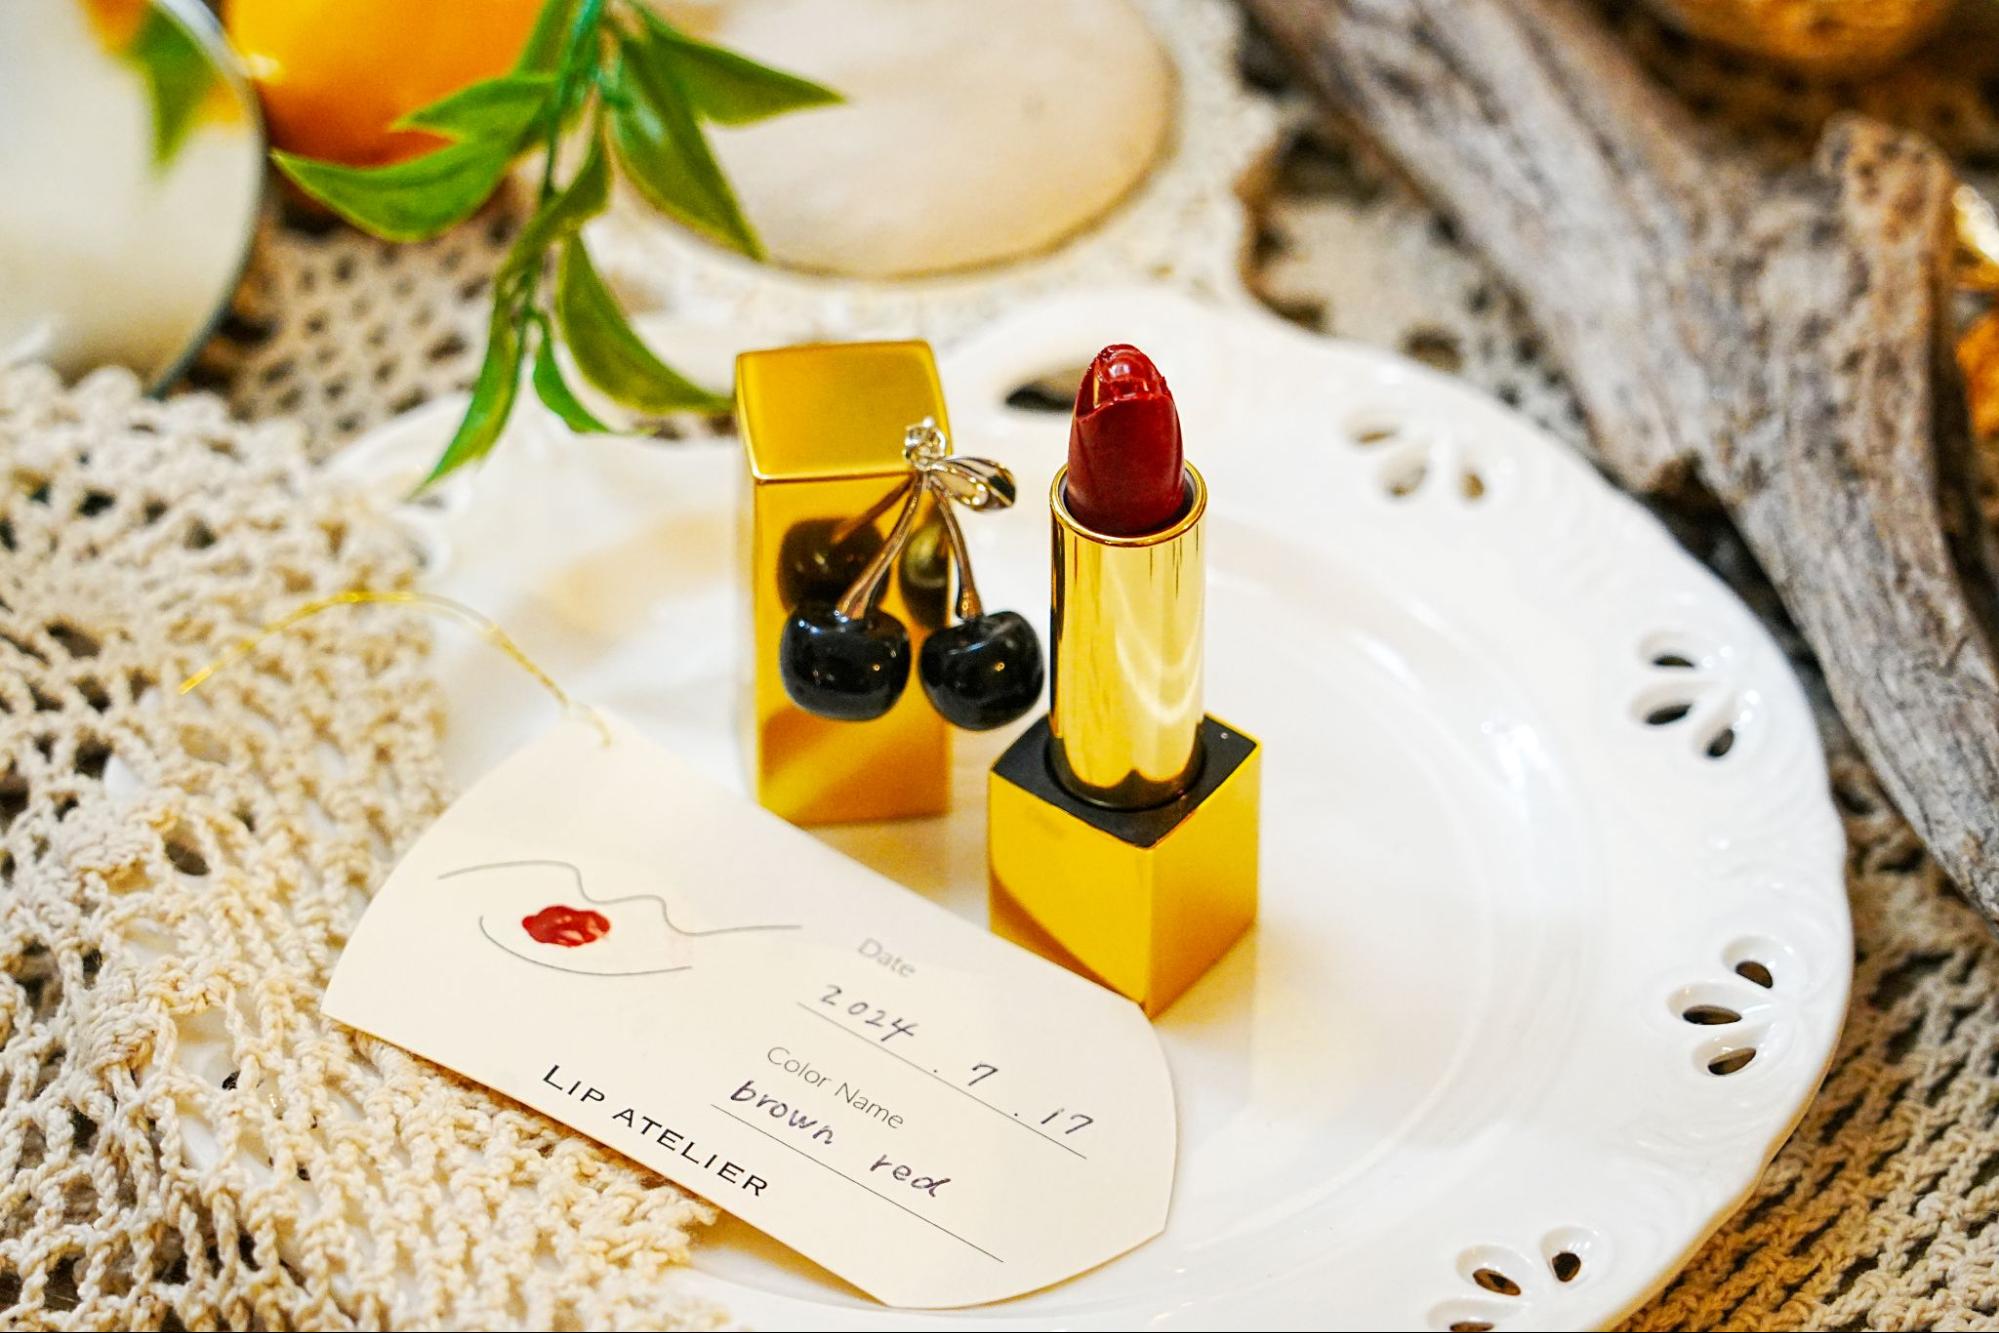
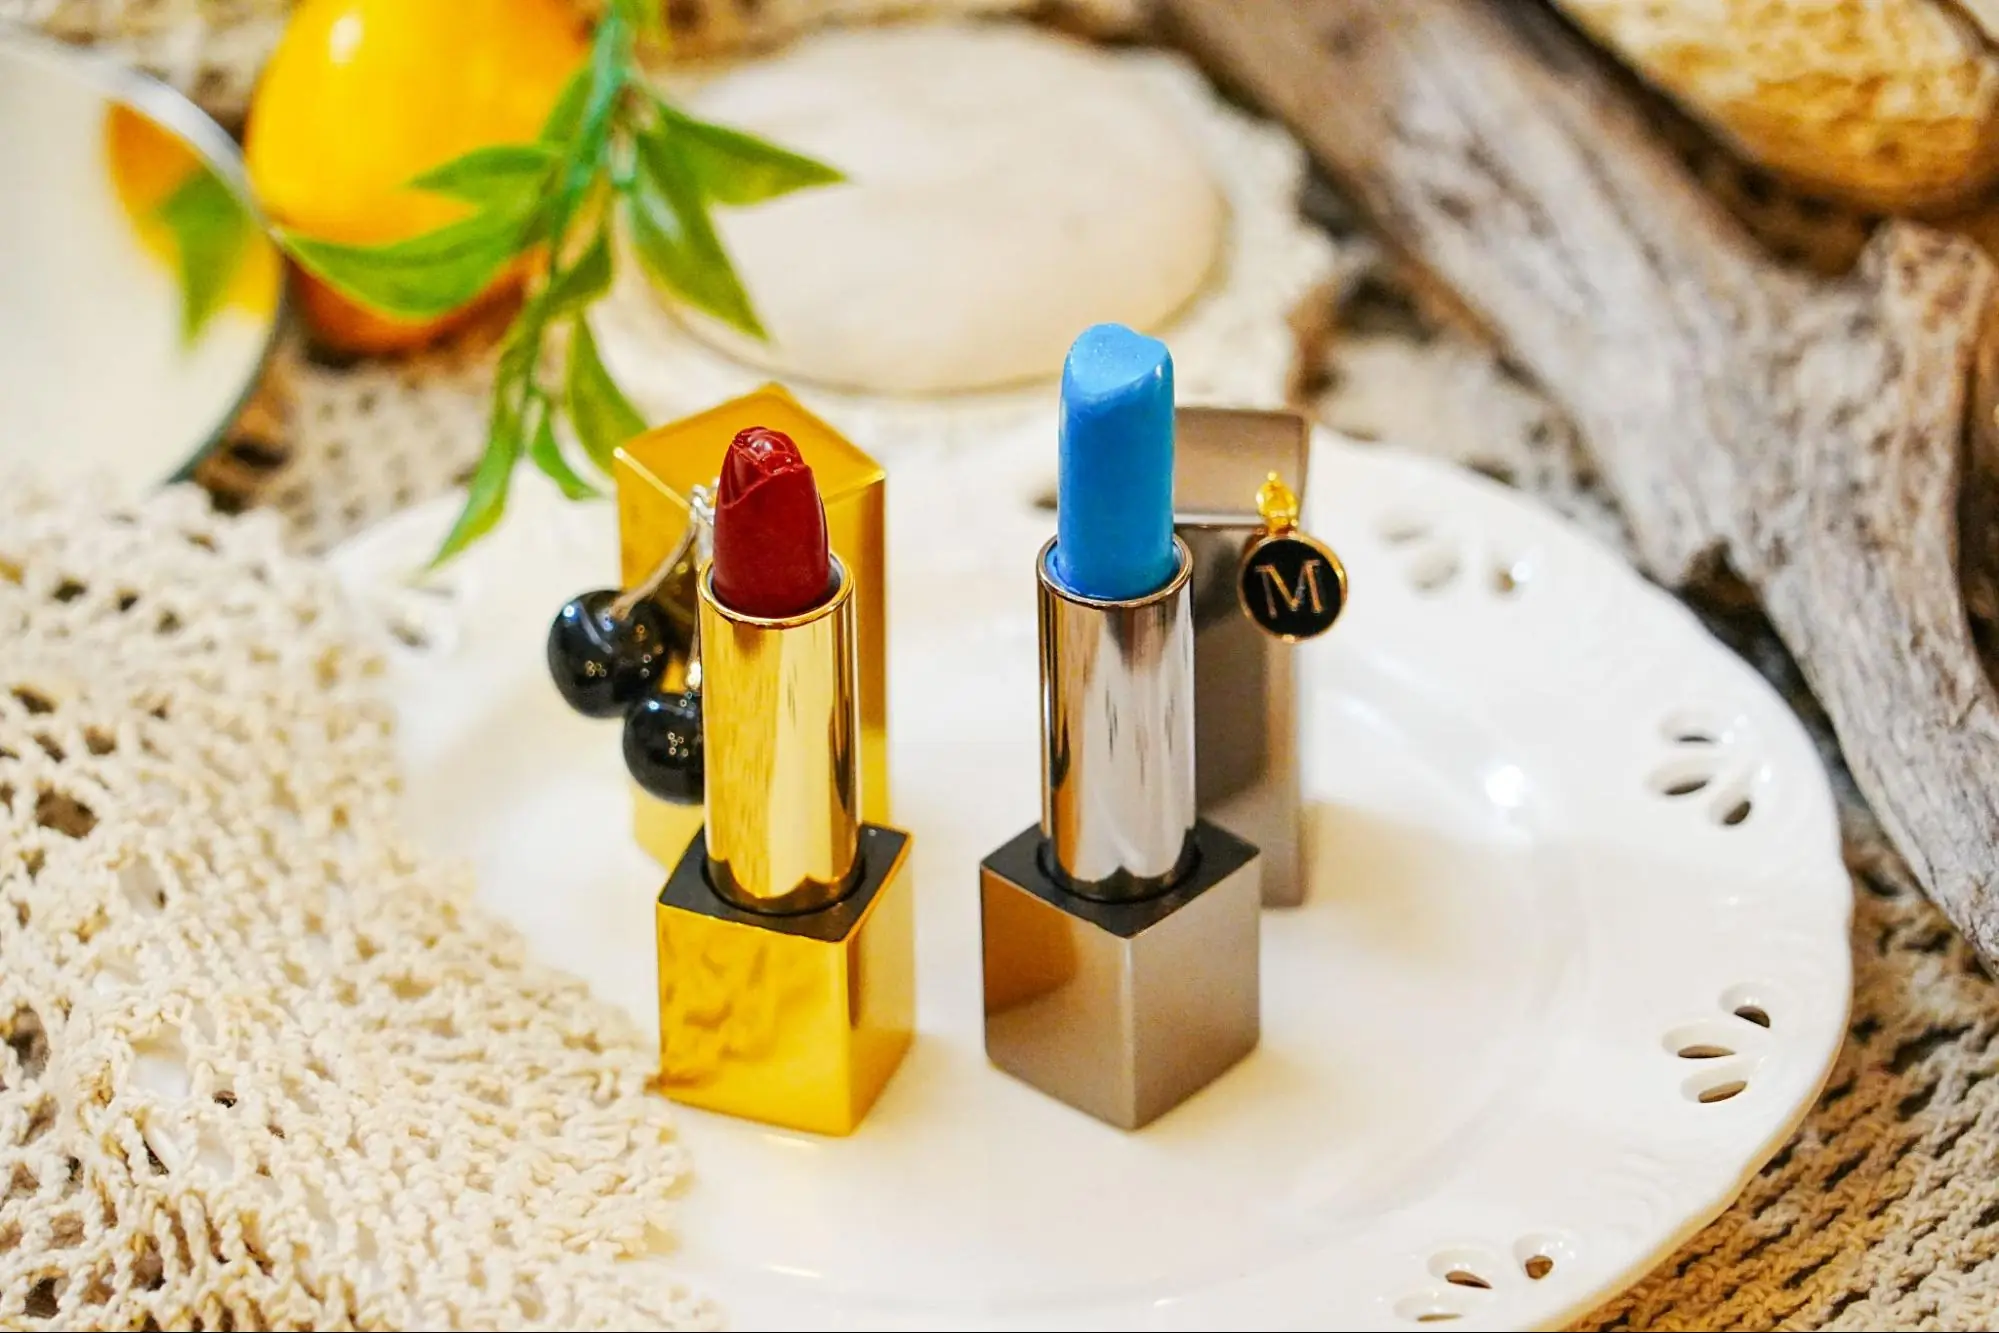
The result is a lipstick called "brown red" that combines red and brown.
The rose-shaped lipstick is finished! It turned out even better than I imagined, and I'm very happy with it.
The large black cherry charms are eye-catching and mature, yet still cute, creating a one-of-a-kind charming lip.
Take a photo at a photogenic spot
Lots of cute photo shooting spots!
Once you've finished, you can take photos in the extra time you have. There are lots of cute photo spots in the atelier, so you can take a variety of cool photos!
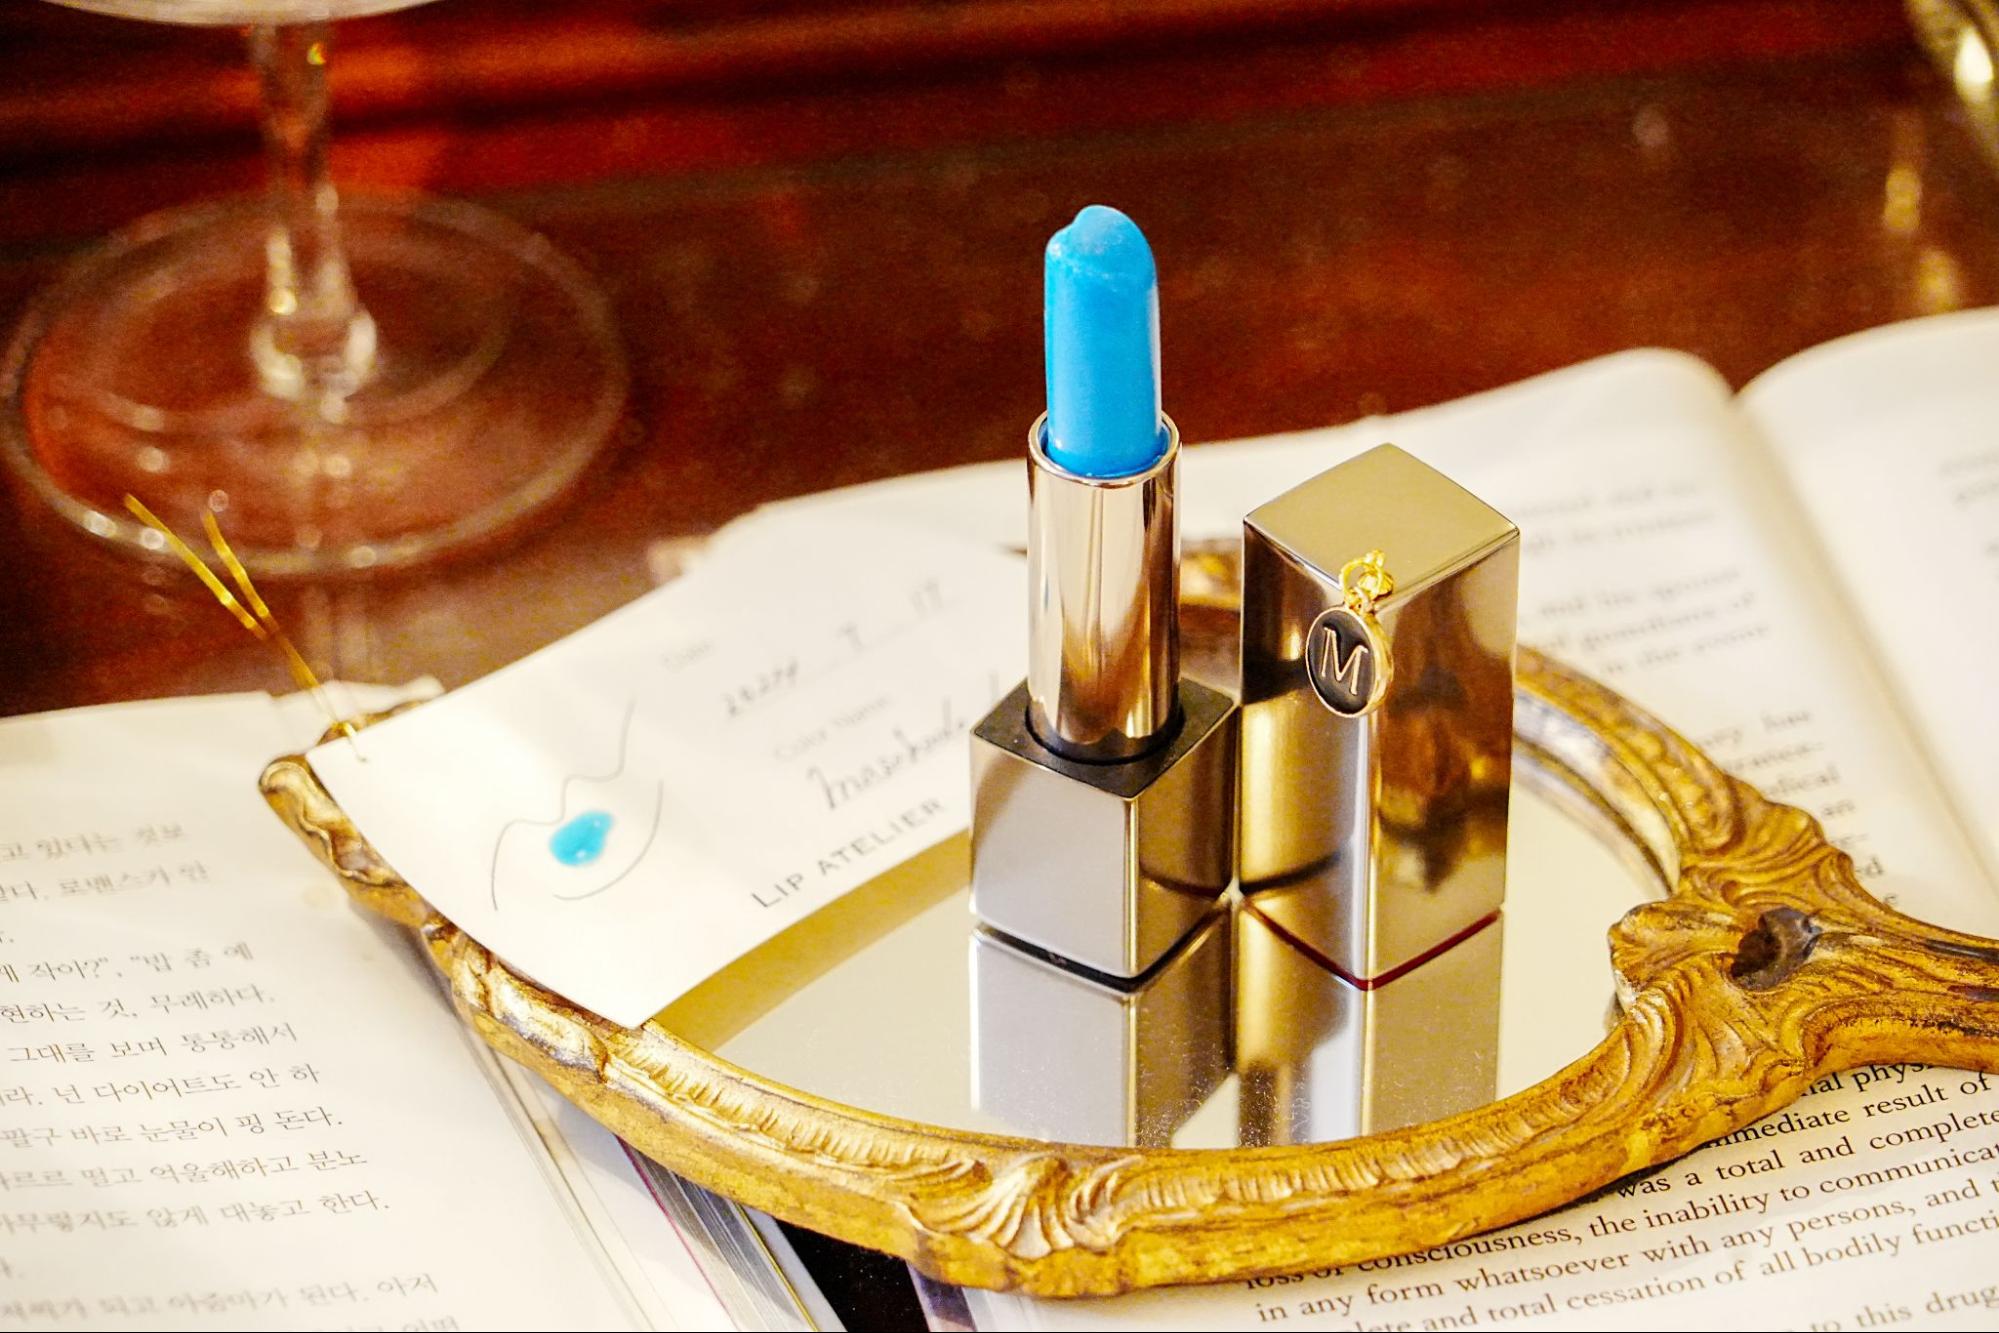
The lipstick, in her favorite color blue, also works well as interior décor.
We also recommend subtle initial charms.
It was so cute that I couldn't help but take several pictures. I was so impressed!
The finished lipstick is still unstable, so wait 24 hours before using it.

Cute wrapping makes me excited
Once the photos are taken, the gift is wrapped up in a cute pouch with the gift's logo and a special chart attached.
Create your own original lipstick at "LIP ATELIER"!
The finish can be completely different depending on the color, shape, and case.
"LIP ATELIER" allows you to easily create your own original lipstick.
This is a recommended spot that can be enjoyed by women, couples, and men. Another great point is that it is a private space, so you don't have to worry about being seen by others.
Why not treat yourself and go and create your very own one-of-a-kind lipstick?


![[Indoor Facilities] Where to Go on Rainy Days in Tokai Area! For Family Outings!](https://life-designs.jp/wp/wp-content/uploads/2023/07/FotoJet-23.jpg)


![[2025 Latest Edition] 32 Summer Resorts Within 2.5 Hours by Car from Nagoya!](https://life-designs.jp/wp/wp-content/uploads/2020/08/d5e9a698a33b82fe60aa760e3d6d995f.jpg)
![[Osu Special Feature] A City of History and Uniqueness](https://life-designs.jp/wp/wp-content/uploads/2022/03/01_Osu-1-768x435.png)
![[Tokai Area] Place to Go on Rainy Days!](https://life-designs.jp/wp/wp-content/uploads/2022/03/f76405aaa33944a4ba88a131fbc56523-1024x580.png)
![[Sauna Specials] Feel Revitalized in Sauna!](https://life-designs.jp/wp/wp-content/uploads/2021/07/Sauna-1024x580.jpg)
![[Special Feature] Enjoy Your Day at a Park!](https://life-designs.jp/wp/wp-content/uploads/2019/12/LD_banner_w1920x1088_park-1-1024x580.jpg)
![[Nagoya-meshi] Nagoya's Speciality Dishes](https://life-designs.jp/wp/wp-content/uploads/2022/06/5ba2ca8c038fd4af7527bc0826367cfb-1024x580.png)


![[Indoor Facilities] Where to Go on Rainy Days in Tokai Area! For Family Outings!](https://life-designs.jp/wp/wp-content/uploads/2023/07/FotoJet-23-1024x768.jpg)
![[10 selections] Recommended for Girls' Trip from Nagoya! Special feature on Hotels and Inns](https://life-designs.jp/wp/wp-content/uploads/2022/11/FotoJet-1-1024x768.jpg)
![[20 Selections] Nagoya Souvenirs: Non-Sweet & Recommended Snacks Available at Nagoya Station](https://life-designs.jp/wp/wp-content/uploads/2025/07/image3-2-1024x683.jpg)
![[Within 2hrs by Car] 12 Outing Areas where You can Go on a Day Trip from Nagoya!](https://life-designs.jp/wp/wp-content/uploads/2023/07/odekake12_w1200h900_20240422-768x576.png)
![[2025 Latest Edition] 32 Summer Resorts Within 2.5 Hours by Car from Nagoya!](https://life-designs.jp/wp/wp-content/uploads/2020/08/d5e9a698a33b82fe60aa760e3d6d995f-150x100.jpg)
![[2 hours from Nagoya] From mandarin orange picking to local food and contemporary art. Recommended for autumn and winter! A day trip plan to fully enjoy Minami-Ise Town](https://life-designs.jp/wp/wp-content/uploads/2019/12/image17-7-150x100.jpg)